Retouching with Actions: Focus on Skin & Curves Part 1
Lesson 6 from: Boudoir PhotographyRachel Stephens
Retouching with Actions: Focus on Skin & Curves Part 1
Lesson 6 from: Boudoir PhotographyRachel Stephens
Lessons
Day 1
1Empower Your Client, Empower Yourself
35:00 2Creating a Nuturing Experience for Your Clients
17:16 3Demo Shoot with a Client
45:14 4Shoot: Implied Nude
15:41 5Shoot: Maintaining a Connection with Your Client
29:03 6Retouching with Actions: Focus on Skin & Curves Part 1
38:19 7Retouching
19:24Retouching Using Photoshop Actions: Recap
25:03 9The Intimate Business of an Intimate Business
26:56 10Finding Your Client
34:14 11Why to Lose the Pre-Shoot Consultation
14:02 12Shoot: Shooting with a Vulnerable Client
44:04 13Shoot: Stripping Down Client Defenses
37:20 14Shoot: Posing and Mixed Lighting
47:57 15Retouching: Longhand vs Actions Part 1
28:19 16Retouching: Longhand vs Actions Part 2
19:57 17Retouching: Longhand vs Actions Part 3
23:49 18Retouching: Longhand vs Actions Part 4
20:25 19Tips for Male Boudoir Photographers
09:37 20Shoot: Creative Posing with Couples Part 1
24:00 21Shoot: Creative Posing with Couples Part 2
17:10 22Marketing: From Prospect to Client
39:42 23Business Practices: How We Do It
48:43 24Size Shaming & Pin Up Shoot
35:51 25Shoot: French Postcard
25:37 26Retouching: Pinup - Longhand vs Actions
34:16 27Retouching: French Postcard - Longhand vs Actions
41:01 28The Value of Failure
27:34Day 2
Day 3
Lesson Info
Retouching with Actions: Focus on Skin & Curves Part 1
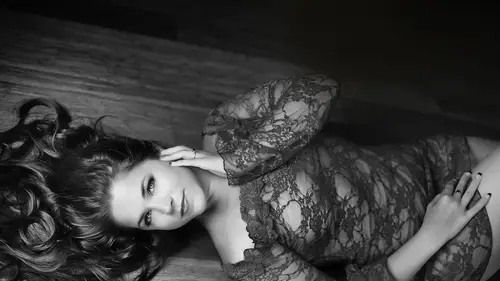
I am going. Teoh let you guys help me decide what image you want to start on. Do you guys want to start on? Um, a more of a body shot or like a head shot, some kind of scroll down. You guys kind of just pipe in and let me know one of these. What do you guys think? Yeah, let's see. She's got a great smile. This one. You see if there's another one? Yeah, I think I'm feeling the smile. Teoh that one. Yeah. All right. So here my presets here. So I always hit tongues and saw first. Then I'll just kind of, like, scroll through and see what I like. I like Teoh really kind of flatten it down, and then I know I like it kind of on the cool side. And then Aiken just kind of bring up the warmth where I want it. And because we're dealing with some Rose Atia here, and so is her face has got a little bit more red in her chest and here on the arm, we're gonna go ahead and blend this once we get into Photoshopped. So when I'm exposing for color here, I'm kind of looking over here right now. Okay. So yo...
u'll have to bear with me while I get usedto normally when I worked my my room's pretty dark, so I did not really don't have overhead lights like this. Okay, so I'm gonna go ahead and export. She'll see CSD eight bits, on board, See what's in here. Do another folder. How he Really? Okay. You'll have to pardon me while I try to get out of here. There we go. So open photo shop here. So normally, when I'm working, I have my Mac that I travel with its a laptop, and then I have my PC at home. So you'll have to pardon me if I screw up my shortcut keys. So here I have, uh, my actions and you can see it's not. It's more than just an action set. It's really in action bundle. There's a lot in here the way that I've named them. They're very it's self explanatory. What they dio I'm not a big fan of just one button kind of does everything. I think that with portrait photography, particularly boudoir photography, you really have to get in there and fine tune it. Although I do have a couple of like of those powerhouse, all in one. Um uh, actions that I sometimes use. Like, it might help if I open the file, huh? Don't mind me. I'm a professional. Here we go. Okay. There. Were you Okay? So here. I'm just going to show you guys. What? This does real quick. I'll hit that. Um, you can see here where I where the, um shortcut keys are. And what these do is these mark my personal recipe. This is the where I start. And then as you go through, you can see all of the different actions that I use on every image and the order in which I use them. Okay, So when I work, I always flattened my images and then doing layer and then flat and do my layer. So you want to make sure in the history palette under history options that you have these 1st 2 selected and what that'll dio is every time I do something and then I save it, It takes a snapshot every time, every time I save. So that way I can keep, you know, people freak out there like Oh, God. You flat on your layers, You know, I mean, when you're working, you can definitely screw something up. You know, like we talked about earlier, like my hit a brush and didn't know it. But you know something in there. And you know that I'm, like, 80 steps in. And how do we get back? All you have to do is go back to a previous history state. Grab it, copy it, go down to where you were, paste it over and then mask in. That one little area takes two seconds as opposed Teoh it being a long process or having to start over with your raw file, You know, I mean, I don't know how many people have tried doing that. You put your raw file over it, but you've already done these, you know, exposure and color adjustments. And then you're like, Oh, great. Now I have to start all over again. So this is a lifesaver. This little thing right here. History options. First to checked. Okay, So I'm going to go ahead and run that same one again, though. This one right here sometimes this just looks awful, but it gives you an idea of where you can go with it. So I'm a really big fan of blending. It's kind of like the way I look at it is like a painter with the pellet. And then you have your pains and you mix your paints and then you put on the canvas and layers. That's how I look, a photo shop, and I'm just going Teoh brush what I want back in. I kind of liked what it was doing back here. So you you guys are familiar with masks, so you can see over here with White where I'm going with it where I'm adjusting it so I'm liking that they're So every time I flattened, I save and it's gonna say that little snapshot for me And just for the record, when you close your image, all those history states go away. So don't think that when you close and reopen it, they'll be there. So, um, you know, if you, uh, you're computer crashes for somewhere if you got a bunch of stuff open with photoshopped, Um, just to make sure that every single time you flatten, you save that way, If your computer crashes, you don't have to start way back. Okay? So I'm not gonna use shortcut keys just so you guys can see what I'm doing them to go to the actual action. So here, what I'm gonna do is I'm gonna go here, and I just kind of want to level this out a little bit. So I'm gonna hit this perfect base. Just gonna kind of now everything that I do in Photoshop is really subtle. So as we're going, it's really not gonna look like I'm doing a whole lot. But as we get towards the end, I'll start from the beginning and we'll go through the history states so you guys can see And I think that's really key when it comes Teoh retouching women is you really want the the adjustments that you're making to be subtle because you don't want to change who they are. But, you know, at the end, you'll see that we actually are doing quite a bit. Okay, so I'm gonna come back. Teoh these do this detail working. When I talked about earlier creating poetry and image and when we talked about the different posing and lighting techniques when we're dealing with the sci sensitive areas that people have. So I know that she's a little sensitive here. And sometimes, you know, you want to be really, really careful in photo shop because just because you can do it doesn't mean that you should do it. So, um, like I said earlier, you know, when you are when you're building your brand, really figure out where you want to be in photo shop, like how far you want to take it and then stick to it because it's easier. Teoh do a little more for a client, maybe than toe, um, have to dial it back from your whole portfolio. So I'm just right now, I'm looking at lines, So I'm looking through here, and I'm just looking to see what's distracting me like this right here is distracting me a little bit. This right here is distracting me a little. So what I'm gonna do is I'm gonna go ahead. I'm gonna show you two ways to do this. But right now I'm just gonna dio liquefy and I know that Liquefy has a bad rap that I personally love it. Um particularly when you're shooting wide open, like idea when you got? You get a lot of that blur. You want to make sure you go right in like this, you can start making these lines too hard. So what you want to dio? What you want to do is you want to come in instead of on the outside. You want to kind of come in on the inside and wiggle. So you're gonna maintain that blur? Sorry. My hands were shaking a little time because I'm a little nervous. It really makes these old detail work fun toe watch, I'm sure. And I'm just going to come in a little wiggle a little here, So you don't want You don't want to, like, you know, make everybody skinny. You know, women have curves. We want to celebrate that. I just want to get rid of distractions. Just gonna softly manipulate some of these lines here, and then we'll get into some of the Rose Asia. I'm sure you guys wanna see and Rachel as you're going through. What are the kind of lines that you're trying to create? What is the overall effect that you're looking for? The first thing I'm looking for is I'm looking for anything that is distracting from the image of caused by wardrobe, like is a strap bulging. Making bulges is my can't the camera lens creating like a weird distortion. Sometimes it'll make the temple's too wide. So sometimes I'll take the temples in just a little bit, especially when you're shooting with, like, a 50 millimeters or 35 millimeter and you're getting in close. Sometimes you can get some of distortion artistically, that could be really cool, but sometimes it makes a little bit. You know, we don't want to make women whiter, so you want to just kind of like tuck in gently where tends to distort, Um, so when you're when you're retouching a, um, curvy woman Ah, lot of times, I'll see people try to totally remove what's going on under the jawline. I am not a huge fan of that. Um, I think that what we want to do is portrait photographers. We want our clients to be able to look at the images. Records recognize themselves, um, not give them the perfect fantasy of their ideal self. Even if they're asking for it, can you to come back a little on that? There we go all right there. It's better. Okay? And I'll show you really quickly how you can also let's just all undo this. But just for fun. Let's show you if I wanted to, like, bring this down, you can grab your lasso tool and have it said about pixels. What is that? Oh, there it goes, and then I'm gonna just kind of grab area and then you can do your transform. Actually, let's go ahead and let's copy that first. And here. Do you guys see this little arch? If you click thought, it turns it into a free transform. So then you can totally manipulate that area however you want it to be. I just want to be careful. You can see here where it's time to come out. If I wanted this part, I could just go ahead and select that part of her shoulder as well. So you can really get in there and manipulate that way too. If you don't like the way that the liquefy works. I personally love the liquefy tool. So I'm gonna show you guys a Really I've got actions for the color fixed, but I'm gonna show you a few things longhand. Eso a really quick, easy fix to take care of skin tone. Uh, first, let me overall color fix real quick. I tend to like it. I shoot really warm, but then I always end up cooling it off in Photoshop. I don't know why. It's just don't know why. Don't Why do that? Just something I dio, um, And in here, you can go in into the different channels, and you can color correct. So if you want it less red, it's a This is a very strong tool for color correcting. So I've really cooled it down here. Is it looking good on the screen behind me? Oh, yeah. Good. It's gonna mass it out, and I'm just gonna bring it in where I want it. Okay, So let me show you this quick little color hack. Okay? So if I go Teoh hue saturation. See this little hand here? If you click this little guy and then you go to the area that you want, Teoh de Saturate picked that one little color and pull it to the left. And she kind of has, like, an overall pink and red tone to her skin. anyway, So we don't want to go to hard core, and then you can kind of play with the hue to blend in where it starts feeling like it's blending in with the rest of the skin. That just looks like, Let's see, Let's go here and see what that does. So I'm just gonna bring down some of the red just where I feel like it's bleeding out. We want to keep it on the peaks of it. And then once you have your area selected, you can go back in oops and play around with this area here, which, in her case, I'm gonna need to go in, and I think I'm gonna need to patch it first. This is gonna be a few steps here, so I'm gonna go about right there, like, 16%. So I'm going to go in and I like using the patch tool. It's I like using it for kind of like everything, but especially good for large areas. So I'm gonna go over to some of the skin that is evenly toned. You see here, Sorry. Mind set differently, and we get rid of that that we get. There we go so just to start to blend this whole area of it. And this is, like, especially useful when you're dealing with farmer tans being able to just grab ah, large area with the patch tool of skin and kind of pull it over just to get that little blend and then you can go back in and, um, deal with the color. So now it's so so see here where it kind of seems like it's like groups like kind of like Bumpy. Like Lumpy. Almost. Now it's more smooth. So that's gonna be easier to address for color matching. And I'm gonna show you guys something awesome. My skin clean action, which I use a lot for, uh, evening out skin tone. So I'm gonna grab my brush here, Gonna put at about 10%. And then if you hold the option key and you grab an area, it's gonna grab that color. You see that? So it's really smoothing out, and you don't want to make it absolutely perfect, cause that's just gonna make it flat. And that's the same thing with the face. How we talked about when you start to flatten out digitally the contour of the makeup. That's like when you start getting into, you know, evening out skin tone. That's when sometimes we start to flatten it out because we're getting rid of the the natural shadows in the face or what the makeup artist has put on. I'm just gonna go quickly and even out her skin tone a little bit. Are you guys all following? When I first started teaching, I realized like my idea of a beginner was not a beginner, So I always like to make sure everyone's following. So as I'm as I'm in it, when I, when I'm color, talked with balancing an image a lot of times when someone has issues with their skin like especially like realization or sunburn, it can be really distracting. And then you can actually make it worse when you're tryingto overall color, correct and image. So you want to get in there and try toe. Blend the skin as best you can before you really get in and and start to balance out the color for the entire image so you can see what I'm doing now is I'm just masking out like where it went over her hair and like her clothes so you can see it's subtle, but really even that out. And for her, I don't think that I would even go too much further. I would leave some of the pink in her skin because she had you Comptel throughout her, her whole skin. She has pink tones. It starts to get into a little more darker exposure There is that pink to it. So if she looks at it and she's like, totally tan, that would be aware to her, You know, So again, you always want to make sure that your, um presenting an image that they can recognize themselves. So I'm gonna clean the skin of the teeth. There we go. And pardon me as I get used to this set up is it's so funny. Health, Quick. You could be on your own machine and get on a different machine. You're like, uh, so the pearly whites. I also, sometimes we'll hit the whites in the I a little bit and maybe the highlight a little, and we'll just de saturate a little bit. As people get older. A lot of times their eyes will become more yellow or more red when they're younger they'll have, like, more of, like, a blue tint in the whites of their eyes. So you want to make sure that you don't make it like to white, you know, And I try to always, especially when people bleach their teeth. I try to make sure that the white of the teeth and the white of the eyes balance so clearly you don't want it that it's okay to have a little bit of yellow. So I would go about right there. And I'm like the absolute worst person with naming actions. So they're pretty basic when Sean and I were trying Teoh name them cause, like, all the actions, you see her like Midnight Meadow whimsical something. So we're like, trying to make them all, like, different. And if everything ended up with, like, boo at the end So I was like, You know what? I'm just gonna name it just generically so people know what what they dio that is likely away more helpful than whatever that first description. So here would I do with the pop highlights? I just go over catch lights, and I might just tap inside the I a little bit. You want to be careful because you don't want to end up, you know, making people look like they're wolfing out. You know, give him those kind of, like, super naturalized. It's really easy to do two and his artists. We like that, you know, really bring the color out, but people don't look like at the sun or really bright light. And in a mere, they don't see that those color has come out in their own eyes ever. So that doesn't look like they don't. They don't think that even though you're pulling out the color that's there, they still don't think that that's their eye color. I was gonna hit the Israel quick. You can see that makes it pop more, you know, but still subtle. Okay, so I'm gonna go ahead again. Patch tool. I made a another layer. I'm just gonna go ahead and grab some of these. Sometimes you if they're really small, like if you have, like, acne or you know, something like that, you might want to grab the spot healing. That might be a little faster. Um, I just find the patch tool has more control, and I don't think we had anybody with freckles. But have any of you ever tried to retouch skin with someone? Freckles and they But they wanted the freckles to stay. It's like you're like, I'm gonna show you really quickly. Um, how to do that? So you can go and do all the skin. Even though we don't really have freckles to work with, I'll show you, you guys super quick What you dio. So let's say that we've done all the skin. Everything's done right. So you you grab a previous state where the freckles are, and then you go ahead and let's go back. Teoh her arm a little. There we go. Let's go there. So then you telling your blending mode it's kind of like, Oh, great. Well, you just put all that back. Now what? On the blending mode, if you go darkened, you can see where these come back. So imagine you've just smoothed all the skin, and now you want to put the freckles back. Now, just the dark parts of the image. See, here were all these little areas or back right down here. So you just mask it out and just just brush the freckles back on right over the smooth skin. Okay, so we're gonna clean the skin a little bit. In my opinion, there's two techniques in my actions that are worth by my actions just for these, um, the skin clean. Um, you can look it up yourself. Don't want the actions. The technique is called frequency separation technique. Now, with the Google in the YouTube, it's pretty easy to find pretty much ever anything. A tutorial on it. So you guys confined it. So what it does is it separates your image So you've got your color, your color, and then you have your texture. So you know, when you have the image and you're working on it with your clone stamp tool, everything just starts to look fake and plastic, and you start to lose all the texture. Well, now here, when you have this frequency Tupper separation technique. Now I can go in with my clone stamp tool, and I can work just on the areas where I want to affect the color, and it doesn't it doesn't touch the texture. So in here it's see that sale of texture is still there. It's all preserved, but I'm just affecting color right here. And you can even grab from the other side just to start the color that you want. Oh, okay. I get crazy with the space bar sometimes and don't realize it actually move the whole image. Do you guys ever work so fast and then see? Okay, so you can see where the color what's happening there. So what I'll dio is I will just do one little area. So I've just done the color and then I'll go to the apace city where I want it blended. And then I flatten and then I do it again. I don't ever do all of my cleaning on the skin on one time. So you know, you can the steps for the frequency separation or it's tedious. So now all I have to dio is just hit f six and it's done. So now I know I can just, um, blast through. I mean, for the for the, uh, sake of, um, teaching. I'm talking a lot. It's sorry. Guys go. It's a little slower, but it might possible post processing. Using my actions. I never spend more than 10 minutes on an image. So see here how we're affecting the texture now, but not touching the color. And again, you You know, this is getting toe back, Teoh. Where, um how much photo shop you should dio, especially when you have, like, you know, older gal or someone who's curvy. Um, just remember, subtle changes make a big difference. Oops. I must clean up some of the hairs here. I was gonna go in here and clean up a little bit in the eye line, just some of that texture there to soften it a little bit. Do you guys have any questions about the skin cleaning? I like seeing people taking notes in our city on here. Let's see if we have any from the go ahead. You know, whether it's a scar like tribal marks or moles. Whoever had made a mistake, unlike you, raced 11 time and they were like, Yeah, yeah, when you're smoothing skin, that's like a small beauty Mark. Don't even realize that you really toned it down and pretty much blended it away. Usually during the session. If if especially someone has a scar, um all like gently touch like leg of its here all toe touch a shoulder that Do you want me to leave these in or out? Because it's a sensitive subject. So you want to address it with a lot of care you don't. So do you want to keep that scar on your chest in or what? You know what You mean like you want to be able, Teoh, Address it. Let them be Rollerball by being vulnerable yourself, you know? And I think that kind of helps with the touch. If your mail, you probably don't want to touch, but definitely, um, communicate and be sensitive. Um, once again just to reiterate, do you, Rachel, do all of these all the retouching images before you show them to the clients? I don't go there, End up with it. Like I said, when I am doing my proofing stuff, I batch everything down. So my as you guys know when you're shooting, you know, when you were working an image, they're huge. They're they're huge, so I'll batch it down to, like a small J peg. I mean, a small PSD, which they go really fast and you can actually even use for skins moving. You can use like the smudge tool, and they won't even notice because it's just a small image. Like obviously, you can't use a smudge told a clean skin on a big image. But for proofing ones you can. So so that's just for proving. And then you go back after they select which ones they want to buy. And I start from scratch with large images. Thank you. And I would say that my sales quadrupled when I started doing that. At least again. I'm just using the patch tool here. So when you're cleaning up hands, you want to be careful because women have. There's yes, there's veins. Mostly they don't want the veins there. But we have tendons and you don't want to erase the tendons, cause then it just looks weird. So you want to be careful there and again, we're on that frequency separation on the skin, clean action. And I'm just going in here, and I'm just blending the skin member the red that we're trying to earlier. I'm just going to blend some of that in a little bit all over, but like I said, we're gonna keep some of the red in her skin. Tone doesn't want to move for me. I feel like I should be talking about. You already know what I'm doing. Okay, so I'm just gonna grab really quickly the brush, and I'm just going So here's a little lighter than I'd like, So I'm just gonna grab from here, blend a little just to kind of balance it out a little bit right about there. So you guys want to see where we started from this point? Absolutely. So that's where we started. Just kind of go through the So we've already made a lot of progress. Just I mean, I know as we're going, you're kind of like, Well, gosh, get to it. You know, But you don't do anything that you can see. We've actually done a lot. Um, we're very close to the end with where I would personally take this. I would also, you know, I would go in here and fine tuned more this here. I would leave when you when you have roles in the side of the skin. I personally think that women's curves were beautiful when you try to remove it, which I have done because people ask me Teoh, it looks weird. It just It just looks weird. when you completely remove those, um, creases from the side of the skin. But it's personal. It's a personal preference. If that's something that you want to offer. That's awesome. Oh, sorry, guys. I don't know what I'm doing with my I'm getting distracted by that big pink ring around my tool. That's what it iss. Oh, there we go. Because my my brush was didn't tiny. It takes me a while, but I get there. Well, again, this was not your computer and set up. I was thinking that pink ring was the brush was never mind, okay?
Class Materials
bonus material with purchase
Ratings and Reviews
a Creativelive Student
Let me first start off by saying that Rachel puts her subject first. She has a passion for empowering the everyday woman, showing them that Boudoir photography by no means only belongs to the "supermodels". She shows them that they're amazing and beautiful, and it was so comforting and heartwarming to see this in action in her Creative Live course! When Rachel's shooting with a client it's almost like no-one's in the room but the two of them. Rachel gives her undivided attention to the client's safety and well-being and general comfort. I was so glad I tuned in for the course as I learnt countless tips and techniques about lighting, angles, posing, different settings for the different types of shots you'd want to grab. Another reason that watching the class was such a pleasure for me is that Rachel comes across as that awesome, down to earth, lovely friend you might have in your life, who just happens to be one of the BEST Boudoir photogs on the planet! This was an excellent workshop, top to bottom, and I'd recommend purchasing it to anyone who wants to learn everything about this type of photography, including the business side of things which her husband, Sean, explained thoroughly. I have absolutely no idea what a couple reviewers were "disappointed with" but take it from me - this is a STELLAR course and if you're looking to get into the business, or just even honing your skills on photographing the ladies, this is most definitely the course for you! Tons of info - great guidelines on how to handle your models, great info on lighting, lenses and settings! Rachel will make you fall in love with Boudoir photography like your life depended on it! She's just THAT good! So go on, purchase the course and have her invaluable instruction at your fingertips whenever you need it!
SunSoBright
I mainly photograph landscapes but I'm interested in learning other types of photography. Being introverted it's a challenge for me to photograph people but I it's a barrier I want to get over. I purchased this course and some others on portraiture and boudoir photography. While Rachel and her husband aren't polished speakers I thought they were honest and straightforward. The "clients" being photographed seemed a bit nervous but I imagine that had a lot to do with the fact they were doing the boudoir session live in front of thousands if not millions of viewers. Rachel also had to keep in mind she was tethered and the recording of the session while photographing her client so I don't think this was optimal and Rachel's back began to bother her so I'm sure she was in some physical pain. Regardless, the resulting pictures were beautiful so Rachel was able to make her clients feel "safe" enough to get through the session. Also it seems part of the audience were women who had been photographed by Rachael so it says something that they came to learn from and support Rachel. I appreciated Rachel was photographing real women, not models. What I liked most about this course is it made me feel like little 'ol ordinary me could be a boudoir photographer too If I am ever inclined to do so. Her style of photography isn't quite mine, but the session was still useful and instructive especially with regard to her lighting set up. I wish Rachel had talked a bit more about setting up the support team that goes around with her like her make up and hair artists, how she finds and decides on houses to rent and what cities she goes to, etc. but I guess you can't go over every single thing in a single course or maybe that can be a future course. Rachel and her husband seemed like a nice down to earth couple who put their family first and they were quite honest about some of the difficulties and their concerns over safety for themselves and their clients. I was touched that Rachel photographs women who have gone through cancer treatment for free as I do volunteer work in a hospital. I thought the bonus and included materials which had Rachel's Lightroom presets and her client info packet was very generous. Some of the other photographers charge for getting a copy of their client documents and presets. I purchased Rachel's eBook off Amazon and wanted to purchase Rachel's Photoshop actions but in searching for the purchase links I read Rachel is going through some health issues, I think it was spinal fusion, and it seems has suspended her business until she recovers. It looks like she plans to still make her "return" sessions starting with Hawaii during April 2017. I wish her and her family the best and will say a prayer for her quick and complete recovery. Thank you Rachel and Sean for coming to Creative Live and I hope you will teach another class or at least participate in a critique of boudoir photographs.
WellsWells
Warning: You are about to encounter a large number of exclamation points. ;-) This was such a great course! It was great to learn boudoir with such a caring, generous, and knowledgeable pair! Rachel really brought it with her posing, shooting, and building rapport with her clients. She even kept going while in intense pain! Also, the sections on retouching were EXCELLENT! I had trouble following the first retouching segment where she used her actions, but then she came back to retouching later and showed us how to do each step "longhand". Knowing what each action is designed for makes such a difference! I feel like Rachel read the audience and saw that we were floundering, and tailored her presentation to just what we needed! Sean was also very thorough in his presentation of the "business" side. It is hard, as an artist, for me to run my business like a business. Sean showed how it can be done. He also showed the need for a strong "why" to focus on when telling others about policies. "It's a business. I need to feed my kids." I need to reach down and find my "why" that will keep me strong enough to stand behind my policies and pricing. I haven't gotten a chance to sit down and go through all of the bonus materials yet, but I am so excited to see what's in there! I saw that Rachel had posted a longhand version of the "little hug," and I watched it, and I have been trying it out on some of my older images. Just that one little tweak makes such a difference! Thank you, Rachel and Sean, for giving us SO MUCH usable content! I'm so glad I decided to watch and then purchase this course! And I can't wait to see the two of you again for your next creativeLIVE!
Student Work
Related Classes
Glamour & Beauty