Lessons
Lesson Info
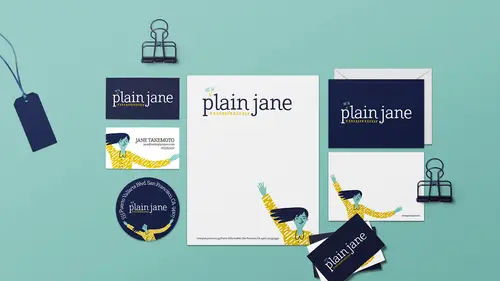
Notecard
So now we'll do file new, and this time it's gonna be a postcard. So, this can vary in size, obviously. It can be four by five and a half or five by five square or whatever. In this case I'm gonna do five by seven. So these sizes, when you're doing this stuff you may have a specific size in your head and then you'd need to find a vendor that can give you that exact size, or you find a vendor, see what sizes they have available, and then you just pick one. So that's where these sizes come from. So this is gonna be a width of seven inches and a height of five and again with the bleed and then create. And this is gonna look really a lot like the business card. So we would come over here, we'll put this on the one side. I'm gonna select it all, copy it, paste. You can see why this is so great to have this in InDesign, it's so fast and easy. So I've got all this selected, I'm gonna do command + shift and drag from that corner and just keep scaling until I fill all the bleeds. So I don't wan...
na stop just here, I wanna scale till I get that bleed down there at the bottom. And then I can drag this over. And then I look at that and I'm like, I have a hard time telling how big the file actually is, so I'll press W and then I can evaluate a little better. Maybe I wanna make this smaller, maybe I'm okay with it, maybe, I don't know if we can just select these three things. So I'm holding shift and I'm selecting the type and the blob. Maybe I just wanna scale those down? I might have to adjust the blob. Yeah, I don't like it, I like it better big. So I like how that looks, so that would be one of the postcards already. So let's go back and make a page two now. And it's basically gonna be like the business card without the text. So we can select this stuff, copy that, bring it in and paste it. Maybe we want to, you know, shuffle the pieces around? Hmm, or marquee select all this stuff and drag it over? Maybe I wanna flip it. So that's one cool thing you can do. With all of these things selected here, I can come up in the control panel, and with my, I call it the move tool, because it is. But it's called the selection tool. I can come up here and click this flip horizontal button and it'll just flip it. So, maybe I wanna spice it up by doing that. And if I wanna rotate. So these are all individual objects, but because they're all selected, they kind of behave together as one. But I can still move them individually if I need to. If I wanna scale up, maybe I wanna scale those, I'll hold shift and drag. And the whole thing with shift and dragging, it kinda depends how you placed the file, whether or not you have to add in option or command or anything with it too, so there's not an easy, you just have to practice and you kinda get used to it. For example, if I wanted to scale this and I just grabbed it and pulled and it didn't scale, then I would know, okay, I need to add shift, or I need to add option or alt or whatever. So, the moral of the story is, just press your keyboard (chuckles) until you can make it cooperate. 'Cause it depends if it's a graphic or if it's an image or in this case it's a vector illustration straight out of Illustrator. So they behave a little bit differently, depending on what file format it is. So we would put those in. I'm gonna duplicate the dots by selecting them and then alt or option dragging. Put some fun dots in the corner. And, hovering my cursor around the edge, I get that curved, I call it the macaroni noodle, and then I can click and spin. So maybe I kinda want it like that. And then I can either create some text real quick or maybe I'm, like, super lazy and I'm just gonna copy and paste this, maybe even the whole frame, and then paste it over here. And then I don't want all this information, but I do want minx. We'll put it in all lowercase, minxhandmade, I can't even see what I'm typing. handmade.com. Perfect. And what size is this? Eh, I might not want that eight points in here, maybe we'll make that, like, 10 points. And let's right-align it. So I'll grab my type tool. And that's just so that if I get out of wonderful mode and I can see my margins, I can just kinda tuck it up in there. Maybe a smidge like that. Okay? And then we'd be good to go. We don't have to extend anything, like, if I put a photo or, like the background here needs to extend, because we don't want the dots cut off, but down here we don't have to worry about it, these are all reaching fine past there, and they'll just cut where they're cut. Okay? So this is great. And then you'd have room to write a note. If you want more space for writing you could move these things up a little bit to leave a little more writing area, I guess. But, that's so fun, and that would be the perfect little note card to just be like, thanks for your order and tuck it into your package that you ship, your product. I think note cards are just, if you made one thing, okay two things, note cards and business cards and I think that's, like, the best. Okay.
Class Materials
Bonus Materials with Purchase