Lesson Info
13. Live Shoot: DIY Product Photography Part 2
Lessons
Class Introduction
02:54 2Home Studio Space Considerations
15:19 3Recommended Gear
19:06 4Low Budget DIY Studio
06:45 5Camera Settings For Low Light
08:55 6Live Shoot: Low Ceiling
28:28 7Backdrop Considerations for DIY
12:00 8Build a DIY Backdrop Stand
12:42DIY Portrait Lighting
17:30 10Live Shoot; DIY Portraits
28:34 11Build a DIY Light Tent
20:17 12LiveShoot: DIY Product Photography Part 1
18:30 13Live Shoot: DIY Product Photography Part 2
13:45 14Live Shoot: DIY Home Business Photography
04:39 15Build a DIY Macro Lighting Tub
12:09 16Live Shoot: DIY Lighting Tub
10:46 17Live Shoot: Natural Lighting With Modifiers Part 1
21:12 18Live Shoot: Natural Lighting With Modifiers Part 2
09:21 19Build DIY Gobos
04:48 20Live Shoot: the Ultimate in DIY
21:11Lesson Info
Live Shoot: DIY Product Photography Part 2
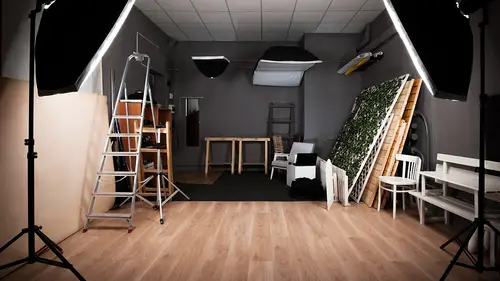
Okay, let's throw in a couple of other things into our light tent. Let's try a different product. In this case, let's just keep on the fly fishing theme here, and then I'll take a jewelry photo. So I'm gonna pull out our fly. Now what I'm gonna do is I'm gonna photograph this reel. Okay? So this reel. It's pretty neat, actually. It's got this kind of hand-drawn art and it's all techy. It actually looks awesome. It's kinda shiny as well, so we're gonna use that. Now if I set this in here, I'm gonna show you one of the problems if we don't have a nice backdrop or a nice base to the light tent. So I'm gonna put this in here, maybe we'll do this side. C'mon, don't fall over. There we go. Alright, so I'm just going to snap a photo real quick here just to show you what it looks like without a nice base or a nice... floor maybe is a term that we could use. There we go. Now you're gonna see one of the problems of shooting macro photography is depth of field. Depth of field is always a problem.
Okay, picture. Now this photo you're gonna see is... There we go. It's not that bad, it's actually... I need to straighten it up just to get my verticals vertical, but overall it's actually a decent-looking shot. Looks like I've got good focus from the spindle of the reel all the way out to the edges. That's actually pretty good. But you can see the edges are actually a little bit blurry, just ever so slightly. So f/16 gets me pretty close to getting the whole thing in focus. Now what's wrong with the photo? Well, what we see is along the base of the product I've got a seam of paper going right there. So that's where we use a longer piece of paper, and I'm gonna show you how I do that here real quick. I love the craft store. We all should love the craft store 'cause you can buy lots of inexpensive products. And here, basically I've just got a piece of paper. I'm gonna say this is, what, 16 by... Maybe it's 12 by 24, something like that. So it's actually a fairly sizeable piece of paper. And I'm just gonna tape this along the top so that it goes against the back of my backdrop, and then this is gonna basically bend forward. It's a really great technique and tool for closeup photography. Pull this guy out. And we'll grab some tape. One of the other things about these do-it-yourself tents is when you use tape, over time the tape kinda pulls away part of the cardboard and pulls away some of the paper, so every few months you have to actually replace the whole do-it-yourself light tent because you just end up pulling it apart with all the stuff you bring in and out. Also be very careful you don't touch the side of the tissue paper. I've got wrinkles and cuts all over the inside of this 'cause I wasn't careful. Okay, great, so you can see I've just taped it up here. I just need enough height on the background so that the camera won't cut it off, and then I'll bring in the reel, like that. Okay, and it's falling over. That's often one of the problems with product photography is finding ways to keep it there so it doesn't fall over, so a lot of times people use that blue, sticky, you guys have seen it. Tacky, gummy stuff. And I don't have any of that here, so... Let me think, let me think. Need something to hold that up. Jewelry, no. (Woman) Could you use some Gaff or something? I could tape it down with Gaff. Let's just do that. I'll just tape it down with regular tape and pretend that we actually had some of that blue, gummy, sticky material. And I just want everyone to ignore my fake tape or my tape that holds it in place. (laughs) When I set it up when we were practicing it didn't fall over. Alright, good enough. Okay, fantastic. Alright, let's take a picture. So here, camera position's critical. You need the camera to be just high enough that you're not getting the front of the paper, so it might make sense actually to have a longer piece of paper. The paper maybe should extend outside the box, that way you don't have to worry about getting that foreground. So you want the camera to be just high enough that you don't get the clutter in the foreground but not so high that it looks like you're actually a human being standing photographing down on the thing. Most of the small product photography you do, you wanna be at, quote, eye level with it. You basically wanna be at a level that's equal with the product. Equal height as the product. Okay, here we go. Try and get it vertical. Gotta get in a little closer. Perfect. Alright, here's the shot. (shutter clicking) So now we've got a nice, seamless... It's a nice, smooth transition from the front of the product to the back of the product. You know, it's not really flashy. I mean, at this point I haven't put a lot of effort into making it really stand out. As I'm looking at the exposure on the computer, I think it also needs a little more exposure, so I need to brighten it up a little bit. But what it does overall is it shows off the product in a way that there's no glaring light. There's no really bright specular highlights on it. It's a nice, soft overall look. The background's nice and clean. You know, it's a nice, overall professional, look. Now, people that'll pick this apart will still find problems in it. In fact, if you look at the front end of the photograph, the front side, you'll see there's a hard line. There's like a reflection along the top and no reflection along the bottom. So, maybe the light tent isn't the right tool for this job. Maybe I need to do something more like the wine bottle example I gave you earlier, and you can oftentimes do that on this other product that I've got here on the end of the table. So, I'm just gonna take one more shot, just to brighten it up slightly, 'cause I didn't get it as bright as I wanted to, final picture of that. Alright, coming in. Yeah, there we go. It's brighter, it's mo' betta. And then I would use that kinda blue gummy stuff so I wouldn't have to see that tape there along the bottom. Now, after cropping and a little bit of Photoshop work that's something I would actually be able to give to my client and say, "If you wanna put this on your website, great." So, there is the light tent photographing kinda three-dimensional products. Let's just do a real quick example here of jewelry. Question, with regard to that one, from Kevin. Would you consider taking out the object after you've photographed it and take a photo of the background and then clone out the stand so you just have sort of the object floating, if you will. Sure. I mean, all of that. You could do all of that. But let's say, for example, I am working for a client. It's a paid gig, I gotta be efficient. Maybe he has, oh I don't know, 200 products to photograph. Well, that means I gotta sit in Photoshop for 200 images and do the clone and the drop and the masking and all of that stuff, so as much as I can, I try to do it in-camera. But I'm a realist and I oftentimes do go to Photoshop to kinda finish it up. I'd rather do it all in-camera if I could, though. And from Jay Overton, do you ever use a shutter-delay or a remote to eliminate any possibility of movement, especially with those slower shutter speeds? Yeah. Jay, I'm sorry man, you caught me. But you're right, you're absolutely right. Anytime your shutter speed is longer than maybe a quarter second or, I don't know, maybe even a 20th of a second, you should really be thinking about using a cable release, so yeah. Thank you. Good on ya. (Woman) Thank you. Okay, let's do some jewelry here real quick. I'm just basically gonna use the same backdrop, and I've got a variety of necklaces over here that were handmade. And some of 'em are even kind of shiny. So why don't we shoot this one here. It's nice, it's held together by a button on top. And so I'll take a couple of shots of this. One shot I'll take of just the pendant area and then another shot I'll see if I can do something with the overall necklace. What I'm already... What's going through my mind right now is I may not have enough surface area inside of my light tent to frame the image so that I get the whole necklace portion, and so I may need to end up going over there. I may need to go over there eventually just to get the whole thing. We'll see how it works. Again, that's the fun part of do-it-yourself photography. You just keep trying until something works. Okay, so now since it's more of a two-dimensional... I know it's three-dimensional, it's a necklace, but its more of a two-dimensional piece, so I really need to be photographing from a higher angle. And since I am photographing from a higher angle, depth of field might end up being an issue here. So, we'll see what happens. Alright, so this is another reason why I talked about earlier about having a tripod that just has a center column that you can move up and down. It's much faster to work that way for this product photography. Okay, let's see. Frame this shot, yeah, and already I'm seeing that because I moved farther away I need to take off my extension tube, 'cause I don't need to get that close anymore. I may have to use a skinny extension tube, we'll see. Okay, oh yeah, it works. Alright, so no extension tube, I'm still using my 85 millimeter, I'm still at f/16, and I think my shutter speed now is a 15th of a second. And Jay, I should be using my cable release, but I'm just going to hold my breath and hold really still. Let's see how this works. Yeah, I can already see depth of field's gonna be an issue. Alright, I'm focusing approximately a third of the way into the object. So here we go. (shutter clicks) Picture. Please come out. (laughs) That's one thing of live shooting is you never really know how it's gonna look. Oh, cool. (claps) I'm happy with that, that looks really nice. Nice, bright white, fantastic. The reflections are not objectionable, meaning there's no specular point sources of light. You know, as we look here in the front of this, the reflections actually look okay. F/16 gave me a decent depth of field. And if you look at it kinda from a far distance away, it's okay, you know? That would work for Etsy or Pinterest. I wouldn't put this in a catalog, though. Catalog or print matter needs more depth of field. So for this photo, it's a bigger product, I'm really gonna need to do my focus stacking technique that I talked about earlier, or get a tilt and shift lens or something along those lines that allow you to get more depth of field. So that was a nice look for that necklace. And just because I'm really curious, I'm gonna take one more. I'm gonna grab this necklace here, which has all kind of shiny rocks and fancy pearly type of stuff. Let's see what that looks like in this lighting scenario. And I'm the first to admit, everybody, I am a guy. I am not a stylist. (laughs) So sometimes I envy those of you who know how to style things so they look so nice. I told you I'm a recovering engineer, so unfortunately this may not look really pretty, that's okay. I'm all about the lighting though. I'm a really good lighter. Alright, here we go. This shot of the sparkly, shiny stuff. (laughs) I'm sure there's a technical term for it that I'm not even using. Alright, you know what? A lot of people who do jewelry photography actually have a fake neckline, a fake bust type of scenario that they put the necklace over. So if you're gonna do jewelry, I encourage you to at least buy something that makes the jewelry look well-presented. That's a fairly lame presentation, (laughs) but, hey. The exposure's great and the colors are nice, so there we go, jewelry. Now someone else mentioned earlier using a reflective surface. I think that'd be great. Reflective surfaces actually work out really well for macro and tabletop photography.
Class Materials
Bonus Materials with Purchase
Ratings and Reviews
Jodz
I was so glad to see Mike! He taught my first DSLR class (Nikon D70 - then Nikon D300). I love his presentation style. It is so clear and he takes care of showing details that get in the way of actually 'doing it'. And I like the way he emphasizes good manners when dealing with a model. Well done Mike!
user-0ee681
I've watched this class a few times when it's been on-air and I realized I really need to just buy it. I find Mike so likable and engaging, and I love how he talks you through the shoot while experimenting. Sometimes the experts show you the perfect way to do it the first time but it leaves you not really able to troubleshoot when you are doing it yourself. I already own a lot of gear that his DIY equipment is emulating, but it's really artistically inspiring to see his creative approaches.
joanna
This course is fantastic! You don't need a lot of money to start a studio or go on location. Mike shows some great easy hacks anyone can use to create a studio and create professional photographs that will earn you the money to then purchase more pro equipment. I got some great ideas I'll be using on my next shoot!