Lessons
Class Introduction
02:54 2Home Studio Space Considerations
15:19 3Recommended Gear
19:06 4Low Budget DIY Studio
06:45 5Camera Settings For Low Light
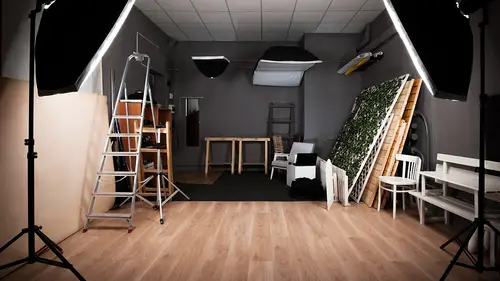
08:55 6Live Shoot: Low Ceiling
28:28 7Backdrop Considerations for DIY
12:00 8Build a DIY Backdrop Stand
12:42DIY Portrait Lighting
17:30 10Live Shoot; DIY Portraits
28:34 11Build a DIY Light Tent
20:17 12LiveShoot: DIY Product Photography Part 1
18:30 13Live Shoot: DIY Product Photography Part 2
13:45 14Live Shoot: DIY Home Business Photography
04:39 15Build a DIY Macro Lighting Tub
12:09 16Live Shoot: DIY Lighting Tub
10:46 17Live Shoot: Natural Lighting With Modifiers Part 1
21:12 18Live Shoot: Natural Lighting With Modifiers Part 2
09:21 19Build DIY Gobos
04:48 20Live Shoot: the Ultimate in DIY
21:11Lesson Info
Live Shoot: Low Ceiling
Alright, come on over here Sidney. So, Sidney, just go ahead and stand here with me real quick. So this is Sidney everybody, and she's agreed to be my muse for the day. I'm excited. We've got a couple of photo shoots with her. I asked her to wear just kind of neutral colors today, that's great. You know, when you're doing do it yourself home studio, you're the boss. And so, some things that you need to think about here. You need to think about makeup. So if you're working with someone, and they're gonna come to your place, you need to think about a place where that person can have their own private area to do makeup. You're probably not gonna hire a makeup artist for your own do it yourself studio, but that person's gonna need to do their own makeup. So have a space they can do that. If you're in the garage, then at least bring in a mirror and some nice lighting for that. If you have a bathroom, great, let Sidney go into the bathroom, and let her spend 10, 15, 20 minutes getting all ma...
de up. You also should collaborate ahead of time. Earlier this morning, Sidney and I talked through, okay, what are we gonna shoot? What type of clothes should we wear? All of that. So just remember that even though it's a do it yourself home studio, you're still the photographer. You still have a responsibility to be professional. That's you're aspiration, right? You wanna become a professional photographer, at least produce professional photos someday, so act professional. So, my interaction with Sidney today is gonna be all professional. I'm gonna talk to her politely. I'm gonna take care of her. I'm gonna ask her if she needs anything to drink. Are you too hot? All of that stuff. Still carry yourself in a professional manner. So, you ready? Ready. Let's do this. Alright Sidney. So the first thing I'm gonna have you do, is I'm just gonna have you sit on this bench, or sit on the stool, and a lot of times when I'm working with a model, Sidney's done this a lot, so she kind of knows the industry. She knows how to pose. She understands the camera and all that. But when you're doing this on your own initially, you can't assume that the model knows what they need to know. So I say, I'm gonna say, "Sidney, I'm gonna have you sit here, and I'm gonna have you put both feet up," or, "put one foot down," or "cross your arms." A lot of times you're gonna have to direct. In this case, we'll see. I haven't actually worked with Sidney before, so I'm assuming Sidney knows what she needs to know, but if she doesn't, then I'm gonna have to actually show her, or model her, or pose her. So, anyways for now, I'm just gonna have you sit like this. Okay. And the photography angle is gonna be that direction. Okay. So we're gonna start out with a single light. Gonna make it simple. We're gonna use one light. And then we'll build it so that one light actually ends up looking somewhat professional. And then as time permits, we're gonna go into two lights, and then we may or may not get into three lights in this segment, we'll see. Alright, cool. What we have here, is we've got the low ceiling again. So the illustration here is you've got that extra room in your house, or the basement, something like that. And we're gonna put it to use, and try to make a professional looking image. Alright, so the idea here is that Sidney's up against the wall, and that's hard to deal with sometimes as a photographer, because we don't like shadows. So as I always say, if something's in the frame, then make it a part of the frame. Make it a part of the photo. So, we can't really get away from that shadow in the background, so we're just gonna work with it. We're just gonna see what we can do. Maybe I can get Sidney closer to me later on, and just do a tight headshot, then we can get rid of the shadow in the background, but for now, I'm just gonna work with the shadow. We're gonna make the shadow a part of the photo. Okay, so for that then, I'm just gonna have you actually scoot back, almost against the wall, but not actually touching it. That works right there. Yeah. I'm gonna pull that cord out so it's not wobbly. Okay, cool. So we're gonna start with one light, and I'm going to actually use this here. Unplug ... Oh, you know, when you do a do it yourself studio, cords, there's just cords. You got cords everywhere. So just walk slow, don't do anything fast, make sure your model doesn't fall on your cords, or trip. Make sure your cord doesn't pull your camera over. Always, that's an issue with the do it yourself-er. Cords, cords, cords. Alright Sidney, so this is not gonna feel very good, because this is really harsh light. But, we're just gonna use it to illustrate. And you don't have to look right at the light. In fact, I would recommend not, because if you did, it's probably blinding. And just remember that, folks at home, that when you're shooting, the model sometimes is really uncomfortable, especially under continuous lighting. So, always be conscious. Are they sweating? Do they look uncomfortable? Okay, so Sidney, I'm just gonna look at you for a second, and just assess what this light looks like. Looks fantastic actually, it looks actually quite nice. Sometimes the light goes lower. And you can see as I go lower, you can see that shadow. See how that shadow changes? Another thing I'm always thinking through when I do studio work, is where is the catch light in the eye. So I'm looking for a nice catch light. And I've got a catch light here. So we're just gonna take a couple shots with the single light scenario. And then I'll throw in some other modifications. Okay, we are tethered, by the way. So I'll bring my camera over. And I'll just start shooting away. See what happens. Alright Sid, go ahead and just look here. We'll start out with a smile. Nice smile, great. Perfect. Okay, so these are just kind of test shots for now. Now we're gonna look at the tethered shoot. I'm gonna pull this up. Pull this a little closer. And Syd, I'm gonna angle this also, I'm sorry, I called you Syd. Is that okay if I call you Syd? Totally fine. Okay. Some people just hate that. But Sidney, this is what we're looking at, so you can kind of see what you look like there. It's a nice looking shot. And we really didn't do much of anything. So let's talk through what my camera settings were. So my ISO, I'm currently at ISO 800. My white balance, well, I'm at custom white balance. And before we started today, I actually did a custom white balance. I promised that I'd show you how I do that, so I'm gonna do that next. My aperture is at F three five. And then my shutter speed, because I've got this nice white backdrop, my shutter speed is at 125th of a second. Great. Okay, so I'm gonna do a custom white balance, show you how that works. Normally I would have Sidney hold onto this. So go ahead and just hold onto that. Bring it right to your body. Good. And typically I would use that to do my custom white balance. But just because this is a do it yourself class, I wanna show you how to do it on the cheap. So, anything that's white will work. So, here's something that's white. Go ahead and hold that. Cool. So I dial my camera over to custom white balance. And on the Nikon I push and hold this button here, it's the white balance button. It's blinking, and it says hey, take me now. So I'm gonna take my white balance here. And, I know the cameras probably aren't showing it, but it says good. So good means my white balance, my custom white balance is good, and I'm now ready to take the shot for real. So now the colors should be excellent. Thank you. Good. Okay, so let's try a couple things here real quick. So you see I've got this light here. It's about at a 45 degree angle, and that's kind of cross-lighting across her face. Go ahead and look right here in the camera. And perfect. Alright, good. Now, with one light, what can we do? Well, obviously positioning the light matters. So, I said we've got 45 degree angle. That's great. If I do a little bit more here in the front, if you now look at where the shadow, the shadow's actually hidden behind her, which is pretty neat. I like that. Gonna move in closer. And, give me another nice smile. Excellent, nice job Sidney. Fantastic. Let's do a serious look. Just pensive. Thinking about that hike we're gonna go on in the mountains. Excellent. Alright, so what did I do there differently? Well, with one light, I've just moved it off to the top. My ceiling is fairly low here, and so I'm actually reflecting a little bit of light on the ceiling, and onto the backdrop. Great. Pretty nice looking image. Well let's get a little bit better. We can do better. We can always do better. So, what were the three things I said? Diffusion, diffusion, diffusion. So let's add in some diffusion. Okay. So now what I'm gonna do, is I'm actually going to change the direction of the light, like this. And, Kenna, just to show what this might look like, I'm gonna use you as a friend. Alright. You know? We're buds. We are buds. I'm gonna use Kenna a lot today, and I'm gonna pretend that Kenna and I are photographers working together. Come on over. And we're working the studio, we're both learning lights, so I'm gonna have you be my human powered light stand. Hi. Alrighty, so I'm gonna have you come in nice and close. About right there, cool. And, I'm gonna have you come over this way a bit. Excellent. Alright, there. Oh yeah. Okay, I'm already seeing this. This is so cool, it looks awesome. And the reason why it looks awesome, is because the light is just washed all over her body. The catch light in her eye is beautiful. Ooh, I like it. So let's take this shot again. Now things have changed. The intensity of light has changed quite dramatically. Before we had direct light, and now we've got diffused light, off of a reflector. So let's take a look at this shot. Oh, nice smile, good. I'm focusing on her eyes. Nice. I'm gonna go vertical here. Ooh, very nice smile. Beautiful. Okay. Thank you Kenna. You bet. Can I ask you a question? Yeah, please. Alright, so this had come in earlier. When you are metering, which part of her face are you metering off her, because there's shadows, and there's highlights. Good. In this case, I'm using aperture priority, and I'm using multi pattern meter. So basically matrix metering on the Nikon world. So I'm not even doing anything sophisticated. But what I am watching for, very carefully, is that I'm not blowing the highlights on her cheek. I'm gonna walk over here to her real quick, and I'm just looking for highlights off the forehead. I'm looking for highlights off the cheek over there. Anything that I see that looks shiny, is probably overexposed. So if that was the case, then I would use exposure compensation to bring that down. Great. Okay cool. Sorry, one more thing. Yeah. For folks at home, about how far am I from the model, as well as the light from here? Super awesome question. My rule of thumb is this. How big is the thing? How big is the diffusion? In this case, it's four feet. I typically put however big the thing is, four feet, about four feet away. So in this case, if you just hold your arm out, would you hold your arm out? Her arm's probably about three feet, so that's about perfect. So if it's a two foot diffusion panel, well then you gotta be really close, and that's super uncomfortable. It's uncomfortable for the model, because she's sitting there like, ah, this stuff's in my face. Another reason why bigger is better. So I'm gonna look here into the tethered shoot. This photo here was taken with the larger reflector, and we have a nice big catch light in her eye, that looks fantastic. There's some other catch lights, and those are from the studio lights. Those two little catch lights on the right side are from the studio lights. So, when you're at home, you're able to actually control the lighting maybe a little bit better than we can here in the studio, because you don't have to do a TV production, or a video live production. But in this case, if you look at it from this angle here, that looks really nice. Let's compare that now with the one where we did the hard light on the backdrop, or the hard light without the reflector. Go here. Okay. So, that's not bad, right? It's still a nice look. It actually looks like it was taken outside on a sunny day. It's a really nice image. You can see the shadows though on her face. If she was older, you would get a lot of wrinkles, especially around the eyes, and around the cheeks, and so, just be careful using hard light for more seasoned models, I'd say. For younger models, you can often use hard light, but for folks who have more wrinkles, or been out in the sun a lot, a lot of times you need to use softer light. Alright, so here's the first one, here's the second one here, where we moved the light up high and shot down. You can see, even though she's inches away from that backdrop, we're still able to get rid of that shadow. And then, shot a couple shots there. Here is our pensive image. And then we'll wait for that to load, it should load here in just a second. The color should look fine. There we go. Oh, and that's just fantastic. (laughs) It just makes me so happy. I mean, this is do it yourself. This is a 30 dollar light from Home Depot, or Costco, I don't remember where I bought it, and a four dollar reflector. And look at that. You could sell that photo anywhere. That could go in a magazine, it could go in her portfolio. It's just a nice looking image, with the most basic of lighting equipment. That's what makes me excited about this stuff. See, you don't need to go out and spend 5,000 dollars on lighting gear. Just a few hundred. Okay, cool. So that was one light. One light with one reflector. So let's just real quick talk through what might we try with two lights. Okay, so for this example, I'm gonna have you come forward a little bit. Sometimes, yeah, that's great. Remember, this is a really tight room, and I'm gonna try to stay in the confines of the room. Yeah, this is great. So now what I'm gonna try to do here, is I'm gonna use two lights. I'm gonna use one light as the key, or the front light, just like we did. And then I'm gonna use another light for a hair light. And that light in the background will end up being our hair light, okay? So, for here, gonna do basically the same thing. And in this case, I'm gonna use my light stand, so that Kenna doesn't have to stand here. Ooh, low ceiling, my stand's too tall. Yeah, make sure you don't have a sprinkler system in your house, and that you whack the sprinkler system in a low ceiling area. Ah, small spaces are always hard to work with, right? Clamps, I haven't talked about clamps yet. You'll see me using clamps all day long. Clamps are like the best thing you can use, in your do it yourself studio. And they're about a buck to two bucks apiece. I recommend everyone having 10 to 20 of these clamps. You're gonna use them all over the place. Great. I think that's probably fine. Alright, now I'm gonna set this up, and I'm gonna have you look right at me. And I'm just trying to get a nice catch light in her eye. Excellent. Now I'm gonna use this background light. And this is gonna be a hair light. So, again, we're really tight in the studio. Not a lot of space. So I gotta find a way to finagle this, and fit it here in the background. We'll do that. Okay. So this is gonna be nice and high, like that. And now I turn this on. Okay, cool. So, I think the cameras, studio cameras probably picked this up. Did you guys notice what happened, those at home, did you see what happened when we turned this background light on? It's spilling over onto the backdrop. And I don't necessarily want that. For this case, I want the light just to kind of roll off her shoulders and off of her hair. So, it's time to do another do it yourself thing. So Kenna, I've made some pre-fab cardboard. Okay. I think it's over here on the gear table. Oh yes. Would you grab those top two cardboard flags? Okay, so for my do it yourself lighting kit earlier, I cut off the front of the cardboard box, and now I'm gonna use these as flags. So, this one is going to block the light there from the background. And I just have gaffer tape, or duct tape. Use whatever you have at home. Hopefully ... Well, we may have to do a little better on that. And this one here, that's gonna prevent the light from basically hitting the ceiling. And longer tape probably helps. One of the great things about do it yourself photography, is you can laugh at yourself when it doesn't work the way you want it to. Alright, cool. Cardboard. Excellent. Watch my cables. Okay. Go ahead and look right at me. I'm just looking at her to make sure that the rim light works, and that it doesn't reflect off of her face too bad. I'm gonna take the first shot, and I'm gonna do it incorrectly. Because what we have here is we have a nice shine coming right across her forehead. So I'm gonna take that picture, show it to you all at home. And then we're gonna fix it. Okay, so lighting has changed again, right? Every time you change the do it yourself thing, the amount of light changes. So now it's gonna be a little bit darker maybe. Maybe it's gonna be brighter because of the backdrop. Who knows. Alright, here we go. One, two, three. Nice. Okay, let's look at the computer. There we go. So, a couple things about the shot. The first one is that our flag is actually in the frame. Okay cool. We can crop that out, or we can Photoshop it out, or I can just move it here in a second. The second thing is, is that we got that shine right across her forehead and her face. So, I'm gonna try to fix that. And the way that I'm gonna do it, is I'm actually gonna move you this way a little bit. Great. And then I'm gonna have you kind of angle your body, yeah, like that. Good. I don't know, camera, can we see ... If you kind of slowly turn your head, look over this way, and then slowly rotate your head across. And as she moves her head, you can see the shadow right there disappears. Notice that? Do that whole movement one more time. Great. So I'm just trying to find a position for her head that doesn't necessarily have that bright light across her face. And then I'm gonna do one more thing. I'm gonna get his as high as I can. Great. Okay, here we go. It's a nice look. One, two, three. Oh, excellent. Oh, you know what? I'm a little bit outside my room. I gotta make this as real as I can. Okay, there we are. So, in the real room, my back would be up against the wall. And, you can see with my 85 ... Ooh, nice smile, fantastic. Okay, so with my 85, as we're bringing these photos in, you can see that I'm really tight. It's just a headshot. So, I might have to go with a shorter lens. In fact I'm gonna do that real quick. Just because it's real life. I'm gonna get rid of my 85, and I'm gonna go down to my 50. The 50 is gonna allow me to get a little bit more of her torso, shoulders. Oh yeah, much more space to work with. I'm gonna have you look this way a little bit, or move your nose, there you go, and look at the camera. Always focus on the front eye. Oh nice smile, good. And I'm gonna shoot a vertical picture too. My shutter speed is at a 50th, so I can handhold that. Here we go, one, two, three. Last one. Nice. Good eye connection with the camera Syd. Thank you. Looks great. Okay, so let's analyze these photos here real quick. I'm gonna back up, maybe three pictures, there we go. So, first thing we notice, the light looks nice. The light on her face looks very nice. I'm always looking at catch lights, so I'm gonna zoom in. See if those catch lights are good. I'm also looking at critical focus on her eye. Make sure I've done a good job there. Looks like I actually mis-focus a little bit. Okay, that's one of the cool things about shooting tethered, is I'm always able to assess whether or not I nailed it. Okay, not bad. Ah, you see, you may or may not be able to see this on the TV screen or the computer screen, but there is a little bit of noise. There is a little bit of grain in the photo. And that's not her face. That's not her skin complexion. That's noise from the camera. And I'm shooting at ISO 800, so we're gonna have to deal with that. And Lightroom has some great ways to deal with noise. The next thing I notice about the photo, well there's that bright spot behind her, on that back shoulder, on the wall. Okay. It's not objectionable. It actually maybe looks like window light. But, if this was an important, that the backdrop be consistent, I would do a better job with flagging that backlight. Great. And then, you notice I'm also watching that reflection on her face. If you have a little reflection there on her face, there we go, that's okay. But if the whole side of the face is washed out, that's bad. So, just watch that side of reflection. We have a nice little rim light off of her shoulder. That's beautiful. It helps separate her from the backdrop. So, that's neat stuff. Again, now we've doubled our investment in our home studio. So we've got a 30 dollar LED for the foreground, or the front light. We've got a 30 dollar LED for the backlight. That's great. And then we've got cardboard and diffusion panel here. So that's a really inexpensive way to go. Alright Kenna, so let's answer some questions for the last few minutes. Alright, that sounds great. First of all, thank you so much Sidney again. Thank you. You can sit here if you want, or you can relax somewhere else. Thank you so much. Alright. Thanks. Alright, thank you. Okay, so I have several people asking about the power of these LED lights. Whether that's in watts or lumens, could you talk to that please? Yes, lumens, it's in lumens. I just threw the box away. Let's see, what are they? I do not remember how many lumens they are. But, I bet it says here. Well it's a 25 light- Oh, here we go, okay. These LEDs are 25 watt LEDs, but there 2,000 lumens. So 2,000. This one here, we're gonna use this one later today. I think this one is 500 lumens. And so, if I compare this with those lights, 500 lumens, 2,000 lumens, somewhere in that range makes good sense. The brighter you purchase is better for your photography, but here's the thing. Sidney's sitting here in the seat, and Sidney has to stare at these lights for an hour. And it hurts, it's painful. It actually hurst to stare at these lights for a long period of time. So, you're always kind of fighting how bright do I want this to be, versus how bright should it be. One quick example, as I was preparing for this class, I had my daughter helping me. And so I said, "Hey honey, would you stand here for me?" And I setup this bank of lights. And overall it was probably 10,000 lumens. And she's like, dad, I can't do any, I can't see, I can't even look at you through these lights. So, just keep that in mind when you're setting up your lighting equipment. Oh, another point to that, that I wanna make, color balance. Color temperature. These snap-ons back here, those are about 5,000 Kelvin, okay. 5,000 Kelvin, that's the color temperature. That's close to the color of flash. Or close to the color of daylight. This one here is also about 5,000 Kelvin. I've made other DIY lights, and I accidentally bought some low Kelvin, you know like the warm light bulbs, that are like 2,700 Kelvin. So the problem that happens is if you ... All of your home lights are different colors, then you have major white balance issues. So try to get the same color temperature of lights, across all of your DIY equipment. Are you using an adapter of sorts to mount those lights to the light stand? Good, let me, I'll pull this out of the studio, so the cameras can see it. Okay. Again, cords, cord management. Okay. This is neat. So, one of the reasons I actually bought these lights, bear with me, I'm gonna grab this one from the back. Whoa, see, almost crashed. Cords. This is the way that it comes from the store, okay? So this is the way that it comes from Costco, and it comes with this little mounting foot here. And that's great if you just wanna mount it on the ground. But when I was looking at it, I noticed that it was screwed on, and I could unscrew it. And then at the bottom of it was a little hole. And I thought, oh my goodness, I can actually screw this onto a light stand. So let me show you how I did that. This is just a typical light stand. It's made by Photoflex. Any of the light stands that you buy. Bogen, Manfrotto, Savage, any of that will work. And then I just have a wingnut here. Here's the wingnut. And then the top of the light stand always has like a quarter by 20, or a three eighths inch thread. And so then I just put this little thing there. Screw the wingnut on. And I'm good to go. That's pretty cool. And then the other neat thing is, it comes with these little adjustment handles, so I can move it up and down. If you need more adjustment than that, then you can always do something like I've done here, I'll pull this one over. And here I've just used an umbrella bracket. Okay, so this is a typical umbrella light stand bracket. And again, I just screw it here into the top of the bracket, and then I have a lot of flexibility, and a lot of range of movement with that one. That is an awesome question. This is why I like DIY, because you get to be ingenious. You get to solve problems. And I must confess, for everyone watching at home, I am a recovering engineer. My history is mechanical engineering. And so I love this type of stuff. I love getting my hands dirty. I love tape, and wrenches, and cars, and mechanical stuff, so this is right up my alley.
Class Materials
Bonus Materials with Purchase
Ratings and Reviews
Jodz
I was so glad to see Mike! He taught my first DSLR class (Nikon D70 - then Nikon D300). I love his presentation style. It is so clear and he takes care of showing details that get in the way of actually 'doing it'. And I like the way he emphasizes good manners when dealing with a model. Well done Mike!
user-0ee681
I've watched this class a few times when it's been on-air and I realized I really need to just buy it. I find Mike so likable and engaging, and I love how he talks you through the shoot while experimenting. Sometimes the experts show you the perfect way to do it the first time but it leaves you not really able to troubleshoot when you are doing it yourself. I already own a lot of gear that his DIY equipment is emulating, but it's really artistically inspiring to see his creative approaches.
joanna
This course is fantastic! You don't need a lot of money to start a studio or go on location. Mike shows some great easy hacks anyone can use to create a studio and create professional photographs that will earn you the money to then purchase more pro equipment. I got some great ideas I'll be using on my next shoot!