Lessons
Class Introduction
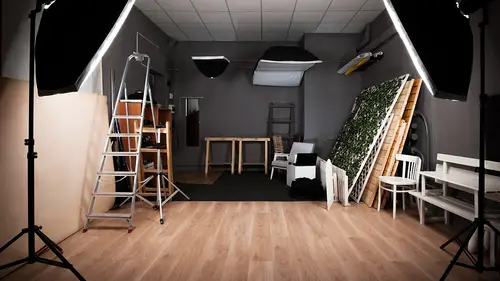
02:54 2Home Studio Space Considerations
15:19 3Recommended Gear
19:06 4Low Budget DIY Studio
06:45 5Camera Settings For Low Light
08:55 6Live Shoot: Low Ceiling
28:28 7Backdrop Considerations for DIY
12:00 8Build a DIY Backdrop Stand
12:42DIY Portrait Lighting
17:30 10Live Shoot; DIY Portraits
28:34 11Build a DIY Light Tent
20:17 12LiveShoot: DIY Product Photography Part 1
18:30 13Live Shoot: DIY Product Photography Part 2
13:45 14Live Shoot: DIY Home Business Photography
04:39 15Build a DIY Macro Lighting Tub
12:09 16Live Shoot: DIY Lighting Tub
10:46 17Live Shoot: Natural Lighting With Modifiers Part 1
21:12 18Live Shoot: Natural Lighting With Modifiers Part 2
09:21 19Build DIY Gobos
04:48 20Live Shoot: the Ultimate in DIY
21:11Lesson Info
Recommended Gear
So now that we've talked about space, I want to talk about stuff you have to buy. All right, so do it yourself, it's all about the lighting and that type of equipment. But there are some things as a photographer that you just have to buy. For example, the camera, right? You can't do a do it yourself camera. Well you could, I mean you could do a pinhole camera, but that's not really great for the type of photography we're talking today, talking about today. So, I want to talk about camera gear real quick and just kind of go through the types of things, maybe a beginning photo studio photographer might need. So let's talk through some of that. And over here on this table, I've got a bunch of stuff that I want to talk through and if there's questions, I'm sure there's going to be lots of questions, feel free to just kind of pepper them in throughout, Kenna and I'll just get to them quickly. OK, first thing. Tripod So, do it yourself lighting is actually fairly dim. Even though, when I tur...
n these things on later on, the model actually will probably recoil a little bit from the light, 'cause it feels bright, but the total amount of energy coming out of those lights is actually very low compared to maybe a flash. So because the lighting is actually low, your shutter speeds are going to be much longer than they would shooting flash photography. For example, when I shoot with my studio lights I have my camera set to about a 200th of a second or a 250th of a second. Here in the studio, a lot of times I'm at maybe a 30th of a second, sometimes a 60th of a second. So you may have to learn to use your tripod to hold you camera steady. So, what type of tripod should you use for the studio? I do a lot of wildlife, nature, and adventure travel photography and for that type of photography, I want the camera to be as steady as possible when it's on the tripod. So, for my adventure photography, I have a tripod that doesn't have a center column and I just keep the camera fixed basically right to the top plate with the ball head so that I don't allow myself even the option to move the center column up, 'cause any time you're moving the center column up, the system gets a little bit wobbly. But in the studio, sometimes having a center column is actually very helpful. So, this tripod here has a center column and I love this because it allows me to very quickly drop down lower, you know, so maybe I'm doing a torso shot here and then the model stands up, or I want to shoot the famous, not the famous, but the classic top down type of image and so now I'm a little bit higher and I can shoot down a little bit just to get a little bit of effect and I don't have to do three legs at once. I can basically do one leg at once or once center column at once. So, that's using the center column. I think, I pulled it too high, there we go. I like using a ball head. So this ball head actually has a quick release ball head. I think that works great for studio work because if you have to hand hold, great, you can hand hold, and then you can very rapidly drop it into place and lock it. So having a quick release plate and then a ball head so you can go vertical or horizontal. I think that's very important. So, anyone who's doing a do it yourself home studio, buy a tripod. You don't have to get a nice big expensive carbon fiber tripod, you can just do an inexpensive aluminum one. You're not going to be carrying it around the world because it's your home studio. So you don't have to spend a ton of money on it. OK, let's talk about cameras next. What I have hear is, I've got a DSLR. This is a full frame sensor and I've got an 85 millimeter lens. This is the classic portrait setup. An 85 millimeter, like an F/1.4 or an F/1.8, on a full frame lens is perfect. It gives you a nice working distance away from the subject and it gives you very limited depth of field if you want it at F/1.4 or F/1.8. So this is kind of the classic portrait lens. You want, generally, a longer lens a little bit more telephoto. I have another lens here that a lot of people own. The nifty fifty, right, a little 50 millimeter. This is 50 millimeter F/1.8 and you can get these in Canon and Nikon and Pentax and everybody's got these lenses and you can buy them very inexpensively, typically, $125 bucks. So a 50 millimeter lens is a good, I'll say surrogate, for the 85 if you don't want to spend the money on the 85. An 85 millimeter lens is going to cost you probably, I don't know $300 to $400 bucks. If you get the 85 millimeter F/1. it's going to cost you more like $1200 to $1500 bucks. So, the 50 millimeter is great if you're just starting out. Why do I say more telephoto? Well, the more telephoto you get, the more flattering your photos will be of your subject. It typically flattens out the face. If you use a wide-angle lens, say like 24 millimeter for portraiture, a lot of times you have distortion to deal with. So the nose looks bigger and the forehead pokes out a little bit farther. It's not always the most endearing look to your photograph. So, first lens, 85. The second one I'd recommend is like a 50. Let's talk about some other lenses you might consider. I'm going to move this tripod out of the way so the cameras can see. So, we've go this, this is a classic. This is the 24 to and most camera manufacturers make a 24 to 70. So, this is nice, especially if you're working a small studio, like the one I have described over here. 24 you can use that if you have to go full length, but you can't back up very far. 70 gets you almost to the 85 number, so 70 is good for close up head shots and that type of thing. But, almost always, I will default to my 85 millimeter rather than using my 24 to 70. What lens should you not use? This. This is a 14 millimeter. Don't use stuff like this for portraiture. Well, I mean, you can if you want to go like really funky looking photographs, but not for classic portraiture. So don't use the really wides. I know some people would be like, ooh, I can use an eight foot bedroom if I use my 14 millimeter lens. Don't do that. You'll never hire another model and no one will hire you for your funky-looking portfolio. So, I generally don't recommend really wides for this type of work. This is a great portrait lens, one of my favorites as well. So, this is the 70 to 200 and, of course, all the camera manufacturers make lens in this range. This is great for head shots, it's great for shoulders and above type of work. I use the 70 to 200 all the time, but you can't do full-length portraiture with this unless you're a long ways back from your subject. Like 30 feet away from your subject. I might use this later on today. It's a lot of fun. One other thing to consider with your lenses. Since your lighting is going to be fairly low level and I'm talking about using a tripod. Some of you just hate tripods. Some of your are like, I hate working with tripods, they're so cumbersome. Well then at least get a lens that has vibration reduction or image stabilization. You can get away with hand holding sometimes down to a tenth of a second or maybe a twentieth of a second with a VR lens or an image stabilized lens. So, those are OK to use, but in general, I still recommend using a tripod. Today, you might find me cheating. You might actually find me hand holding a few times, just because I'm trying to do things fast for the class, but overall, you're going to get better results with a tripod, maybe more than the VR. OK the next thing I want to talk about, I think this can be very important. This is a cable release. So this plugs into the camera and allows you to trigger the camera without actually touching the camera and it also allows you to maintain eye contact with your model. So, a lot of times I will be talking with the model and say pose this way, pose that way and I can be looking at her while I'm taking the picture versus my face kind of hidden behind the camera and you lose that connection sometimes. I use this for both people photography and also still life or product photography. So, along those lines, let's talk about still life and product photography. What I'm thinking of here, what I'm imaging, is table top work. So, you've got a table and your photographing maybe some food that you've made. You're going to put that food on Pinterst or maybe you're photography some crafts or necklaces that you've made and you're going to put that on Etsy or maybe eBay to sell. Well, you're going to need some way to focus close. You can buy a macro lens, great. You all know that macro lenses aren't necessarily cheap or inexpensive. So, the easiest way that I have found over time To do inexpensive macro photography is to use these. These are called extension tubes and you can buy a set of extension tubes on Amazon.com and they'll work with, you just buy the one for your camera manufacturer. So Canon has them, well they make them for Canon, they make them for Nikon, they make them for Fuji, and everybody else and there's no lens element in these. These just literally, just push the lens farther away from the camera so you can focus closer. Really inexpensive way to do macro photography. So everyone should get yourself a set of extension tubes. Next, flashes. OK, I bet almost every body out there watching this today probably has some type of flash. Most of us buy a flash because well, we're supposed to. You buy the camera, you gotta get a flash, right? So, later today, especially in Segment 3, I'm going to show you how to incorporate flashes into this whole system. So, I'm going to show you how to use flashes with the DIY lighting modifiers and also with the DIY lights. I think, in general, you have to find a way to get those flashes off camera. That's important. Actually, it's critical that your flashes be off camera. So, how do you get them off camera? Well, one way is it use a cable, a flash cable. They're just called TTL cables. And that now allows me to fix this to my camera and then put my flash on a stand. So you can see this cable is only like three feet long. You might want to get something longer. Just a little tip for you all. You can actually daisy-chain these together. You can get, if you find a good deal on cables, you can actually just get a number of three foot cables and stretch them out and you can get much more like eight, ten feet, something like that. A TTL cable, I think, is important. Everyone should have one of these. Or... Find a way to get your flashes to fire without wires. So, this is a little flash trigger. It's a little Nikon product. All it does, is when it sees a pulse of light it triggers your flash. Of course, Nikon and Canon, and even some other third party manufacturers have all the wireless TTL stuff, but some of us, when you're first starting out, you don't have all that technology, so, one recommendation I have is everyone go on to Amazon and you can find these really inexpensive flashes. This one's made by a company called Aperlite. I don't even know if I'm saying that right. Aperlite. This flash was 60 dollars and it has it's own built-in trigger, so it'll fire as soon as it sees any other flash in my system, fire. So, for $60 bucks for a flash like this, you can buy three or four of them. There's your in-home studio and now I'll show you later on how to use reflector boards and that type of thing. You're got a great studio for a couple hundred bucks. That's great. What else do we need for camera gear? Well, in terms of the camera gear itself, tripod, camera, lenses. I didn't talk about the camera bodies very much. I'm a Nikon guy, great, but I also know Canon makes fantastic cameras. If you're just starting out in this world, I would recommend something in the Canon world like a Canon 7D or the Canon 5D series. Those are all very good. In the Nikon world, something like a D750 or a D500. Those are great cameras that aren't going to break the bank, but are still somewhat professional. You can also get away with a lot of the mirror-less cameras now. Fuji is doing incredible work with their mirror-less systems. Sony, oh my goodness, Sony just came out with some new mirror-less cameras a few weeks ago and they're incredible. So, the cameras that you use aren't as important as this. I always tell people that. Don't really get into the gear acquisition syndrome. We call it GAS, or in the Nikon world we call it NAS, Nikon Acquisition Syndrome. It's like, ooh, I need that 600 f/4.0. Naw, you probably don't. You probably need to spend more time here, in your brain, working with your system. I always think that's more important, practice. You know, when we were setting up for this class, I was talking with a bunch of the crew. This was yesterday and a bunch of the crew were like hey Mike, I've got the flashes and I've got some of the reflectors, but I still don't really know how to use it because I just haven't. I haven't really practiced with it. So, more important than the gear is practicing with what you have. I always think that's critical. Practice, practice, practice. OK, one more piece of camera equipment that I want to talk about before we move to the next phase here. This. So, this is a gray card and we use it for getting while balance. All cameras now have auto white balance. And auto white balance is great. The camera just basically tries to figure out white balance and the colors, but sometimes it's very difficult to accurately collect white balance without using something like this. When you're doing do-it-yourself lighting, we're going to see this today, an LED from Costco is going to be different color than an incandescent light from Home Depot and that's going to be a different color than your flash. So, I'm going to show you how to do white balance using this type of product and you'll never have to guess about your colors ever again. If you don't want to spend money on this, this is, I don't know, I'm going to guess $40 bucks, well guess what, you can use paper. You can literally use a white piece of paper to collect your white balance. So rather than using the actual gray card today, I'll show you how we do it with just a white piece of paper. Well first of all, Mike, I like that you said, some of our crew said that they have a flash and they don't use it, that would be me. (laughs) I didn't want to call you out. No, it's so, so important, like you said, to get out there and practice and I think that's huge. You're going to learn today how to do that without having all this extra gear. So, would you have some questions that have come through, to what you've been talking to in addition just to the spaces as well. So, Juergen Kierkegard is asking about painting the ceiling mat black. Would that give you the ability to control the light even more. Sure. Yeah, so Juergen, that's a great question. These are all creative choices, right. You could even paint the walls red if you wanted to because that's a creative choice you have. Black is a good option. What black does...the non-technical term I'm going to use here is a light sucker. You know, black takes away light, right? So sometimes we use them to make a side of the face darker, so we'll put a black board next to the person's face. Black on the ceiling gives you a lot of control because sometimes, when you use this DIY lighting equipment, the light actually will spill onto the ceiling. So, for example Juergen, let's say that we're taking a portrait. I'm going to move back here. Let's say that my subject is actually sitting like here. OK, now I've got a DIY light here and I've got a DIY light here and now that light is also shining onto the ceiling and sometimes I'm not able to really control that bounce, that reflection off the ceiling. So, having black up there actually can prevent light from shining down on the person's face and maybe creating like raccoon eyes. So, yeah, that said, Juergen, overall I think it's better to have a white ceiling than a black ceiling. That's my preference. Everybody's got a different opinions on that, but for me, I like white every where. Because if I have to, I can just throw a V flat, not a V flat, some black board up there above the person's head and do basically the same thing without having to repaint the wall or the ceiling. So, that's my opinion. All right, great. Anything else? This is a question from Sarah Brown who said, can't we use the walls then for the white balance? Yes, great Sarah, perfect. Well, no. (laughter off screen) Here's the thing, when you do white balance, the most important thing is to white balance where the subject is. You don't white balance where the wall is. You don't white balance where the lights are. You have to white balance where the subject is. I'm going to make this harder on the cameras in the studio here real quick. I'm going to stand over here. So I'm standing over here and we have studio lights, so let's just pretend the studio light shining on me now is one of our in-home camera lights. Here I am, I'm standing here, and you can see the light's hitting me on this side of the face and then over here you can see that it's a little bit darker. Well that lighting condition here, I'm going to move over this way, is much different than the lighting condition, using the same light, but it's different than over here. So maybe there's some bias. Maybe the carpet's different. Maybe even there's a light up here in the ceiling. The point is, is that the light where the subject is, that's always most important, so we white balance there. You might think, oh well I can just do the wall, but you can't because, here's the thing. Let's say I turn on a background light, okay, like that. And let's say this background light's an LED and then one of my foreground lights is, let's say an incandescent bulb. Well, that's different. You're not going to white balance for the background because you always want the subject to be colored properly. So, you always white balance right here, right at the person's face. That's the key. That's important.
Class Materials
Bonus Materials with Purchase
Ratings and Reviews
Jodz
I was so glad to see Mike! He taught my first DSLR class (Nikon D70 - then Nikon D300). I love his presentation style. It is so clear and he takes care of showing details that get in the way of actually 'doing it'. And I like the way he emphasizes good manners when dealing with a model. Well done Mike!
user-0ee681
I've watched this class a few times when it's been on-air and I realized I really need to just buy it. I find Mike so likable and engaging, and I love how he talks you through the shoot while experimenting. Sometimes the experts show you the perfect way to do it the first time but it leaves you not really able to troubleshoot when you are doing it yourself. I already own a lot of gear that his DIY equipment is emulating, but it's really artistically inspiring to see his creative approaches.
joanna
This course is fantastic! You don't need a lot of money to start a studio or go on location. Mike shows some great easy hacks anyone can use to create a studio and create professional photographs that will earn you the money to then purchase more pro equipment. I got some great ideas I'll be using on my next shoot!