Lessons
Lesson Info
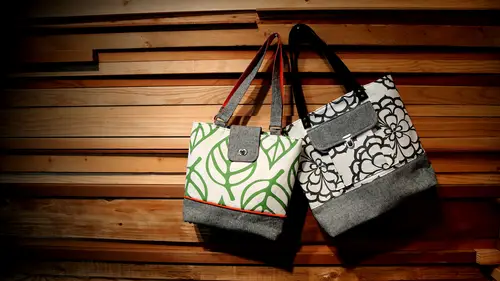
Flap Closure with Twist Lock
Now we're going tio install a twist lot closure on a flap on the bag so use the smaller bag is an example and this is just a simple bag closure that you can add on any tote and it's simply a flap and some kind of closure so I've used twist lock here, which is pretty cool looking I think adds a professional touch to your bag you could also have a magnetic snap or button even velcro if you wanted to so there's a lot of different options for, um securing a flap on your bag but we're going to try the twist lock today so I've got my flap cut out here and the template for this flap is included in your bonus materials and so we have the flap in an accent fabric and I have the back of it interfaced with feasible fleece and that just gives it a little bit of body and then this is my lining fabric you could have it be the same fabric I just like the little pop of color and it's going to tie in with our piping and then I have that interfaced with, um just a cotton woven interfacing so it's a litt...
le bit different this just add some stability and then this adds a little, uh dimension so we're gonna put those right sides together and we're going to sew around the perimeter I'm going to stitch that with a quarter and seem allowance and I'm going to leave this street edge open for turning now a lot of people are sort of apprehensive about sewing curves and I find that if you like, I'm sitting at a quarter of an inch and there's a mark in the machine, which is basically at the edge of my foot and my technique is, well, first of all, practice a lot, but I so the straight part of my stitch line and then when I get to the curve, I just allow that curve tio hit the foot at the exact same spot like they don't look anywhere else, I just stare at that spot that I'm trying to align with and go slowly knots kind of the bust, the best way to deal with a curve and then when you get around the curve and you're in the straight part than just relax and go straight to get the next curve and then we'll slow down again okay, so usually when we so curbs it's really important to take notches out of the same allowance because when you turn it right side out um you know this this edge is longer than the edge of your stitching and there's just extra material and then that's going to look punchy and weird, so the nice thing about having a narrow seem allowance and pinking shears is that the pinking shears basically take little notches for you so instead of snipping with the tip of your scissors in creating matches you can just use pinking shears and then of course if you don't have pinking shears you can take some little matches like this with your scissors and you want to get um I don't know an eighth to a sixteenth of an inch um to the stitching you don't want to cut the stitching but since I have thinking shoes I'm just going to use this ok then we'll turn this right side out came on work the seam allowances that with your fingers and then wanted to suppress ok then we're going to top stitch around this edge and for top stitching I like to make my stitch length just a little bit longer I normally seem at two and a half of a stitch length but for top stitching I'm gonna bump it up to three ok now we have our flap done and we can install the twist lock hardware so let's look at our flapping in here so the first thing we're going to install is um because it's kind of a gram it's the opening that the twist lock is inserted into this's on the outside of the flap and it has two little prongs and then this is kind of like a washer that's on the back that the prongs spend on too signifying the center of my flab by just folding in half and giving it a little pinch there and my chat with the pin and then I want um the center of this to be one inch up from the bottom edge. Actually, this may shock you better. Okay, so I'm gonna take this piece and put it face down over my mark and then I'm going to draw with my marker inside of this little washer thing. All right, then we need to cut that hole and then it's a little nerve racking, but it must be done to speed brave, so we're going to take a little snip and poker tip of your scissors through you got a couple layers, you've got the two layers of fabric and two layers of interfacing so you can cut one of the time it's easier and you can also you should also cut just a little at a time because we don't want the whole to be too big parents and let's pop this in here and see what it looks like. Okay, so when I put that in there, um there's still some fabric showing it looks like mostly it's, the lining, someone to turn a little more so this is just a little game of back and forth here term just a tiny bit more, okay, all right, so there's still a little bit sticking out there but what I'm going to do is use my frey check and that's going to help with these little threads and it also it will help them from fraying and they'll also kind of be wet and they let me switch them down and get inside the hardware here we go all right I'm going to use my little all tools and kind of pushed that around now some people it's where by using hardware glue as well which you're certainly welcome to use I have this clue that's used for jewelry and hardware and um if bonds really well I'm always just personally little hesitant he's glue because I don't do a very good job usually make a mess of things with it so all right so we have um the outer part of our component in place and we're gonna put a little washer down and then we have to bend these prongs down things a pretty easy to band your fingers and then you can kind of you know you have another little place to sort of talk those fibers in all right so looks pretty clean from the front you can always go back if there's any street threads you can go back and terminals all right half done with the twist lock all right? So now we're going to get our bag out and do the other side of the component all right, so let's look at our example so we want to make sure that our twist button on the lock is centered and then we also need to figure out the placement for how far down we want it from the top so I like to have a little bit of play um between the top of the bag and the flaps so that if you if your bag is stuffed with a lot of things that you have like a little bit of room at the top another thing that I want to do is add a little bit more reinforcement on the inside for that button so I'm going to turn this inside out actually start this question we'll find the center and then I'm going tio just for the sake of finding the placement I'm going to pin the flap in the back of the bag and then just sort of mock uh position it so the top here will have a half inch seam allowance to hold onto the flap and this will full down like this and there we have a little extra extra bit of play here so we know that we want the button to be right about here ok, so in order to know where that is from the back of the bag where we're going to put our reinforcement I'm going to stick a pin in that dot and then I'm going to market where the pin comes through in the other side ok, not, we'll turn inside out. Okay, so for the extra reinforcement, I'm just going tio fuse a piece of police, an extra piece of feasible police onto back, and we're going to use our press cloth because we want the iron to be nice and hot, but thief usable polices is synthetic and we don't want to melt it on our iron that feels like it's on there. Okay, so let's, get our components for the button, basically here's the little button that twists and it has two prongs on it, and then it has its own little washer peace with the holes for the prongs. So we already marked our position, and now we want to mark where there's little prongs touch, so I'm just going toe kind of make a dent by pushing on it a little bit and then mark those and then you can use an exacto knife or seam ripper to make those holes, and I usually make him the smallest possible and then kind of jam the little prongs student open him up to so it's just just enough of an opening, and then I'm going to use some free check again, and then we'll put those prongs through the holes and then on the back when we put the little washer on and this part is a little tricky because the button is so dimensional, it's kind of hard to get, um, some leverage here, but then you're going to want to bend ben these tabs in and lets see, oh, look at that, I could do with my own brute strength, so just get it started and pushing in towards the center. Second one's always a little harder to push, and then you can also kind of push it on the table. Okay, so there we have that again if you wanted to add a little hardware glue underneath, uh, the metal you can do that, and then I'm gonna just check my placement one more time. Put that on here, flip it to the back. Yeah, I think we're good. All right, so now we've checked our placement and we're going to go ahead and so the flap to the back of the bag so we're just going to machine based it for now, and it will get finished later when the lining is sewn in. I'm just going to make a little mark here, and so I'm going to place that at my marks with the basically right sides together, all rights there is our flap with our twist lock.
Class Materials
Bonus Materials with Purchase
Ratings and Reviews
Chrys Elrod
This was an amazing class! I wish I had Betz in my sewing room with me on every project I sew. Her patterns are wonderful and easy to understand. Thank you Betz!!! I appreciate this so much....the tips and tricks you showed are sure to make my bags even more impressive! I love having the videos to watch.
Christine See
Most excellent course. This class explains, in detail how to add multiple different exterior pocket to take your bags up a notch. Also shows different types of closure techniques including zippers, snaps, press lock, etc. Great close up shots to see how everything is put together.
Liz Hanes
Thank you, thanks you and thank you! Your instructions on how to do dimensional pockets and piping were so clear and informative! I have had difficulty with both of these things in the past and now I feel that I should just go cut some fabric right now and make a tote!