Lesson Info
7. Full Back Zip Pocket
Lessons
Lesson Info
Full Back Zip Pocket
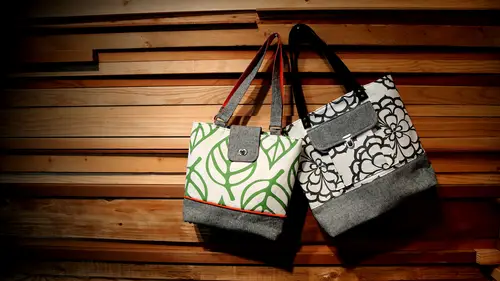
We have one more pocket for this class and it is a zippered pocket that goes the full width of the bag on the outside and this is a great pocket for I think it's a great pocket for travel because it's nice and big and it's easy access on the outside of a bag um you could make it you know, a certain size if you have like a particular notebook or something that you want where uh just you know another another area to customize so we're gonna work on that next so the first thing we're going to do is get our zipper prepared so let me show you again on here at the ends of the zipper I used an accent color in it but you can match it or use a different except basically I'm just showing a little tab on the end of my zipper just to kind of give it a little closure and helps when we're doing that side seem if we don't have tio so over the zipper tape so it's just a little clean finish on either edge either end of the zipper so we're going to keep this really simple and just lay a piece of fabric ...
this is just a two inch square across the end of residue burr and then um I want to make sure that we're not sewing on that metal so I'm going to take my pen and market I can feel where that tab is so we're going to so across here and then and then press the tab like this actually think that a little closer and then we'll do the same at this end now it could be helpful to take a to take a stitch in your um zipper tape to keep it together but yeah, I think actually going to do that because sometimes sums of bruges behave differently than others so I'm going to take a little stitch in there so that that the tape stays pretty even so I'm just gonna grab a hand sewing needle and double threat and just take just take a couple stitches in the end we just want to kind of keep those bring those two together a little bit all right? And then we're going toe pin this to the end and market like we did on the other end again we wantto make sure we don't so over that medal it's almost it's right there, okay? And then I'm just going to flip this back and kind of finger president and then I'm gonna top stitch again across that end and then pulled that back and top stitch the fold ok, so now we have our ends of the zipper finished off and a lot of stray threads and a little excess fabric I'm going to trim this down to be pretty close to the width of the zipper all right so then we have that ends finished and we're going tio stitch that to the pocket and that outer bag all right so the first thing we're going to do is take the zipper and place that face down on the right side of the lower um the lower panel of the back in the bag and we're just going to sort of center this and and here all right so we're going tio put the foot on the machine and based this in place which is just a temporary stitch until we get the other layer on right now we need our pocket piece and that is cut thie same size is the lower panel so we're going to say in which the end of the zipper in between all right well so this with the quarter inch seam allowance and the zipper foot okay let's give this a quick press ok now we have this pressed and we're gonna top stitch this edge and it will give it a nice clean finish and also will keep the fabric away from the zipper so it doesn't get caught when you zip it now I'm going to switch back to my regular foot just because um I find that I have more control and usually my top stitching is straighter if I use thie regular foot so I might have to do a little maneuvering around the head of the zipper but I think it's worth it for better top stitching so I'm going to use that edge of my foot is a guide and then I'm going to move the needle position over a ce faras I can and then I'll lift this up and zip zipper head out of the way okay, so we have the bottom part of the bag done and now we need to d'oh basically the other side of the pocket and the top panel so we'll get those pieces out so what? We're going to deal it's good to kind of like lay this out and, um visualize it least it is for me sometimes I get a little turned around with what goes where so we know we want, uh the right sides of the pocket facing each other and we know we want, um panel the upper panel to be like, so go let's based this upper panel on first and then we'll say in which that on there and um and the middle just hang down straight from the back like this and you'll have the full pocket I'm gonna pop the zipper foot back on here, all right? And then we just need to put the back part of the pocket on and so basically we're just going toe so that right on top of what we just did, but on the half hour all of our components in place okay, so we'll stitch that and then do one more roll, a top stitching, and then we'll be done with this pocket. Kay let's, press this. Okay, this time we're just going to be top stitching through, um, the upper panel and the zipper because our pocket air pocket pieces hanging down with the other pocket piece. Okay, so to finish up this pocket, um, what you're going to want to do is we have, you know, the super done, and we have the pocket is fully formed there on the inside, and the sides will get closed by sewing the side seams of your bag and saying with the bottom that'll all be, um, basically finishing the bottom edge of the pocket. You can see here that my pocket pieces arlan even that's because one was so into one side of the zipper, and one was sent to the other side, so it kind of shifts thumb, so you might want to cut them a little bigger, just so you have a little play in there when you're constructing years, so so that would be your next step. Two machine based the edges and then continuing to construct your bag so this's the end of our class, we've learned to so much and this exteriors. Component of our towed class. And I hope that you feel like you learned a lot of tricks and tips and details that you can add to your bags to really keep yourself organized and have your bag stand out. You can choose, you know, just one or two of the options that we talked about. And, you know, customize to your heart's content.
Class Materials
Bonus Materials with Purchase
Ratings and Reviews
Chrys Elrod
This was an amazing class! I wish I had Betz in my sewing room with me on every project I sew. Her patterns are wonderful and easy to understand. Thank you Betz!!! I appreciate this so much....the tips and tricks you showed are sure to make my bags even more impressive! I love having the videos to watch.
Christine See
Most excellent course. This class explains, in detail how to add multiple different exterior pocket to take your bags up a notch. Also shows different types of closure techniques including zippers, snaps, press lock, etc. Great close up shots to see how everything is put together.
Liz Hanes
Thank you, thanks you and thank you! Your instructions on how to do dimensional pockets and piping were so clear and informative! I have had difficulty with both of these things in the past and now I feel that I should just go cut some fabric right now and make a tote!