Lessons
Lesson Info
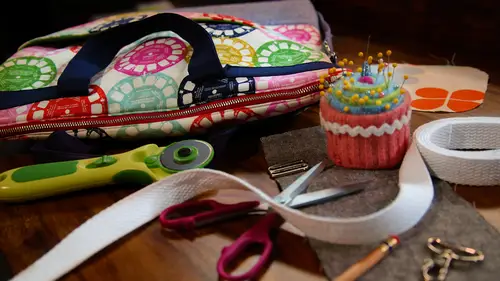
Flush Pocket Zipper
Okay, so let's get started on that interior flush pocket I've got are lining piece already sewn to the facing and I have a time by twelve piece cut for the pocket and I'm going to line that up face down and a seven inch super so what we're going to do is make a little window we're going to draw a rectangle and it's going to make like, a little window for the zipper, so we have to mark where we want to make that cut, so I have this peace center there's about two and a half inches on either side, and I want this to be down about an inch and like I said, that's the first seven inches from the stopper to the top of the zipperhead, so I'm going to take a disappearing ink marker and actually make sure I have that centered, so we have about one and a half inches in yeah, perfect, okay, so I'm going to draw one side of the rectangle and then you want your window to be, um just about eighth of an inch wider than the teeth. So for this it's going to be a quarter inch and then you're just gonna t...
ravel ends of the rectangle and we're gonna pin this together and they were going to sew around that line that we just made, ok, so we're going tio it's a straight stitch right on the line that we marked and we're going to pivot at each corner I can't say I'm going to leave the needle down in the work and then lift the foot and pivot the piece around and keep going and then we'll play it again and go back okay all right so we can take our pins out ok, so the next thing we want to do is actually cut the hole for the window so we want to go down the center of a rectangle I'm just gonna mark a quick line here and then we want to cut a little v here into the corners so you can start with the tip of your scissors o r if you want to use seam ripper to get started and you're going through all the layers, so you're going through this pocket piece and the lining ok? And when you get this little v just take a little snip like that into the corner don't cut the stitch line but just get pretty close and we'll do that at this end. Ok, now we're going toe just take this whole pocket and shove it through the opening when that we just made and pull it through to the other side and then we're going to give it a good press so that basically made the little window that the zippers going toe be seen through son, this is a little bit fussy on these corners, but I'm just gonna press the heck out of it and then in the liquor, I'm going to use a little water spray you can you steam on your iron, so you're just going to kind of roll those seem allowances with your fingertips and press that seem the street as you can, okay? And then you're gonna turn it over and press from the other side if you if you notice on this side it's kind of punchy and not all that great looking, but that is not to be seen that's on the inside, and if you're seeing a little bit of that from the front, you can go back in and snip a little closer to those corners of if you need tio and then the other thing I always say is for a lining of the bag, you want to look good, but it's also really kind of the thing that you're going to see more than anybody else. And so if it's not perfection, doesn't really matter, no one, no one knows what it looks like, but you ok? So now we have our little window and we have our super, and I'm going to use a little notion called wonder tape, and this is a double stick tape. And it's really nice to use for zippers because it'll keep it it's it's good for things that are difficult to pin so we're going to put this on either side of our fabric zipper tape and it has paper on one side so it's double steak but you're going toe to stick one side first okay, so make sure that's on their good and then you're gonna peel off the paper maybe he'll try this and there we go, okay? And then we want a position our little window over zubar, so you'll just stick that down into the wonder tape and you want to give your zipper like sixteenth of an inch ah breathing room, you don't want it to be right on the edge of the zoo groups moved a little bit here. Okay, ok, so one thing I've noticed is that my window is just a little bit smaller than where the zipper stop is, which is the little the little metal part at the end. And so I just want to make sure that when I top stitch around this window that I give that and a little extra space because if I so right on that metal stop, it could break the needle and it's, you know, you're not going to go through metal, so so we'll just kind of extend our window a little bit around there so it would be ideal if the metal stop was inside the window but not a big deal, okay, so that's all battened down and I'm going to put one little pin down here just to keep this flap from getting up in my way when I'm stitching around the zipper ok, so now we need tio change the foot and machine to a zipper foot, so a zipper foot is just basically a narrow foot that has one little ski on the end and you can position it in a way that you can so pretty closely tio a zipper um and what I'm going to need to do on this machine is every zip reported a little bit different, but this one I need to actually change the position of the needle so that I'm sewing ah, next to the zipper I'm going to move that over and check it yet that looks good, ok, so basically we're going to sew rectangle again, we're going to sew around uh, the zipper okay? And like I said, I'm going to take a couple extra stitches past the end of this just to make sure that I clear that medal on it feels like I'm past it there, I just want to make sure I'm going to go really slow just in case again and then we'll pick it and go back the other side another thing you khun dio, if you feel like the zipper head is in the way, is partially unzip the zipper, once you get in that position and then we'll pivot and go across the end, ok, so now we have our super zippered window, but the pocket is not a pocket yet, so we have to turn this over, and we're going to fold the rest of the pocket up and without sowing through the actual lining we're going tio just flip this up and so the pocket to itself all the way around, so I'll pin those two together, okay? So I'm going to sew from this bottom corner up here, across the top and down the other side, so I will put the regular foot back on because they don't need the zipper foot anymore, and then I need to change the needle position back to center, and I'm going to sew this with a quarter inch steam allowance, so you're going to want to fullback the lining out of your way because we just want to so the pocket to itself, all right, that I'm gonna pivot here and make sure of the top of the lining, out of the way, all right, so now we have our zippered pocket and you could see there that we have the lining. And the right side of the inside of the pocket. And that will hang nice and smooth inside your bag and it's. Perfect for just corralling all those little pens and the bomb. And whatever.
Class Materials
Bonus Materials with Purchase
Ratings and Reviews
Liz Hanes
I loved this class! Betz is very relatable and she explains what she is doing and why she is doing it! I think that it's really important to know why something is done the way it is. I think anyone who is considering bag making or wants to improve their bag making skills should take this class! Thanks for offering it and thanks to Betz for teaching it
Judi Nicholes
I love this Build Your Own Tote bundle and the totes she makes. I am in the process of making them all! Her instructions are excellent and as a result, my totes have turned out great!
Christine See
Excellent course! Explains, in detail, many techniques for sewing bags. This includes different types of pockets (inside and exterior), adding hardware, etc. Very thorough explanations with up close shots of how it all goes together. A great class to learn how to make your bags look professional!