Lessons
Lesson Info
Padded Tech Pocket with Velcro
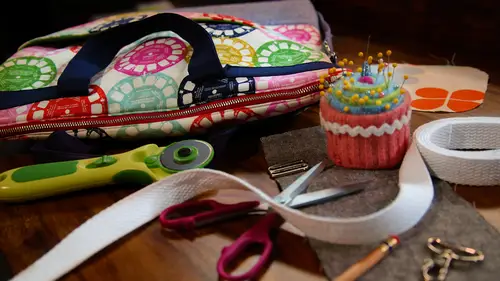
Okay, continuing with pockets, we're going to work on a pocket I have here in this larger bag called at padded tech pocket, so basically, the spotlight is going to be great for an ipad or kindle or something like that. So I'm going to work with the measurements that I have here, but you're gonna want to take measurements off of whatever your devices just to make sure that it will fit so let's, just take a look at pocket in here and it's just a big patch pocket and it's got some padding, and then I have this little velcro flap, so you can just slide it in there and pull that over in little state, just smooth with the back of your bag. So I got my pieces cut here for the pocket and also the part of the lining that we're going to attach that to, okay? So I have my lining sown with the facing, and I have my cut pieces here for my tech pocket, so this I have to cut at nine and a half by twelve, and this should fit a regular size ipad, and I have the back of the pocket fused with feasible fl...
eece if usable fleece is a stabilizer that got a little body to it, and I've done both both sides just to give you know, some extra padding and then this is our tab which also I've done the same thing with the feasible fleet so the first thing we're going to do is so the two layers of pocket together and it'll be super puffy and beat you know? Nice nice padding for your device I'm gonna pin around the edges and this will be similar to the divided pocket that we did where we're going toe believe in opening on the bottom and we're going to so the rest of the bottom and the sides and the top okay, so I'm going to sew around the perimeter of this with a quarter inch steam allowance at the corners okay? And then like we did on the divided slip pocket we're gonna trim off the corners to reduce some of the bulk and they were gonna turn this right side out through the opening in the bottom okay? So you can work that out with your hands and then get some kind of turning tool something longer like a chopstick or something and you can kind of workout this corners now they're not going to be super crisp corners because you have all that puffy interfacing in there so we'll work him out especially can when they will give us a quick press and then again on the spot a mint you're gonna want toe flip those seem allowances in to be even with the seam in there the usable fleece is a little tricky dis wants toe b flat okay so now we're going to take a minute and just top stitch this edge so we have a nice clean edge on the top of our pocket and I'm just gonna so a quarter of an inch top stitch okay so before we attach this to the bag we're going to put a piece of velcro on here and then that will um have that tab that comes down and attach is to it to keep it secure so we'll cut about a two inch piece of velcro and we'll have one part for the pocket and one part for the tab so we'll find the center of our pocket by dis folding it in half and I'll put a little pin there and then I'm going to place this just down from the top a little bit doesn't have to be precise well when we get the tab so now and we can figure out that the placement so we'll just put this here and you can either use um ah little bit of wonder tape which is um great because then you don't have to been sometimes velcro can be kind of hard to pin through so we'll just use a little bit of this on that will help it keep in place with me so it case I'm just gonna eyeball that about half inch down from the top animal just stitch around the edge and about an eighth of an inch in from the edge you want to make sure that the velcro you buy is so in velcro and not the sticky velcro because if you buy the sticky velcro it will gum up your machine because it's it's kind of the no so option so since you're sewing it, you don't bythe ok now we have the pocket with the velcro and we're going to so are corresponding tab and this is basically what exactly what we just did only much smaller so we're going to put this right sides together and I'm not even gonna pin it because it's pretty small and I'm going to leave an opening so I can turn it right side up again with the quarter inch seam allowance can you see from those corners off and turn it right side out hey use your tool again work out those corners all right? And lincoln that a quick press okay, well, just top stitch around the entire perimeter of this and it'll close up that little opening ok, so now we want to do the velcro the other side of the tape for the side of the tab so we'll just take the other side and line it up there it's kind of double check that'll work and I put another piece of wonder tape on it and well so around that ok, so now we have to figure out exactly where the pocket is going to go and where the tabs going to go so that everything lines up and it's a good distance from the top for access et cetera. So I'm going to just, you know, we want the velcro to match, so we'll just stick that on there, and since this is the top of our bag, we'll have a little bit of seam allowance here, so, you know, I wanted just just a little bit down from the edge of the, um facing and you want to make sure it's centered side to side and then you want room for thie tab to be sown, so and I'm going to give it a little play. I'm not going to have a really straight flat on the top of the pocket. I went a little bit of room in case, but something else in there, like a notebook or something that's, it's, fatter, so battle just have a little expansion room, so gonna have this here I'll do one actually, I'm just going to dio some pins across the bottom toehold, a pocket in place, and then I'm going toe andi the velcro and put a pin fear to mark that placement, okay? And then I'm just going toe move this out of the way because I want to sew this and then flip the pocket up and so that so we'll do one one part of the time but this will kind of save our alignment all right? So I'm just gonna go back and so this right along the line of top stitching from before when you have a larger a bag like this you could just sort of roll up um you know whatever you're trying to keep out of the way to sort of roll and talk it underneath the edge of the machine like this and you want to make sure you back stitch so that this will stay on even with a lot of wear and tear okay? And then I'm just gonna basically on penn the pocket and flipped that up and then actually I'll get up and put the rest in place so we want to make sure that we have it you know, pinned evenly all the way around and when we go across the bottom we have this opening from when we turn the pocket that we need to make sure we catch and have that close and since the seam allowance waas a quarter of an inch I want to actually take um so this more at like an eighth of an inch just to make sure that I don't miss any of that if I sewed too far away from the edge that opening my might open up again can't be sure to back stitch up the top. Okay, so we have our tech pocket done. Just trim off a few threads and pulled down the little tab, and then we have it.
Class Materials
Bonus Materials with Purchase
Ratings and Reviews
Liz Hanes
I loved this class! Betz is very relatable and she explains what she is doing and why she is doing it! I think that it's really important to know why something is done the way it is. I think anyone who is considering bag making or wants to improve their bag making skills should take this class! Thanks for offering it and thanks to Betz for teaching it
Judi Nicholes
I love this Build Your Own Tote bundle and the totes she makes. I am in the process of making them all! Her instructions are excellent and as a result, my totes have turned out great!
Christine See
Excellent course! Explains, in detail, many techniques for sewing bags. This includes different types of pockets (inside and exterior), adding hardware, etc. Very thorough explanations with up close shots of how it all goes together. A great class to learn how to make your bags look professional!