Stabilizer Cord and Milk Jug Background Light
Lesson 13 from: Building and Using DIY Lighting GearKevin Kubota
Stabilizer Cord and Milk Jug Background Light
Lesson 13 from: Building and Using DIY Lighting GearKevin Kubota
Lessons
Day 1
1Everyday Carry Kit
16:48 2Three Essential Lighting Styles
16:20 3Rules of Lighting
14:58 4Lighting Q&A
12:11 5Camera Gear
18:17 6Building a Door Scrim
20:13 7Lighting Demo with Door Scrim
23:55Building V-Flats
12:17 9Triple Reflector V-Flat
11:06 10Building a V-Flat Window Box
25:07 11Building a Medium Sized Softbox
27:17 12Building a Snoot
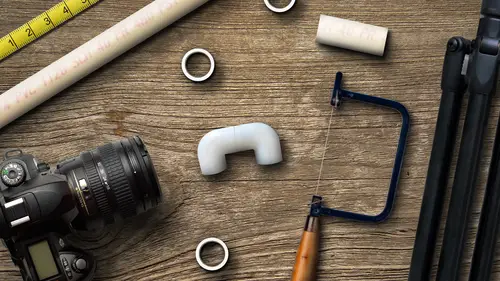
16:30 13Stabilizer Cord and Milk Jug Background Light
19:43 14Flashlight Lighting
27:48 15Flashlight Lighting Q&A with Review
08:27Day 2
16Making a Beauty Dish
12:14 17Beauty Dish Lighting Demo Part 1
26:42 18Beauty Dish Lighting Demo Part 2
25:25 19Making Tube Strip Lights
20:49 20Making a Kaleidalight
26:30 21Making a Wall of Light
19:47 22Making a Human Light Tent
16:30 23Making a Backlight Wall
17:32 24Kid Kooperators and Mobile Shooting Cart
07:42 25Making a Shop Light Ring Light
34:35 26Making a Photo Booth
33:07 27Final Review
18:02Lesson Info
Stabilizer Cord and Milk Jug Background Light
At some questions over the break, people saying hey, you know this is awesome don't even need to get you know, those expensive light boxes and things like that and you know, eventually you will and I'm not saying this is a replacement for professional gear, which if you're going to be a professional photographer now if you're if you're an amateur and you just kind of getting started testing the waters um I don't suggest investing a ton of money if you're not really sure this is what you want to do and this is a great way to do that experiment like I talked about earlier that if you want to try a certain particular style of lighting, you're not sure which style is you yet and you can experiment and before you invest in a good year but all of us who have been in the business business for a while unless there's not something existing too, but you want to do you make it yourself, but otherwise we generally by from reputable manufacturers so I can't lie I've got tons of professional gear at...
home and I love it and I use it, but when I'm coming up we now have an idea for something or when I was just starting or what I want to experiment with the what happens if I use something whiter and shorter and there's nothing really on the market I'll make it and try it and if it works, then you know, maybe that's your next d I y success story or maybe it's just like you go and look for that professional piece, so just keep that in mind and, you know, I don't wantto people to say, you know, kevin's a hack, it doesn't use any pro gear just sometimes true, but not always. And so, um, use this as a stepping stone or way to experiment or just to save money when you're getting started. Okay, um, I think we covered things the morning, so I want to show before you were going to a few more little lighting things I wanted to share just a almost did it to, uh, quick little chip that's kind of fun, it's not really a building anything but it's just a little idea that I kind of thought up a while ago when I when I'm traveling, you probably with a hick is this so when I'm traveling, I don't normally like to take a tripod with me, but it's always good to be ableto to stabilize your camera, so one of the ways that I would stabilize my camera would be to actually tie a cord to it and then put it under my foot and that upward pressure with the cord under the camera keeps it somewhat stable lot more so than just basically hand held on dh. You could still move around with it like that. So instead of just being free floating, you've got that upward tension that keeps it pretty much rock solid and so that's a great way if you're just doing, you know, have a quarter second exposure, something you don't need, a long tripod type thing, so I would use a cord like that, you know, basically put on your foot to put this in the bottom of the camera and you attach it. But let me show you have kind of I found this little gadget that I want to share, that I think is kind of cool. This is a you can do this different ways, but this is from a company called night eyes, and they make these cord retractable cord things that's easy. Just pull it and it locks. And then you press a little lever here, and then it unlocks so and there's a little piece of paper accord that comes with it and has a clip. All right, so what I have decided to do with this is to actually clipped this to myself, you side like that, and then on this side, I've got a pulley, um, and a caribbean or clip it's a little clip like that so this pulley we can do it in a couple of ways if you want to this actual actually works if you're shooting video it's kind of a neat little thing that you can use this for video as well, so if he wanted to use it with the pulley, it gives you the ability to kind of move as you're doing video, so run that back through here the way this works you just pull that string and then it locks and it doesn't move okay, so you can now attach this to the bottom of your camera and I'm just using one of my tripod plates if you could see the bottom here it has a little flip up ring that I used to untie it or untie it thank you unscrew so I'm just going toe I'm just going to anchor right into that on the bottom here that you can also, if you look around, you can find other ways to attach little of some of the lot of these plates have a little flip bring little deering on the bottom that's what you're gonna basic attached to and then you've got yourself a little system so I want to pull that tightens it up hold your pants up really well too, which is kind of nice, but if you notice if you hold it like this just having an anchored there stabilizes the camera if you're shooting video like this camera, this one has a flip up screen here. This notation there you can actually hold this out here, and as you're moving around, the reason I have the pivot on there is they can rotate or if I'm walking, it still keeps it somewhat stabilized, but the main thing is for photography, it actually is kind of cool you're traveling, he just bring this up to your face attention this down, having it where you want people that high and as you're lifting up, they hold your pants up, but it also stabilizes the camera considerably versus having it free flowing. Thanks so there's something you can just throw in your camera bag if you don't want took it to your belt. If your gal you're not wearing pants, just make a little loop and put it under your foot and pop it up and pull it. So this tension between your foot on the base here and as you're holding it, it stabilizes. So I was playing with this that I've used this court system for photos and just recently started just saying, well, now I'm shooting video wonderful to work for many video stabilizer is not going to place a stabilizer all but baseball is doing that I was put this down here about this but that screen out, and it was like following my kids around the house like that it's definitely more stable than just holding it handheld or is not going to be a stable is a counterbalance type thing, but something I think about, you know, simple things thrown your bag on who actually works pretty well, one of those gadgets that you don't have to build anything, he just finding other ways to use things and again, it's, you know, we're going to walk through home depot, and I'm just looking at stuff going, what kind of use that for? We're going to use that forget that for now, and I do that all the time, which is terrible because any time my wife sends me to home depot to go, okay, go get propane, come back, she'll give me specific instructions. Do not look at anything do not stray from the cash register. We're gonna buy propane and an hour and half later I'm back with a bag full of stuff. Usually. So that's the problem with having a d I y mind. Okay, now, let's, make something else for for our lighting. Um, still be talking about speed, lights and one of the other things that we can make for our speed lights is something too. Drink milk from so we had a contest earlier about, you know, if you heard that thing, you can't drink o gallon of milk and not throw up it's true you can't he threw up earlier together was pretty nice, so we got rid of the milk threw up, but I thought this could be this is kind of similar to a background reflector of have seen these hoods that go on to flashes and they're basically semicircle things like this and they're white these professional things, and they basically are designed to throw light kind of just that way. And I figured I'm looking at a milk jug going that kind of looks like that's the same thing when if that would work so well. Let's, try it this, cut it up and put it on a flash and see what happened. So why don't we do that? So I'm thinking, well, how we're gonna mount this thing to the flash? First of all, so we wanted to be oh, here, the water first way want to basically go like that and we could use it either way, we could use it with the handle on the back er cut the front half off or we could turn it around this way. And then have more of an even thing with this in the top cut the hand apartment thinking we could take the handle this is a little more even around the back throw more light that way so I'm probably going to want to cut off uh that front part here of to the handle it's messed with that and then I would have to leave some room for me to mount this to my flash and so we're getting there that's going to be our little doo hickey that throws the light forward but we need to cut some way to mount this I'm thinking if we could just cut this neck off I went too far they want to cut that front part ofthe to tape it up keep that front part connected and then cut little vents here should be able to press fit to the flash it reconnect this front piece so what I'm trying to create a something that just slides on and kind of sticks by itself without me having to duct tape it so I could easily put it on take it off again that's something so normally if you can see here I actually cut through but I would leave it so that it's intact so there's a ring and that way I just cut slits here so this should be able to kind of slide and fit around the edge of the face of that ministry took reattach this most white enough. Let's. Watch kim in play with a knife. There was tension in the air. A little more questions. In the meantime, more come up with this one or where? Where'd you get this? This is a again just looking at things around me and, um, there and then also looking at tools that I know from as a professional tools that I'm familiar with and trying to find a replacement for that. So knowing that this this kind of a reflector is a common thing for backgrounds thinking, well, how can I make something like that myself? I want this tangle backwards. Mix up that in there. So how can I make one of these myself a lot of stuff? That's all around me and it's sometimes it's just sitting at breakfast or looking at the milk jug and going that looks like a reflector? What would cut it up? What if we did something with it? Okay. And again, that's. What I want encourage you guys to do start having a d I y mind looking at everything around you as a potential lighting tour. An accident waiting to happen. One of the other? Yeah. Piece of white paper taped to the back instead of having tio cut up. Milk jug like that? Yeah, the nice thing about a milk jug is it kind of brings it around this way so you have it so you could put some white paper and kind of form it around, but the idea is you want light to bounce into here into the sides here and kind of come out like this without reading too much and definitely not coming any this way because I don't know if this is behind the model for example, I want this this is like how they use it in the background you're gonna use it on the wall, something like that and you want just to control the mountain, go boom and let your your background like that. All right, so let's, take a look at this and just see what area it's illuminating with with whatever it is I'm on and try maybe different zuma settings to see how that works and we can throw danielle in here and take a photo. This is just eliminating the background channel a get my camera, my zoom setting right now is on twenty eight millimeters that's fairly wide said daniel, you're going to stay out for a second is going to shoot the background okay, sorry didn't make that clear I just wanted to see and to show where what this is actually lighting on the wall kind of the pattern and makes and you know whatever you use is going to make something different so you never know sex was contaminated okay so it's a fairly even light and it basically just kind of is going to create sort of a gradual glow like that if we aim it up will filter mohr forward we pull it back further away and if you're looking at that now and wonder what kind of a light that would be that's lighting through it you know this this is a glowing right here it's fairly thick so it's going to defuse a lot of light but just thinking about what if I put that on there but cut the bottom out of the jug you use it like a big white snoot but it's more like a half snoop beauty dish kind of thing you know so that just now I just thought of that before I cut him like me they should not cut it moves try make that instead so these things just keep popping in so again person even background light and the idea being is going to cast a fair that's pretty even I'm pretty pretty impressed by what that milk jugs the evenness of the light and the idea is to have a gradual spot that slightly fades off to the side and that's pretty much what is doing I am it up just a little bit there's water in my transceivers should cast in a little more upwards exposure wise pretty good I'm looking for even illumination all around even so the other reason to use one of these instead of just your flashes if he wanted to evenly illuminate a background and you didn't have a lot of space on you want to say put your model in front of that you want to put your background like directly behind the model if you didn't have something to diffuse it out that way you'd have to step quite a ways back I mean, so I have to come further back and use a wide angle from diffusion of some sort so that loves you to get pretty close to the wall and still scatter enough light and that I could put my model right in front of it if I wanted to hear way back to the wall. Okay, so let's see e turn that down just a wee bit and they will put daniel and there was she won with this soft box again channels that on he is going to turn that down two thirds one stop get rid of my overhead lights but changing my shutter speed and I'll bring this soft box back in and just do a quick, quick shot with that caitlin, can I borrow you? Please grab that again and then you know what? You stand right here so try to block that block that light with you ok and kind of just put your weight on your back you can let your left foot and a pointy pointy and then you're gonna come in over here come a little closer at that we're gonna try to keep this again facing away from the background so it doesn't cast any light doesn't affect that just the soft box just gonna be daniella and then that's in the background and we just do a quick shot you got like extra legs coming up behind you from the late your arm because you got a sleeve and your thing here so you have to turn your shoulders or your your sleeves all bunched up in there looks like a big giant muscly bicep pretty fancy tangled yeah we'll just know you're gonna have a big bicep in the shot okay no don't blame me I don't know that flash was set up but we'll find out all right I was about the right setting after all okay so this time I would have you looked right at the light this light over here and turn your shoulders a bit back towards me the other way it's looking right the light big smile and throw your head back and love ah turn your face towards me a little bit more there we go good no more keep it up right that way it was the first video it's a nice even light on the background before you take that into a corrupt that down a little bit short cut our and then um if I wanted to do and yet a little bit and said I kate side I decided I want actually less of that of course take our vignette drop that down just a wee bit signed guys a little three quarter fashion shot try some like sixty five fastback all right, give me the same I bring my exposure down just do we mean the yellow out logistically cool change the background to make it more dramatic little bluer took some of the yellow out of the pre set which added gelato or face but when a counterbalance that and made the colors in her top pop out and also kind of through blue cast on the background which is kind of one of the tricks I have when I don't want to throw blue gel or anything I just want to get more interesting the background this preset is kind of cool it's called sixty five fast back and it could be used to make a warm tone on the skins or by dialing back that the blue returns that skin tones to natural and then makes the other stuff blue which is kind of a cool little effect there okay all right there's our milk jug now weaken let's put that away
Class Materials
bonus material with purchase
bonus material with enrollment
Ratings and Reviews
Geo Montecillo
Super good course highly recommended it will help you get started on a low budget, yet creating wonderful images. Is there a link to west got?
F8 and be there
This was an awesome fun class! So many great ideas on how to achieve various lighting effects on a smaller budget. You will save the price of the course most likely by making one softbox (or whatever) yourself. Highly recommended!
Adrian Martinez
Going into my 4th year of photography, I finally built a photo studio in my home and after purchasing some lighting gear and other accessories, I decided to buy this course for additional ideas - GREAT class! I learned a LOT and was very inspired to be more creative. I especially liked that Kevin didn't joke too much or stray away from the course very much at all. Yet, he was still very entertaining and very informative. I'm putting so much of what I got form this class into action right away! This course DEFINITELY pays for itself - right away!