Lessons
Day 1
1Introduction to Senior Photography
34:11 2Getting Started in Senior Photography
33:54 3Dealing with Competition
07:02 4The Ambassador Program
19:34 5Q&A
16:32 6Marketing to Seniors
40:35 7Shooting Seniors
24:40Selling Workflow
11:52 912 Month Plan
19:11 10Your Business Plan
41:55 11SWOT Analysis
40:29 12Packaging and Pricing
32:11Day 2
13Preparing for a Photoshoot
31:01 14Selecting Outfits
21:22 15Picking Outfits with the Senior
11:15 16Lighting Setup
12:14 17Shoot: Red Backdrop
23:13 18Shoot: Red Backdrop Q&A
22:45 19Shoot: Clam Shell and Ring Light
27:00 20Morning Session Q&A
13:51 21Shoot: Garage Door, Shade
38:27 22Shoot: Alley
26:54 23Shoot: Rooftop, Flash in the Direct Sun
37:34Day 3
24Workflow
52:15 25Sal's Photoshop Edits
19:43 26Lightroom Workflow and Q&A
11:10 27After the Shoot
43:16 28Selling Your Work
25:12 29Live Sales Session
48:08 30Sales Session Q&A
43:25 31Pricing Your Work
19:02 32Pricing Your Work Q&A
21:59Lesson Info
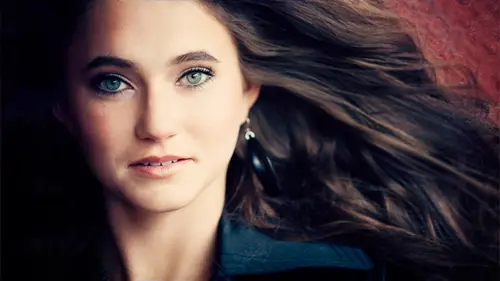
Sal's Photoshop Edits
So yesterday we went out with kendra and we got some great images of her. What you're seeing up here is one that I converted to black and white I love her expression I love her eyes this was taken in the alley right next to the um outdoor john so yeah so it just goes to show you well yeah oh yeah johnson sorry we're standing by as we took the picture so no all seriousness right when we showed yesterday when we walked into that alley and we look down that alley it was garbage man I mean, there were dumpsters everywhere junk on the ground on you know, as as a photographer is an artist, you have to have vision man when you step into that alley in this particular shot I think I even said on camera I'm seeing this vision where I shoot it from the side we convert some depth of field on go that and go that route so this is ultimately what we want to be able to catch her you would not know that you were in an alley now can you imagine when mom comes in today and see something like this she kno...
ws what that alley looked like to her eye oh, but to our eye it looks completely different so this is one of those images I edited let's look at a few others here's one we got in the chair I think that's super cool. Okay, um again that was right in front of in front of the studio so very artistic style at it tell bambi I'm going to steal that chair she's trying to pick a few more here I love these head stuff headshot style shots so this is one that I would easily be able to sell as a sixteen by twenty four to the client very similar to what you see behind me on the wall. These are the type of images that the client wants to see let's go in here and take a look at some of the ring flash images we got gorgeous stuff some of the endorsement I'm going to err on the outdoor I know everybody wants to pricey the rooftop another one sell a little bit about the choices that you made with regard to why I chose that image particular image or why you chose that look. Yeah. So what ends up happening here? What I want you to see and I'll slowly scroll through is you're seeing what I'm talking about from a titan and a wide perspective. So if we look here hear, hear here and I'm just gonna pick a handful of images and then uh bring him up, so if we look at what's on the screen this was her and pretty much one one location and just in one location, you see, I've got everything from a tight headshot toe a full body to a three quarter to a horizontal tow, her sitting on the ground. And so when they look at these images later this afternoon, I'm going to guess just having done this long enough that they're going to enjoy every single one of these images, they're going to select these he's going to make it to their final selection process. And so that becomes very important is understanding I have to help taylor in the sales room, so when I'm going through the post production process and selecting images, this is what I'm basing it on. I'm looking for diversity and expression pose aspect ratio, right? I mean, so vertical horizontal and then focal length a cz well, so you've got to give the client diversity, then what I'm doing is an image like this oh, is I've put texture on well, I didn't do it evolved in it. They did this last night for me they put texture on it right it's a warmer style image, they cleaned up our skin skin softened it. These are the kind of things that I know I could sell to the client again is a sixteen twenty four so let's, go look at the space and you know I love this image so we swapped out the sky. And depending on what kind of monitor you're looking at, it might look a little little darker. Not. But we swapped out the sky. We gave it a very dramatic look. That's where that off camera flash lent into this. This is something that will be a piece of art for the client. Another one we did towards the end, right? This would be a panel. This would be a fifteen by thirty shot for the client. So it looks very different than what we were capturing on the roof. It's almost dreamlike. Those last two were those of all those revolve all day for you. So they they really do know kind of what you're looking for. Did you tell them that those of us too? You wanted them to do the advanced at it on and tell them? Hey, listen, I want some texture and border or whatever you did. Yeah, I said these. These two are my arm. I money shots. These are the ones I wanted. I know you want to sell to the client in large print. S o make sure we focus a little bit on these and so they'll look at it, and what I love about evolve is some of their higher level edits if they don't think they're the right image is they'll tell me back we don't think those were the right image is for more of an advanced at it and then we got some really cool shots oh yeah buddy off camera flash there's john I don't know what he's doing one lights pointing in the wrong place john did you did you do what you trying to shed some light on some self john I don't know I don't know all right all in good fun all right, so let's go back into looking at a single image. So here is the image that I went back to my room yesterday and I processed on posted online so this particular image I would say probably took me five to seven minutes to edit and so this is where having vision comes into play, so if we look at what this image look like out of camera that's what it looked like at a camera okay, so you can see now it's already been cropped, of course, so it wasn't crop that way out of camera we cropped it, but as faras the editing goes, this is it it's she's you know, I've got that dark blue sky she's being illuminated and then layer by layer and I'll cover each layer right? We got the image to look like that okay, so some of the things you'll notice notice the texture on the image notice we've blurred out the background a little bit so we've made it a little softer so that the space needle is not his prominent it's probably tougher for you guys here to see but we soften that up so it's not his prominent okay? And then we added a little bit of an hd are at it so let's go through this step by step so all of our cameras have censored us and this is kind of my way of working, so if you look over here on the right, you see all these layers that are building up that's the beautiful thing about working in photoshopped that you can't really do within light room light room doesn't support the whole layered concept, although there are tools out there like from on one software there's something called perfect layers but this is the beautiful part about working within the photo shop environment, so first thing I want to do is remove spots so their sensor dust all over this thing right? I mean, I'm notorious for changing lenses it doesn't matter how windy it is, right and that's gonna let dust gets into my camera and as often as I clean my camera doesn't matter they're still going to be censored dust well, nothing screams junk like camera dust on your images so get rid of those things now some of this you can do in light room but for our demo purposes I just created a layer that build spots will then you notice her armpit here okay? I don't like some of the discoloration and you see some stubble. Okay, so that's great. Nothing wrong with that that's real life but we got to do something to clean that up so I created an under arm layer and that's just removing some of that stubble and, you know, painting it and the way we did that and I'll show you in a second is we painted over her arm so it's kinda interesting so we use the paint layer to paint her arm with similar skin. Then we created a new layer and on that later look under her chin notice the shadows under her chin you see that from the flash coming in it's creating that directional shadow and then notice her eye her I had a piece of hair there so we got rid of the hair under her eye and we got rid of that hard shadow under her chin. These are the little things you have to be able to do to get your image to that next level then we came in and this is one of my favorite tools. This is from nick software they have all these amazing plug ins one of them though in the color effects palate is total contrast that I find to be a better hdr tool right? So you guys heard me say hdr million times high dynamic range and what that's going to do is just controlling your shadows and your highlights and so it's going to give you a great range is going to bring out all that detail so if we just punch this up we can see look what happens to the roof look what happens to the trees in the background the sky gets a little grittier we see some shadows opening up in the space needle so depending on how you how this is being broadcast online, you might have some trouble seeing some of the subtleties and the details but this total contrast range gets you very close to an hd our style edit without it looking fake that's the key she's a lot of hdr edits out there and tools and plug ins but I don't want it to look like a comic book that's very important at least from my style photography there's guys out there who do that comic book style hdr and it works and they can sell it but in my studio I can't sell that then we came in and we added a texture okay next layer we came in and then using something called focal point this is ann on one tool. I'm just gonna zoom in here to give you perspective focal point by on one allowed me to give this a one point to blur so it's built right into the tool so you can see how soft that all went and created separation from her in the background somebody's playing with my mouth okay so created separation with her in the background so I wanted that blur to come in will again this took me about five to seven minutes to do something like this so let's do this let's get rid of all this time I keep my spots and we'll go from the under arm up all right? So let's do this let's create a new layer right? I'm gonna hit command j and that's going to create a layer for me what I want to be able to do and these air simple techniques, guys I am by no means a photo shop wizard that is not what I am and I know enough to get by and do my business the way I need to do so I learned tips and tricks from everybody so let's come in here, okay? First thing to do somehow j is a short cut key and that's the healing uh, tools so we're going to here I just want to get rid of it looks like she's got a little beauty mark there so just clean up some of that, and then what I want to do is get rid of some of this. So what I'm gonna do is go to my brush b for brush, and then I'm making that my, uh, trying to adjust my brush size here want opacity down to about fifteen, sixteen percent hit your all tool, and what I'm gonna do is click on a color of the skin and you could see what happens here holding down ault and clicking on it. It gives me it changes the color of the paint to match the color of her skin. So now what I can do here brushes, monsters. Okay, what I can do now is start painting in here, and I'm literally using the color off her own skin to paint over this, okay? And notice that hair has now gone away. So I hope you understand this technique. It's a really simple technique. I'm matching the color of her skin. You don't want to be one hundred percent here on opacity if europe one hundred percent, it looks ridiculous that I'm literally painting over her face, right? That looks ridiculous. So if you're just looking to do paint in there a little bit of color, think about when you get shine on people's face. That's how you get rid of that shine, you find the color of the skin and you just slowly start painting over it and take that opacity down a fifteen percent ten percent and just may have to go over it over and over again just to get it to look somewhat normal. And you have to, uh, perfect that so that would be her under arm. Okay, so let's, get rid of that layer. Then I created a brand new layer and I don't know how many of you know how to do this. I learned this somewhat recently, yet you have all these layers that you're building, but now you want to create a new launch point and merged all those layers but still maintain all these layers underneath. So here's a little trick highlight those layers hit command all shift e and that builds a layer right on top of it. So I don't know if you can see this. I just turned off all these layers here. I just turned off all these layers here and now that layer is a culmination, a combination of all those layers so I can always go back to the individual layers, or I could just build on this one layer so very important from history state to be ableto have that, so now this becomes our new build layer and now we can start doing things from there, so we'll get rid of that. Now I want to add that total contrast. So we'll go into here it's going to color effects for, uh, that's. Beautiful. Yeah, let's. Try perfect effects three. Hopefully we get a different response. If not, I did the edit. We'll work from that, uh, beautiful. Uh, I don't know if it's gonna happen like that. I happen to do it imposed myself so beauty alive. So what we did here is I used the total contrast filter and that brought out all the detail in some of this. So if we if we move this, I'm just going to show you the trees, her dress and I turn this on and off. You can see what's happening with the detail in that in the shadows and that's what I want. I want to bring out some of that shadow detail, highlight detail and give it a little bit more of an eddie edgier high contrast. Look, now I will tell you you can see this here there's a mask because what happens is if we delete this mask and weaken, delete it for this sake what's gonna end up how what ends up happening is all that tax year starts applying to her skin so you ever see those hdr what it does to skin it looks absolutely horrible no clients going to buy that if they've got that hdr gritty tax or look what it's doing to our arms I mean, it really makes it look bad so what I did was I put a a mask here and then painted out that mask, right? So I went back on her to the original layer where her skin was all beautiful and looked great the next thing we did here was we added a texture layer now these are my own personal textures so you know, I sell these you can check out our website, but I I'm not here to sell those to you. At the end of the day, I have found my own textures that I love you guys are all photographers shoot your own textures and then I incorporate them into my images so as we add, these textures were building this images and, you know, I'm just walking through this and it's not taking me a very long time, so when I'm doing it myself it's very easy so what I'm gonna do here is showyou focal point cause I think this is a pretty powerful tool, so what this allows me to do is this is by on one I think they have a giveaway today and we're gonna open this tool it's gonna bring that image in get this full screen okay? And this image of course looks completely ridiculous right now so what we're gonna do is we're gonna control feathering it's got this tool called a a bug this allows me to move it identify my subject control the with control the blur amount control the feathering so what the fall off is and what this is going to allow me to do is selectively control what's going blurry what I love most about this is that has lens options. Check this out, guys if you wanted to have a fifty millimeter one point two blur but clearly we didn't shoot this at one point too I don't know if you guys remember what we were doing up there were like a f fourteen yesterday so everything is coming into play but I want it and post I want to give it that one point to a depth of field very shallow depth of field I can come here and they have all these cannon and nikon presets built right into the tool. So now I select that and of course I can start controlling the amount so I find here that bringing this down to about six or seven that controls the fall off the way I want and then again I can control the feathering and how how that is falling off so obviously wanted to look his natural eyes possible and then of course we would apply that to our image so if we go back to my original image here's what I applied on my own when I was messing with it and it was very, very subtle how we created that transition from beginning to end so what I want to do here is I've got about eight minutes to break I want take a few questions but then I want to go in a light room and just show how I do work in light room prior to getting into a photo shop so some questions actually I didn't fly over this too fast for everybody okay? Coffee junkie from dallas would like to know if you mix different style edits in a single senior chute or do you keep the same style for each shoot uh no, that is actually a really great question I make my edit decisions based on the image so what I try to do is look att each image as a piece of art and I'm trying to make creative decisions on what I think will sell to the client and you never know so if you stick here's a great piece of advice by the way if you stick to a single edit style pursuit and you miss it meaning the client doesn't isn't digging it you're screwed because now you've edited every image to have that same style so what I'd rather do is the opposite pick a few images and go with different edit styles, so to ensure that if they don't like one, maybe mom comes in today and she doesn't like texture let's cool, mom, because I got another version of this image, so give your client as much diversity as possible. So a question to build on that from camille is what if the client likes a particular picture, but not that at it, not the textures? Do you offer them the option of selecting that photo with a different edit? Or just say, well, here's a different at it with a different image? Yes, I will do that. That is a great, great question that's a question I get asked all the time. So what ends up happening there is we will in fact, it happens all the time we will pick what we think are the best images, and then the client from time to time will come to us and say, you know, I really like this image better, but I'd rather see that edit on this image and hey, if you're gonna buy a big print, we tell him for larger prince because this required so much work and we all know now that it required, you know me to send it to evolve, I didn't really do anything but because of the amount of work involved ah, we can only do that on a larger print, right? I don't want to start doing all these edits for people who order an eight by ten. And so, yes, if it's gonna help you get a bigger print sale on one hundred percent, re edit that image and sell a bigger print. That's, what's all about.
Class Materials
bonus material with purchase
bonus material with enrollment
Ratings and Reviews
a Creativelive Student
I have been shooting seniors now for 6 years. I have to say this is the best course I have ever had online! My head is still spinning trying to process it all. (luckily I gave in and bought the course :) I was going to be printing my marketing magazine for my seniors this week. After the first day of this series, I completely changed my pricing structure and felt so much better about how it would work for me! That is what is amazing about this series. It has incredible amounts of information that the newest photographer to the seasoned photographer can take and use in the business. I watched all three, took notes like crazy; watched again and still could not get all the info I wanted on paper. So I did the logical thing. I bought it! I was so impressed with the down-to-earth style of teaching that Sal and Taylor use and how open they were to sharing so many helpful aspects of how they do business. I really wanted to buy another backdrop, but I truly believe my $99 for this series will reap way more benefit for my business. Thanks so much Sal and Taylor! Now... to go redo that marketing info. :)
a Creativelive Student
This course is amazing. Sal offers a truly comprehensive path toward success in a step-by-step way that leaves nothing out. You can tell he's very secure in his success and his skills and, therefore, can truly share his knowledge. This workshop is great for amateurs and experienced alike. And, unlike many other presenters, Sal doesn't spend exorbitant amounts of time bemoaning the existence of "shoot and burners" ... instead, he inspired even them to raise their game - benefiting the industry overall. Nice. You must buy this workshop.
Student Work
Related Classes
Portrait Photography