Creating a Chocolate Baby Figurine
Lesson 3 from: Cake Decorating: Modeling Chocolate for BeginnersLucinda Larson
Creating a Chocolate Baby Figurine
Lesson 3 from: Cake Decorating: Modeling Chocolate for BeginnersLucinda Larson
Lessons
Lesson Info
Creating a Chocolate Baby Figurine
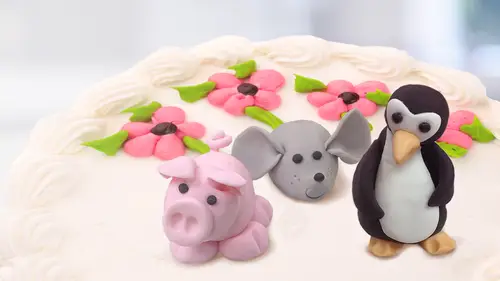
What I'm going to do now is I'm going to make some skin tone so that we can create a little baby and get strong so what I'm using to create skin tone is I'm using a little a little light brown a little pink you can even use a little bit of orange if you're using color from a bottle uh terra cotta color works really well for skin tone they also skus l quote unquote skin tone but basically you're kind of looking at these kind of colors and that's probably too much pink soul takes excuse me takes him off and a lot of white and of course depending on the skin tone that you need to go for, sometimes you need a little darker skin tone you know what I want to do before I get too far along here is I want to wipe up my pink that I used the destin colors with now you know why my washcloth looks so fabulous because what I'm wiping up color all the time I had another skin tone here that looked more like silly putty and skin tone skin tone is really a little more orangey a little more terra cotta, ...
which is orange and I probably want to add just a touch of brown I'm gonna go with the lighter around so I made a lighter brown I made a darker brown I made a black I just made all kinds of color, my skin tone I can use for my monkeys, and I can use for my babies and that's what we're going to do in the axis but can do little baby, and I'm going to bring in by pattern sugar must do it this side also, ok, so I've got a pretty good skin tone, it's a white baby like me, okay? And I'm not going to use that hole. What? I'm only going to use a smaller portion now when we're doing figures, there are three or force things that we need to know one is there's only so many shapes that we're using one is the ball shape. When is the cone shape? And to get a cone shape, you roll a ball and then you between your hand, you get it into a cone, and we also have and I also refer to the cone, is the teardrop shape, and we have the sausage, so either have brown on my hands or didn't get my brown mixing well, so those are our three basic shapes that we create figures with, and this goes for babies, giraffes, elephants, that's, the three shapes that we use ok, then the next thing that we need to know is that when we do a face or head our head and face is divided into three portions, so if you think in terms of your mouth is thiss dividing line for one your eyes dividing line for the other you'll have it made the nose goes between the eyes and the mouth the mouth goes to the bottom of your ear so the ears go from the mouth up to the eyes you get a much bigger than that or out of alignment it doesn't look natural and what else do I need to tell you? Babies have a really big forehead ok, so we're gonna do a big forehead for babies if you want something to look cute and adorable, you make the head larger than the body which in real life is not how we look hopefully ok, so for our baby, I probably have too big of a head there. I think I'll cut some of that off baby care us? Yeah, no problem okay, so I have this ball I've got it nice and greasy to up their cause. It's warm now I might have to set it off to the side. I'm going to and I'm going to use my ball that I made it's a demo okay, so for the baby's head here's what we're going to do choose a side that doesn't have the brown showing I'm going to take my little finger and I'm going to put it right in the middle and I'm going to rock it back and forth and that's going to give me my baby's head and face ok and let's just sit this here for a moment I got this nice soft stuff here and I'm going to I like to use my short palette knife um you can also use your exacto knife or you khun if you use your exacto knife and you're doing it this way be really careful because we don't need to go to the e r today, okay? I don't know bleeding in your chocolate is what I'm saying in a nice way so what I'm going to do is I'm going to cut this down and it's still pretty big but this is a good waited to start kind of working things it's just cut it down and then what I want to do is want to cut that little section off the ball I don't want to throw that away I'm going to use that for the ears and then this one it may be too big I want to make a little nose come on okay little knows that doesn't want to stick to my finger and we're going to put the little nose okay, we're right there always right on that ridge right there just attach it okay then this little ball I want to rule I don't want to cut it in half a cz perfectly as I can get it roll each of those into a little ball and these air going to be our ears so any time you have two of something, if you make one hole and then cut it in half, you're going to get equal two's equal legs, equal arms, equal ears equal eyes equal whatever it is that you need to of if you try to do them each individually, you're going to end up getting kind of a weird little look going ok, I want to use my ball tool or my wooden skewer, which I didn't give myself one of but I have a tool that has a little ball on it so I will use that let's come on, just messed up my little baby's face there, okay? So now and you can see I'm getting too warm my ears are melting into my hands I spent too much time talking, I'm gonna put the ears on either side of the head right on the side try to make him level really does it really does help if you make him level okay? And then I'm gonna use my little tool what? I'm just gonna attach it to the inside of the head and pull it down so it looks like a little here also if you were right handed you will have more success if you do the left side first and try to match up the right side if you do the right side first and then try to match up the left side it doesn't match up a cz well the other thing is that said if you're left handed do it just the opposite do the right side first and then to the left side because your brain can mimic the other the opposite side better than what you're your hand is does that make sense okay now remember I told you that we're going to turn this little drinking straw into for copy stir into a tool here's what we're going to do that so I'm going to take the straw and at the end I'm going to just trim at an angle a little um I was moving in off camera so that you wouldn't wouldn't shoot into the air but we're going to shoot so where it went so well take that off and at this point I can go let's test it see how that looks oh that's to court to um I'm gonna try it again trim it off my little straws pretty tough here okay you guys see that last little test now then I have my tool made take my little face at a little I little eye and I can either just leave his mouth or I can add a little mouth his nose is too flat it's a hee you noticed? I've already decided it's a little boy now I can take some brown dusting powder and dust a little hair on his head but I am going to move on. Let's put we're going put his head right there for right now stuff is sticking my tool bag try to keep my environment clean here. Okay, now then let's use blue since he's a little boy we're going blue charity decided he was a little boy sometimes they come out they're little girls, you know and truthfully, when I do these, I don't usually do want do several because then you can choose which one's the best and I can have my head of time got got cocoa butter coming out how you doing? Wait, I'm needing my blue I'm gonna make a blanket oh, god! Keep up it's got to be soft. All I do is need that's I spent more time meeting. Maybe I didn't invent a machine that needs okay, get my powdered sugar here. Roll out! Okay, now at this point, let's peel that off the surface and I'm going to use my spatula, my palette knife make a little square or triangle rectangle a shape now here's the magic tool this is a piece of cover for fluorescent lighting and sometimes you can get him broken out of the barrel at high com depot till this given to you. Sometimes you have to buy it for a small fee but this is all that is it's the cover for fluorescent lighting wash it, of course. Especially if you got it at home depot so it doesn't have sawdust on it or something. Then I want a powder sugar that get my powdered sugar there let's just do a little press and I want to kind of precedent and former uh oh, look at that. A blanket that great. Now one thing I like to do is on I didn't cut that very straight, so let me cut it a little straighter. That's pretty good. It does not have to be perfect because it is a blanket and it's gonna be. But on what? Cia have the press side in this side, what I want to do is I want to press it along the edge here so that when I tuck in that baby and fullback the blanket I have printed on both sides but before I took in my baby I want to take that I give you guys a wooden skewer. Yeah, ok, I did not give myself a wooden skewer, so I'm going to use another another thing here um what would also work is like the back of a paint brush so what I want to do is I'm holding this in my hand next to my finger and I'm rolling back and forth with either my wooden secure or the handle of my paintbrush or one of these high end fancy tools I can see what a difference a high end fancy tool makes none that I can see it's all in the technique groups trying not to have it stick to you and then I'm just going to ruffle it back and forth and that's going to give us our little ruffle along the edge of the blanket because little babies always have ruffles don't they yeah these little babies air great if you build the little bassinet and then you can have ruffles on the bass in it and then have to blanket go over took the baby into the bassinet it's just that the bassinet and all that was a little more advanced somewhat I wanted to go into today so now I've also been shown that you can do a ruffle by putting it on the surface and if your hands are hot this is maybe the way you want to do it and do it like this but you have toe keep lifting I find it easier to do on my finger but it's up to you how you want to do your ruffles and let's give a little ruffled over here okay now then we got our blanket ready and I'm going to use the same brush that I brushed the purple off of on a brush off that excess powdered sugar and then I want to make a body so your body can be made out of any anything because it's really not going to you seen so if you have some left over something that you want to use or if you want to pipe it in butter cream or something, you could do that, but I want to make kind of this little shape we want to make sure it has a little bottom I'm gonna curve it just a little bit again we're not going to see it, but I want youto think in terms of doing it that way then I'm going tio get my surface here and I might have set this right here we could even go so far as tio that might show I don't think so now here's one of the things I want to tell you whenever you're doing people or babies in particular if you want don't put the head like this it looks like it's not a good baby you want to turn the hey little bit, tuck it down so this looks like a little baby that's asleep, not one that we're burying and then we're gonna put the little blanket here, track it and I need I need more warmth of my portion here so it sticks to the baby this's a difference between modeling chocolate and gum paste because gum paste or funding I'd be getting these wet in modeling chocolate you've got a warm him up I lost the head again let me get the blanket tucked on and then we'll get the head and I'm going to redo the knows I'm not happy with the nose on this little guy it was to smooth it was cute you would think a sticky is everything is that it would just stick to you but for some reason it doesn't and now I've got it looking like a little old man knows ok there's our little baby can you guys see that? How you guys doing? I'm still not happy with this old nose I don't wanna I'm going to reduce it in size big head little nose not a big kid big news here we go. Go that's a little better if you warm it it will been better on your blanket. Yeah, so ali j mac would like to know how do you get different colors from modeling chocolate? Do you bite in different colors or can you make it with how do you color it when you get yourself? I just color my modeling chocolate with, um my standard doug food colors might the ones that I use so I'm just using soft gels and my favorite brand is america color, but I'll use anything I don't care long as I get the right color america color the cool thing about america and this is why I like it is that they have a good line, a good selection of colors but their colors all coordinates so if I'm buying an airbrush color a teal airbrush color and a teal paste and a teal for candy or chocolate, I'm getting all the same. Teal I don't have three different colors a teal they're all the same and they do sell a special colors just for chocolate but that's really if you're using just straight chocolate once you've got this into a modeling clay youth pretty much already have. You can add any color you want so you could use airbrush color you could use powder colors you could use your gels whatever color it is that you want to use it's fine and you mix it, you could mix it all white and then mix in your colors as you go along and that's. What the students did is they started with white and then mixed in their colors or in my case because I knew I was going to be doing these different colors I just made it while it was all the chocolate and with soft it made it easier to mix in um the other thing that you can do is you can also dust you, khun dust the chocolate. So if I'm very careful on this is too bright of a pink I can come in and add a little pink to the cheek of our of our little guy here it's a very bright color so I a softer pink would have been a better way to go, but you can see how you can actually little literally use your testing colors too. So that's what we're doing with colors, any other questions? I'm gonna leave that sitting right there. You can see, was it you said a lot harder lot harder. Yeah, it's been like I said, it's not really my favorite medium but you can see it's a lot of fun and people people love the idea that it's chocolate oh, my gosh! It's chocolate and look at this, you know oh, that's made out of chocolate. Come look, it's all chocolate. Yeah, that's you know, that's what they love. So the same thing goes, though when we start doing our gum paste flowers because it won't do or gum paste flowers or like, look, this is all sugar well, these flowers or sugar, so yeah, you have to kind of go with what people like
Class Materials
bonus material with purchase
bonus material with enrollment
Ratings and Reviews
fbuser 995017ee
Awesome work and easier then I thought. Thanks for all the great ideas.