Button Layout: Top Deck
Lesson 3 from: Canon 5D Mark III, Including Canon 5DS/5DSR Fast StartJohn Greengo
Button Layout: Top Deck
Lesson 3 from: Canon 5D Mark III, Including Canon 5DS/5DSR Fast StartJohn Greengo
Lessons
Introduction & Product Overview
15:14 2Photography Basics
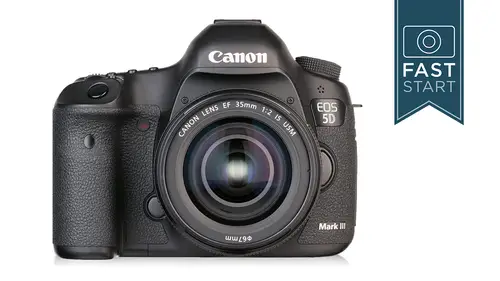
06:47 3Button Layout: Top Deck
46:23 4Button Layout: Back Side
25:37 5Button Layout: Other Sides
11:41 6Lenses
17:12 7Display System
09:48 8Shooting Menu
29:38Lesson Info
Button Layout: Top Deck
So let's, get into this camera, so we're going to start off with just what I call the button layout, which is going around the camera, and we're gonna talk about what every button is on the camera and anything else that maybe you didn't. You know about what's going on in that button, so okay, let's get real obvious and super simple. The on off button has been moved up er left on the camera around the exposure mode, dialing my cell place when you turn the camera on the camera has a pco electric ultrasonic oscillating device in there that shakes dust off the sensor on previous generations. For those of you in the audience and I myself, who's used a lot of cannon five d's the original one dust on the sensor was a major issue, and it was a pain in the butt, and that improved quite a bit with the mark to this one has basically the same unit for keeping dust off the sensor. Now you may still get dust on the censor, and I will address that later in the menu section. When we lock the mirror up...
for cleaning, we won't actually do it in class, but on how to do that so that's what's going on when you turn the camera on. On the camera. Now, when you turn, the camera on the camera does come on and it's got different levels. It's got like, a nap mode and a sleep mode and then an off mode. And so when you press down on the shutter release, we'll talk about that it's fully activated and that's what? The way you can always wake the camera for many of its naps or sleeping modes. Okay, right around that we have arm odile and the lock button that seems to have generated a little bit of angst with some people. We've got a button in there. We can't just turn the dial. We have to push that button. Uh, personally, I kind of like it because on previous five cameras, one of my standard protocols, as soon as I take the camera out is where has the mod? I'll shifted teo after being ruffled around in my bag. And so now it's it's pretty easy do you could do it with two fingers. If you just push your index finger in and use your thumb on the back, you might need three fingers, but once you get used to it, I think it's really nice it's nice to be able to have that locked in, but you do have to press that to get in and change the expo so let's talk a little bit about the exposure mode on our camera so let's uh go ahead and turn it all the way down to the a plus mode the a plus mode well, I think the a plus mode is not for people who on this camera if you own this camera this is the mode you put the camera in to give to somebody else to shoot I think it's it's a crime of photography for someone with a five d mark three to be shooting in the a plus mode what's going on there is the camera setting shutter speeds, it's setting apertures and it's setting a whole bunch of other things in the camera that you can't turn on and off in some ways it's like child safety locks on a whole bunch of features that you're going to want to get in and change and so trust me, if you really want to use this camera, you don't want to be in this mode, but if you're going to hand it to somebody else to take your picture that's a perfect situation for it, all right let's go to the p mode the programme mode now kind of the secret is is that the programme mode is essentially the same as the ai plus mode when it comes to setting shutter speeds and apertures the difference is is no child safety locks all right, so if you want to get in and change the so you are free to do that, if you want to change the white balance or any other function in the camera, you are now free to do that. And so the very simplest mode that you should have your cameron is the p mode, which is a generally good mode for having the camera figure out basic shutter speed. So if you put the camera in the programme programme mode, pick it out, shoot a picture, you should be able to look at the back and get a reasonable result when it comes to brightness, we're going to forget about focus we're going to do with focus a little bit later now if you change the main dial on the camera, which we haven't talked about yet, but you could just change this to any setting you want, and you're going to be changing shutter speeds and apertures in unison together. Now we're not going to go in and talk about where to set this, but you can set it anywhere you want, and so if you are in a travel mode okay, you're in a foreign city, you're walking down the street, you don't know what your next picture is gonna be, it could be of a person wearing a really funky outfit walk across the street or it could be a bunch of flowers beside a building that you want to take. Maybe you want shallow depth of field and fast shutter speed or you want lots of depth of field. You can quickly make that change by just changing that main dial. However, I don't really like this mode. The problem is, is that let's? Say I find something I want to shoot. Okay, fine. Here's a statue that's really cool and I want lots of depth of field I dial and a whole bunch of depth of field and I take some pictures and maybe I turn my camera off. Maybe I just let my camera sit for a moment will I think. And I come back to press my shutter release after six seconds, the camera resets back to its original what I call middle of the road section where it's not really very good at either extreme of the shutter speeds and apertures. And so the camera is constantly resetting itself. And so this is only really good when every shot you take is going to be different. And you want to adjust and have a simple starting point to begin from so I really can't recommend this for most knowledgeable users on this camera, I think itjust resets too quickly. Now, when we go through the program, the shutter priority in the aperture priority mode, we're going to be also dealing with exposure compensation so the camera is figuring out how bright and how dark the picture should be and in general it's always trying to choose something right in the middle, but that's not always the case. Let me give you a visual example here, so sometimes when you're taking a picture, you're thinking, wow, maybe this would be a little bit better if I took it and it was a little darker or maybe a little bit brighter, and you can make this adjustment on the camera by doing an exposure compensation, you can go to the plus side and make it brighter. You go to the minus side, make it darker. Now you can do it in many different increments, and the way you do that is with the dial on the back of the camera and just make sure and I haven't talked about this button yet, but below the big dial in the back of the camera is a lock switch. You want to make sure that lock switch is to the left so that that dialled is unlocked so that you can make that change, and if you want to take a picture of anything you want, go ahead, just take a picture and then dial in a plus one and what you'll do is you'll look in the viewfinder as you can see at the bottom of the screen have that indicator that needle over by the plus one you can take a picture there and then you will move the dial on the back of the camera so that the indicator in the viewfinder is over at minus one. You take another picture there and you should end up with a dark picture, a lighter picture and then a normal exposed picture. And this is a manual bracketing it's, a way for you to darken or lighten up in individual picture. And the reason you might want to do this is because the camera is automatically thinking everything it shoots is eighteen percent gray and this table is not eighteen percent gray, it's black and so I would need to do a minus exposure if I was shooting something very dark like this or if I was shooting something very bright, like a white sheet of paper, I was doing a cover shot of this guy we need to probably set it to a plus one or so setting. Now you can you can make it in finer increments in one third increments if you want, but that's how and why you would use that dial so moving on now normally step back from it makes sure you reset that to zero so that's where you want to leave it most of the time, you don't want to leave it at minus one plus one for an extended length of time without a really good reason. All right, so let's move the camera to the tv mode which is not for taking pictures of the tv but could be used for it. Totally okay. It stands for time value. So time value you get to choose a shutter speed so students in class I want you to set a shutter speed by changing the main dial on your camera to one thirtieth of a second. So it's going to say thirty and I want you to take a picture and take a look at your results and give me a nod. If it looks like a good exposure, does it look like a reasonable exposure to you? All right, now I want you to set a shutter speed of one one thousandth of a second. So a very fast shutter speed and I'm gonna do the same. I'm gonna take a picture of you and I have a prediction. Your pictures are very dark, ok? Am I right? Yes. Alright, so why are your pictures dark? You got to choose the shutter speed. The camera is supposed to figure out the aperture foryou problem is, is that none of you had a point o o one lens in order to shoot in here uh you didn't have enough light to shoot a thousandth of a second, and this is one of the reasons why I don't like the shutter priority mode is that you can easily make a mistake if you weren't paying close attention eso it does work in some special circumstances, so I'm not going to say never use it, but be careful using it because you need to make sure that you have inappropriate aperture available for you while using it so let's step up to the next mode that I do like because after all I've said, I don't like most of the things so far aperture priority so avie aperture value here you get to choose the aperture so students in class go ahead and take a picture at any aperture value you want and then changed to a radically different aperture value and take another picture. We're not worried about shutter speed. We're not worrying about focus right now we're just worried about exposure and I should see nods from you that you're getting reasonable exposures on every picture you take and that's because the camera has a wide collection of shutter speeds, so pretty much any aperture you choose the camera is going to probably have a shutter speed for so that's a very safe mode for you to be in a quick mode so if you're on vacation or you don't know what your next shots gonna be and you kind of want the camera to help you out a little bit, put it in the aperture priority mode you could dial it toe one side of the apertures for shallow depth of field and fast shutter speeds you could go to the other extreme for more depth of field or slower shutter speeds, so I think a v is a very good mouth next up let's go to manual now you notice as we were going through these modes were kind of always using the dial on the top of the camera for changing shutter speeds or aperture so this the style does changes we go through this and so as we go to full manual, this is back to changing shutter speeds and our dial in the back of the camera is now controlling apertures and what you're gonna need to do is you're gonna need to hold the camera to your eye you're going to look in the viewfinder and you're going to see that exposure indicator at the bottom middle of your camera. Chances are because it's not too bright in here even though we got a lot of tv lights on it's still not very bright it's probably way down at the minus side and so to set and even exposure you need to pick either a shutter speed or aperture and then change the other one until your exposure level indicator gets in the middle and so let's set an aperture of f forks I think all of you have a lens that goes down to f four and now I'm going to change my shutter speed and I get a shutter speed of one twentieth of a second went to call out some shutter speeds just to see where you are oh uh I met aya so four hundred we haven't talked about that one yet. Thirtieth of a second I was at a twentieth a tenth of a second the fifteenth okay, so we're all getting pretty close to the same amount of light in here cause we're all shooting pictures and relatively the same environment so that's how you would manually set and exposure on the camera. All right, next up we have bald and here we have a prop thanks to john cornyn, fellow eh? Regular here it creative live people often wonder why the bold his name's such what it is is it's a long time exposure and it comes from the days when we had bull breeze leases like this so maybe this is an indication of how old john cornyn cello is just kidding john all right, so on these bold releases we have an heir bulb here, okay? There's nothing mechanical it's just air and as I squeeze this it pushes the cable out and it stays out as long as I leave my hand squeezed on this ball, and so the bulb setting on your camera is for doing a long time exposure and it's going to stay open as long as your finger is on the shutter. Generally, you're only going to use this for really long enclosures because the camera could go up to thirty seconds now I personally like doing nighttime and long time exposures and rarely do I ever go over thirty seconds, so it's very seldom that you would ever need the bolt mode because while you can do a twenty minute exposure with this camera, you're going to get very poor results, leaving a digital sensor active for twenty minutes. I would say that in jail I haven't done a test on this particular camera, but I know from experience on other cameras that you're limited to about five minutes of exposure before you start getting into it's called long exposure noise and it's just going to disrupt from the picture. And so I kind of had some fun many years ago using film cameras and shooting star trails for eight hours and leave the camera shutter open for eight hours with film you didn't have the same problem with sensors, but if you do want to shoot a picture longer than thirty seconds is why you would want to use b next up, we have c one, two and three thes air custom modes when we get into the menu system, I'm going to show you where you can customize your camera, and this is for people who have different types of photography that they want to quickly make a lot of changes on their camera for. So for instance, maybe you're into travel photography and you kind of have your camera set up in a landscape type mode for lots of depth of field, but you also have an interest in bird photography and there's a lot of differences you want spot meter, you want your cameras focusing system completely changed in that situation, what you would do is he would set the camera exactly as you wanted for that situation, you'd go into the menu system that will talk about a little bit later, and you would program that into c one, c two or c three, and so you can quickly change dozens of features on your camera with these pre program setting. So these become your favorites things that you do if you're ah wedding photographer we have a number of wedding photographers here, and I think this is a fantastic wedding photography camera, by the way, you might have one that's for kind of action people walking around and moving the bride moving down the aisle, but then you want to switch to something else, that's got a different focusing pattern different meeting pattern for when people are just standing there for shooting portrait's versus action and so great system for anyone who uses this camera in a in a variety of situations highly recommend using those to your best advantage, so that is the mode, but we do a lot of things I'm gonna go back and leave mine on manual for right now I'd be able to change things manually. All right, next up we have the hot shoe on the camera so you can melt a sort of flash units on it. Now one of the things that you can and has changed recently is that they put a kind of over ring seal around the hot shoe and their latest flashes now have a seal around them so that when you have a flash on there it is whether sealed around this area when you have a flash mounted on it let's talk a little bit about flashes, so the cannon five mark three does not have a built in flash. So if you wanted just the barest minimalist flash, this is one of the few times that I actually do recommend the speed light to seventy e x it's not super powerful it's not super versatile, but if you wanted a pop up flash, this is as close as you get to it if anyone wants to get better flash photography, this is not the flash. This is the small, lightweight travel hiking one. They do have a low and flash that is kind of unique because it has a video light on it. So if you're going to shoot video, it adds a little bit of light it it's not that powerful, so it's not going to be good for things that are much further away than about six or eight feet. Now we're going to start getting to the flashes that you would probably be more interested in if you're looking at better quality lighting on this camera and that is the speed light for thirty. This sells for about three hundred dollars and it's a good intermediate level flash. For someone who does a moderate amount of flash work, this would be a good one to choose. The new six hundred e x rt is cannons top of the line flash. This one is going to sell for a whopping six hundred six hundred fifty dollars. What is new and unusual about this flat is that it has a radio trigger, innit? Previous flashes were using a light system to trigger the remote flashes. So what you can do with this camera is you khun by oh let's say you buy a dozen of these things okay, that seems pretty easy you can have one on your camera triggering the other eleven in different groups and patterns and in different places so you could create an entire lighting setup with these flashes. Now there is I will mention still available today at least the five eighty e x version two which is the predecessor to the six hundred which sells for noticeably less money in his pretty similar in power and general features minus the radio triggering capability which is also a good one but that one's going to disappear fairly soon with any of these what is often recommended is the offshoot court. This is one of things that I have to have with my flash because we all know from our creative lighting classes that if you want good quality pictures, you need to get the flash off the camera. And so while I do not make a habit of shooting weddings when I do and I have to walk around with a flash, I will use a flash bracket which keeps the flash above the lens whether I'm shooting horizontal are vertical and in order to maintain the tt l communication from the camera to the flash I have one of these offshoot courts connecting it, and so if you want to get the flash away from the camera it's only good for about three feet, so either handheld or on a bracket works very, very well now there is a few little funky things when using flash on this camera, so if you are using a cannon flash or you're using the offshoot cord, the maximum shutter speed that you can use is one two hundredth of a second uh, if you shoot it one five hundredth of a second, as you can see here in this example, the trailing the second shutter curtain has started to close and has blocked the flash from hitting the censor even at two fiftieth of a second it's clipping off a little bit of the picture so one two hundredth of a second. However, if you are in a studio and you are using larger, more powerful non cannon strobes, one two hundredth of a second doesn't quite cut it because the length of these flashes when they fire, they fire and they fire for period of time it's a very short period of time but it's a little bit longer than the cannon speed lights and while you can shoot it one two hundredth of a second, you'll notice it's a little bit dark at the bottom of that picture and what I and many others have noticed is that even at one sixty eighth of a second, which looks pretty good, still isn't quite an even exposure, so I would recommend one hundred twenty fifth of a second, and if you actually dive into your instruction manual, kanan recommends one sixtieth toe, one thirtieth of a second for studio strobes. It depends on the situation, but in pretty much every case that I've seen one hundred twenty fifth of a second will do just fine, and so don't try to push the limits of the camera. The flash is going to be stopping. Action just finds the one hundred twenty fifth with studio strobes, and while it seems a bit a bit disjointed to talk about a gps receiver right now, this is what connects up to the hot shoe on the camera, so they have introduced a new g p e three, and I've not had a chance to test this out. I don't know if it's arrived in stores as of the arian of this class, but if you want to add gps information, you had mount that up on the top class unit, and that would communicate with the camera, you can even have it set the time and date in your camera correctly as you travel around the world now this is going toe. Have its own battery supply and it's gonna add information to the metadata in your camera and so if you want more information about this, I would probably check out cannons website because it looks like could be kind of interesting for anyone who likes blogging where they go with their gps unit. All right, let's get back to the top deck of the camera and continue working around we are we do have a question in class that we will go to yes ah quick question about the gps if it's attached to your hot shoe but you want to use flash how would that work? I don't know that you're going to be able to do that there may be and I'm thinking there is and I'm sorry I don't have this completely memorized I think we may be able to plug it into one of the ports on the side of the camera as well, but then it's going to be kind of dangling off and you're gonna have to find someplace else to mount it and so that could prove to be a challenge and the long term solution is the five d mark four will probably have that in the camera and so it's it's a little this this is the early days of gps and cameras I said before it's it's like internet circa nineteen ninety six you know it's a little rough around the edges okay, so up on the top right hand side of the camera, we have a row of buttons that has all the important features of the camera, you might say, and so we're going to start off with the first button to the left, which controls the meat oring and the white balance. And so if you are new to cannon by pressing this button, it'll be active for about six seconds, and then you need to turn one of the two dials on the cameras. So in this case, in order to change the meter, and we're going to change the main dial on the camera, which is the one on the top, and so you press that button and the metering becomes active for a little bit and you can start changing that dial. Now canon has just some little symbols that you kind of have to memorize, and so the evaluative one is the one that I recommend for most shooting most of the time it's the dot with a circle around it and that's a good general averaging system. What it does is it takes sixty three zones, averages compares the lights, throws out the high score in low score it's kind of like ice skating in the olympics and comes up with a nice, good average of what the picture should be. There are reasons why you might want to choose a partial meter or a spot meter or center waited meter, which are all basically circles in the middle of different sizes. The most valuable one beyond evaluative, I would say is probably the spot meter which is using a very tight one point five percent of the viewfinder to do it major so if you're shooting a portrait of somebody and they're wearing may be black or white clothing and you want to get a reading off of their skin tones, you could take a reading off their cheek or their forehead or something like that to get a better reading of what the amount of light that is heading them. But for most people most of the time the evaluative would work just fine next up when you press that same button but you turn the back dial, you're going to be adjusting the white balance and this is the color of the photographs that you get this is kind of new to us in digital photography were gotten quite used to it. The problem here if you are new to this is that the camera doesn't know what color the light source is and we work under a large degree of light sources and sometimes we need to make adjustments to correct for the different color lights that we shoot under even daylight cloudy and shade conditions have slightly different color cast so if you are getting unusual color on the el city of your camera of the pictures you are taking you may want to adjust the white balance to the most appropriate setting so we have three different settings for what I would call the natural conditions we have three different settings for artificial conditions tungsten light is very orange fluorescent light kind of has that greenish yellow look to it flashes of course well balanced right at normal light and so beyond these we do have a few other customizable settings we have a kelvin city if you are so smart that you know the kelvin temperature you could set that manually now I know this seems kind of unusual but let's say you have a home studio that you work in and you have a set of lights that you always use those are going to have a certain kelvin temperature once you figure those out you'll be able to set that manually by just going in and dialling in five thousand six thousand seven thousand or whatever it may be we also have a custom settee now this is going to be used in conjunction with something that we get into in the menu system and let's say you wanted to take a picture in here of say something on this tape and you needed to be perfectly color balanced what you would do is you would take a white sheet of paper you would photograph the white sheet of paper, you would then go into the appropriate section in the menu and you would set a custom white balance for the light that is striking right here. And so if you don't know the light source, you could figure it out exactly right using the custom light source. Now, as much as I hate setting anything in auto on my camera, I'll have to admit I do leave my camera and auto white balance most of the time for a couple reasons. Number one, it does a pretty good job at figuring things out. It's not perfect by any means, but in general it's pretty good. The second thing is, and we'll talk more about this little later is I should in raw, and when you shoot in raw, you can fix white balance later with no damage to your photograph. If you shoot in j peg, you need to be more conscience conscious of making appropriate white balance settings. Having said that, if I'm in an environment, uh, paul is talking about shooting in a concert hall where they have kind of funky lighting. I'm not going to shoot with funky lighting all night long. I'm going to kind of figure that out, because when I'm looking at the back of the camera, I want to get results that are very similar to what the final pictures are, so my, my general philosophy is used auto, white balance until you are getting funky lighting and then make a change. Uh, if you shoot in raw, you can fix all of it later and tweak it more later, but I'd like to have good feedback when amount shooting, as I think most photographers d'oh and so that's, of course, changed by pressing the first button and the back dial on the back of the camera, the quick control dial. All right, moving over one button. We're gonna be going over to the auto focus and derive button, so we're going to be working with the main dial up on top, which gives us three options. If you're not getting three options, make sure your camera's lens is in auto focus needs to be an auto focus for this to work out, we have the option of one shot, eh? I focus and say I serve up most of the time, I think most people are going to be in one shot. What happens then is the camera focuses, it finds something to focus on, and then it stops focusing the kind of opposite of that is a servo where the camera will focus on a subject, and it will continue to track that subject as it moves forward and backwards. In essence, what we have is we have a static shot for still subjects with one child, and we have action or moving subjects in a servo, and this is a major change that you need to make when you are shooting something that is standing still versus something that is movie the nice part about having one shot and let me go ahead and make sure that my camera is in one shot right now is that I can focus on a person, and when I press halfway down on the shutter release, the camera focuses on that person and it locks in as long as my finger is halfway down on the shutter release. Now I can move them off to the side of the photograph and take a picture, and this is called focused lock, and this is a really good system for doing portrait photography. Where if you want to have somebody a little bit off to the side, you focus on them and move a little bit off to the side works really good, but when the subject is moving towards you in away from you, you need to go to a a I serve elmo. And so for sports, we're gonna go to the ice servo for other shots. We're gonna go to one shot. What about that one in the middle? Okay, this is kind of a split between the two. This one was where the camera automatically tries to detect. We stress that again automatically tries to detect whether it's moving or not uh, I have found that it's a little unpredictable as well as a lot of other photographers, and I can't recommend using it. I have found that most people are either shooting sports or they're not shooting sports, and so either you're doing one or the other a tricky one is for those of you shooting weddings where the bride and groom were standing there and you want to get one shot with him kind of off to the side and then all of a sudden they're walking towards you. And this is where those custom modes on your camera would come in really handy where you have one set up for one type or one for the other, but you can also do that change writing can't pretty quick as well, but you got to be you've got to know your buttons really well on the camera for that, all right, so pressing that same button and turning the back dial gets us to the drive mode. And so here we have many, many different options we have single shot, which is where you're gonna be in most of the time you're going to be in continuous high when you're shooting sports, we have a continuous mode, which is a lower speed. The high speed is at six frames a second. The continuous mode is at three frames a second, and then one of my favorite new features in this camera is the silent mode. So let me fire off the camera, just normal sound, and we'll put this pretty close to the microphone. Oh, my camera's beep is set on going to talk about that later, but I gotta disable that that just drives me nuts. Here we go now, let's, go ahead and change this to these silent mode and so for wedding shooters for concert shooters, you know, maybe not rock band photographers, but maybe a symphony that is a great system to have. They also have a single continuous it's not as fast but it's still reasonably fast, and it is way quieter than any other camera that I have heard out there that has quiet or silent modes and so great silent shooting and that we also have a self timer that's two seconds or ten seconds in length that we can also use the little rc six wireless remote control now this is going to sell for about twenty five box it's only good for about fifteen or twenty feet uses infrared so it's not the best under bright sunlight. But if you want more time to get in the picture yourself, it's, a very inexpensive remote to use with this camera next up, pressing that same button and turning the back dial. Excuse me where we are. We are, we're doing the so we're at the third button, but we're doing the top dial the main dial, and we could now change our isos, and this is the sensitivity of our sensor. Now the camera will normally go between one hundred and twenty five thousand, with the addition of an auto setting as well. The best quality setting is going to be an esso one hundred, assuming you have enough light. The higher you go, the more noise you're going to get in lower quality image, you're going to get on the sensor. The camera also has what's called an esso expansion capability will go through this in the menu system, where you can expand it to go down to fifty. Or up to one hundred thousand I like turning this on just because I like those options if I need to go there they're available for me to go there and so I'm going to recommend turning those on a little bit later in general we're not going to get into it a lot but I would say setting our cameras at one hundred here in the classroom we're going to keep him a little bit higher because we're in a pretty low light level in here but normally you're gonna want to leave it at one hundred and then bump it up from there as necessary depending on the conditions the lens and tons of other factors and actually what I was going teo doing here is I did a test with this camera I wanted to see how good this camera is at different isos and so I shot it at the full range I'm giving you a sampling of some of the critical ones here and so I tested this from one hundred to one hundred thousand and like most my rule of thumb on most cameras is that the top eso is garbage and one down from that is garbage the twenty five thousand could be acceptable in some situations and for for the geeks out there this was shot in raw with zero adjustments just processed it through like room and I just made some straight very tight crops to see what the noise level is like and in my general opinion I think one through one hundred through sixteen hundred is just fantastically clean sixty four hundred is pretty usable on I want it really hesitate going anything one through sixteen hundred I would start trading a little bit more carefully up at sixty four into twenty five thousand and well one hundred thousand that's for bigfoot ufos and things like that only when you absolutely have to get up there so very good at the low light levels and you could also apply noise reduction and improve the results that I showed you there by a fair margin so that third button also control something that really doesn't do anything as most people have their camera right there because this controls flash exposure compensation if you have a flash attached to your camera I don't so it's not going to do anything but I can still go in there and make that change and this is where you can power up the flash or power down the flash and let me give you a little visual is to why you might want to do that normally the camera uses a mita ring system called tt l which stands for through the lens metarie with the flash and the automatic flash in many cases while technically correct is aesthetically a little overpowering a little overbearing and so in most flash situations were say you're photographing a person in front of you it's good to power the flash down. A lot of my good friends like to power their flashes down about one stop. I don't see too much difference here in two stops, but I think one stop minus one looks better than standard detail, and I didn't even do a plus one because I know it when it looked good in other situations, depending on the brightness and contrast in what people are wearing. T l can be very overexposed, and so in this case, I actually like tt l minus two, and so if you are using flash, you're going to definitely want to experiment with powering the flash down so it's not too over handed in lighting your subjects. Most people want a little bit of light on their subject, and they don't want to be overpowering it because they're balancing the the flash as well as the ambient light. And while we're getting dangerously close to the edge of a lighting class, we're not going to go there, ok? There are other great classes online t s so in general, I wouldn't have a problem leaving my camera said it minus one all the time and occasionally dipping down below that, and so that's your flash exposure compensation, yeah. All right so next up what we have we have our shutter release this is where you take the picture when you had to take a picture okay how about something more serious ah the camera has a shutter durability of one hundred fifty thousand firings all right uh for comparison the cannon seventy also is durable up to one hundred fifty thousand firings the next level down the sixty d has a shutter durability of one hundred thousand so it is on the more durable end of things however the new cannon one d x has a shutter durability of four hundred thousand so you kind of think of this as miles on your car uh one hundred fifty thousand is a lot of shots for most people it's generally going to be a few years worth of good service at one hundred fifty thousand the camera doesn't blow up it doesn't stop working it doesn't have a little light that says you have to go in for an engine check the camera may continue on for several hundred thousand that's just one of the ways that they rate the durability of the camera and as I said before when you do press down on the shutter release it does wake the camera up and puts it into an active mode it starts the meeting it starts the focusing and so it's a good place any time the screen goes dead on you just hit that halfway and everything turns on all right next up, right next to that is the m f ine, which stands for multi function button button, and this is something that we're going to be using in a moment to change you're focusing points. Uh, we're gonna have to press another button first and then press this button. But if you just go ahead and press this button on its own it's not going to do a lot right now, but you can customize it to doom or when we get into the menu settings. So one of the things that khun do is it khun do a flash exposure locks, so if you're using a flash you can lock and exposure in, you could do a test, a test firing of the flash and then lock that exposure and for people using flash photography and what I think, it's one of the cool things is it has an electronic level in the view find her so that when you press this, you get this little level in the viewfinder, not on the back but in the view finder to see if you have your camera held level, which is kind of a nice little feature, and we could get in and program that when we get into the menu system. All right the main dial we've been using this a lot you know what it's for it's the main dial on the camera we also have a little light right there on the corner of the screen so that you can light up the top lcd panel when it's dark out take note of the little brackets right in there that is indicating your remaining shots how many shots you have left on your card and I will remind you this is an estimate you may get more than this it's unlikely that you will get less than that but you may get more than depends on the type of shots that you take there is a quick little battery indicator how good your batteries but we're going to find a much better one in the camera in the menu system and what are we looking at here? Oh yes the cards storage we have two different memory cards will talk about those in a moment but this kind of explains what cards you have in the camera and what way you are recording raw or j peg to which card? The little saturn symbol or ufo right there is an indicator of where the film plane is now there's no film in here let's call it the sensor plane the focal plane how about that uh where the sensor is in the camera chances are you'll never need this but for some technical reasons some some people need to know about this when they're measuring the distance from the subject to the focal plane of the camera maybe we could take just a moment and go for some questions before we move to the back of the camera sounds great good yeah lawyer was actually gonna ask what is or is there any drawback to silent shooting silent shooting is slower thie I was testing out last night the response time because we had a question in a previous class aboutthe lag time it seems to be justice quick taking the picture but technically it's got to be a little bit slower because what's happening is the thing that's making a lot of noises the mere coming up and it's slowing that mere move movement and so that's slowing the shutter leg it's imperceptible to me but it's also slowing it on the return and that's going to slow down the shutter speed thee dr modi think is at three frames a second and it doesn't you can't do six frames a second so it's not for sports but I think three frames a second it would be more than fine for say shooting a wedding so question from many max uh if the shuttered starts to wear out does it just stop taking photos I haven't used a camera long enoughto where shut her out but in general it would just stop working uh I suppose you could have poor shutter speeds where maybe a shutter sticks. I've seen that on older manual cameras where you like said it to a thousandth of a second, and it looks like one second because the second curtain is sticking or something like that. But generally the camera will just stop working. Um, good old sam cocks and loveland, colorado asks when, uh when in one of the custom mode such a c one or see two on the dial, you still have freedom to change the exposure settings? Correct? It's not locked in. Let me explain a little bit more about the custom mode because, uh, I don't know if you notice, but I just got a little frustrated. Well, working because of something that happens and I'm not completely fonda in the exposure mode. The member I talked about the programme mode where it sets shutter speeds and temperatures in the middle of the road and you make a change and then it resets itself. Okay, well, the custom modes are kind of like that. You can set it to be in manual program, shutter priority aperture party. Any one of those moods you want, but let's say you set it up to be in manual, and then for some reason you decide I want to be an aperture priority. Well I guess that mode that that's not a good example so I guess let me answer let me answer his question first, which is you can have it in any of the four modes you want and it will stay there however, what frustrated me there for a moment is that I had it in the custom mode and the camera was beeping at me so I went in and I turned off the beach but when the camera went to sleep and it woke back back up it reset the beat back to its normal setting so the thing is is that you have to set things up and lock him in now you can go in and change them for a shot or two, but they're going to reset back to those standards and it is kind of frustrating but it's also really good because on my camera I have a landscape mode where my s o is at one hundred and I know every time I turn it to the camera it's always resetting to one hundred because every once in a while I'll bump it up to four hundred and I don't want to leave it there and it kind of resets it hope helpfully helping me in that case so it could be a good thing or bad thing depending on how you're shooting right? This question goes back to the beginning we were watching that video the storm from jennifer what about the front of the lens and whether resistance she read something about how uh some need filters to complete the weather ceiling? Well, er the glass is water resistant it's the edges around there that can be a little bit of a problem. Uh, it's a good reason for keeping a uv filter on your lands that some people are very picky about whether they use u visa or not. I typically like to use a good quality you ve on there. I haven't heard about it completing the o ring seal because there is basically plastic on metal and it's unlikely to have a problem unless you were really negligent and staying out there for a long period of time or maybe trying to dip the front of your lens into your pool to get a water blood picture below the water. Uh, and so you still need to be careful about that. We have a question in class. Uh, is there any reason why I couldn't just leave it in silent mode all the time like battery life or there is no real reason at all that I have heard of or no up and so I think it would be fine for a lot of people I think a lot of people have become used to the sound and it just kind of feels good it's like from basketball player hits hits a solution it just hits all net it makes a beautiful little sound that you like but I think in the future photography photography we're not gonna have mechanical shutters and we're gonna have the option as we do on some of the pointe shoes of having pure silence and I think it's something we should get used to because it's kind of nice to be stealth on not everyone looking at you oh, listen to that that camera firing and so yeah at a wedding I could see leaving it in there the whole time um going also back to the video uh yuri analysis in mass manchester england as asking uh when shooting photos during video recording does it interrupt the continuum of the video at all? Yes obviously the camera is slightly distracted by trying to take a still picture and so what happens is you end up with a video clip that has a one or two second gap very similar to the one that I had in mind and so if you are panning and you take a shot you will notice they'll be a areas that you didn't quite cover in that pan question from now right tonelli watching ellie photography um again in a servo does the camera continue to track changes in the subject even when the shutter button is being held down? Yes, the camera can constantly track and so it brings up another good point is that when I'm shooting sports, one of the things that I'm doing is like, if I'm shooting a person running towards me, I'm gonna think about where do I want to start taking pictures, which is maybe here and I'm going to start focusing and tracking them well ahead of that point and then I'm gonna press down on the shutter release and if the cameras in its high speed six frames per second mode, you just leave your can't your finger laid down on that shuttle release as the subject is getting closer to you and what's happening is every time the mere comes down it's checking focus and adjusting focus following that subject and so it's doing a lot of things very, very quickly. So yes, you just leave your finger laid down on that shutter release you khun you can do one shot or you could do a group of shots I recommend doing a group of shots focussing systems on this camera are not perfect, no cameras perfect and so it's best to shoot a burst of shots, and what you're likely to have is most of them in focus and maybe a few out of focus um barbara ziman zimin nick um from british columbia um said just purchased the mark three last weekend and noticed that some of the images do you have a great equality um that she did not notice under mark to um and is there a way to adjust the green kind of going back to the so I guess but lower eyes I would need to know more information I would love to have visuals love officials no, I don't know why that would be because I've tested the two side by side yeah the five d mark three is better how much? Well that's area of dispute but it is better I want to go back a little bit and talk about the battery is the battery from my five team mark one compatible? I think probably people are wondering if the batteries are going to be compatible from the mark one mark two to the mark three it changed from mark when the mark too but it's the same from the mark two to mark three thank you and a question from limoncello is there a disadvantage of using ice or vote for still subjects? The problem with using a servo for still subjects is if I'm going to focus on, say, one of my students and I focus on them and it's in servo and now I decide well I would like it to be off to the side now the camera's going to focus on something else all right, so that's the main problem is that you can't focus and recompose we could just focus on the person and leave him in the center, and it would probably be okay. Uh, but it just doesn't give us the opportunity to focus and recompose. And so, from a technical point of view, yeah, you're probably okay. From an artistic point of view, I think you may be limited.
Class Materials
bonus material with purchase
Ratings and Reviews
Tami Miller
I really enjoy any John Greengo class - beside being an incredible photographer, he has the true nature of a teacher. What a combo: a fantastic photographer with a great sense of humor who can really explain complex concepts and take the fear out of all of those buttons and dials! I LOVE his 'tests' and visual challenges: the immediate results help to cement the information. I have had my Canon Mark D III for almost a year now. The time I spent experimenting with it and reading most of the manual (ok, maybe I am a nerd!) was great preparation for this class as I knew exactly the things that were confusing me. And, as usual, Mr. Greengo delivered. So glad I purchased the course so I can review it many times. Only two disappointments: unless I missed it, it wasn't made clear how to switch from one card to the other. I was in Scotland and my screen kept flashing, "card is full" - and I couldn't figure out how to switch to the other one; and I did want to fill in the copyright/name information but can't figure out how to 'type' in anything. Class is a must for a new owner of this camera.
Steve61861
Wonderful, wonderful instruction! I wish every instructor could be as point-on as John Greengo. I had my money's worth about a quarter of the way through the class. At the end, I called it priceless. I have had my 5D Mark iii for almost 2 years, and John taught me some extremely useful things about the camera I did not know. Even if you are an advanced shooter with considerable 5DMiii experience, you are likely to get something valuable from this course - otherwise, you are CERTAIN to get really valuable knowledge about your camera. Strongly recommended for Canon 5D Mark iii owners.
Liesa Wayson
LOVE, LOVE, LOVE John's classes. Bought the 70D class for my first camera, now the 5D Mark III class, so worth it. Awesome investment!
Student Work
Related Classes
Camera Guides