Lessons
Class Introduction
09:14 2Photo Basics
04:00 3Basic Camera Controls
04:36 4Mode Dial
24:19 5Top Of Camera
21:42 6Viewfinder Display
09:18 7Live View Menu
08:16 8Movie Mode Menu
03:03Back of Camera Buttons
04:37 10Quick Menu
22:00 11Playback Menu
08:58 12Left & Right Sides Of Camera
04:39 13Bottom & Front Of Camera
06:28 14Lens Options
08:28 15Menu Functions Overview
22:13 16Picture Style Menu
05:23 17Multiple Exposure & HDR Menu
04:53 18Image Quality Menus
06:47 19Live View Shooting Menu
02:23 20Movie Shooting Menu
15:30 21Playback Menu
06:53 22Set Up Menu
15:07 23Viewfinder Display Menu
02:35 24GPS Settings Menu
04:36 25Touch Control Menu
03:38 26Custom Shooting Mode
05:33 27Custom Menu
26:28 28My Menu
04:41 29Camera Operation
09:31Lesson Info
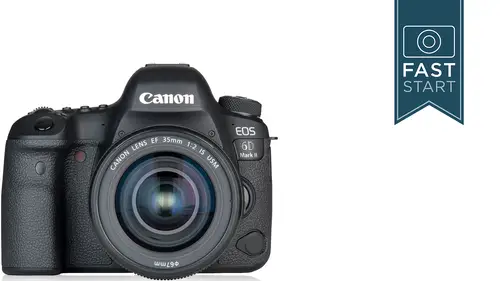
Back of Camera Buttons
Next up is our AF-ON button. Now, as you get the camera straight out of the box from the camera, the AF-ON button really doesn't do anything for you. Because when you press down on the shutter release, the camera focuses. You don't need the AF-ON button. But as I mentioned at the top of the class, if you wanna turn off the auto-focus on the shutter release, then you would be using the AF-ON button on the back of the camera. So if you want this to work properly, you can go into the Custom Functions and you can program the buttons of your camera so that only the back button will auto-focus. Now, the reason a lot of advanced photographers like this is because they wanna separate the action of taking photos versus focusing. I know, myself, I'm kind of picky about how I compose my photographs. And I may want to use the center focusing point, because that's the most sensitive. If I wanna use that focusing point to focus on a particular subject, recompose the camera, I can then go over to the...
shutter release and take as many pictures as I want knowing that I focused properly and every time I shoot a photo, the camera's not going to refocus on me. So it's very good for subjects that you're going to focus away from where the focusing points are, and subjects that you're going to shoot multiple photographs of where the subject is not moving closer or further away from you. So it's a good system to try. I encourage all photographers to give it a try out. I will let you know that it does take a little bit getting used to. There's a good chance that you'll try it out for an afternoon and go, "Oh, I just don't like it, not used to it yet." It takes a little bit of shooting before you get used to it. But I have known somewhere between zero and very, very few people who have given it a good fair try and then gone back to a traditional system. It seems like once everybody figures out the magic of this, they stick with it. Next up, is this star button on the back of the camera. And that is Cannon's designation for Auto Exposure Lock. So, what's going on here is it'll lock the exposure as you move the camera from side to side. So lemme give you a little example of how that works. Right now, I have the camera in the Program mode. So it's figuring out shutter speeds and apertures as we can see here on the back of the camera. And as I move the camera left and right, you're gonna see those numbers change. Because the lighting or the subject material has changed. Now if we figured out that, you know what, what we really want is a 40th of a second, we would press in on this asterisk button up here in the corner, and it would lock that number in so it stays exactly there. This could be helpful during a sunset, where you don't have the camera pointed directly at the sun, could be helpful with a person standing right next to a very bright doorway or window, where you get the lighting right on them, and we press... Take a picture to reset it. And actually, I'm pressing the right button here. I want it to reset, so I'm going to turn it off and turn it on to make it reset. And so I would get the lighting that I want on my subject, lock it in, and then come over here and I actually do not need to leave it, have it pressed. Some cameras need it to be pressed, and there, when it times out, it does reset. So, here, lock it in, move it over, and take the photo when it's locked in that exposure from where we locked it in. And so, there are some people that use this quite frequently, and there are some people who never use this. And if you never use this feature, not to worry, that button is not going to waste. You can dive into Custom Operations and you can program that button to do something else. And that's gonna be very handy. We'll look at some of those different options when we get into the Menu section for Custom Functions. But you can program it to do something else that's more useful for what you like to do. The next button on the top right shoulder of the camera is the AF Points. We talked about this earlier. This activates the focusing points so that we can move the focusing point around. If we wanna choose different size areas like single or group points, we would use that button on the top of the camera right next to the shutter release that has a similar looking set of grouped little points, but the AF Points is gonna be most handy for those of you who want to change your focusing point left and right. That'll just turn on, activate those points.
Class Materials
Bonus Materials with Purchase
Ratings and Reviews
Warren Gedye
John, this is my second class of yours I'm taking on Creative Live. You are a very unique and articulate instructor. Your knowledge, understanding and experience in all matters photography is astounding! You have certainly fine tuned the knack in imparting your deep knowledge in such a palatable way! Your slides are magnificent, simple and concise and caters directly to your audience. I can only imagine the hours upon hours of time spent making these valuable slides. I look forward to many more of your courses!
a Creativelive Student
Always enjoy all of John's classes, but especially this one since I've decided to upgrade from my previous 6D. Awesome camera and this one is so much quieter than the older one. Thank you for explaining things in terms and ways that are easy to understand!
Tim Rogers
Thanks for a very useful course John. Not to get out and enjoy the new toy. Wish I had done the similar course for my previous camera (60D); will be recommending it to the person I am giving the camera to.
Student Work
Related Classes
Camera Guides