Lessons
Lesson Info
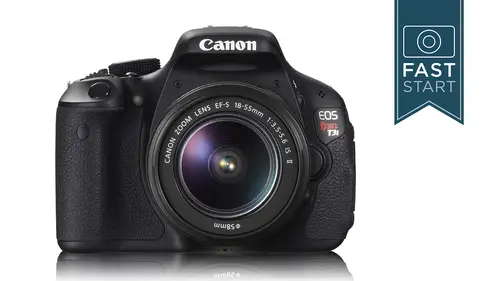
5. Menu System
Okay, so this this is the this the hard part this is where we're gonna go through the men you can get a little tedious in here because there's a lot of stuff in the menu but hey, you paid good money for a camera you want to get as much you sat out out of it as possible so you might as well know what's in here so we're gonna go ahead and start going through the menu system and before we dive in let me just say kind of right from the outset there's probably about one hundred things in here and half of them you will have no interest in at all thanks cameras designed for a lot of people and most people don't use most of the features it just has a lot of them in there so that you could do a lot of different things for it. All right, so let's get started into the menu system how do you get into the menu? Well that's going to be that menu button on the back of your camera when you do that you're going to get a display that looks a little like this and the thing to note is that we have differe...
nt tabs different pages of information the red tabs are things dealing with shooting taking pictures in the cameron how the camera is set up for that the blue ones are for playback so features related to playing images back are going to be in those we're going to have some general set up features in the yellow wrench section and then finally we're gonna have my menu which is in green and this allows you to find your favorite features and you might want to keep note of we'll say four or five or maybe six of your very most important features and you can have those in your my menu which we'll talk about at the very end so it is also very important where your mode I'll is turned if you are in one of the basic modes you are only going to get access to some of the menu you need to be in one of the more manual modes like full manual or p for program or one of those other modes up there and that way you can get to all tabs all pages of information the video mode allows you access to special video menus and so what? Well we want here is we want to not be in the basic moz not those picture moz we want to be in the in one of the standard menus or the video menu depending on where we are and we're going to start with the standard menu so if you want to turn your camera to the p mode or am for manual, that would be a good place to start with so this is the shooting menu these air in red this is the first red tab and we're going to start with the quality and here we once again we saw this in the quick menu this is jay pegs versus raw and you know there's still some people out there that are kind of new to shooting with digital slrs and they're like what's the difference between ron j peck and so I have a great little analogy for it. So imagine you were going to write a book and you want to write a book about something so you went out and you read other books you took notes you interviewed people and you kept notes from their interviews you gathered a bunch of facts you got a bunch of quotes and stories and you put all this together in a big file. Now do you just published the file? No, you got to put it into a readable format so you write down all the important information in a easily readable format. That's you're finished book. All right, that book is the j peg. The original file is your raw now you take your book to a publisher and the publisher goes, this is fantastic. I love it, but you gotta rewrite chapter three, go back to your notes, rewrite it with a different perspective if you threw away all your notes you want to be able to adjust chapter three very much and that's why you wanted keep your raw images is because it has all the original information that was gathered when you took the photograph now whenever you have a rhyme and you can always create a j peg from it, but if you have a j peg, you can't go back and recreate where that original information came from and so if you're serious about your photog fi, you're going to want to shoot in wrong. The little catch with it is is that you can't email somebody iran image in general because it's too large a file you need to make a j peg and send it ah that in that manner so you need a good software program and there's a number of them out there. My favorite is adobe slight room the camera actually comes with its own software from cannon for reading raw images you can use photo shop you can use bridge, you can use aperture from apple there's a lot of different programs out there which one you choose to use now that's completely up to you, but I found that having a simple, easy to use program makes this process very easy because you will download a raw image to your computer I'll keep him on as a raw if I need to email an image to a friend or for publication reasons, I'll just make a j peg and send that off, and so I encourage you to shoot rock, because in that way you're going to get the most out of your camera, and if you I really don't want to shoot raw for some reason, I would at least choose the very large setting in j pegs. And so hopefully that answer some of the questions about ron and I may get some more questions and that's that's perfectly fine, we'll answer those kind of when we get to the end of thie shooting menu. Next up is the beep, and this is that little section that we can turn on and off here. So if you don't like the beep calling out every time that your camera focuses this's one way to quiet your camera down a little bit showed a release without card. If there is no card in your camera, do you want your camera to be able to fire off a picture? Most people don't, because they think that there might be a card in there, and they're taking pictures when they're not, so I would leave this disabled image review. This is your choice as to how long the image shows up on screen, I believe standard is for two seconds, but I prefer four seconds, so this is one of those little things I have a little change that I make to my menu. Peripheral illumination correction. Wow, that sounds complicated. I got a visual for it, though. All right. One of the problems with cameras, lenses and so forth is that the lens will sometimes not let in as much light in the corner as it does in the middle. And you end up with vignette ing or a darkening of the corners in this picture. Here, you can see the skyline is clearly darker in the corners weaken, turn on peripheral illumination correction and it illuminates the outside area. And you might be saying that you at this point in time ah, this is something I definitely want to turn on and in this particular picture yes, this is something good to turn on. However it's not something you always want to turn on aa lot of pictures in for me, a lot of people pictures I like adding a little bit of in yet to the corners. It draws your attention more to the center of the frame where the subject is. So I don't mind that those corners or dark in this example now, once again, this is not being done to any of the raw images this's only being done to the j pegs, and this can be done later in software programs. I know in my uh, light room there's an actual little check box to fix the lands it knows which lends I am working with and can automatically correct for it. Or I can manually do it myself. Next up is red eye reduction. This is one that I like to turn off because I don't like a bright light coming on for two seconds and delaying the shuttle released by two seconds. You know, if you have a lot of kid pictures that you taking, you get a lot of red eye, this might be a good choice, but this is something that you can also fix in software later on, and so I would tend to just shoot it quickly and right in the field. Ah, and then fix this later on. Next up is flash control and this is got a few extra features. So I'm going to switch over to the camera here where we can dive into the menu because I want to be able to show some of the options that we can go down into here. So if we press set and dive into this, we can turn off the built in flash if we wanted to, but I think most people are going to want to leave it enabled we can change the meat oring pattering pattern in here if we wanted to, but I think evaluative is pretty good and then inside built in flash function setting is a whole bunch of other settings and this is probably the most important settings in here normal firing easy wireless and custom wireless now I'm not going I have the time to go into the wireless settings on this, but if you do buy one of the other cannon flashes and you wantto fire the cannon flash with this built in flash you're going to be using either the easy wireless or the custom wireless for most people they're going to leave it under normal firing. We can't get to the flash mode it's great out right now because we're choosing normal firing and we don't have a flash attached onto the camera shutter synchronization first curtain and second curtain remember way back at the beginning of this class when we're going through the photographic basics and I talked about the shutter curtain there's a first curtain and a second curtain do you want the flash time too with the first one or the second one? Most people it's just going to be fine leaving it with the first one but there are some fun special effects that you can do with second curtain exposure compensation well, this was done a lot easier in our quick menu, but we can also control this here if we want tio so if I wanted minus two thirds I could set it right there and if we hit the menu button weaken, jump back to the menu and we also have options for controlling an external flash which I don't have hooked up so I can't really get in and dio and I can control the custom functions of the external flash as well is clearing them from here is well and so those are some of the enhanced features and some of these are brand new in the t three I so next up we're going to go to the next tab and I'm gonna switch back to my keynote. And so here was some of those built in flash function settings that we just went through ok, so we're going to move over to the second red tab and here's where we can do our exposure compensation which we already learned how to do before because we can just use that plus minus button also known as the a v button but we can also do exposure bracketing here and what bracketing is is it's a fast siri's of shots usually shot pretty quickly in a row where you shoot one at the recommended exposure one over exposed and one under exposed you could do these one stop apart you could do these two stops apart three stops apart or various other levels in between and so if you were really unsure of the correct amount of light, this would be one way to bracket to make sure you got the right exposure and this is also useful for a new type of photography called hdr or high dynamic range photography where you shoot pictures at different exposure levels and then use a special program like I believe it's votomatics that will combine all of them into one photograph so that you can have much more light in the shadowed areas that so more sophisticated technique and photography but this camera allows you to do that. Next up is the auto lightning optimizer now we saw this back in the quick menu where we were lightning lightening up the shadows and so I would probably leave this to turned off but know that it's there and you can turn it on for special circumstances the meat oring mode this is something that we were in in the quick menu we have our evaluative partial spot and center waited meter I would probably leave this on evaluative next up what we have our custom white balance this is where you should ah white piece of paper and you photograph a white piece of paper you go into custom white balance and you tell the camera hey, this is a white piece of paper by uh kind of calibrating that piece of paper and what happens is the camera then can recognize what cover the light sources and it will correct for that on all future photographs next up is the white balance shift and this is if your camera has shifted in one direction or another you can adjust it here highly unlikely that you will ever need to do this you can also do bracketing which will shoot a syriza pictures like auto exposure bracketing but with the color balance shifted if you shoot in white balance excuse me if you shoot in raw you do not have to worry about this number five at all because you could fix it totally later in post color space I would switch this to adobe rgb it's a slightly larger color gamut then rgb or srg be so you want to choose adobe rgb it's a slightly larger color gamut so if you are shooting j pigs you're getting the white ist color gallant gamut possible by this camera and then finally down here we have picture styles and we've talked about this before you can kind of create your own effects but these air only going to be in j peg and it can it is actually much better done if you by shooting raw and working in a computer quick question for you john for that and that is from clare of all right can you control how many images are part of the exposure bracketing well let's jump over to the camera and just take a look because come on, switch this over and I'm not in the hearing make sure this is turned on I'm gonna try to switch over to the camera here we go and just take a look because sometimes I deal with so many cameras I forget the answer to these questions so I want to see it for myself so if we want to set exposure auto exposure bracketing I am turning the main dial and I have three shots so I can't do for five I can only choose three but I can choose how far apart they are and let's see, can I change? I can change how close they are and so let me see if I can do one other change so that's changing that expression bracket dean so I can see it's a pretty simple adjustment and I'm not doing something here we think about this for a moment because there's another adjustment that I can adjust and it's not doing it for me because I should be able to get out to five I wonder if I can do that more easily on the quick men you know, come on screen struggling there we go so I can basically jump back to it with a quick menu, but basically I'm limited to just three shots thank you I just want to see something real quick if I jump in and it's way down at the end it's still going to be limited to three shots, so, yeah, you're basically limited to three shots there. Let me switch back over to the presentation mood. There we go. All right, so the third red tab in the shooting menu dust delete data I talked earlier about the little sensor and the dust in front that can cause a problem. It has a automatic sensor cleaner, but sometimes there's something that gets on it that doesn't want to shake off, and in that case you want to clean the sensor. I'll talk about cleaning the sensor in a moment, but if you can't clean your sensor, one of the options you can do is you can shoot once again. Another white piece of paper and your camera can map out where these dust specks are, and it will basically clone amount as you shoot them once again. This could be this could be done in post, but if you want to do it in camera, you're on vacation. You can't get your camera to a shop to get it clean. You don't have the materials to clean the sensor, but you want to get it fixed in camera. This is a way to do it. I would try to avoid doing this because I don't like my camera cloning over pixels because it might do a bad job in some case. And so it's kind of a last ditch effort to fix the a dusty sensor next up is the ice so auto I'm not a big fan of using the I s o in an auto mode I like to choose the ice so myself if you do want to let the camera choose that you can choose some parameters for instance that only go up so high so maybe you only want the ice so to go up to eight hundred well you could set that is a parameter in here but I prefer to take control of the isil and I would hope that most photographers wanted keep direct control over it as well so this feature is not the most important for more advanced users not very many in that second tap so we're going over to the third tab in the live view shooting and this is where we can get in and set some custom functions and I am actually going to switch over to the camera menu so that we can get in and take a look at some of the features that are inside here so we got our menu we're going to go over and up to live you shooting we have enable and disabled if you really don't like shooting with live you or movie modes you khun disable it but I would leave it enabled in here we have the live mode this is where we have the face that's actually a little face their face live mode and the quick mode so these air different ways of focusing let's let's see if it recognises kenna's face here and so we are going to put this in live you throw this into auto focus let's listen to program and you can see that it is tracking kenna's face it's not real fast there you go but it's tracking her face so that is the live human so it can track faces but it is a little bit slow so switching back to the menu so I would probably leave this in life mode myself. It's not the fastest, but at least it's somewhat predictable on how it's working we have a great display that we can turn on and off I'm going to switch back to the keynote for this we're switching back so those were the different auto focus modes that we could choose and in the grid moe than the great display. Some people like myself sometimes have a problem keeping the horizon line straight. And so if you have a hard time holding the camera perfectly parallel there's a great display that will turn on in the live view screen in the back to let you know that it is uh properly properly level next up an aspect ratio. Cameras like this have traditionally been shooting an aspect ratio up three to two so there's three and alongside to in the heights as far as the height toe with ratio that's kind of the standard where thirty five millimeter film has been for many, many years now you can shoot a little bit more of a squarish look for two three you could shoot a pure square which is one one or you could shoot in the hd tv format of sixteen by nine if you want to get the most out of your sensor, you're going to want to set this to three by two but if you do want to crop in image to those other formats you can ahh not sure why a lot of people would but if you want to do this in camera, you can do it in camera and then you can also adjust the timer for the meat eerie when you press the shutter release for me during how long does it stay on? I think the standard setting is probably going to be fine, but if you want it shorter or longer, you can adjust it here if necessary and I think that ends up our shooting motives are some money follow up questions we have regarding things that we just saw in the shooting mode. Not sure if this is directly related, but from evan one four zero is there it's still a live history graham feature on the new rebel there is if we throw this and let's switch this over to the camera and we're gonna go into a live view and we're going to be okay uh now I'm going to hit the information button once twice and there's our live hissed a gram and so what I want to do is I'm going to switch to manual looks like I still have bracketing turn on and we're going to see our history graham if you've never seen a hist a graham this is showing the brightness and the darkness areas so if its way over to the right that means it's really, really bright see that white wall there is very, very bright the right side is bright and if we pointed over to some darker areas and adjust for the exposure that was would there is kind of dark and so a proper exposure is going to be somewhere in the middle so I would say that's a pretty good looking history ram right there despite the fact that it's out of focus let me manually focus because once you're in live you just manual focus works better and so look at that wonderful shot and we can play that back and what I can do is I can hit that information button and I can pull up my history ramp so there was the history graham that I saw live and now I'm getting back here with all the information and I know I said to keep your camera that I s o one hundred, but we're in a really dark room here, so I needed to jump it up just for experimental purposes only rose eighty who's fallen along also had the auto exposure bracket still at the negative three when he or she passes, she passes the presses, the shudder halfway down. You can't figure out how to change it back to zero on the bar. Ok, so let's, I think cause I think my camera is set up like that too. So what you want to do is you want to go to exposure compensation and you can see here it's expo comp e b has got those three little tabs underneath the exposure meter, so that means we've turned it on right now and you can see right here that it is turned on and so I pressed set to get into this menu feature, and I am going to turn the main dial back and forth, and if I get it back to one shot right there and then press set on the back of the camera, we're now back to normal, so hopefully that explains it. Great, thank you question from evan one forty do the cannon rebels still not let you take raw images when in any of the auto scene modes I'm pretty sure about that let's go ahead and give it a try. I'm going to put it in the a plus, which is the most basic of the modes I'm gonna switch back over to our camera setting and let's take a look in the menu setting and you'll notice the tabs up on top. We only have two red tabs now, uh, our quality setting we can adjust and who we do have raw there let's, change it to one of the other little picture modes and see what happens here we are in ross who aid now this is something that I didn't realize were before I hadn't really it played with, so we are able to shoot raw in the picture modes there were some previous cameras that forced you to shoot j peg and so that's a nice little subtle change that no one told me about. And now, you know, learn something every day, even in my own class set tech asked, are there certain situations that specific aspect ratios are best used? Well, let's say you have a tv show and you're shooting pictures for your tv show, you might want to change them to sixteen by nine, because then they'll match exactly the way they're going to see on tv, so, like if you are a still shooter for tv and all your pictures are going to appear on tv. That would be a reason for that. Sometimes. It's, just fun to shoot different format pictures. I mean, you just for kicks. Your next family get together, shoot everything one by one like a square image and should a black and white to so you could do that let's. So it's see that's actually that's our grid let's go to change it one by one. And when we look through live you on this it's going to show you some little marks there let's, turn off that hissed a gram so you can see what we're going to be getting in the frame. And so your call created creativity. All right. Question from rhea shell. What are the differences in the live you and the in the live mode and the quick mode. All right, well, let's, just do a live demo. How about that? Okay, so we have live. You enable live mode, let's, make sure we're in auto focus. I'm going tio set a little something up here. So this fairly normal? All right, so if I want to focus on this, I'm gonna press halfway down on the shutter release and you can see the camera focusing he's the little green box that's how long it took to focus and here we have canada you can see she's way out of focus and I'm going to start pressing down on the shutter release right now stop that and so what did that take about five seconds to focus back and forth and so if you can see it's relatively slow bill it's in focus now what I'm gonna do is I'm going to go in and I'm going to change it to the quick mode live we're gonna skip the face we really played were out that one quick mode set set menu back to real life okay so what the camera did there is it went out of live you went back to traditional and focused before so let me do this here so can is out of focus I'm gonna press down on the shutter release halfway the screen is going to go black the camera's going to focus and then it's going to return in focus in about one second so it is quick it's faster but it's awkward because I can't see what I'm focusing on see if I'm down here and I moved the camera it's not focusing because it didn't know what to focus on and so it's it's a little awkward I'll focus on that and I'll come down and focus on that so it's it's awkward I would have to say so that is the difference between live in quick last question from picture can you set your camera to shoot black and white photo? You can yeah, that would be in the picture styles mode and I think we went by this right down here so we can go to shoot in monochrome now I have done it's myself and the advantage to this is that when you shoot pictures and I like to shoot in raw, you shouldn't run, you get all the color information, but the advantage with monochrome is that on the back screen it's going to show you your image in black and white every once in a while I'd go, you know that I think would make a really great black and white picture, and so I can shoot a picture of it in black and white and it's still going to give me the full color image when I downloaded on raw, but I can adjust it to black and white again and get that black and white back but it's, just nice for in the field feedback. Great question from photo marsh when you make changes in the menu, will it affect all types of settings or just the one that you're in when you said it? Sure exactly what they mean by that? I guess maybe if you're on aperture priority e I don't know how these kind of wholesale changes throughout the entire camera I will. I will note that when we changed all these live you settings, which is the fourth tab this is for live you and not movie mode. Okay, we're going to do movie mode next. And there is a difference between live you and movie mode. Remember, remember, in movie mode, we have to have the dial turned all the way to the movie mode. Ok, live you is when you just press the button on the back of the camera so that you can see through the lcd on the back of the camera. And so, like that grid display, you could have it turned on. Turn it on here for live you but turned off for the movie mode. And so that's your call on that one. So that's one things that that is kind of different, and I think with that we're going to move right into the video mode. So I'm gonna switch back to the keynote. And so what you want to do on the top of your camera is turned your mode dial all the way to the end of the dial for the movie mode. Now, the first thing that you can control in here is your movie exposure most of the time, the camera's gonna be set in automatic if you want to set it. Manually like if you were going to do some serious film work, you might want to set your apertures and your shutter speeds very specifically yourself. Now if you're just shooting just simple little videos of this and that it's not that important to you I'd probably leave it in the automatic mode so it depends on how you plan on using it the auto focus mode well, we were just talking about this and this is true it has the same live face and quick option in live you as well as in the movie mode so you could have different ones selected eso if you find one preferable you could change it in here once again the best of these moments I think it's the one that's not listed and that's manual where you just simply turned the focusing ring on the lens and adjust it before you shoot it is very difficult to shoot video with these digital slr tze and change focus while you are recording video, most people are adjusting the focus beforehand either manually or automatically they leave it set for that shot which maybe two to ten seconds and then they stopped recording change focus, change position change lenses, whatever but you're not changing focus very often while the cameras recording that's one of the limitations of these as a video camera they record great quality video the image quality is fantastic but focusing is not designed for video but this allows you to change the mode that you use right there next up auto focus with shutter button during recording if you want to press the shed a release button to change focus while you are recording you can enable or disable this a lot of people don't like the focusing change because it makes a bit of noise and the built in microphone will pick that noise up and so some people will want to leave that disabled you can customize the shutter and auto exposure lock button not going to dive too far into this but basically you can customize these buttons to work and operate in just the way you want to and so if you don't like the way the buttons are standard from the camera you can get in and change him there's a remote control that you can allow access to or not if you want to have a remote control that gets the camera starting on recording highlight tone priority and do I have this talked about here or in another section I don't recall I believe I'm going to explain that further in another section all right this one's pretty important movie recording size what size as faras the dimensions and frame rates do you want to record for nts c users here in north america for instance we have thirty frames per second as our standard video twenty four if you're in hollywood and you're making a movie, we also have the option of sixty frames a second, and then we have a very small youtube version at six forty eight thirty frames a second if you are in another part of the country in another part of the world, I should say, and you use a pal system it record, they recorded twenty five frames a second it's a little different feed, you might say, and so there are some different options when you select between the video format ntsc or palace to which options are available and I will mention at the bottom there you do also have an option of a digital zoom where you can digitally zoom in and normally on traditional point and shoot cameras. Digital zoom was a very, very big no, no, you don't want to do that on this camera. It can actually work out pretty good, and if you do record video and you want a longer telephoto lens like you want to record a video clip of a bird on a bird nous that's pretty far away, you can use the digital zoom and still maintain a lot of quality because your cameras just using different parts of the sensor but still recording an hd quality video, so that is something you might want to do if you need a super telephoto lens. Next up this sound recording you have some manual controls over sound recording whether you want it recorded or not. Once again, we can limit the timer on the meat oring on this one, just a small, customizable feature that most people won't be playing around with. We have our grid display, we can add for video use video snapshot mode. Sorry, and what by that one, a little quickly video snapshot mode is a very strange moment. I don't know who would use it, but it limits your recording to about two seconds of time. And so you could just do a little snippet here on a snippet there in a snippet there, and it all adds up into one video next up. Exposure compensation. You can adjust the exposure in the movie mode because a lot of the other camera moz, don't work if you need to change it in the video mode, this is where to do it. Auto, lightning, optimizer this is where it lightens up the shadows. But just for the movie mode, our custom white balance we can adjust white balance for video is exclusively as well, picture stiles. This is ah, a little bit more important, I kind of passed by this in the camera section. Where it changes the contrast in saturation of the image in video it's a little more important because in video we're not shooting and rot it's, compressing it into a standard format that's easily readable and transferrable. So if you are shooting and you don't like the law, look of your image, the color of the contrast, the saturation, you can adjust that in the picture styles to your liking. All right? So we're going to need to switch back the camera back to the regular shooting mode. So I'm going to flip this camera back to the p mode for program because we're going to be getting back into the playback modes for standard camp for the standard camera mode. First up, protect images if you take a picture you really think is important and you want to make sure it doesn't get deleted, you can go in and kind of put a little lock on it so that it doesn't accidentally get deleted. You can rotate images if need be on on the playback, and this is just simply for playing back the image and looking at it in the back of the camera you can erase images, but I think this is actually a lot easier done with the garbage can that's right on the back of the camera next to the play button, but you can do it from here is well this is one area I'm definitely not going to spend much time on. You can use this camera as a platform to print from, so you could hook a printer directly up to the camera and you can go into the print order and select which pictures you want printed and how large and in what order. And there are pages in the instruction manual on how to do this. We have creative filters. Once you have taken an image, you can add a creative filter to that image if you want to. This is something that you might want to do if you don't own a computer, but it's probably a lot easier to do once you do have a computer. And then once again for people who don't own computers, you can resize images. Second tab under the blue is our history. Graham here is ah, something that I would go in and I would change. You see if I'm gonna switch over to my camera mode, which over to the camera mode takes just a moment here, turn on our menu and go over to the second blue tab and one of the recommendation recommended changes. I would make his change your history graham to rgb that way when you play an image back. And let's, see if I can play an image back right now, I get that red, green and blue hissed a grand up in the right hand corner, and if you've taken a basic photography class, you'll know howto read that hissed a gram and know if you're getting the right exposure or the wrong exposure, and this just doesn't more clearly, then the brightness option that we just switched from the brightness option, which I will show you right here is just this white mound of pixels when go back and we're going to change this to the rgb image jump, we'll just continue right here in the camera mode when you turn the front dial it's going normally jump ten pictures at a time if you want that to jump one hundred pictures at a time or jumped by date or by any of these other options movies, stills, image rating you can do that as well, but for the most part, I would probably leave it at jump ten images. We have a slide show mode, and we're not going to get in here, there's a whole bunch of things that you can set up on creating a slide show in camera that you can hook up to an hd tv or a traditional tv and do a slide show straight from the camera. I think this hasn't done much more easily from a computer where you can really get in and adjust the image is a bit more but you can do it in camera necessary right here the rating mode this is really really important here this is where you get a rate your images how good they are I I kind of consider this the stuck in the airport mode when you have nothing to dio you have two hours to kill you khun thumb through every picture you've taken and you can raid it one start a five stars and so there's canada and see actually I'm going to jump back there and I'm going to write kanna five stars there we go so you can go through and rate all your pictures if you want to right there and for those of you who like a lot of bass in your sound okay you got a thumping car going to have a thumping camera here it's got a lot of base you can enable the base on this it's got a really tiny speaker folks but if you want a little bit more base out of it you can add a little so just a little better sound and then finally down there at control over htm I if you have this hooked up to an hd tv and you want to control it from the tv the tv side remote you can do that so that you can go forward and back through your pictures so we're going to switch back to the kino. We're going to jump through these little things that we just talked about right here and kind of catch up to where we're supposed to be, which is the setup menu. And so these are going to be features controlling how you set up the camera. For the most part, these air features that you're not going to go in and access on a really regular basis except for a few of them that you might want to most of these air. Just general, how you like your camera configured auto, power off. How long do you want it to be before the camera powers down? Auto rotate. Now, this is where I do recommend a change on this one song. Let's, switch back to the camera. This is kind of a one time switch. We're going to go into the menu system. Come on up menu there we go. And that's where your camera is set. Normally, what is the better choice? Is thie on computer only. What happens is it's going to flip all your vertical pictures when you are on your computer and you've downloaded your images, but it's not going to flip him on the camera that way if you shoot a vertical portrait of somebody well, you're gonna have to hold your camera sideways but you're going to get the full screen to view it as and so that's one change that you would want to make their next up is for matt. This is when you want to delete all the images on your card and you want to get rid of everything on the card. This is what I do before I go out on an important shoot reform at the card so that all the pictures are gone all the ghost folders all the directories all that is wiped off the card in the card and the camera have a clean line of communication now before you reformat realize that everything is going to pick on off that card so don't just reformat if there's some pictures on there right now so that's kind of a standard practice of a serious photographer file number you can do some slight adjustments to the file numbering on the way here it orders its numbers I would not change this for most users but you can if you need to. There are different folders that you can create and select on this camera. For instance, if you use your camera for business and personal use, you could have all your business pictures in one folder and your personal pictures in another folder. Another thing that you can change is the screen color and this is purely your choice here is to what color the information screen on the back of the camera comes up as the eye fi settings. If you have a if I or a wireless card, this is the memory card that transmits to a nearby computer. You, khun set those settings when you have that card installed. All right, so we're at the second tool in the setup menu, the lcd brightness. This is going to generally be set right in the middle. If you're viewing this under very bright conditions outdoors, you could adjust the brightness so it's more easily seen under bright conditions. Uh, the lcd on and off button can be customized here. We have the date and time that you want to go in, and you wantto make sure it's correct for the correct date in time. Because on every picture you take, it tells you what date and time you took that on. And so you might as well have that set properly. The language said here for many different languages all around the world, the video system is important. If you're going to shoot video and you are working with a pal system or ntsc here in north america, the united states, america, we use an ntsc system I know in europe. In many countries they use a pal system you may need to check with your local region to see which type of format is most common where you are and what works with your local tvs sensor cleaning the camera has an automatic sensor cleaning every time you turn the camera on and off and that's the way I would typically leave it if you don't like the camera doing it, you can somehow turn it off for some reason turned it off in there or you could manually do it right then in they're now for for cleaning the sensor and let me jump into the menu system real quick here because they want to show a little bit more about what's going on so we can clean manually we can leave it on auto cleaning, which I would recommend or weaken clean manually and mirror will go up and you would then clean the sensor so I'm going to switch back to the keynote here step one is using a bulb blower and this is just to blow away gust of air in over the sensor to knock off any dust so you're going to take the lens off you're going to go into the sensor cleaning you're going to do the manual cleaning, hold the camera upside down and then blow air up inside the sensor to hopefully clean off any dust if that doesn't do the job step two which not everyone necessarily needs to go to you might want to hire somebody to do this or take it to a cleaning shop or repair shop. To get this done is to take a swab and liquid and swipe the sensor clean of any dust a zay say not everyone wants to do this, but some people who want to maintain control can do it. It takes a very special swab and some liquid you can buy these in pre moistened packets there relatively expensive it's, about five bucks to clean the censor yourself if you want somebody else to clean your sense or it's going to cost you around fifty dollars. Ah, but these are the tools that you would need to do that feature guy these air, the little tool tips that will pop up when you're in different menus to let you know more about what's going on, I would leave this turned on as you are learning your camera, but then later on is you learn your camera and you're tired of these things coming up on blocking your view, you probably want to turn it off after a while. All right? We're up to our final page of senate menus, custom functions and buried inside this little one feature here are a whole bunch more features, and we're going to be looking at a bunch even here, the first group deal with exposure and so we have eleven different ones here we have our exposure level increments they could be done in half stop our third stop. I would leave the standard third stops said I esso expansion this is allows you to shoot it twelve thousand eight hundred which is very poor image quality but you don't know you might want it someday this is one that I would adjust and I would turn on next up is thief flash sink speed in the a v mode I wouldn't make any adjustments for the beginning photographer here but you can adjust this if necessary in the aperture value mode what sort of shutter speeds can be chosen as I say, I would leave that standard to start with. All right, the next grouping here deals with the image we have long exposure noise reduction and hi s o noise reduction which are very similar and what's going on here is that when you shoot it lois owes you're going to get a very clean image when you shoot it high I esos you're going to get this noisy or grainy image and there is a built in noise reduction system well truth which will reduce these problems and while it might seem like a good idea to turn this on, this can once again be done in a software program like adobe light room and various other programs and many cases it can be done better in these other programs, so I don't know that I would necessarily turn that on except for special situations where you want to try to fix it in camera highlight tone priorities I think this is one I've mentioned probably four times and said I will tell you about it and now is when I will finally tell you about it in some pictures where you have very bright highlights you will lose information because the pixels are so overexposed if you turn it on for instance here in the doorway on the picture on the right, you can see there's just a bit more detail in the highlights kind of depends on how good your monitor and screen is is to how many highlights you're going to be able to see but there's a bit more information in those highlights, so if you turn on highlight tone priority, you will be able to basically recover some of those highlights more easily. While this might seem like a good idea, everything has a downside to it and the downside to this one is that you can't shoot it. I have so one hundred anymore and I think that's a pretty major ah thing to give up and so it's not something that I would necessarily turn on, but it is a feature that you can access if you need and that's the d plus that will turn on in the viewfinder in the back of the cameras well, all right moving on to custom function number seven auto focus assist beam firing there's a little flashlight that turns on in the front of your camera I personally don't like this I would prefer to either manually focus or do something else to get the camera to focus rather than having this light turn on. Some people like it because it will assist in low light conditions helping your camera focus but it's only good for about ten feet in front of you next up is mere lock up near lock up is a technique that some landscape photographers and product photographers and other photographers working from a tripod use to get the sharpest possible images you see when you're at a critical shutter speed let's say an eighth of a second it's pretty slow there's going to be a little bit of movement when the mere comes up and it hits the camera and it's trying to get out of the way as fast as possible it causes a little bit of vibration and so you'll see in the image here on the left the mere lockup is turned off there's a little bit of blurriness in the image on the right we turned mere lock up on and we have a very very sharp image and so for those of you trying to get critical sharpness on your images when you're on a tripod near lock up is a technique that you can use next up is kind of our fourth group of functions. This is general operations. We can customize the shutter release and the auto exposure locked button, not going to get too much into this, but if you want to customize the camera, you can look at the options in there. We can assign the set button on the back of the camera, which normally doesn't do anything to do something that we wanted to dio once again, this is a personal choice on your part, and then the finally we can control how the lcd is displayed when the power is turned on and which buttons will turn it on. This is again just a little customization that you get to do on your camera, working through the final little things in here, we have copyright information you could actually put your name in your camera and have it attributed to all of your photographs. So when metadata is pulled up, your name as the owner of that image will come up. This part of the metadata we can clear setting. So if you've been going through messing with these cameras setting so you want to get back to the factory defaults, we can clear those settings right here in the camera. Firmware firm where is the software that runs your camera? And from time to time they find that they need to make a little improvement and so they put on new software on the new cameras that they make, and rather than having you send your camera back to japan to have new firmware put into it, they put up the firm where right at their website cannon dot com I think it's under drivers and downloads you will go to that you will look up your camera and you will find out what's the current firmware version you have in your camera. And so here are the current firmware versions for the various models we have out there, and if you don't have the current firm where why you can just simply goto cannons website, download the new firmware onto your computer you then transferred from your computer to your camera via the memory card. You can put your memory card in a card reader or you could plug your camera directly up to a cut your computer. There is more information at cannons website on the exact procedure that you need to do to make this happen, but essentially you would go to the firmware and you would update this new firm where that is on your memory card and you can get the latest features oftentimes they're small little adjustments they're making, but sometimes that they'll add brand new features that they didn't have in previous versions all right, so we're at the very end we've got to my menu and if you found any of the previous men, you things that you would like to have regular access to without diving into the menu trying to find him you can adam to your own menu and what you would do is you would go to register to my menu and you would add those in and I'm going to switch over to the camera here, go into the menu and I'm going to show you exactly how to do this so that a press, the menu button going to go over to my menu and I want to register to my menu and I'm going to go through here and I'm going to find some things that I might want to change on a regular basis. Okay, maybe that auto lightning optimizer isn't something I want to leave on all the time, but I'm going to want to turn it on and off from time to time let's see what else in here might I want to change? How about the auto focus mode? I might want to change that on a regular basis let's see what else about format I want to form at my memory card on a regular basis, so I'm going to choose that one and let's find one more in here yes, I want to change language is all the time that's what I'm going to add in on this one so I'm gonna press the menu and so here's my menu I can now sort through these images on c format is something I'm going to do a lot I'm going to put that at the top of the list, I'm going to take auto focus mode and I'm going to move that up a couple of notches and so what I'm doing here, like image review, if I want to move this down to the bottom, I'm going to press the set button on the back of the camera and I'm going to go down with the cross keys and I'm gonna press set again, so I'm just organizing the format that I can change these out, I'll press the menu button and I can go in aiken delete individual items if I want I can delete all the items, and what I want to do now is I want to display from my menu and I'm going to enable this that way the next time I press the menu button, what happens? It starts at my menu and hear my options that I added in so I can add in one, two, three, four, five, one, two, three, four, five I think I can add in one more six if I wanted to so if I want to go change the language, I'm not going to because I won't be able to find my way back out, but if I wanted to, I could go change it very quickly and easily every time I turn the menu on, I go from my quick menu to my full menu, I'm in my own menu, so I have my favorite features right there, and so that's, why I recommend using my menu to get straight to your favorite teachers and take a not a break here, but I want to take a quest a break for questions here before we go on to our final section. Ok, sounds good a question from ali in that play back many o protect images doesn't allow them to be deleted, but is it from the memory card, or how does this one's from the memory card it's protecting them on the memory card just so that you can't delete them? Right? Okay, and a question from evan one four zero does highlight tone priority work on ly andrzej pegs, or does it work with raw? It only works on j pigs. Ok, great, a very specific question from evan one forty can you set the camera to auto focus from another button in camera settings? Nine I believe you can, so let me so he was talking about custom functions custom function okay, so I'm going to try to switch over here we're going to go to custom functions and he said it was number nine so I'm gonna go straight to that all right? So this is not really obvious, so let me explain this ok up on the top in the yellow it see where it says shudder forward slash a lock button okay, so that indicates to different buttons anything that happens before the forward slash is your shutter release button and what happens after it is thie a lock or the asterix button on the back of the camera? So if we wanted tio, we could go in here and change the way that our shutter release works right now our shutter release auto focus is the camera we can switch it so it doesn't auto focus just the button in the back does and it's this is more of an advanced feature I'm going to recommend that beginning photographers don't change this, but I will let you know that I've changed my camera and I've changed it to this setting here and this is a little awkward because when you go down to press the shutter release the camera won't auto focus you have to press the button in the back of the camera and so you have to be really aware that your camera is customized tow working in this different passion so yes, it can be customized play around once you've gotten used to how the camera works, you may want to play with this so I don't change this the first day out of the out of the gate, I would get used to the camera and then think about how you shoot and whether this works for you. Great question from mg hewitt, can you can you show how folders work used mentioned that if you, you might want to use one for business and one for home, right and so ander folders let's see, I can remember select folder I can create a full there, create a fall there, ok, so we have a folder one a one I have five pictures in here, and so now I have another folder where aiken is that as my new folder, where I'm shooting pictures do so now I'm about autumn business, and I'm shooting pictures that go into that fall there, and when I download or transfer all the images to my computer, I'll have my images and to clean folders, okay, great, thank you. And question from from geek tinker was once the pictures air rated, can't you show a slide show of all those pictures with, say, just the five sorry stars and somebody else had mentioned can you print just those certain rated images well you know what the key to tell you the truth I don't do slide shows and I don't print from the camera so it's not something I regularly d'oh but let's see if we go into slide shows all images can we hit for more information here set up time I don't see an option for selecting starred images in here for printing purposes while I've never gone in here no I've got in here just to see what's in here but you can print by folder this camera makes up for a very poor computer okay for organizing and rating your images you can rate them and that goes with the metadata that gets downloaded so you don't have to do it later but you're not going to be able to do too much else with it question from fasted I seven how do you get the life boats screen to stay on without shutting off in about thirty seconds that would be in the life of you mode and so this would be the media ring time or down here we can set this to one minute ten minutes or thirty minutes so that it stays on longer do you know if the folders r rating is new for the teeth drivers is the tedious it's a brand new feature I reckon that was photo march who has the t t y uh feeling I can't find it okay, a question from m chang oh one can john explain the low level formatting and the audio settings a g c automatic gain control? Okay, let's, if we could go to the video first cause that's more difficult to answer let's, get this into the menu takes just a moment to foot over there we go. Okay, so at a question about audio sound recording. Ok, so it has a fairly well that's my voice uh I'm animated by very simple things. We can change this to manual or disable if we want to. And then if you if you're in manual, you can adjust how sense of it sensitive it is when you add gain your kind of adding sensitivity to it, it sometimes can result in lower sound quality, but sometimes you have to do it to make it work. There's also a wind filter on in here? Not sure exactly how good it isthe, but it's going to hopefully filter out some of the wind noise is going to cut back on the sensitivity of the censor. This is really disturbing looking at my might at my voice visually I'm really loud okay just had to try that. All right, so the second part of the question was thief formatting and so this is kind of a cool new feature on this camera I don't know how geeky am I that this is cool this is a sad point in my life where this is a cool thing ok so with format you have an extra low level format when you form at the card I told you that you're getting rid of all your images folders, directories calls folders and all of that technically that was a lie or maybe it was just simply misleading it gets rid of most all of it if you do the low level for meant it gets rid of all of it and so that's kind of really scrubbing the card clean of everything that's possibly on it it's not really necessary for most types of formatting but if there is an issue with communication between the card and the camera you might try a low level format and do not hope for ever resurrecting any images from the memory card at that point oftentimes after formatting in one of the little secrets I'll let people in on a little secret if you ever go to like a concert and you take pictures and the security guard catches you and says you have to delete those pictures and they say reform at your memory card to say ok reform at the memory card and then go get some rescue software to rescue all your images off your memory card and so that works with the concert police or the real police as well and but you don't want to do a low level format, and so hopefully, you know, there's, no police officers watching the low level format, because then they're going to institute a low level format for any photographers that need to delete images. But so that's, are you telling us this from experience, john, I have no love. Okay, uh, question from ali, what is the recommended movie recording size recommended recording size? Well, if I was recording video on this, which I would do from time to time, I would want to record in the highest quality mode that I could get, and so is my camera slowly flips over here to the menu mode as it comes up on screen and just ever so quickly here. Recording size nineteen twenty by ten eighty is what we call full hd. Some cameras were record at a smaller dimension, which would be considered, maybe hd, if I wanted to record for youtube, and I wanted to have a video just ready to go without any re sizing, I might recorded in six forty at thirty frames a second if I was going to film school, and I like the look of hollywood films because there is a difference between video and hollywood films, and it seems counter intuitive, but hollywood films is their shot at twenty four frames per second video standard everyday tv has shot at thirty frames a second and that's why when you see live tv there's something just very crystal clear and real about it right there and there's just a different look to the movies and part of that is twenty four frames per second and so if you're going to film school and you want something to look at that film look, you can try it at twenty four frames a second question from rye a shell is what is filed numbering exactly file numbering well that your camera has a rather awkward system for filing uh it's pictures it has a ten thousand number counter that it uses some you see if I can find this here I think it's where's filed numbering there it is and it goes up to ten thousand and then it goes back down to zero and starts over again and you shoot twenty thousand images. You're going to have two of every image. Basically you're going to have double file names and that's a bit of a problem and which is why you want to re net rename or re number your pictures once you get him into a software program, continuous is a good default system because it only happens everyone's every ten thousand pictures you could have it automatically reset to picture number one every time you reformat the memory card and so if you reform at on a regular basis, you're going to end up with a lot of pictures. Number zero zero zero one you can also we manually reset it at any given time that you want for most people, I would leave it in continuous and re number. Your image is once you get him into your computer, thank you, and the question from rhea shell is so if you just delete a picture on the camera, there is a way to recover it. There is, you will need to get recovery software. You'll need to load the memory card on your computer. I know that lexar in sandisk, which are two of the major card manufacturers, have their own different types of systems for recovering data. I know the local camera shop down the street for ah, small service fees. We will take a card in and run a number of programs through it to recover data from the software as well. I had a situation where I use the software, and I was not able to recover the data. But I sent the card backto lexar, and they sent me back a dvd with all my images and a new memory card, because something had gone corrupt on that memory card and that's, one of the advantages of buying a name brand memory card like lex rr sandisk is that they have a little bit better customer service than some of the no name brands, and so I was able to get all my images and a brand new card out of it cool vidin wanted to clarify if you recover the image while the quality still be good is it make that file in general? It will be good, but sometimes if something happens to the camera, maybe it gets dropped in a fall and something gets damaged on it. In the writing process, you may get part of the picture back, but generally you either get the full picture back or you get nothing at all. This question was from hadiya a little a little bit back does quick mode being we can take two pictures one after the order other quickly no quick mode just has to do with the focusing great and clay in austin as asking about fireworks and night time lapse photography. Well, this camera doesn't have any time lapse built into it that would require some sort of external device which can it doesn't have anything specific for this camera and as far as shooting fireworks, photography well, we just had a fireworks workshop here not too long ago and I believe that's like a free download and so I'm not going to touch that when it was already done and done well, you know, I think you can what you can watch it for free on I would say I will give you this tip uh tripod helps and manual exposure helps and another question from ali for video what is the best mode to use live face live or quick mode? Well, we kind of went through all three of those and they all have their pitfalls and advantages I think for shooting video I personally like to use manual all manual focus before the shot is taken. If I do use the auto focus mode, I will typically use the live mode just cause I can see it working I like the speed of the quick mode, but I can't see what it's focusing on when it's doing it and so live mode is my automatic backup, but I I tend to go with manual just because auto focus is slow so slow on these cameras when you're in the video mt and from deb see ray why? When in live you is there quite a lag before the shutter fires that's another one of the disadvantages of what's going on on the camera? When you do have it in the live mode and you're taking still pictures, it is a very slow process and it's not good for any sort of action photography s o I wouldn't use live mode for general picture taking it works okay for some situations. I use it aa lot for landscape photography, but I will never, ever use it for portrait photography or sports photography. It's, just what's going on is that the mirrors in the opposition and the shutter is open. What has to happen is the mere needs to come down. The shutter needs to close than the mere needs to come up, and then the shelter needs to open. And so there's, a lot of little mechanical things going on in the camera. When you do this, they're not designed to be shot in the live mode. It works for some things, though.
Class Materials
bonus material with purchase
Ratings and Reviews
TOnya
This was such an awesome class. It's nice to finally be able to figure out my camera. John is such an awesome instructor. I love his classes. I like watching the videos but also need to read the transcripts so I can take notes. It can be a little bit challenging but also very funny at some of the words that the transcription (software?) thinks they are saying. I really get a kick out of it. I have taken John's Fundamentals of Photography and have had so many aha moments in both classes. Its just so nice when everything clicks. John's way of teaching is so down to earth and just easy to absorb the information. Now I'm off to see what I want to do next. Thanks so much for such an awesome class!
Scott Jackson
It's almost embarrassing to admit. I've had my T3 Canon for over 5 years, and am just now trying to really learn what all it can do. Up to now, The best I could get in photos, unless I got lucky, was pretty much equivalent to the old 110 pocket cameras. While the T3 is an older model comparatively speaking, especially in the current electronics age, it's still a very good intermediate camera in my view. John as much said this in this course, which made me feel better. I didn't know if it was me, or the camera. Obviously it was me on the poor quality photos. John is so in depth, and speaks well to simple minds like myself. I could understand exactly what he was saying. Everything makes sense now. As John said, the manuals that come with these cameras are a bit over whelming, and just so much to try and read. I learn better with visuals and audio much better. John excels at doing just that. If you have a camera that has so much on it, and you're totally confused like I was, I HIGHLY recommend this course. You'll be glad you did. In just a few hours, I knew more about my camera, and the basics of just about any camera of this type. I was amazed.
Paul Spears
I'm a beginner , I'm so glad I took this class. I always come back and re watch it trying to get theses things engrained in my little pea brain. LOL I like this system I can rewatch it when I want or need a refresher. I tried other sites but I like this one the best. If you need help with the T3i or any other Camera they have it all here. I'm now taking the fundamentals of photography. It a lot more in depth but they explain it very well.
Student Work
Related Classes
Camera Guides