Lessons
Lesson Info
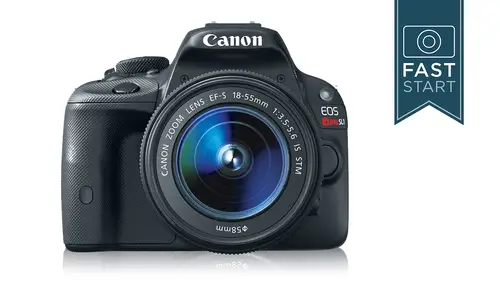
Buttons: Sides, Front, Bottom
Next up is the left side of the camera and over here probably the one of the more important buttons is the flash button up there on the top part of the side there and so that's going toe pop up the flash on the camera and let's talk about flash for a moment so with flash pictures first and most important thing to know about flash is that flash especially the built in flash is on ly good for a very limited distance in front of the camera and so it's going to illuminate the penguins let's say right there in front of you that are ten or maybe at the most fifteen feet away but it's going to do nothing to the mountains that are far off in the distance it's on ly good for things that are directly there in front of you probably the best use of the flash which is not a great place to have a flash but it's the most convenient place on a camera is when taking people pictures and so in this case on the left in this example you can see I did not have flash or it can add a little bit of phil flash ...
we call it fill flash because we're filling in the shadows with more light and so this is a great technique to use when doing people photography if you're photographing a person reasonably close in front of you then it's a good time if the person is pretty far away like twenty or thirty feet it's probably not going to look too good you want to be right in front can also be very handy when you wouldn't expect it for instance, on a bright sunny day you get a lot of contrast with the shadows you can use the flash to really fill in the shadows and see what's what's there. This is going to be very helpful if somebody's wearing a hat and their eyes are in the shadows, for instance and the built in flash is very handy to use and only have to do is just press that button it'll automatically pop up in the scene modes in the a plus seen intelligent mode the super super modes the flash will do it the popping up and firing on its own if you're in the program time value aperture value or manual modes it's at your discretion as to whether you want to use the flash if the flashes up it is going to fire. If you do not want the flash, you could just gently push it back down and close it that's how you turn it on and off now if you want to shoot pictures of subjects that air further away or you want to have more versatility with flashes, here are some of the optional cannon flashes that you can get excuse me, I don't recommend the ninety e x because that is basically doing exactly what the built in flash is doing and so that is designed more for cameras that don't have flashes and so there's not much advantage there the two seventy e x is going to be a little bit more powerful, but I don't know that it's really worth the money it's around a little under two hundred bucks in price the one that there's two of them that I would mainly recommend looking at with this camera the first one would be the three twenty e x. The advantage with this one is it gives you the ability to bounce the light off of a low white ceiling. This is going potentially give you much better lighting control. It is more powerful, quite a bit more powerful than the cameras built in flash. It also has a round video light on it that you can see that's just below the main light and this is going to be a constant light that is on all the time for when you are shooting video now it's not very powerful so it's not going to illuminate a big room in fact it's only going to illuminate maybe a person's face who is right there in front of you, but it is potentially a good option for somebody who shoots a lot of video and still work the other flash that I would recommend is the four thirty e x two this is going to be even more powerful. It could be a little bit more versatile because you can spin this light around and bounce it in mohr different ways than even the three twenty and so it's probably the main light that I would want if I wanted an additional flash unit with this camera, you're probably not going to need it, but cannon has their top of the line six hundred flash, which sells for pretty close to six hundred bucks. The four thirty flash is going to be around the three hundred dollars price range. The three twenty e x is going to be a little over two hundred dollars in price with any of these. If you want to get better quality light the off camera shoot cord the e three is a way for you to get the flash off the camera about a foot to three feet away, so you're just hand holding it or perhaps it's on a flash bracket, and the camera and the flash maintain complete communication back and forth flashes one of most complicated areas of photography and there's, a lot of communication that's going on between how much power goes out of the flash. How much light is getting to the sensor and what the camera sees and so there's a lot of great automation that is being done for you and we're not going to be getting into it in this class now back on the camera some just points to know about flash first off is the top shutter speed when using flashes one two hundredth of a second you don't need to concern yourself with this too much because the camera will automatically keep you in the correct range you can't physically set a higher shutter speed, but if you try to set a higher center speed it won't allow it the range on the flash depends a little bit on the so setting and the lens and the aperture you have set on that lands on the camera but in real general terms it's only going to be good for about three and a half meters or twelve feet. There is a feature that you can turn on or off called red eye reduction and I do not like red eye but I do not like red eye reduction on the way that this camera handle said it's a little disturbing and I'm going to show you how to turn that on or off on exactly how that works a little bit later on and then there is something else called flash exposure compensation if you remember the photographs of the waterfall that we made leiter and darker than average, you can also do that with flash by powering the flash up a little bit more or powering it down, and normally the camera tries to figure out the best flash power for any given such a situation and usually it's pretty close to the mark, but sometimes it's a little overpowered, and you want to tone it down just a little bit, and so that's going to be a neat option that I'm going to show you how to adjust here in just a moment. But those are just some good background information's on how to work the flash. Next up is a feature that was traditionally on lee on professional and cameras it's called depth of field preview, and what it does is it stops the lens down to the working aperture. Normally, when you're viewing through the camera, the aperture and the lens is wide open to give you the brightest, clearest, easiest to sea view, and what happens when you press down on this button is it stops the aperture down. Well, let me show you in this little part of the keynote here, so we're going to press down on the button and you'll see on the left side of the screen how it stops are aperture down. You know I'm going back back this up and I'll do it one more time, so we'll press down on the button and notice on the right side of the screen how we shows us more depth of field so normally we're looking through it very shallow depth of field, but if you want to get a preview of what the final picture is going to look like as far as depth of field, you can press this button now it is a bit challenging to use in some environments because because when you stop the lens down it does make everything darker, but it is just simply a preview of the depth of field, not the exposure and while this was a top of the line professional feature on many cameras it's not such a big deal these days because if I want to see depth of field in many cases I will simply just shoot a picture, play the image back and look at it and then zoom in on the image to see how sharp it is. And so it's a tool that I would say many people who own this camera will never use but it's unlabeled and that's what it does so we had to talk about it over on the left side of the camera is a little rubber door that opens up and allows us to plug a bunch of other accessories into the camera at the very top, we have a mic input with a standard three point five inch, many jack on it. So if you want to hook up a stereo microphone, if you do a lot of video recording, I highly recommend getting a stereo microphone that you could add on, you can plug it right into the hot to the camera makes a real simple little video rig, and you're going to improve your videos by having better quality sound. Next up is a remote and the remote that this that works with this is the cannon rs sixty e three, and this would be a very good tool the have if you like to use your camera on a tripod at slow shutter speeds. This will make sure that you're not touching the camera and vibrating the camera when it's actually shooting pictures. And so this is going to very popular with landscape photographers, architecture, macro photography, still lifes anything like that where you don't want to vibrate the camera? This is a way to keep that perfectly still. Next up is your basic input output for the camera, and if you did want to download directly from your camera to your computer, this is thie cable that you would connect up or where you would connect it up, too, on the camera, I don't recommend that for downloading your images, I have a little better system I'll show you in just a moment but that's the system and then I was right there and then finally if you want to look your camera up to a hd tv you can send a video signal out of the camera to a tv you could do this either to do a slide show with still images or initial video you recorded on the camera itself and that is the left side of the camera can we take a couple of questions before continuing on to the next section? Absolutely okay great sam cox from colorado of course long time viewer here at creative live asked regarding the touch screen is the glass pretty robust for example is unlikely to be scratched or would you recommend a protective cover for the screen or with that interfere with the use of the touch screen? All right, so good question I would not recommend a cover because it would interfere with the touch screens surface of it and it wouldn't be sensitive to your fingers that if you never wanted to use the touch screen but you didn't want to scratch it that would be an option for you I imagine that a lot of people are gonna want it use the touch screen at some time on it and it is a fairly robust glass I haven't taken my keys or my knife to it as a test on I don't plan to either but it does seem to be reasonably scratch resistant, okay, so if somebody was wearing eyeglasses, for example, it would probably be okay if they held the camera up to their face. Well, if you'll notice all may turn the camera around here, it actually has a rubber I cover that sticks out fairly noticeably from where this is, and so I don't think that's going to be a major problem. Perfect. All right? And then quick question about the built in flash, since we just cover that as well does or can the built in flash be of any help and focusing and dark scenes? Yes, and that is another sore point with me, things that drive me not so on. And so things that happens on this camera is that under low lighting conditions, the camera will fire a burst of flashes in order to focus. And if you happen to be a private investigator sitting in a car out on the street that's, the last thing you want is being this little strobe light going off that you're trying to shoot pictures and so you'll need to make a decision. And so you can think about this for the next few minutes well, until we get there in the menu setting is, do I want my camera to send out a whole series of lights? In order for me to focus because there are other choices and I found that most of the time if you know about the focusing points and the cross sense there on the horizontal and vertical sensors, you know exactly where to focus the camera under very little light because the camera will focus on its own without any help at all under very low light conditions without that burst of light coming out of the camera I tend to like it turned off, and the other thing is is that the lights really only good for about eight feet or a couple meters in front of you and so it's not very helpful it's often distracting and you'll get to make a choice when we get to the menu setting good points for photographers who are shooting and stealth mode trying to be stealthy let's see last question before continuing on vinny from hawaii asked using the hd am I output? Can you pass a live hd signal from the camera to a monitor? Are there any overlays in that signal such as metering motive? Petra you know I have set up I don't know on this one we stumped john green now I'm pretty sure you can't send out a live signal I think it's only the playback and so I'm pretty sure about this, but I haven't tried it myself yet so like you can't get you can't record a live feed out of it and think it's just in play back okay, great! That answer is the on topic conversations for this times we can continue on okay, so we're now under the front of the camera and right there at the top either red dot is your lens mount index and will be a red dot on the land so that's the two you want to match up when you are taking the lens on and off camera let me do that right here for you because some of you may be new to interchangeable lens cameras and so you can see the red dot on the camera you can see the red dot on the lens you'll simply match it up and turn it on until it clicks and then you know you have done it correctly now this camera also has a white square on it for e f s lenses and this s stands for short back focus and it has to do with the lenses that especially designed for these smaller sensor that is in this camera and so you can use both of these type of lenses and we're going to address lenses in a few minutes and you can assess I say you can use both types of lenses on this camera and so feel free to use any of the canon eos lenses on this camera there is a read our light over on the top side of the camera, so when you d'oh, use the self timer, it'll glow and let you know when the picture is going to be taken. We have our lens release knob or button here, so you would press that and then turn the lens about a quarter turn to remove it from the camera. Inside the len's mount area, you'll see the cpu contacts, and this is just the way the camera communicates with the connection on the lens and how it focuses and sets the aperture and so forth. Over in the grip of the camera is a little tiny window here, and this is the remote control sensor. If you were to purchase the cannon r c six, which is about a twenty dollars wireless remote, which enables you to fire the camera from a distance, so if you have a very complicated self timer shot, you would simply take his much time as you want, at least for the most part, and point the sensor at the camera and take the picture whenever you wanted, so that you could have much more time than the normal ten second delay that most people use in the self timer mode. Well, let's, move around to the bottom side of the camera. Obviously, this is where you're gonna put the battery and in the battery compartment, it takes the l p e twelve battery, which sells for around fifty bucks, and the camera does come with a battery charger that's, a very convenient small travel charger that just plugs straight into the wall, the l c twelve and this is also where the memory card goes as well, so the memory card is going to go right next to the battery in the camera, and it takes s d, s, d, h, c or s d x e cards. They're all sd cards, which is secure data cards. They're just different capacities of cards, so how much memory you can get on the cards? Something to know about the memory cards themselves is that there is a little switch on the side of the card, and if it is in the downward position, it is locked, and that means you can't shoot pictures with it. You can't delete pictures with it, you can hardly do anything with the card you khun offload the pictures and that's about it. So you generally want to have the switch in the upward position for normal use, but if you did want to lock it in, you could lock it in now, the cards, they're going to obviously have different sizes, and they're gonna have different speeds on the card, too. And for this camera, it's not what I would call a high performance camera, and it doesn't really need the premium gasoline, you might say, and so pretty much any of the cards will work fine on it. But for those who shoot, video video is very intensive on a card because it's recording and streaming that information constantly to the card while it's trying to record it. And so you do want to look at the card classifications, and what you want to have is a car that is class six or higher, so inside the little circle is a six, eight or ten and then there's a new level of cards called you a chess, and those will be a class one or class to class two is faster. We haven't really seen those cards out on the market yet, but a class one card is very, very fast here and so it's a little confusing how they six, eight, ten or one, and sometimes you'll see both of them on a card. And so just kind of make sure that you got the right card for what you're doing there's not a lot of ways that you can go wrong in the camera and uh for our live camera just want to show you a little trick or a little something about taking the battery in and out of the camera and take my tripod off here so for removing the battery let me get the camera like this there's a flip for the battery coming in and out and on the memory cards you just press in and it springs out a little bit so that you put it back in I was reading an instruction manual I know this sounds horrible but I have to read these things and in one of the instruction manuals they said be careful when ejecting the cards so that it does not hit you in the face and that must have a pretty strong spring in there if that's going to hit you and so that's the way that you get the memory card out there is a little diagram let me turn that around a little bit there's a little diagram on here on how you were supposed to put the card in and so you just simply match it up so that it's springs in and that's incorrect so we'll put it in the correct way like that and then there are little contacts on the battery for viewing let's see the contacts go on the outside so I got to put it in like that and then close it and you're set john you said you read the manual I read them I find that hard to believe. I thought you wrote the manual. I would like to rewrite the good and that's what? This class tonight I was gonna say what kind of what you're doing right here classes the rewriting of the manual in it. I like here for all right? So one of the options that you have on the camera is that if you have forgotten to put a memory card in the camera, what would you like to have happen? You want to be able to take pictures? You can I mean, you could fire the shutter, but you're not really keeping pictures. You could take him, but you can't keep him. And so one of the things we can do is we can lock the camera down so that if there's no memory card in the camera and we press the shutter release button, nothing happens. And so that will prevent us from taking pictures without film in the camera and I'll show you how to do that in the menu setting after our break all right on the bottom we also have our serial number you can mark that down for your insurance purposes it has these standard quarter twenty tripod socket, so any sort of tripod accessory you can probably put on their aa minor little gripe that I have about this cameras you just saw here is I had to take the tripod or the camera off the tripod in order access to get into the memory card in battery door and so there's a lot of tripods and so forth that if you're working from and you need to change batteries or memory cards, you're going to need to remove it from the tripod, do that and then put it back on. Now, I said, I would tell you a better way of downloading your images, and rather than hooking your camera up to your computer, the problem with that system is that it is very slow it's, terribly slow in many cases, so if you're somebody that has one of the new computers that has a card slot for the sd card, it is much faster to pull the card out of the camera and plug it right into the computer it's a little bit simpler and the camera can be off shooting pictures someplace else and you can just be downloading that card that's the best way to do it? If you don't have that, I would recommend one of these card readers there's a number of manufacturers that make good ones they'll sell anywhere from ten dollars to forty dollars, depending on how many different types of cards and how fast they are. But if you're going to be downloading pictures on a regular basis, these are the two best ways of getting the images from the memory card into your computer.
Class Materials
bonus material with purchase
Ratings and Reviews
Jennifer
It's a great class for people that have a long attention span, tons of time and understand greek. I wish I'd bought a plain point and shoot camera as I apparently don't understand camera speak. I'm a get right down to it kind of person. It is a great class, it's just not for me because I don't understand any of it.
Drew Kovach
John is a great teacher and I learned so much more by taking the course as opposed to reading parts and pieces of the owner's manual. Thanks for teaching me about my camera.
Julia Ensign
Learned so much from this class and the photography beginners kit, now on to fundamentals! Can't wait!
Student Work
Related Classes
Camera Guides