Using Photo Mechanic to Cull
Lesson 7 from: Capture and Create Artistic Wedding PortraitsCaroline Tran
Using Photo Mechanic to Cull
Lesson 7 from: Capture and Create Artistic Wedding PortraitsCaroline Tran
Lessons
Class Introduction
03:15 2Why Care About the Film Look?
03:48 3What is the Film Look?
03:59 4Tips to Achieve the Look of Film with Digital
19:22 5Live Shoot: Bridal Portraits
47:44 6Introduction to Editing for the Film Look
07:42 7Using Photo Mechanic to Cull
10:02 8Live Edit: How I Get the Film Look
38:30Lesson Info
Using Photo Mechanic to Cull
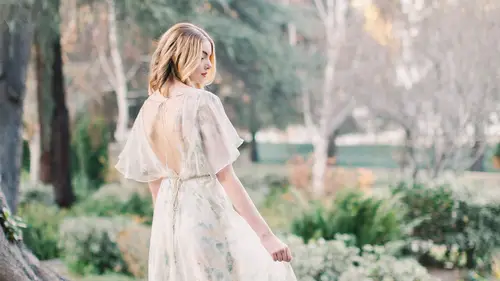
So this is Photo Mechanic. So the first step that I do is I import all the images onto whether it's your hard drive, your desktop, some remote server, whatever your work flow involves. This one is on my hard drive, my desktop right now. So I am going to open up this folder which will have all. Okay. So as you can see, this is everything we shot. You can see how quickly everything was loaded. Right? We don't have to wait for it to render any kind of previews or anything like that. So, I just quickly go through it. Ctrl + 1 will give it a one star. This one you're able to embed all the metadata, tag, and anything you want without having to wait for all that processes that typically rule would require. So, what I'm looking for when I call is good composition, something that if it's not perfect but I know that I can, like, you know, whether it's like minor adjustments. So what I'm mostly going for is do I like her expression? Do I like the composition? I might be wrong on this one, turning...
her away from the light. But we'll see when the editing happens how that goes. Because yeah. I saw in the camera when I shot. I was like, "Oh it's not what I was predicting." But, I think it would be worth to see what happens when we pull it into post into Lightroom and see. So this is like a really loose call. I'm not choosing this because I don't like how much, like this might work for Instagram if you crop it into a square because then you'll lose all that top part. But, I feel like we probably have something kind of equivalent. I don't have to put that much effort into the post process. So I'm just going to run through these. You'll get to see, see I don't like her expressions in these ones, right? Sometimes with the motion, okay I like that one. I like, and her dress is moving. So I like that. That one, it's a little blurry but I still love the motion in it. Again, ideally, I should have been further back so I don't chop off her feet. Like that I hate. But I'll see in post if either maybe I'll crop in a little bit more because remember either it's in or it's out. Make a choice. Right? So I don't like that this is half in and half out. But I will keep it because it's worth trying and see. She looks happy there. Typically for my own workflow, to be honest, I don't do this myself. I have my assistant do this. The reason is two fold. One, I don't like being in front of a computer. (laughing) Two, I think I'm sometimes too emotionally attached to the images and I don't like it so objectively. So there might be something that, to be honest, it really wasn't that great. But because I knew I spent so much time trying to create that image. I don't know if you guys have ever done that. Where you're trying so hard to make something work. Then you don't want to, you know, kick it out because it kind of worked, you know. Then my assistant will look at it and be like no. (laughs) I figure when I'm going through her edits after and if I'm looking for that image then that means it meant something enough to me that it was worth fishing back for. But if I forgot about it as well, then it's like it wasn't that significant. (laughs) But I think sometimes that emotional disconnect is better for calling. It depends too how heavy of a shooter you are. Right? Some people are like, and have to go through like 20 of the same images, right? For me it's like just look at the eyeball and see which one is actually open. Especially like group shots. If it's like group of 20. I don't want to sit there looking through all 20 eyeballs seeing if every one's open, right? So I feel like that one is, that one will make me fall asleep. So I can't wait to edit these and see. All right. So this one is more in focus than this one. Like, at least the parts I want it to be are in focus. Keeping that one. So you can quickly rotate using command in the bracket. So for these ones, there. I like to rotate it here before putting it into Lightroom. Yeah. This one I wonder how it would look if she.. no, that looks upside down. (laughs) Sometimes I like my subjects upside down but I don't want it, like, if you're looking at it and you want to do this then it's not right. Your viewers shouldn't want to have to twist their heads to view your images. Alright so now I want to try to find one of these that I like. Ooh, I like this one. Rotate that. Okay, I like the other one more than this one because it's more level. Okay, I like this more. I feel like she's more flat. This one is, she's more parallel to the plane in my camera. The slice of bread is flat. I hope you guys like think of me when you see a loaf of bread now. (laughs) I am just going through it really quickly. I want to move onto the editing part of this. So this one I think it's too messy in the background. So I'm glad that I moved it down for this one. I think it cleaned up the back. I always ask myself, "What am I trying to get viewers to look at?" That's what you want to make sure really pops in the images and that everything else just kind of fades away. So sometimes, that's why I say I'm kind of mindful of what things look like when they are blurry. So, you know, the hair. Like if there was texture in it then it can look like hair. But for that one, it was just looking like a straight black line and it looked distracting. If you looked at a quick glance I felt like the hair took more precedence than what was in focus, than what I wanted to be in focus. That's why I think it was a good call to lower it. Sometimes when I call I call backwards. I start at the end and go forward. Sometimes the better images happen at the end of it. Or, I start front down until I lose attention span. Then I go bottom up until they meet halfway. (laughs) Alright. I don't like that part of her eye's showing. Again it's either in or out, right? I'm trying to see what's actually in focus. Let's see. So there's a zoom thing here that you can zoom in and see. Where am I trying to focus? Let's see. So if I recall, it was one of these leaves here. There's quite a bit of little motion blur and I actually really like that. I like that it's not tack sharp. I think that's what makes it look very digital. Once it's processed, you'll see. Like I actually think that would work out really well. Like let's see how these ones look up close. This one's more in focus. Right? But there's still a good amount of blur in it as well. So I love the blur. I embrace the blur. Almost there. Her skin tone is already looking pretty good to me. What do you guys think? So it will be fun to see after running it through Lightroom. When I am done calling like I did just right now, I create an additional folder in here called Edit. Then I sort it by just one star and above. That basically kicks out everything that got no stars. Then I actually move everything into this Edit folder. So there's 83 images. What that does for me later is when I open up in Lightroom, I only open that one folder. I don't have to wait for it to load all the other rejects.
Ratings and Reviews
JennMercille
Caroline Tran is bursting with creative energy and enthusiasm! In this class she walks you through the little differences between film and digital that separate the SOOC of the two. She shows you how understanding what makes them different is the cornerstone to learning how to manipulate digital to mimic film. All you need is a working knowledge of manual mode, and a willingness to let go of go-to DSLR habits that keep your images distinctly digital. She finishes with walking you through the simplest post-production that doesn't even require a strong knowledge of Lightroom. She even sells her presets if you don't want to recreate them on your own. This class was wonderful and so much fun! Thank you Caroline!
Student Work
Related Classes
Portrait Photography