Adjustments & Printing Q & A
Lesson 15 from: Capture and Edit Classic Black & White PortraitsJared Platt
Adjustments & Printing Q & A
Lesson 15 from: Capture and Edit Classic Black & White PortraitsJared Platt
Lesson Info
15. Adjustments & Printing Q & A
Lessons
Class Introduction
03:23 2Set Up Your Black & White Portrait
08:35 3Create & Augment Light
08:31 4Backlight Your Model
08:42 5Light for Contrast
13:09 6Portrait - Male Model
16:17 7Portrait - Female Model
06:30 8Shoot In Black and White Q&A
09:01Lesson Info
Adjustments & Printing Q & A
so any questions about that process now we've gone from shooting the photograph, lighting the photograph all the way through Tethered came to hear. We adjusted the photograph. We did some underlying color adjustments to, as well as some burns and dodges to it, a little bit of retouching. And then we set up a profile and a printer, and then we sent it out to the printer. So any questions on any of that? I've got some questions online, So we had a couple of people ask similar variations of this question. But Deloris just wanted to know to clarify What is the advantage of doing this in light room vs Photo Shop like a lot of this could have been done in photo shop. Why do you prefer light room? I prefer light room cause it's you're already there. It's all raw. It's very simple. And most of the time when you go to photo shop, you're just wasting time going somewhere that has too complicated a tool for the job you have to do when I go to photo shop. I'm doing serious work, but when I'm here,...
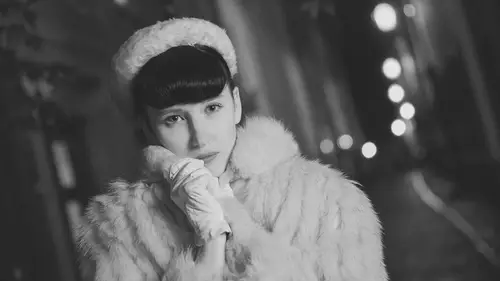
I can do most Portrait's without ever going to light, or 90% of what I do is inside a light room. Maybe 10% goes in tow Photoshopped, but it's for fairly serious things, like teenage acne. It's faster to do and Photoshopped. But, um, adult. It's much faster to do inside of light. Okay? Any other? Yes. So this one comes from Frank and Frank wants to know. Do you ever add any grain to the black and white photos, Especially for portrait, just to give it more texture? Yes. Love, grain, love, grain. In fact, grain is a beautiful way. In fact, he lets go into the develop module really quickly and zoom into. So if I zoom into your face and I see like those little inconsistencies in the skin. So I'm zoomed in really nice and close, and you can see that the skin has some kind of bump to it, right? And that's just natural skin, right? So But if we want to smooth that out, if I go down to the effects panel and I add grain so I just click on this grain, see how those just disappear. So if I and the bigger the size of the grain, the Mawr that stuff will just disappear on you. And be careful cause you don't want the eyes to go soft on you, so you just kind of be careful and play around with it. But look at the difference between that skin. Without grain, you can see the little dots and the divots in the and then if you turn on the grain, it just Smoothes it out. And that's because you're I can't follow a line that's broken. So you're I always follows these lines through photographs, and if something intersects the line, your eye stops and go somewhere else, right? Well, if you have inconsistencies in the skin like you have, let's say you have a patch of something on your skin. Or maybe it's a blemish. All that is is a circular line around that blemish, and if you intersect that line with a bunch of grain, the I doesn't have the ability to follow the circle all the way around, so it doesn't exist because your eye goes on and then it goes off somewhere else, and so your brain just disregards it. So grain is a beautiful way to soften up a photograph and and not have to retouch it before the client chooses. Then, once the client chooses, turn the grain off, go do the retouching, turn the greenback on or leave the green off. But, yeah, it's a beautiful way. I love green. Green is one of my favorite things. Yeah. Is there any way to brush grain? Like you said, Don't get it into the eyes or be careful of the eyes. So is there any way you can brush the grain on the face toe where it doesn't go into the eye? Or is that something that photo shop with layers you can't. You can't do that in light room, but nor would you want Teoh. The reason that you wouldn't want to brush grain is that if you are looking at a photograph and there's grain on the skin and then there's no grain in the eyes, you're gonna be looking at those eyes and like there's something creepy about this photograph, and you'd be like backing off of it. Um, if you wanted to do that, though, you could put grain on one and no grain on the other, opening his layers and photo shop and then a race around But I wouldn't suggest doing it because you would freak people out by the grain. No grain issue. So instead, what I do is if I If I've put grain on something and it's doing this to the eyes instead, what you would do is go into the brush, and instead of trying to brush out the grain, you would brush in contrast and clarity. So you would come in here and say I'm gonna add a little bit of contrast on a bunch of clarity and then I'm just gonna paint in on his eyes so that all the dark parts right there get a little bit darker. And so now when you look back at that, his eye pops out through the grain. You see what I'm saying? So your creepy, you know that you're softening the I by putting grain on it. So then you're just increasing the contrast and the clarity of the eye to push it through the grain. That's how you do that. And then you would still see grain in the eye so it wouldn't be freaky. That would be freaky. So you like three d? Let your freak I like free super freak. All right, Another question out there. One more question on the print process. Frank wants to know. Do you usually get the first print? Correct? Or how many prints does it take to get it just right? When you're doing this process, I never get the first print right? In fact, to that point, there's the first print, and it's a little milky. So I have a setting somewhere in there that's not quite right. And I think that what it is is that I'm using the wrong paper setting in there. And I had this when I tested it last night. I had this issue and then I toggle the setting. And then it was fine and it printed Great. And so I'll show you the print that I made last night. I'm glad that I did this so because it was the same issue so you can see there is the There's the print with the right setting on it, it's much more Ah, contrast. It's got a lot more depth to it. And so, yeah, when you when you set something up originally and we kind of moved really fast here from over there to over here and I Something got set changed. And there was, Ah, there was an update to to the camera raw that had to happen in the interim, and so I think it freaked it out. And so the first print will probably look a little dingy or the wrong color or whatever, and then you'll tweak with it and you'll get a better print out of it. Once you're done so you'll see. You can see if you look at him side by side, you can see that this one's more dingy and this one's stronger and it's just a There's a setting in there. And once I set the setting right, it turns to this. And I think it was just the paper type that I chose. So, but unfortunately I was moving quickly. So anyway, but the first, the first print won't turn out perfectly, and that's why you have the adjustments that you have, especially down there in the print module. At the very bottom. This print adjustment, brighter contrast, that's really useful in tweaking it because it'll never be perfect to your liking right out of the gates, because you probably like brighter or more contrast you're less contrast or something, and so you're gonna want a fuss with it a little bit, but the key is that once you get the print right, make sure you go over here and let's say you create a profile. Are ah preset over here? And then you're like, OK, I want a tweak with it. So set it save, save your template, and then once you tweak with it. So if you're like OK, I think I need more contrast in this, and it needs to be a little brighter. And actually, I need to use this profile instead. Whatever it is, then what you're gonna do is you're gonna go over here and you're gonna right click that same one that you made, you're gonna click on it and you're going toe update the current settings and it saves everything that you just changed over the top of that. So then when you go and you hit print on this now it's gonna use all those new settings, and it's gonna shoot out your printer. You don't even have to look at the printer dialog box again. Once you set it up, then you're rocking and rolling and then then then it's always the same and it's you can. You can almost bank on the fact that it's gonna come out. So when I say the first prints never right, I'm saying the first print. When you set up that paper on that particular printer, right? It's never perfect the first time you got a fuss with it. But once you get it perfect, it's perfect for a long time until you change papers or until you change printers or something like that. So and that's what we've done here is that I don't have this printer at home. I have different Canon printer at home, and so my canon printer home is different. So I had to set it up here, so that's why we have to reset it up.
Ratings and Reviews
rorofot
This course is a good overview and I love the way Jared teaches. But the course mixes basic lightroom handling with intermediate portrait photography and really expensive gear. Which person, that doesn't know the basic importing and editing in lightroom, has three studiolights from profoto with grid or a calibrating system for the inkjet printer?? And be aware, it's only about LR-editing and nothing about photoshop. But over all it's a good overview for beginners - alas not for intermediate users.
TIm Smith
I usually don't write reviews, but thought Jared did a great job presenting the material. Clear, concise and didn't talk excessively fast. Material was well organized and reasons were given for why something was done a certain way. The fill lighting technique was something different and plan on using. The discussion on tones, textures, clothing and background were also helpful when discussing black and white.
Amy Vaughn
I haven't shot much with the intention of turning the photos black and white, but this class piqued my interest in trying it. This class isn't just about how to turn any photograph black and white, but how to think about the photo as you're shooting for black and white. I especially appreciated Jared's explanations about the importance of texture, creating drama and carefully targeting lights.