Lessons
Class Introduction
03:23 2Set Up Your Black & White Portrait
08:35 3Create & Augment Light
08:31 4Backlight Your Model
08:42 5Light for Contrast
13:09 6Portrait - Male Model
16:17 7Portrait - Female Model
06:30 8Shoot In Black and White Q&A
09:01Lesson Info
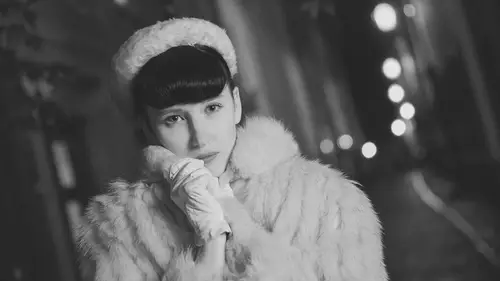
Portrait - Female Model
So just just is an example. We're gonna have time, you come up and I'm gonna take a picture of her. So that so that when we're in the editing phase, you can actually see that process happen because she's got a blue outfit, and then this warm face. So can you come right up here and you got it. Tiptoe. Yeah. And then just get, like, lean in like this. Yeah, like that. Okay, clasp your hands together, and so I'm gonna turn up my soft box. Right, Because I want it to be now softer, but I still want some of that drama. And then I have to turn this modeling light back on because she happens to be shorter than Chris. Here we go. So I'm just going to make sure that it's on her. Plus, that white is gonna be fairly bright, so we may end up having so Chris has dark hair, right? And so it needed a lot of light to kind of sparkle around his hair, but this is bright white. So in order to deal with that Tanya, can you look here and tell me when this is pointing out? You actually gonna lower it just a...
little bit, because you shorter, okay? And tell me when it's pointing at you right there. Okay? And I'm gonna take this down a full stop right from the beginning because I know that it's gonna just beam off of those off of her scarf. Ready? Here we go. Do you have any special considerations for very dark skin when you're shooting for black and white like, is there anything you would consider different about the background or lighting? Um, well, there are considerations to be made if you if you think about dark skin and your meter ring system, you're gonna end up with, um, the wrong meter if you if you think that it's gonna meet with same way or if you think you're t TL on your flash is going to read that skin the same way you gotta learn the difference between a brighter skin tone and a darker skin tone and how your camera and the T t l and the meter on your camera's fooled by that. So most of us are in a kind of a light gray or about a stop brighter than middle gray. But then when you're dealing with, like, a black skin tone, then you're dealing with maybe 2/3 stop darker, then middle gray. Right? So you got to be very careful about that. And just what I do is I just make sure I'm eyeballing the person and making sure that what I'm seeing on my camera and remember, the best way to meet or someone find out if they're actually correctly exposed is to get in. Especially if you have this. You can do it like I was doing it going and crop and just see, Are they falling in the right area of the hissed a gram? But if you're out on location, you can come in and just photograph their skin, doesn't even need to be in focus, take a picture and then see if that pile lands in the right area on the skin tone. And then if I got you and I'm like, OK, that's right. Then I'd come over here and take a picture of him and I would look and there yours should be a pile to the right of middle gray, and his should be a piled just slightly left of middle gray right so and then his should be like, right in the center. So you just get get to know what skin tones look like. And hers might be an extra third or so Stop to the right of yours. So you just kind of get to know those How we doing? We still we're good. Is it busy? Oh, you didn't break the camera. The camera is just intimidated by your beauty, that's all. Ah, uh, and if only I could have shot that here. This is what we're gonna dio. I'm just gonna take these porch. It's without the help of my tethered capture. So I'm gonna go in there and take that shot, and I'm gonna show it to you. So I'm looking at the history, Graham. So let's get the camera in on here. So I'm looking at this in the history, Graham, to make sure that I got the right exposure and that there's nothing blinking up there. So I have my blinking highlights on so that they don't blow out. And I'm looking to see if there's any blinks happening here in the actual scarf and then see that That's perfect. So one stopped down, worked just fine. There's a little tiny, tiny, tiny, tiny bit of blinking right on the edge of her face. Right, And that's it. That's the only place that we have. Blinking is right right there. Okay, which is fine, because it's a small slide amount of blinking, So it's no big deal. And I'm looking at my hissed a gram. Oops. I'm looking at my hissed a gram here and I can see that there's no real clipping. It looks great. And so we're gonna We're gonna use that. So we're just gonna fire away. Ready? Here we go. Looking good. Okay. Now, I want you to just slightly look over to me. There you go. Right there. That's good. Good. Excellent. Okay, serious. That's nice. You could be warm about it. Yeah. I don't want you to look like you want to hurt me. It's the last thing I need is you become hurting me sometime. Okay? Look off this way. Just a little bit. There. Right there. Love it. It's beautiful. Okay, good. So now we can use those. Thank you. Thank you. All right. So we have them in the can, and when we get back, we will actually go into the editing phase. And what we're gonna do is we're gonna take you the process of looking at the photographs, editing the photographs, adjusting them for black and white. And then we're actually and take you into the printing process and will print out some images that we've created and make sure that they look beautiful in the print itself.
Ratings and Reviews
rorofot
This course is a good overview and I love the way Jared teaches. But the course mixes basic lightroom handling with intermediate portrait photography and really expensive gear. Which person, that doesn't know the basic importing and editing in lightroom, has three studiolights from profoto with grid or a calibrating system for the inkjet printer?? And be aware, it's only about LR-editing and nothing about photoshop. But over all it's a good overview for beginners - alas not for intermediate users.
TIm Smith
I usually don't write reviews, but thought Jared did a great job presenting the material. Clear, concise and didn't talk excessively fast. Material was well organized and reasons were given for why something was done a certain way. The fill lighting technique was something different and plan on using. The discussion on tones, textures, clothing and background were also helpful when discussing black and white.
Amy Vaughn
I haven't shot much with the intention of turning the photos black and white, but this class piqued my interest in trying it. This class isn't just about how to turn any photograph black and white, but how to think about the photo as you're shooting for black and white. I especially appreciated Jared's explanations about the importance of texture, creating drama and carefully targeting lights.