Lesson Info
21. Editing Urban Shoot Photographs in Photoshop
Lessons
Day 1
1Introduction
08:01 2Posing Rules
1:14:17 3Clothing Review - Step 2
32:36 4Location - Step 3
12:50 5Mood Management - Step 4
12:06 6Point Lighting - Step 5
11:34 7Technical Settings - Step 6
10:08Composition & Framing - Step 7 & 8
04:29 9Details and Expression/Spirit - Step 9 & 10
29:05 10Urban Shoot Challenges
22:36 11Photograph Critiques from Students and Audience
14:44 12Shoot: Bedroom with Baby Desmond
16:25 13Shoot: Bedroom with Alexis
14:02 14Shoot: Bedroom with Joseph
14:17 15Shoot: Bedroom with Alexis and Mom
13:34 16Introduction To Lessons 17-23
19:07 17IntroductionComposition and Framing
50:19 18Relationship Dynamics
13:49 19Park Shoot Challenges
1:08:19 20Critiques of Students and Photo Contest Submissions
37:31 21Editing Urban Shoot Photographs in Photoshop
24:42 22Shoot: Rooftop with Madeline
39:46 23Shoot: Rooftop with Aiden and Angelina
25:05 24Introduction To Lessons 25-37
08:21 25IntroductionShoot: Rooftop with Destyn and Ursula
21:45 26Shoot: Rooftop with Rowan
23:58 27Shoot: Rooftop with Mom and Baby
17:06 28Shoot: Working with Motion with Destyn
09:02 29Business Scorecard - Part 1
29:04 30Business Scorecard - Part 2
35:31 31Shoot: Living Room with Ari, Eli, Zoe - Part 1
36:24 32Shoot: Living Room - Ari, Eli, Zoe - Part 2
17:54 33Shoot: Living Room with Baby Maria and Mom
18:05 34Photo Contest Top 20
20:58 35Contest Winners
07:06 36Workshop Overview & Photographs from Shoots
14:19 37Q&A with Tamara and Final Thoughts
18:48Day 2
Day 3
Lesson Info
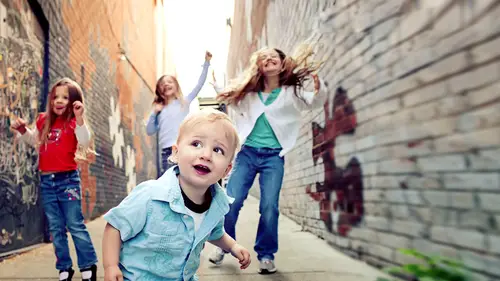
Editing Urban Shoot Photographs in Photoshop
Um, okay. So my goal in this exercise is not to show you something that was so perfectly shot that it never needs any fixing. And I'm such a genius that I could just do. I'm done, because that is not true. Um, earlier, when we did the park shoot, you know, we were joking at lunch about the fact that what I was I was I was initially given from the park. Shoot was an eight minute segment. It was eight minutes where they edit it down to show where I got things, right? And we got great shots. And I said, that's awesome, that makes me look so good, but that's not true. So I asked them to please reset it up, which they were very kind enough to do to get me all forty minutes or whatever it was thirty five minutes of footage s so that I could show you times where I say, come here, no, goodbye, you know, and I could show you. Look, I got that shot, and I just miss what I was going for. I have to reset it up and do it again so I can get it in photo shop, I'm going to do something very similar, I...
wanna pull for you, some of the images were that were almost there and what do I do to get them all the way there? So this beautiful little girl um she was wonderful she's a great little model. When I shot this, I was jumping back and forth and moving. Ideally, what did I tell you about where you want to do your crop points where you want to shoot it? You don't wanna cross with the joints? I'm really closer angle right there aren't I I do not like that. Um what I know is that I shoot wide enough for things like this that if I need to crop in a little bit, I have room to do that and I will so that's one of the first things I see when I look at this image compositionally it's nice that her eyes are in that upper right hand third but it's oh, it's too much of a tilt for me. I need to bring it back. I need to rotate it a little bit more left. That's another thing that I want to fix. Uh, this is raul directly out of camera. If I go into camera and I click um oh, by the way, way to show you this one thing a time if I click auto in my experience with camera raw auto rarely to never give me what I want it really doesn't onda reason why is because it's choosing what is optimal for what they think the shot is? But I think and blows out highlights often in my experience, or it makes things too dark. Does it's picking one point? So what I want to do here is, um, first and foremost, I'm going to bring in the recovery slider, just a hair. I feel like her face is a little bit right. Um, the other thing I noticed is the focal point is kind of here ish. Not here. Ish. The other thing I notice is the focus point is here ish. Not here. Ish and that's a mistake. That was a mistake I made while shooting. Um it was corrected on the next couple shots and I got what I wanted. But if this had been the only shot I've gotten, um, then I need to figure out what I want to do to fix it, which I will d'oh. Uh, so, in general, one of things I can do just generally speaking too quickly fix the issue is bring up the clarity and make it a little bit sharper. Um, that's gonna fix my one spot, but then it's going over sharpen the other areas that are fine and that are in focus um, but I can more quickly and easily clean that up later. Um, for the images, for the purposes and everything I'm doing here is for the purposes of how to quickly added a shot to show your client. If I were to show you a print finish at it, that would take so much time you'd be falling asleep, and you'd be asking me to stop the way I do it. So what I will take is probably something like no more than two minutes per image. Maybe not even that ninety seconds per image to hand it over to a client because I'm trying to shoot as cleanly as possible. And I very quickly changed little edit points as I go. But when they say okay, that's wonderful. I want that image printed. Then I go down and I dissect the image and I really do go in into every part of the image and I check everything I zoom in, zoom out a check. Focus points check contrast check highlights. I checked chroma pop areas on dh, so I checked all that. Did you mean by so I mean, like a fuchsia or a neon green or something? The chroma color pops somebody tell that that's the right term that's what I say all the time, pardon clamming out of gamut out of gamut when it goes out of the cul arrears astounds medical your sounds bad like a design term I think you're probably correct, but is it clamping? Uh, clipping you can clip or clamp the white shirt dark I've never heard it referred is clamping. I love learning on the show that's what great alive is great for relieving everybody learns so maybe maybe yeah, let's see which one of them are right. I know it wasn't me. I called chroma pop. I want to avoid chroma pot. Um and it's. So funny, because I never question that the studio, my studio manager sarah, all the time she just hears me say, crowbar pop all the time and just like that must be what it's called it's not, uh so that pop up the clarity a little bit. I heard the ever go into vibrance here. This is that there's a lot that you could do with this. I actually don't like I feel like I try to shoot with some vibrancy and mine and then I want to clean that up when I'm in my photoshopped directly. Um, so I hardly ever play with the vibrance tool. Um, are you guys all familiar with camera raw settings you want me to do you do a quick overview of those two second interview okay, so uh right at the top you have your white balance you could be as you shot it I tend by the way to shoot with a little bit of a cooler tone and I shoot in a more neutral palette so what I want I'm shooting with the expectation that I will be photoshopping these images um if I were shooting with the expectation of handing them right at the camera too like a newspaper then I would want a little bit more pop and saturation and tone in my images and I would probably want to make sure that they were a little bit warmer but I actually like my image is just a hint cooler so that I could do things like that unless it's like a very vibrant warm scene and then I know that that's what I want to shoot it but in an urban setting I tend to go more cool because it fits the landscape it fits the field so um obviously I can go auto and it's gonna warm it up right away but that's not actually what I'm going for I want to start here the cooler thing and then bring in the shift as I go um I do tend to tend to pop up oh sorry so there's temperature and then there's tint obviously this is the temperature in terms of um your surroundings and what you're bringing into you make it warmer, you make it cooler. The tent, of course. This is the portrait photographer uses photo shopped for her own studio work lesson plan. Um, tense would obviously change the other tones in terms of greens and magenta exposure. This one I used all the time, so exposure is something there you can get into reading the history ram. And it gives you alerts and you get the little triangle that says, you underexposed, overexposed. All I really care about is that I want everything to be in range, so if I want to bring it down just a little bit, or bring it up just a little bit, I'll do that. I I really do that a lot unless I told the blue shot in which case but I totally blew a shot. I just shoot it again instead of trying try to force a fix. Recovery is helps me for highlights. If you see when you go really up on recover, you lose detail, use vibrancy in the face. I'm really careful with the with the recovery tool not to overdo it because I've had images that come out very flat, very boring because you overdo recovery tool, so I use that sparingly, um, feel like this is the digital version of what I try to do on the shoot this is what I want to do on the shoot, which is obviously to bring in phil, um, I only use this if I didn't get the right amount of phil that I wanted, um, you can pop that up a little bit. So again, I do like the blacks that basically this deepens the blacks in the shot. I think this adds a lot of contrast a lot of pop I love playing with the blacks um and then, um and then brightness it'll automatically bright it for you. I kind of tone that down a little bit brightness has come a long way and finish out the brightness tool used to be the one I say don't ever, ever touch, but it's been improved a lot in ongoing it orations of the software clarity, of course, will sharpen the whole thing and vibrant I stay away from entirely, which is popping out those saturation and colors saturation, then you know, I think he could go into crazy places with saturation. I don't like to do it in here if I have to do a little bit of it in a photo shop, I'll do there so that's just how I do it that's, how I like to do it that's all I'm telling you, I'm not saying this is the overall adobe photoshopped, sanctioned method of teaching that's just what I tend to do. Um, so then I'll open the image into photo shop, it'll take off those, um and then right away, what I saw in the beginning were two issues my crop point at near the joint of the ankle it's too close for me. I'm not comfortable with that. I want I want change that crop and the second thing I see is the tilt it's a little extra tilt in the biggest thing I want you guys to go away with when you're thinking about being out photographing is you don't have to be perfect on a chute you want to be engaging, you want to you want to engage the child you want to shoot as well as possible you want to run through this ten steps so everything's in his good a place as possible, but if you're not shooting it perfectly, have enough skills and photoshopped to make sure that you're delivering something that's in line with your standards that you wanted to do when you shot. I wouldn't do this on every single image because they will drive you mad and you will go out of business because all you're doing is editing, but just know you have that at your fingertips, then you don't have to be perfect on a shoot I've never, ever had a perfect shape. Um image image rotation I'm going to go into an arbitrary and I'm no look at this and just this tells me I probably want to go about three degrees counterclockwise um that's just from site I want to bring her up just a little bit more I still want to run a tilt, but I felt like she was two tilted um this one obviously already automatically affect my crop points and so I will crop that is mid ankle right there, so I will bring it in and then I have something like that so you do see just the quick difference she's a little straightens not it's, not crazy she's still tilted, but we have her eyes right where you look and I don't have to worry about that terrible crop right at the joint anymore um and her head's nearly at the frame, but again, she's right in that point that I wanted to be, um the next thing I'll do is I'll go into image adjustment curves and I just pop up the overall toning you could do a million things with curves. The one thing I love about curve the curves told today is all these preset I used to go in and plot all these little pinpoints to be able to create more contrast and boost this and that, but if you're not familiar with your presets incurs there's a lot of power on there and it's quickly at your fingertips and it's a click versus going in and trying to master curves the most commonly used curves functions are now in your presets so I think a lot of you ignore that part and you shouldn't because you can save a lot of time by doing this and then what you confined is you can start with a pre set that looks pretty good tweak the curves tool to make it more like what you like and then save it as a custom preset so you kind of have your favorite custom presets at all times um this could get me a super strong contrast this would give me a funky I'm in an x ray machine this gives me a medium contrast if you're not familiar with these you haven't tienen here to dio and you noticed right now when they have increased contrast versus medium contrast mediums closer to what I want increase contrast is boom it's like a powerhouse um and then of course you can darkened and image this way with a lot of control leave a lot of power in the curves tool on dh you can cross process a shop which I never do and then of course you can now be an alien in an x ray machine uh so what I actually really like is the medium contrast I used that fairly frequently to boost contrast versus going into image adjustments contrast because I find that some of the tools up here the image adjustments with brightness and contrast levels and exposure there's a lot in there but you could do nearly all of the same things that the curves tool with more powerful powerful and when I say powerful I mean it's more quality it's like a more quality job so it's kind of you to go you khun brighton an image in forty eight million different ways in photo shop curves is one of them so is levels but if I go into a levels to brighten this image I lose a lot of tone and contrast I don't lose that tone in contrast in curves all right, so what I will dio every single time if I go into image um adjustments curves medium contrast that is where they told me I should be for that but I don't believe them so I go into fades curve curves and I make it what I really want which is toned down a little bit more and now I feel like I've got contrast I've got pop I've got more modeling on the face in terms of the dark miss over here with the shadow that I love um that's a really flattering way to light your subject is that is to have less light on the side of the face that's closer to the camera because it looks thinner and more modeled on children you not to worry too much about this, but if you're doing a little bit more of a, you know, kind of fun fashion shoot with kids, which we always I like to turn it out with little girls, they love that a lot um, that does aid you and kind of building out that she phoned to be more elegant. Um and then we also have we have dark, dark hair against lighter parts of the rest of the images, including the catch lights, but we don't lose thie shadow detail in the hair you could make you can have so much contrast in an image that you've just completely lost, the fact that you have hair, it just looked like a big clump of black wig on someone and you don't want that, so you want to keep your contrast in range that way? Um, remember earlier I said that I boosted the sharpening across the whole thing by the clarity tool uh, I could do one of two ways I can sharpen just the eyes in the areas I could put a layer mask on and then just sharpen the whole sharpen the middle area and then protect the rest of the image or I can sharpen the whole thing and just kind of at a soft lens ler to the background it's kind of depends on how you prefer to do it some people will tell you that if you don't do it option a you're the worst person in the world and other people will say that they would never do anything but option c I tend to do either the layer mask or simply a refined edge uh fine edge here feather inverse it and then go into filter blur lens blur I over lens lor more than I want that's why I tend to do a lot of my actions remember I said that I'll I'll do it more than I want and then I doubt it back to taste um that's good the more that I want, I click okay I let that function work let's blur filter has come such a long way it's a beautiful little tool if used in moderation to enable you to achieve a shallow depth of field if you didn't get it at the time. One of the great tricks with fast moving subjects like toddlers running through a field is to go ahead and have and increase field of focus so you get the kid and then do a little softening to the edges through lens blur later so it looked like my god how did you know that one too? And now I'm just that good that's what that gives you later you can't do this with every image and stay in business um, but to select a few that you really love and do something fun with this, this allows you that opportunity. I always do photoshopped through that filter. I'm not talking about photoshopped filters now I always do photoshopped through the filter of can I do I have enough time allotted to do this and stay in business and that's really important? Because one of the easiest temptations in the world is to get lost in our images realize it's two a m and you only did four tell me I'm not the one who's done that. All right? I'm in here and then I've got my fade lens lor so as you can see what the lens blur went crazy when everywhere I did everything, um, you can go into edit, fade, linds, blur and then bring it to something I don't want the gazi and blur. Look, I want to make sure I'm not getting that, uh, one of the things that want avoid is on her clothing. We had these sparkles in the pants, which were really fun, but quite bright and vibrant. We also had a lot going on with the stripes, and so if I could tone that down a little bit by doing this, I could do that the other option, of course, for that is black and white takes that out of the picture altogether um but this at least gives us a little bit closer to that um so do you see where we're going with this the difference between um before it and after you see that it almost looks like the structure going in a little bit doesn't it but ads as a richness to the scene that I quite like um so the other thing I will do is then go into the face a little bit you see right there we're going to the face and I'll take the brush tool and I pick capacity in a flow of about thirty thirty um again I have to preface this in photoshopped there's four hundred ways to do everything and I it's very easy to watch somebody do photo shop is that where you're doing it that way shouldn't you that way I taught a photo shop world last year and I said before I start this I do know that there are eighty six ways to do everything and I still have four five hands raising did you know that you can also do that yes I do um well maybe I do but that's not the way I'm doing it so I will selected area and then simply even though I'd feel like I still have these eyes I'm going a little bit and even though she has perfect skin I could do a little bit of smoothing and this shady area right here doesn't bug me in a small print this will be a gigantic area on a forty by sixty print do you see that this is what I want you to get really familiar with looking for is these darker patches that naturally appear when you're out shooting this just looks like a shadow it's not a big deal it adds contrast but if it's not handled a little bit if you can't soften it a little bit it will look clumpy on a large print and of course it depends on what kind of printing your doing if you're doing campuses of metallics or prince because they all look a little different but I would just soften that a little bit so if you see this is where we started this is where we end not a lot a couple quick steps big difference in how it looks um I actually love on a contrast it just does the nicest little things um another way to boost contrast that I do very frequently frequently is simply duplicate the layer um and then offset it with a soft filter so let me show you that real quick I'm goingto layer I click duplicate layer I click okay and I go in here and I choose soft light as one of my overlays and then I dial it back that's another way to get some nice um contrast in there this would be overly contrast because already boosted contrast. But let me show you the difference that was before it. And that's after I do the duplicate layer soft, soft like option. Often I don't need to do it because I already boosted my contrast and curves. S o this is really close to exactly what I would do deliver to a client. I went through it very slowly with you and quietly, uh, this would take me about ninety seconds and it's the difference between what I got a camera and what I deliver this is what I mean when I say, I don't do a lot of photo shop. Um, I do ado photoshopped a photo shop everything. I just don't go crazy. I just do boosting sharpening and little fixes the things I wish I'd done on at the time. Um, before I printed, I would do a few more steps, which is take out this little guy that's, just the patch tool. By the way, if you guys saw that flatten image, uh, patch tool right here. Just take it and then pull it down and knock it out of my frame. Um, I might, depending on how large this image goes. Uh, we do print a lot of our work, which is why I'm referring to it so often, depending on how large this image goes, this might start to bug me. This does not bother me at all right now when it if it were to be a large metallic print, it would probably pull focus away a lot and then said, the other thing I could do here is one of two things I could go into the clone tool and go under, um, darken and just kind of worked whole a second, I go here and dark and these up a little bit, you see this? It just pops out those if I wanted teo, um what I would do is probably as one big scoop do that and then go back and fade because I don't want them gone. I just want the minimized maybe to here and that's a really nice, quick, quick way to manage like pops of light that you don't want little speculator pops that you don't want on your frame, all right? Any other questions about this image this is this would be kind of this or the same image image in black and white would be an image that eye would present to my client, and I feel really happy with pretty much as is as an edit finish I just did the images here they are edited back to you oh, you want this? Let me dive in for another half hour before printing okay, so very quickly let me show you um two images shot side by side uh that that I will pull into black and white to show you um image like this to see how these air both dark I'm gonna use this image this alert get tells me it's too dark if I click auto I don't like what it does so I go out of that and I go to default and then I kicked kip kick up my exposure um and then I'm gonna kick up my fill light and then I'm gonna open it up. Um one of the things I wanted to think about is when you are shooting raw of course you've got a variance uh n f stop that you can work with if you have an amazing expression working and you can only get halfway there in terms of what you want to adjust her technical settings too because they just dive forward and do something awesome go halfway there knowing that you have the option to do more later um an image like this let me say I want to pull it into a black and white I'm just going to crop it here and then I'm going to go into um okay there's a ninety eight million ways to do a black and white I'm going to get away I probably don't do but this way anybody at home can do this image assuming you photoshopped image adjustments hugh saturation just take the thing again I prefer to go through the channels and adjusted and have more power to my black and whites but this way everybody can do it. Um I could go into, um curves and then just quickly brighten this up and then I could do that soft. I want to do that soft thing I did so layer, duplicate layer ok, I mean, my layers palate I go into soft light um and I immediately have that much more contrast, which I quite like and then I flatten the layer. A lot of people work differently and photoshopped some people's comfort level is to save every single layer they do and name it. And I just I get to certain point I feel like it's good enough I flatten it keep going um, because they usually do things on top of it. If I've done one really good note of warning if I've done a lot to an image um and then I want to make it black and white always, always, always, always do a lot to an image in color save it then go ahead and turn into black and white because when you're sitting with a client and she's like I love it can have a color you like? Oh, oh, oh, because I already did the face and I took off the patch told I cleaned up to this and now I have to do it all again. You don't wanna do that always do your changes in color and then switch to black and white uh, so I've got here a black and white that simply black and white I prefer a great deal of tony I'm gonna go to image a justin's adjustments and color balance and bring in some golds and reds eso aiken bring some mid tones in my goals and I can bring some reds in my shadows. Um, I have some color here, it's probably a little bit more than I want I'm gonna go to edit fayed color balance again, I'm a huge fan of the fatal um and then I'm going to simply go up and do simple little cleanups that I like here very much. I'm going to somehow pick up a random accent that helps with photoshopped as well uh, image auto contrast always gives you extra kind of boom fade it back and this becomes close to what I will deliver to a client with the four minutes we have
Class Materials
bonus material with purchase
Ratings and Reviews
Judi McCann
I really loved these videos and am grateful to Tamara for her clear teachings and her ability to relate her ideas in an instructional setting. She's extremely thorough in her explanations as to the how's and why's. She's got a super sense of humor, too, which is nice. I would very highly recommend this class.
Charlene Goldsmith
This is my first creative live course, and I was really sceptical that I would be getting my money's worth. But I can honestly say that this has been a brilliant investment. Not only is Tamara amazing, but the content is fantastic. I feel like I got more than I bargained for as I even learnt some things in Photoshop I didn't know. Big double thumbs up!
Mari Sierra
Tamara is so good at what she does... Plus funny! This class was great and I learned so much from her... It's one of my faves and in my wish list!