Lessons
Class Introduction
05:06 2Lens Basics
10:55 3Focal Length
04:43 4Normal Lenses
10:14 5Wide Angle Lenses
09:24 6Telephoto Lenses
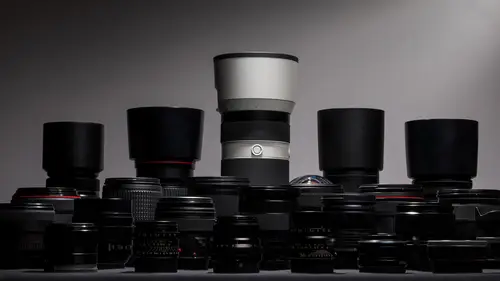
11:43 7Lens Comparisons
08:33 8Aperture
11:26Equivalent Aperture
04:07 10Depth of Field
05:25 11Maximum Sharpness
02:58 12Hyperfocal Distance
09:33 13Mount System & Lens Grade
04:03 14Lens Design
11:36 15Compatibility
17:29 16Lens Technology
05:21 17Focusing & Stabilization
06:39 18Image Quality
04:46 19Standard & Super Zoom
04:52 20Wide & Telephoto & Super Telephoto Zoom
07:48 21Prime Lenses
06:06 22Short, Medium & Super Telephoto Lenses
05:35 23The Macro Lens
07:14 24The Fisheye Lens
10:24 25The Tilt & Shift Lens
10:59 26Filters
06:34 27Lens Hoods
04:02 28Tripod Mount
02:42 29Extension Tubes
03:26 30Teleconverters
03:11 31Making a Lens Choice
04:15 32The Portrait Lens
08:44 33The Action Lens
11:23 34The Landscape Lens
06:51 35Lens Maintenance
09:40Lesson Info
Filters
Alright, it's time to talk about some of the accessories on cameras and the first accessory that a lot of people wanna know about and talk about is the filter itself and so on most all lenses you are gonna find that there are some threads on the front of the lens that allow you to screw in a protective or some sort of type of filter to manipulate the light that's coming in. There's a lot of common sizes and so 67, 72, 77, 82, those are some really common sizes and the manufacturers tend to stick to these common sizes if at all possible. Now the main reason for a UV filter these days is for protection. At one point it was filtering ultraviolet light. Not really necessary in the modern realm with digital cameras, but it is there for protection and there's nothing better than to get a heated debate going at your local photography party about whether you wanna use filters or not. You're gonna find very different sides to the issue. They both have things about it, that is correct. I tend to...
like to use em because they don't tend to degrade the quality of the image in any noticeable way, but they provide a nice level of protection on the front of the lens. One of the most significant filters that is still very useful in the days of digital is the polarizing filter. This is a filter than can help reduce reflections and here's another good example from Horseshoe Bend. We're going to take a polarizing filter and we're gonna turn it from minimum to maximizing effect and look at the water. It's really dark and now we can see the reflections in the water and the question is is do we wanna see those reflections or not? And a polarizing filter will allow you to put it on the camera and then rotate it to get the effect that you want. So let's try this again. Now we're in a pond that has a lot of fish in it. We see a lot of reflections in this case. Let's rotate the filter and now we can see the fish in the water much more easily. And so here is a very effective use. Do you wanna see the reflection or not? And it varies from situation to situation, but this is something that you can decide just when looking through the lens and the filter itself. I find that I wanna use these on sunny days when I'm outside. It can help cut through the glare on the water. It can help cut through glare on the tulips I'm shooting. This is a short video and I'm turning the polarizer of my telephoto lens. And you can see how much it changes the saturation of color of those tulips and so it can be very very helpful in many many situations. I'm in the rainforest and there is a lot of light being reflected off of this leaf. Let's go ahead and turn the polarizer and make it nice and saturated green. And so there's a big difference between using this and not using this and so it can be very effective in the forest. We have a lot of white light reflecting off of the leaves. Add a polarizer, we get to see that nice green vegetation. The other time it's very helpful is with blue skies. Here's another little video and let me go ahead and start this. And you can see as I'm rotating the lens how much the saturation and density of that blue sky changes as we are changing the polarizer around. It can also help cut through haze. We have a great little viewpoint here in Seattle of Mount Rainier, but it's often covered with a little bit of haze. The polarizer will help cut through some of that haze and really get you a nice blue sky in the background. And so any time you're at the correct angle, you can change that background of the blue sky, but not significantly change your exposure or your main subject that you're shooting. And so those deeper more saturated blues are often very attractive in a photograph. In Monument Valley there appeared to be a lot of haze and the polarizer was able to cut through a lot of that haze so I could see that blue sky much more clearly and this is not Photoshop, people. I'm not adding a bunch of saturation to this image. This is just the way I got it straight outta my camera and there is no way to do that much work, or at least it would be extraordinarily difficult, to try to mimic that in Photoshop. It's much easier just to put the polarizer on and get it done in the field and so there's a lot of great useful times. It tends to be an outdoor filter. It tends to be a little bit more of a sunny day filter although there are some exceptions to that. Now the way to properly use a polarizer is that you need to locate where your bright light source, normally the sun, is and then turning 90 degrees to that light source and that is where it's gonna have the greatest impact. It does not just turn the entire sky blue. It turns the area of the sky 90 degrees to the sun most blue. This example is a bad use of a polarizer. I have polarized the left part of the screen, but not the right part of the screen and so in this case it probably would've been better to use a more normal lens or perhaps use a vertical lens only showing a portion of the sky over by the arch on the left hand side. So when it comes to the polarizer, it's gonna help reduce reflections, it's gonna increase your saturation, and it's gonna give you better blues and blue skies and so it's a very helpful polarizer in many situations. But be aware that it does take away a couple stops of light. It depends on how exactly how it's set on your camera which is why you don't wanna leave it on your camera all the time as it's taking light away from it. Now there are some different styles of polarizers out there. You put the polarizer on, it's this really dark filter, but there are different thicknesses to different filters and if you have one of the ultra-wide lenses, you don't wanna get too thick of a filter because you may be able to actually see the filter when it's on your camera. And sometimes it can be a little bit tricky getting polarizers off because they rotate and so if you have a hard time removing a polarizer one of the things is to try to grab the filter with as many fingers as possible in as many different locations so as not to bend the filter and warp it in any sort of way and hopefully with that you'll be able to get it off. Next up is some of the bigger lenses will have drop-in filters that you can use in the back. This means that you can use much smaller filters which makes em much easier to manufacture and less costly and then you can simply adjust them by turning the dial right on the back of them. And this is a big help for any of those with big lenses that have this option available.
Class Materials
Bonus Materials with Purchase
Ratings and Reviews
E.L. Bl/Du
John is one of the best instructors Ive watched. he's clear, concise, and gets right to the point. His display's and diagrams are so great, he makes very complicated subjects easy to understand, and fun. He holds your attention and interest b/c everything he says is valuable. This really helped me understand the vast complicated world of lenses. I would highly recommend this class to anyone who doesnt know what hyperfocal distance is.
Boris Dimitrov
Excellent class packed with incredibly useful knowledge. John is an amazing lecturer. He has also developed really great materials to help explain all the concepts and technologies that are explored in the class. Looking forward to my next class with him!
a Creativelive Student
Great class. So informative. John Greengo is such a fantastic tutor and explains everything in such and easy-to-understand way. I would highly recommend this class. Prior to doing this class, I was so confused about which lenses are best for various photography. Now I understand lenses completely. Thanks John!