Lesson Info
35. Lens Maintenance
Lessons
Class Introduction
05:06 2Lens Basics
10:55 3Focal Length
04:43 4Normal Lenses
10:14 5Wide Angle Lenses
09:24 6Telephoto Lenses
11:43 7Lens Comparisons
08:33 8Aperture
11:26Equivalent Aperture
04:07 10Depth of Field
05:25 11Maximum Sharpness
02:58 12Hyperfocal Distance
09:33 13Mount System & Lens Grade
04:03 14Lens Design
11:36 15Compatibility
17:29 16Lens Technology
05:21 17Focusing & Stabilization
06:39 18Image Quality
04:46 19Standard & Super Zoom
04:52 20Wide & Telephoto & Super Telephoto Zoom
07:48 21Prime Lenses
06:06 22Short, Medium & Super Telephoto Lenses
05:35 23The Macro Lens
07:14 24The Fisheye Lens
10:24 25The Tilt & Shift Lens
10:59 26Filters
06:34 27Lens Hoods
04:02 28Tripod Mount
02:42 29Extension Tubes
03:26 30Teleconverters
03:11 31Making a Lens Choice
04:15 32The Portrait Lens
08:44 33The Action Lens
11:23 34The Landscape Lens
06:51 35Lens Maintenance
09:40Lesson Info
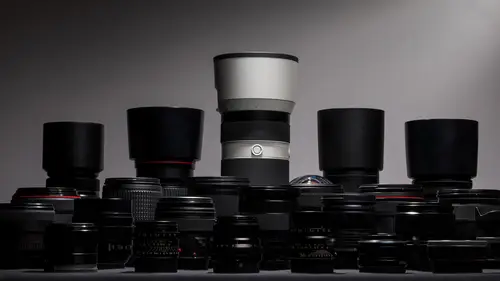
Lens Maintenance
Alright let's talk about lens maintenance. You want to keep your lenses for a long period of time. All of my lenses are an important investment to me because I'm going to keep them. I'm going to use them as much as I can and when I'm done, I'm going to turn around, I'm going to sell them to somebody else. And I want to keep them in good condition. I'm not going to freak out about every little scratch on them. But I'm not going to just scratch them up just to make them look used. And so I want to keep them looking new and I want to keep them working properly. First thing is keeping the glass clean. Some things to think about here. I really like the microfiber cleaning cloths. They are very good for cleaning the front, back lenses. There are some other tools out there, but the microfiber cleaning cloth is really nice. Having either compressed air or the rocket blower can be really nice for getting dust that's kind of stuck inside where it's hard to reach on lenses. So I will use that fro...
m time to time. I don't typically use lens cleaning fluid which is something that you would put onto tissue or a cloth and then rub on your lens. You don't just spray it on the glass itself. But I know it is used by technicians and repair people around when there is something really sticky that you need to get off. For cleaning just kind of the outside surface, the focusing ring, the zoom ring and so forth, there are brushes that you can use. I typically will just go down to the store and buy an old paint brush or a new paint brush and then use that if I'm getting dust and dirt in and around. So if I'm in a bad environment, I'll tend to do that. I mentioned before that filters can cause a lot of discussion among photographers whether they like to use them or not use them. There are three different ways of protecting lenses when you're transporting them, when you're using them. That's lens caps, lens hoods and filters. And each of them has their own purpose. And so obviously the lens cap is a good way of protecting the lens when it's not in use. Just remember to take it off the lens to take photos. Now I have found that these are a hassle to work with. They get lost. And also they collect dust right on the inside which goes right on your lens. And I think I actually need to clean lenses more often with lens caps than without. Now as I said before, I am kind of a fan of filters. I think it's nice protection because I don't like using lens caps. I would prefer to use a lens filter than have my lens ready to shoot at any given notice. And so this is something that is gonna protect the lens at all the times. And for some of the lenses, it's going to help prevent water from getting in there. And so it helps weatherize the camera in some small degree. Now it's not going to improve image quality. It could degrade it, I gotta admit to that. But I don't think it does so in any significant way. And it does come at an additional cost because you have to buy the filters for the lens itself. Now the lens hoods are something I try to use as much as possible because I'm trying to get as much contrast out of my lens, and I'm trying to block that extraneous light that can hit the front element. And it's also fantastic if there's a little bit of rainy mist out there. This will just be enough to keep it off the front of the lens. And so yeah they do have their downsides as far as, you gotta reverse it to put it on. It makes the lens a little bit bigger. And if you're ever shooting out the window of something that can catch the wind, or you have your tripod or your camera on a tripod and the wind's blowing, that's a little bit more area for it to cover. Now the thing that I have found is that you do not need all three of these. You can usually narrow it down to one or two of these things for any particular use. And so the cap and hood is popular by some people. And what I find here is that you're going to get the best image quality possible. You do have the minor hassle of taking on and off your cap. But what I prefer is the filter hood option. No lens caps. And you do have good protection of your lens, you have excellent image quality if you have an excellent quality UV filter. And you don't have to worry about taking lens caps off and where they went. You pull your camera, you pull your lens out of the bag and it is ready to shoot and ready to go. And so that's what I prefer in the way that I like to work. Now there is a special kind of last minute note here for those of you from Canon and Nikon. Those of you with DSLR cameras. The focusing system in that camera is estimating where your subject is. And then it sets the focus there. And sometimes it gets it wrong. And if you have a really fast lens like an 85/1.4 or a 200 f/2, it might front focus or it might back focus. Meaning focus in front of your subject or behind your subject. And if so, you need to check your lens and do an adjustment in your camera. Called either the microfocus adjustment or a fine tune adjustment, depending on whether you're with Canon or Nikon. You need to find a target to focus on and you need to measure whether you are actually focusing on that target or in front, or behind that target. I use a couple rulers to do this. Now you can purchase a calibration tool like this so that you have an area to focus and a way to measure it. But if you want to do it yourself, you can do it yourself and save a little bit of money. So I set up a couple of rulers, yardsticks in this manner so I can focus on one. And I'll check to see if it's in focus on the other one. On the camera, you'll be able to go in to either their micro adjust or their fine tune adjust. And you'll be able to change the focusing plus or minus 20 steps. A step is just a small distance. It varies from lens to lens. In this particular case, with my lens set at zero, it was not perfect. It was close to good, but not perfect. And so I needed to adjust it to somewhere in the plus three to plus four range. Now if you want to microadjust, you need to have everything that you would need to take incredibly sharp photos. Tripods, cable releases, and you're gonna need your measuring devices. And you're going to set up and focus on something and see if it's in focus. You need to set your camera up so that it's shooting as shallow depth of field, and as high a quality as possible. You don't even need to download the photos to the computer. You can now magnify the images in playback on your camera and see if they're as sharp as they're supposed to be. What I tend to do is, I manually un-focus the lens. I let the lens focus, and I do that a couple of different times so that I can see that I'm getting a consistent result from the camera. And I have found that with my 50 millimeter 1.4, 85 1/8, 135 f/2 lenses, 70-200 2/8. Most of them had needed to be adjusted a little bit. And that's going to be true of a lot of the Canon and Nikon lenses. The mirrorless cameras don't need to worry about it because their cameras are reading the light and focusing right off the sensor. Which is the exact area you're recording the image. And so this is one of the advantages of the mirrorless cameras. And one of the things we have to worry about with SLRs. If you shoot an SLR and you have a very fast lens. But that's only the people that really need to worry about that. As many of you know, I have fast start classes which are instructional tutorials in how to use a particular camera. And I have this for about 60 different cameras out there. So all of the major popular models. I have these in depth classes where I go through every step in the menu. I show you what all the buttons and all of the dials do. And it's a great companion to this class here. And I will continue to make these as we go forward in future with all the most popular cameras that are available out there. If you want to learn more about photography in general, I have the photography starter kit for beginners if you want kind of a short class to get you out the door really quick. If you really want to get in depth, I have something called the Fundamentals of Photography. So take a look for the fundamentals if you want the full kit and caboodle on photography. I do also have specific classes on nature landscape. And then another one on travel photography. And for those of you on the Canon and Nikon system, I do have in depth, complete guides to the Canon and Nikon lenses. And that's where I talk about all of the lenses and the setup. And I spend even more time than we had today going through all the specifics on all the different lenses and the technology that they use in their systems. And so if you want to dive in even deeper, that's the pool next door that's all deep end you might say. And then for everybody, how about something free? Everybody likes something free. So here at Creative Live, I'm doing something called one hour photo. And this is a lot of fun. This is where I get to interview. I get to sit down and talk with some of the other great instructors here at Creative Live. And you kinda get to meet and know your other instructors. What are they like? What do they like to shoot. How did they get into photography. All sorts of things about behind the scenes things that they don't get to talk about in their own classes. And then the two of us get to review your images because a lot of you submit images into the class and then we review them. And that can be a lot of fun because you get two very different ideas on philosophy about what looks good in a photograph. And it's just real good. And then we also address your questions here. So you can submit your own questions. And so if you have your questions that we weren't able to answer in this class, you can submit them in here and then I'm going to select some of the best and answer them right at the beginning of those classes. So that's called one hour photo. And so check that out here at Creative Live. I also have my own website. Johngreengo.com And of course I'm on Facebook and Instagram. Would love to meet up with you there.
Class Materials
Bonus Materials with Purchase
Ratings and Reviews
E.L. Bl/Du
John is one of the best instructors Ive watched. he's clear, concise, and gets right to the point. His display's and diagrams are so great, he makes very complicated subjects easy to understand, and fun. He holds your attention and interest b/c everything he says is valuable. This really helped me understand the vast complicated world of lenses. I would highly recommend this class to anyone who doesnt know what hyperfocal distance is.
Boris Dimitrov
Excellent class packed with incredibly useful knowledge. John is an amazing lecturer. He has also developed really great materials to help explain all the concepts and technologies that are explored in the class. Looking forward to my next class with him!
a Creativelive Student
Great class. So informative. John Greengo is such a fantastic tutor and explains everything in such and easy-to-understand way. I would highly recommend this class. Prior to doing this class, I was so confused about which lenses are best for various photography. Now I understand lenses completely. Thanks John!