Lesson Info
39. Retouching Details in Photoshop®
Lessons
Class Introduction
04:29 2What is Cinematic Lighting?
06:42 3Motivated & Practical Lighting
07:41 45 Cinematic Lighting Tips
04:53 5Low-Key & Upstage Lighting
06:26 6Control Your Fill Lighting
05:18 7Show Depth In Your Image
13:24 8Pre-Production for Cinematic Lighting
22:42Grip Tools: Clamps
08:41 10Grip Tools: Apple Boxes, C-Stands & Grip Heads
10:53 11Grip Tools: Pins & Portable Gear
04:50 12Grip Tools: Scrims, Silks, Flags & Tape
13:52 13Grip Tools: Wind and Haze Machines
04:07 14Grip Tools: Unusual Tools
04:47 15Grip Tools: Filters
11:05 16Grip Tools: Q&A
15:04 17Theater Shoot: Concept
08:03 18Theater Shoot: Pre-Production Considerations
08:48 19Theater Shoot: Lighting Gear
04:27 20Theater Shoot: Motivated Lighting Considerations
26:47 21Theater Shoot: Lighting Walkthrough
20:45 22Theater Shoot: Capturing The 1st Shot
27:37 23Theater Shoot: Hero Shot
21:47 24Theater Shoot: Capturing In The Seats
21:48 25Airstrip Shoot: Concept
05:49 26Airstrip Shoot: Pre-Production Considerations
19:31 27The Haircut: Location Specifics and Motivated Lighting
13:17 28Working With Scrims On Location
06:34 29The Haircut: Getting the Shot
24:28 30The Haircut: Shooting Plates
08:21 31Staggered Planes: Location Specifics and Motivated Lighting
08:10 32Staggered Planes: Getting The Shot
08:23 33Capturing Plates With Talent In Background
16:26 34Airstrip: Environmental Portraits
07:01 35Airstrip: Location Shooting Q&A
22:05 36Using Plates to Create a Pano in Lightroom®
16:08 37Transform Tool
04:50 38Post-Processing 1st Theater Shot
09:48 39Retouching Details in Photoshop®
13:09 40Color Grading in Alien Skin Exposure X3
06:27 41Post-Processing Theater Hero Shot in Photoshop®
08:11 42Creating a Spotlight in Photoshop®
05:31 43Adjusting Color for Cinematic Lighting
12:28 44Post-Processing: The Haircut
12:08 45Coloring the Sky and Removing Modern Building
05:10 46Creating a Pano Using Plates in Photoshop®
17:12 47Developing Cinematic Portraits in Lightroom®
07:29 48Retouching Cinematic Portraits in Photoshop®
08:57 49Color Grading Cinematic Portraits in Alien Skin
13:20Lesson Info
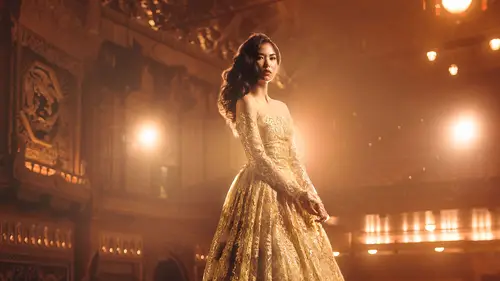
Retouching Details in Photoshop®
We are into Photoshop. I'm gonna show you... Kind of just a few things, obviously, we don't need to go through the whole entire process. I don't need to show you how to use the healing tool. But, I do want to show you, basically, what I would do to finesse this image. I'm looking to remove some distractions, for example, (clicking) Let's do this, there we go. For example, I've got this flare thing over here that I've gotta get rid of, things like that. This exit sign I want to get rid of back over there 'cause it's green and unsightly. There's also, this was the railing that we had to take out it's up against the side over here, I'm gonna take that out. I've got this red bucket which I think is a bit distracting. This flare over here, I think these lights up here are also a little bit distracting so I'll probably take those out or at least minimize them. As far as the subject, I'm gonna remove this light and replace it with another one because I don't like the different embellishments.
I want something that's a little bit more consistent. I'm gonna repair this flare right here, so you don't see it as much. And then, I'm gonna fix the edge of the hair a little bit. From there, obviously, you treat it like a regular old beauty retouch, but there's not really a whole lot of stuff that I would necessarily have to do. I get to get away with clone stamping it. Let's see, go to current and below. This is also, sometimes this kind of stuff is really effective with... With using frequency separation. Sometimes the removal of these things can definitely be easier with frequency separation, but sometimes we can just get away with stuff like that. Nice and easy, This is also pretty consistently dark areas. There's not really a whole lot of detail, so the way in which I clean that stuff up isn't hugely problematic Maybe I'll kinda remove this stuff as well with a little bit of a healing. Okay, something like that, that looks pretty good. Let's just, out of curiosity, see if this fixes that. Yeah, that works well, I'm okay with that, 'kay. And over here, it's a little bit trickier because at the base of the poles, I mean fortunately everything's kind of out of focus so you don't really see it as much. But, what I'm gonna do is clone stamp this edge down and I'm just, basically, gonna reconstruct the wall a little bit. We're just gonna do this here. Somethin' that looks like that. And, we'll bring this down, just line it up use that smart preview. And kind of clean it up a little bit with that. (Makes shooting noise) Kinda rebuild that edge, that looks fine. Maybe we'll darken it a little bit 'cause it woulda been a little darker. We'll just give it a little burn. Yeah, not too bad. 'Kay. That gets rid of my weird little fence in the back. 'Kay. As far as over here, I'm gonna come through, I'm gonna just basically cut this out. I'm gonna create an edge and I'm gonna use the clone stamp again. So I'm just gonna trim a little bit of this dress off. Give myself the gap here, 'kay. Grab my clone stamp, take this, bring it right over. Maybe have to rebuild it a little bit better. Something that looks like that ish. There, something kind of like that, 'kay. And that gives me a little bit of a hard edge, so I just grab my blur tool, and I just run it right over that edge and that kinda gives me that a little bit which I think is fine, it's fine. Okay, so I'm gonna do a little bit more cleanup around the edge of the hair and I'm gonna do the same thing that I did on the dress below with this. So again, trim a little bit out of it, create your constraints, stamp, just take it move it in a little bit and voila, it's gone. Blur the edge, you can also do this with a pen tool, probably a whole lot more exacting with a pen tool. I love the pen tool, but sometimes I can I'm totally fine just quick little selection, blur it, good to go. Now, up here it gets a little bit trickier, This would definitely be a better instance to use the pen tool, but just to keep things relatively consistent. I'm gonna cut a little bit off the neck. I just think that that hair over there is a little bit distracting so, I'm gonna give her a cleaner edge to the jaw. Something kind of like that. 'Kay. And when you look at it from a distance... I messed up down below. Let's erase this a little bit, there we go, okay. So when you see it from a distance, definitely looks a lot better in terms of the jaw. Gives her that nice clean shape and line. Very easy to pull off. Up here, this is a similar thing. We just do a little bit of stamping right around the edge. And also, like I said, really great frequency separation methods to do a very similar thing here and... (mouse clicking) That'd probably be what I would use if I really wanted to make sure that this was correct and to the best of my ability. But for the sake of speed which is kind of what I'm showing you today, that it can be pretty easy and straightforward, this is pretty effective as well. I'm just removing a lot of these flyaways. Remember, the background is pretty out of focus so you're not seeing a whole lot of loss of information here to anything that you're probably going to be missing. Especially, when you start seeing this full-size. It just, it completely goes away, oops. Just, you want to follow the lines of the space and try to keep that as clean and realistic as possible. Now, what I'll usually do here, 'cause you can see that the edge of this looks not great, I will like grab like a mask or an eraser tool and kinda just, this is my quick way to blend hair back in, I just kinda draw it. Let's turn that opacity down. And I just kinda do this over the edge. And it kinda gives me a little bit of that hair edge back, organically. There's the fake edge and there's the one that looks a lot better. I'm just basically drawing hair, but it's not gonna... In where I'm kinda drawing the strands, but it's not gonna bring everything back, it's gonna kind of trim it in, but it's still gonna be grounded a little bit more in reality. This is kinda my way that I fake bringing back hair when I trim it up pretty heavily. I just kinda draw it a little bit, right along the edge, it takes me a couple minutes, but man it looks way better, take a look at this. Alright? And she still has that really beautiful glow all the way around you still get the idea. It's just a much cleaner version of it. And that takes me all of a couple minutes. The thing about lighting with that rim light is especially when you're doing hair (imitates bomb exploding) It highlights everything, so, strong back lights will definitely create that effect. Alright, so you can see that this looks... Pretty good right now, I mean, if you want to get into turning this into a beauty retouch, that's a whole other thing and I'm not going to get into, "Let's make this a beauty retouch." But, what I am going to show you is how I would... I'm gonna liquefy this a little bit and I'm going to do a quick little color adjustment on it. So, I'm gonna liquefy it first, and the way liquefy needs to work is we have to put it on a brand new layer. I'm gonna command, option, shift, E. On a Mac it's control, option, shift, E. On a PC that's merge visible on a new layer. What it did is you can see that it combined both of these layers into a brand new layer. So that now when I go to liquefy... it's all on one. Now, this is pretty processor intensive, If you want to just make that selection and come into liquefy you can only liquefy part of the image at once, which can be pretty helpful. I'm just going to kind of shift this around a little bit kind of show you what you can do to the shape of the dress. I'm really just working to make the lines a little bit more... A little bit more elegant, a little bit more natural. I'm going to come into the face a little bit and I'm also going to tweak the edge of the hair which I had just cleaned up. This is gonna allow me to make it even better. If you wanna come in and shrink that down a little bit, make that edge a little bit... Smaller and tighter you can do that. Another cool thing is you can grab the pucker tool and you can run it right along the edge and it's gonna make messy hairs a little bit neater. That's a cool one, too. That's the pucker tool, that's pretty cool. I'm gonna just reshape this a little bit, give myself some kind of really nice floofy lines with the hair. There we go that looks pretty good. Something that maybe looks like that. Yeah, that looks fine. (sucking air) Good. (keyboard click) It shouldn't look hugely different. But it definitely is a tighter cleaner version of it. I use this a lot to fix hair and wardrobe probably more so than almost anything else. Wardrobe is one of the biggest things that I use liquefy for, makes clothes fit much, much better. What I did down here was I just reshaped it a little bit. Kind of, tried to fix the distortion on that pelican case that was poking out on the left-hand side.
Class Materials
Bonus Materials with Purchase
Ratings and Reviews
Bruce Walker
This course is simply terrific, and I highly recommend it. Firstly it arrived at the perfect time for me as I am soon to do a studio shoot very much in keeping with a cinematic or theatrical aesthetic. Secondly it's taught by Chris Knight who I swear is like a long-lost twin brother. :-) There are so many parallels in the way he thinks and works to my own style. So I avidly watched this as soon as it was available for anytime streaming. This is the first time I have made extensive use of the CL iPhone app, btw, and I love how it pretty much enabled me to seamlessly switch back and forth from desktop viewing to my iPad that I carry around the house during the day. I was able to make coffee and still carry on taking in the course, uninterrupted. The content is fantastic, delivered succinctly yet entertainingly. Some material and ideas are already in my repertoire and were reinforced and validated by Chris' demonstrations. But he also introduced a lot of ideas and methods new to me and very welcome. I was particularly glad to see how practical it is to stitch a series of tripod shots into a wide pano. I have been afraid to try that but I will now be using that in my next shoot, for sure. As alway, his post production practices revealed all kinds of tips about Lightroom and Photoshop I didn't know. Negatives. The volume level mastering is iffy. It started out at a decent level then midway through one of the early lessons dropped so much I had to turn up my sound system to compensate. And as I write this one lesson (34) is missing and in its place was a duplicate of the next lesson (35). I expect CL will have that fixed shortly though (I sent support a note).
Jeph DeLorme
One of the best classes I have viewed at Creative Live. Definitely worth the investment of time and money. The pace of the class allows you to learn extra tips and tricks throughout the process. Great instructor, highly recommend this class to anyone looking to step up their creative game.
a Creativelive Student
excellent class in all regards. outstanding instructor with experience in complicated cinematic shoots but who also is willing to thoroughly cover the basic nuts and bolts. i wish all creative live classes were of this quality.
Student Work
Related Classes
Lighting