Lessons
Color Introduction
06:25 2How to Apply Color Using Watercolor
11:42 3How to Apply Color Using Gouache
07:06 4Color Materials & Setup
04:33 5Color Style #1: Pen and Watercolor sketch
06:05 6Color Style #2: Doodle style using Pen
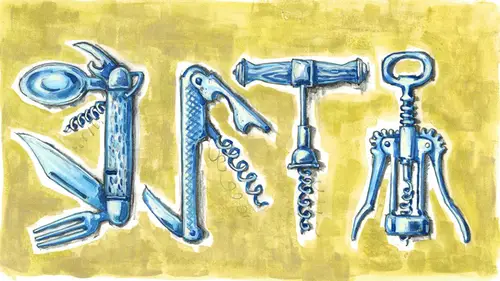
07:01 7Color Style #3: Brushpen
06:26 8Color Style #4: Chalkboard Technique
15:23Color Style #5: Spot Coloring Book
07:44 10Color Style #6: Add Color with Your Background
03:07 11Color Style #7: Create Color Combinations with Metallics
07:01 12Color Style #8: One Color Value Study
06:25 13Using Multiple Colors for Shading & Highlights
19:56 14Develop your Style by Showing Your Work
06:04 15Ways to Display Your Art
22:03 16Turn Your Drawing into a Digital Product
09:16 17Paper Crafts with Your Drawings
15:50Lesson Info
Color Style #3: Brushpen
So let's try another technique. It's kind of fun just messing around, trying all these different ways. This is gonna be a brush pen. Now, you can do this with your paintbrush, but you can also do it with this, because it's so much more convenient just to carry that around. So the whole trick to doing this one is you either just pull up and do it very, very lightly, or you press down hard and you get a really dark, thick line. So see how thin you can get your line? That's pretty thin. It's kind of nice and wiggly, and then, when you come to a spot you think might have some shadow, press down really hard. And if you, you can turn it, then you can get it really wide, too. And then, if you have an area to fill in, this is a great, quick filling in. Remember, the last fine point marker, we had to do all that scribbling back and forth to fill it in? This one is just, push it on its side, and push it really hard down in there, and totally fills it in. So I also tend to hold this a lot more st...
raight up and down instead of that way. I only put it on the angle when I'm for sure I wanna do that thick line. So get kind of wiggly, and anywhere you see something that you think is gonna be a shadow, press hard, like that. Anywhere you think is gonna be a highlight or a very light area, do it really thin. Okay. Also, anything, this is kind of my shaded side. So I'm gonna make sure my lines on the bottom and on that side that are in shade are darker and heavier. And this is really great for calligraphy when we come to this spot. So when you're doing any kind of lettering, kind of the basic starter rule is if you're doing a downstroke, press harder. If you're doing an upstroke, lift up. So here I'm going down, pressing harder. I'm going up, lifting. Pressing harder because I'm going down. Going up, lifting until I get to the top. Pressing harder on the way down. Really experiment with this one, seeing how thick and how thin you can get it. And then, I also like to get really unusual shapes, because with the other pen, it's very much like this is the width of the pen, and it's always gonna be that way. It's very designer-y, and this one is just, use it for all it's worth here, as far as getting all the different textures. It kind of makes the paper look, the plastic look really crinkly and wrinkly. I don't know if they have an apple candy. This is another one I also made up. Feel free, when you're drawing something, to make it any flavor you want it to be. Okay. So that's kind of the basics of pen drawing. Lettering, on this tiny lettering, it's gonna be so messy I usually just do it at the lightest pressure I possibly can, and it comes out looking wiggly even if I'm not trying. This. Cleo, one of our online students is asking about the type of paper that you're using at the moment. Yes, this is my Arches Hot Press Watercolor Paper. Great, thank you. If I'm using this pen, it's great on Bristol, that's kind of what Bristol's made for, but since I'm doing this kind of painting round up, I just decided to do 'em all on the watercolor paper. Great. But yeah, if I knew I was only gonna use this pen, I would probably start out with the Bristol. And do you have any tips or tricks for thinking about black as a color and using that in general in your drawings? Yeah, I use black as outlines, and I use black when I'm maybe coloring something that is a wrapper that I know the printing is black. If I'm painting a tree and one side is in shadow, I'm never gonna use black. Basically I only use it as a little spot color when I really want it black. All the other times, when I'm just trying to paint something dark, I will try and mix together a bunch of my darkest colors on the palette, because adding black, the pigment itself is a really charcoal-y, it's as if you took a charcoal briquette and just ground it up. It's very velvety, thick color, and it kind of makes all the other colors grayish green when you're using it. So all your pure color's gonna go away. So I try to avoid it for mixing, unless it's just a very graphic look like this. Okay, and then you can fill these in with as many lines as you want. I decided to try these horizontal lines in here 'cause I thought this pen lent well to looking a little bit like an old engraving where they have kind of like a crosshatch, but it's really like an across hatch. So that's another technique.
Class Materials
Bonus Materials with Purchase
Ratings and Reviews
marcelle gray
I love this class!!! Cleo is such a natural, enthusiastic and funny teacher. She shares her ideas very freely and makes learning so much fun. She likes to explore her materials by experimenting and also making charts. In art school I always thought this was a little boring, but Cleo makes it fun. It is a good way to warm up and prepare to draw and then begin paint. I have learned to enjoy this process so much by taking this class. I would recommend this class to both beginners and experienced artists.
user 43495d
Cleo does start quite nervous, and not very clear in her explanations. Thanks to the guy asking the questions throughout the class…I guess he was as confused as us in the beginning. BUT…the class does get better!! She gets more confident and does give good examples to take your simple drawing to a colorful piece of art you can sell on products or share on social media. I really enjoyed later lessons. And I always say-if I can get a least ONE good advice or trick – then it was not a waste of my $20.