Lessons
Class Introduction
02:35 2Describing Color
04:21 3Color Settings
05:53 4Adjustment Layers Vs Image Adjustments
10:57 5Blend Modes
06:46 6Gradient & Layer Style
10:34 7Brightness Contrast Adjustment Layers
06:24 8Levels Adjustment Layers
29:58Auto Color Correction
04:13 10Curves Adjustment Layers
10:56 11When to Use Solar Curves
13:45 12Hue Saturation & Vibrancy Adjustment Layers
07:10 13Color Balance Adjustment Layers
10:12 14Black & White Adjustment Layers
08:39 15Photo Filter Adjustment Layers
08:43 16Channel Mixer Adjustment Layers
05:19 17Color Look Up
07:30 18Gradient Map
09:07 19Selective Color
07:09 20Review of Adjustment Layers
06:28 21Using Smart Objects
10:52 22Color Techniques Workflow
20:11 23Match Color Image Adjustments
06:36 24Change Hair Color
19:04 25Color Gradient: Libraries
04:45 26Adobe Capture: Color
09:04 27Even Skin Tone: Hue
06:10 28Color Adjustment: Curves
05:27 29Image Adjust Color Match
11:31 30Color Match: Curves
15:04Lesson Info
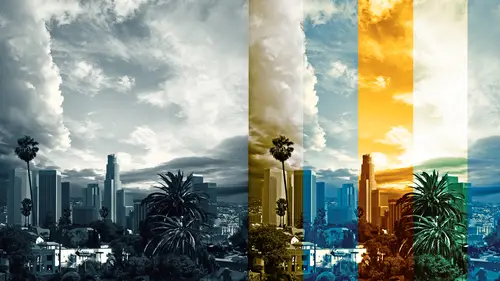
Channel Mixer Adjustment Layers
So let's take a moment and talk about Channel Mixer. Now the good thing about bringing up Channel Mixer now as opposed to earlier, is we've been talking about channels. So now you understand a little bit about what a channel does and when you mix a channel, you are changing the density. I'm gonna start by, the density of the channel, excuse me. So I wanna start by saying, you probably are never gonna use this filter, this adjustment layer. I never use it ever, ever, ever. But I think it's a valuable conversation because the more you all understand the mechanics of how Photoshop is working, the more you can get yourself out of your own rabbit hole. So if you really get that a channel controls the color because of the black and white value in each one of them and what do I mean by that. I mean, look at the red one. I just made that red channel over here in the right hand corner dark by using this Channel Mixer function. When a red channel goes dark the picture will go cyan and we talked ...
about that earlier. When a green channel goes dark, the color will shift to magenta. Right now we're doing a cumulative color because of Channel Mixer. But if you guys can start understanding this sequence, when you're color correcting, you're gonna understand what you do. When you add light to the red when you're in curves, you know what it's really doing is going over to that channel and lightening it up and oh so your value's gonna light up at the same time and then it won't matter which of these adjustments you pick. It won't matter because you'll know what it's doing. Now I say that, I've been doing this 25 years, that's why I say this. So if you're sitting there going oh my God, I'm never gonna know what this is, it will come. It will come in time. You just have to give yourself some patience. So Channel Mixer is this bizarre adjustment layer that I only have ever known print shop operators to use. It's the only people I know who use 'em. It doesn't mean there aren't other people. That's just all I know. And it mixes the channels. Again, it doesn't feel like there's a lot of control with it, so I don't like using it because I can't set midtone points and whatnot, so I don't feel good about it, let's just say it. However, there are some presets here to the Channel Mixer and I'm gonna pick 'em up here and these are awesome possum. These are black and white. So the only thing that I've ever used the Channel Mixer for has been to do black and white filters through the Channel Mixer. Do you remember in that last segment we just talked about with that question from the viewer about selective color and I said, oh I would pick the blue channel for that foreground area? Well that's what this filter does. See here? It's using a blue filter. I know I'm saying the word filter. I often think of adjustment layers as filters. So it's just one of those things. It's not a filter, but in my mind, back in the photo days it was a filter. So if I say those terms, don't let 'em throw you. So this is an orange filter, a red filter and it's doing... Well my gosh, doesn't that look very familiar? Doesn't that look like what the black and white filter did? Yeah. And not only did it do, the black and white filter, when you did the same effect, if you wanted to lighten the reds or darken the reds, you did it on the actual thing that looked red. In the Channel Mixer, all I have is red, green and blue and density. So at this point, I am hella confused. And you guys can feel free to be hella confused as well. So if you want a canned look, if you wanna write down this in the worksheet or on your notes, if you know you want an infrared look, a black and white infrared look, cool, come on here to Channel Mixer and you can find it in two seconds. If you're writing actions, this is a great adjustment layer to use, but if you needed to make some decisions and play with the file while it's open, my suggestion, rather than Channel Mixer would be do the black and white filter. Again, it's got some really nice stuff and let me take a moment to say that sometimes these auto presets are great to get an idea. Does this happen to you when you all have a file and you open it up and you're like well it needs something, but I have no clue what it needs. I just don't know. And I will say even to this day that happens to me. I'll look at a file and I'm like, oh well it looks like kak, but I'm not exactly sure the solve to fix this. Kak is a technical term so feel free to use it on your jobs. And then sometimes I'll go through the filters or the presets and I'll go, oh that looks good, oh that looks horrible. Hey, no that's a good solve. Alright, I'll start here. So use it perhaps in that way and then as Bob said earlier, don't ever send a file to a client with something you don't want turned on 'cause they will turn it on. So get rid of it once you've used it.
Class Materials
Bonus Materials with Purchase
Bonus Materials with RSVP
Ratings and Reviews
user-6180b9
Another awesome course by Lisa Carney, packed full of information This course is really a comprehensive look at colors ... I learned so much, and even stuff I thought I knew pretty well, I found some pretty eye opening new information. I find Lisa Carney to be a wonderful teacher. When she has an important point to make she'll say her point, pause and then repeat what she just said, just to lock it into your memory. Fantastic. Side note: I signed up for the CreativeLive creative pass as soon as I realized how great all of Lisa Carney's classes are. I'd started to buy them one by one and quickly realized they are all wonderful. You can watch this class from beginning to end and get great information ... but to get the most bang for the buck you'll want to pause, hit rewind, get a cup of coffee, open Photoshop and try out her tips while you watch. There are sections I rewound and watched about 5 times, to be sure I understood all the subtle points. Lisa Carney is pretty amazing - she works really hard to thoroughly explain the process she uses to solve problems, and she never glosses over anything important. To cover a particular point, she'll start with a finished file with all the layers - and instead of simply explaining each layer like a mortal would do, she'll literally delete all the adjustment layers and start from scratch to show the process. This is incredibly empowering since it gives you an understanding of just how easy the process can be once you get the hang of it
user-93854c
This is an EXCELLENT class for Photoshop users! Lisa is very professional, knowledgeable and, also, a delight to watch and listen to! Not only that she explains the concepts but she also shares her own experience and her practical ways of using those concepts! Great, great class! Thank you, Lisa and CreativeLive!
a Creativelive Student
This course has an abundance of useful information along with professional tips based on actual field experience. This course is definitely one I will come back to from time to time to reiterate the information. For this reason the way it is organised is perfect to find information about a specific technique or adjustment layer. It is well composed with some humour and advanced information. Loved it and highly recommend it for people who want to deal with the little details and get things exactly the way they want. Not suitable for lazy or sloppy people who just want to get the job good enough for sharing but don't care about getting it perfect for print.