Adding solid color precisely to an image in Photoshop
Lesson 10 from: Complex Selections: Furry, Fuzzy, and HairyBen Willmore
Adding solid color precisely to an image in Photoshop
Lesson 10 from: Complex Selections: Furry, Fuzzy, and HairyBen Willmore
Lesson Info
10. Adding solid color precisely to an image in Photoshop
Lessons
Color Range Selection on Smoke in Photoshop
16:27 2Adding Drop Shadow to Selection Layer in Photoshop
02:23 3Initial Selection in Photoshop
05:45 4Refine Edges in Photoshop
04:59 5Using Overlay View to make detailed edits in Photoshop
18:30 6Brush size demo in Photoshop
03:18 7Detailed Baby Hair Selection in Photoshop
04:40 8Decontaminate Colors in Photoshop
03:31Lesson Info
Adding solid color precisely to an image in Photoshop
Then I'm assuming I can create some issues with this image by stopping my viewing of the mask in putting something behind this I hope there's gonna be a problem with color or problem with was something like that that we might be able to deal with if not, I'll open a different picture and try to create a problem my job's funder because I can mess with the problems and just figure it out it's when you're actually have to get work done and like send us up now client in the problem ma'am, I'm guessing if I do something like this we should end up with a pretty messy okay, I can see uh this might not look color might not look appropriate coming through the hair, that type of thing I'm not sure if you just right there to me it looks kind of purplish or something that doesn't quite look appropriate to me. I'm not sure if that's uh disagreeable to your eye or not, but I'm going to act as if there's an issue of color there. So what are some of the things we could do? Well, there's a bunch of stu...
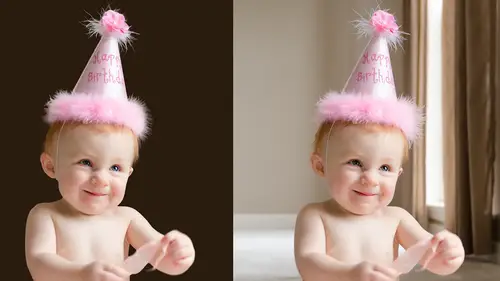
ff we can do let's just look at a few of her options first we could create a brand new empty layer to put paint on and so I'll go to the bottom of my layers palate I'll create my brand new empty layer and then I'm going to grab the paintbrush tool, and whenever you're in the paintbrush tool, if you want to choose a color to paint with, you can select it right out of your picture by holding on the option key in clicking on your picture option clicking what it does is it temporarily uses the eyedropper tool to grab a color out of your image to paint with, so I've just option clicked on my picture to grab a color, and now if I were to paint without color first we're in hard micks mooted twenty percent of capacities let's go back to default rush, which will make me have to read crab that color. Um, but if I paint that color in it's just going to blatantly cover up my picture, so I'm gonna have to be overly precise and careful. I don't want to be careful and precise before I paint I'm going to do something that makes it so whatever I put in that layer on lee shows up where that hair is in the way I'll do that is I'll go there's a bunch of different ways of turning it on, but one is I'm going to go the layer menu and there's a choice called create clipping mask when I do that, watch my layers panel you see I have an empty layer on top of the layers stack that's what we're working on watch what happens just the right of the eyeball icon for that layer when I choose create clipping mask do you see a little down pointing arrow appeared there that means that this layer is now clipped to this so that the only place where things that I put into this layer can show up is where this layer shows up in any part where this layers hidden this will be hidden too so it's called a clipping mask the two are clipped there's more than one way of doing that so if you've ever done it another method and you ended up with that little don point narrow you did the same thing which means one of the other methods is just move your mouse on the line that separates two layers hold on the option key and click on it that's another way of doing the exact same thing there's usually more than one way of doing something in a photo shop but if the end result looks visually the same it's probably the same feature I only mention that because if I don't everybody asked they're like is that the same and it's only with quick mass mode that they're usually wrong it's just because to you quick mass mode means red overlay and red overlay it's just red overlays just when it's a selection it's quick math okay so I got this layer it's clipped to the layer that's underneath and now let's see what happens when I paint if I paint now I can cooperate here and here I'll just paint blatantly over the heads you can see it but you noticed that when I get out here it is not able to get into the blue background something sense so choose undo it is a matter of picking colors that might be appropriate for here it's not always the color of the hair that's most appropriate sometimes it's the color of the background and I want to come in here and just do a slight paint over like that to get it to blend more with the background sometimes it's a huge brush and you go just a little spit out here and what that's doing is bringing some of the color from the background almost as if there's a background that has color hitting it and it's reflecting off of the background and popping into here uh but whatever it is right now it's clips so it only can show up where they are and so if the background had any kind of a detail we're not going to be seeing the blatant paint on the background we're going to see on lee some of it on here but sometimes that's necessary either taking colors from the hair itself or taking colors from the background putting in could be convenient when it's clipped to what's underneath that c one of the kind of issues can we get? I'm guessing let's see, we already we already have that one up here I have a copy of this one I have a copy of this one where some things were already done to it and I want to see if there's any special things I needed to do to get this toe look right. This image you noticed looks like it has a bunch of layers that's mainly because we have two versions of the picture one version on the right one on the left. I'm going to possibly get rid of the one that's on the right just to simplify and then I got a bunch of layers in here I'm gonna turn them all off. I'm going to just see what we have in here. Okay, I think this is an extracted version of the image as if we went through the process we've done on multiple images we did refine edge we painted on theories that needed it. Okay, so one of the things that we can run into is sometimes the harry stuff will look like it's too bright on the new background in when that's the case uh here's how I lessen that problem if you duplicate the layer and take whichever the two original your duplicitous underneath in set the menu at the top of the layers panel that is found right up here, called the blending mode, to multiply. It can often help let's see how it if it helped here. I just noticed I had it in here, but it doesn't look like on this exact background in helped. Um, if you were in my last class, I think I used it where I had some trees duplicate. Later set the layer that's underneath the multiplying that's. Primarily, if you notice things looking too bright on this particular background color, that might not be the case. But I noticed they had one in here, so I assumed it might have been.
Class Materials
bonus material with purchase
Ratings and Reviews
Lonnie
Selections have always been my nightmare, Ben Willmore is a Godsend. His easy to comprehend teaching method and techniques make learning fun and the lessons taught stick. I now own others in his lineup of classes with more on my wishlist. Thank you Ben for making Photoshop Selections less daunting and complicated than it can sometimes be and thank you Creative Live for having one of the best teachers out there. I highly recommend this course to any and all.
a Creativelive Student
Terrific course with detailed and *clear* instructions on these essential skills. So happy with my purchase!