Lesson Info
16. Wash-n-Suds: Lightroom Culling and Exporting
Lessons
Day 1
1Introduction to Compositing
13:20 2Lighting for Compositing
17:55 3First Photoshoot with Model
41:26 4Developing New Ideas On-Set
57:32 5Matching Lighting and Camera Angles
22:57 6FreePreview: Testing Composite in Photoshop
21:18 7Shooting Second Image with Model
22:48Adjusting Lighting and Angles for Composite Image
1:01:01Day 2
9Introduction
13:21 10Pre-Shoot: Love at the Wash-n-Suds
1:14:04 11Test Shoot with Models
35:17 12Creating Levitation Effects with Compositing
33:57 13Shoot: Love at the Wash-n-Suds Part 1
1:11:35 14Shoot: Love at the Wash-n-Suds Part 2
48:52 15Culling the Images
20:47Day 3
16Wash-n-Suds: Lightroom Culling and Exporting
40:07 17Compositing: Wash-n-Suds Part 1
45:46 18Using the Pen Tool
32:38 19Compositing: Wash-n-Suds Part 2
35:43 20Swimming in Cereal: Culling and Exporting
33:22 21Compositing: Swimming in Cereal Part 1
42:24 22Compositing: Swimming in Cereal Part 2
1:02:49Lesson Info
Wash-n-Suds: Lightroom Culling and Exporting
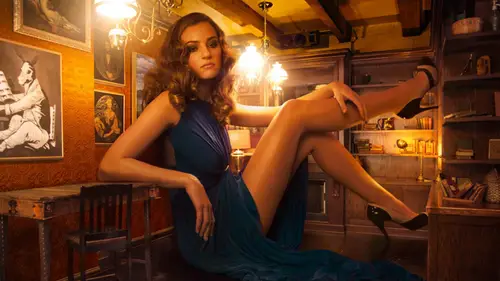
What we're gonna be doing to start off with the day we're going to actually kind of like book and the entire three days, so we're gonna go back and we're going to be doing the love at the washington composite first. The reason is it's a little bit on the easier side. This is if you guys remember what's up compositing frame compositing nice, which I totally made up a couple days ago, were doing frame composing and frame compositing is the easiest, most simple type of compositing, so we show how you show you can actually shoot frame compositing, and today we're going to be putting it together. Not only that, but we're going to show you through the entire process. They're at the end of the day yesterday we talked about actually took choosing the images that you wanted to do. You like picking your select and getting mouth, so we're going to start off today in light room, I'm gonna go through and show you the exporting process and how you actually get the files out there, and we're starting...
basically completely from scratch. This is not like a cooking show where it's like, I'm just going to tell you how we did it and it's like, poof, it appears we're going to see everything happened as it goes. Because of that we've got a lot to cover we're going to go a little bit quicker I can't explain like every single little thing that I do important keyboard shortcuts and things like that I will definitely give those a shout out but for those you guys from the home if you do miss anything well you can just watch the re watch or purchase of course so you can watch it over and over and over again magic of recording and the internet so yeah let's go ahead and get started we ready? Perfect. All right, so I'll take my seat and I'm just gonna sit here for pretty much the rest of the day it's gonna be a very exciting so let's go ahead and talk about our shoot we're going to go back to we do have is there any way we could turn? I think that there's a there's a program that shows all my keyboard shortcuts and I think that you will find that in photo shop I use aa lot of keyboard shortcuts very fast away. I am pretty sure that everyone will wind up hating that by the end of the day, but we'll give it a shot if you guys really want to everyone on the staff is like, you should turn that on, people love it and I'm like all right there's a lot of keyboard shortcuts you're going you see flashes of screen but all right let's go ahead and go through the go through the actual files so we're just going to start off with kind of how the day started I'm just rolling right to the left now this's basically where we started off with you know almost no light so this is no life and we're just trying to like start to build up our light thinking about creating these shadows and doing things jumping in the air and basically like building up our light from from nothing as we go through we're still testing and building up our lighting here and scrolling out we're starting to work on our composition as well and if you guys remember from the end of the day yesterday we already kind of chose some of our picks so I'm just going to go back through the pics but usually this is how I how I will go through let's just make sure we like that once a pic too there's a lot of stuff that's really you know kind of like not you're not sure of a lot of these things when you start often image you know is we have to kind of test this and especially with like throwing clothes in the air like you can't get that perfect the first time or the second time there's no like guidebook on how to do it and this is just like literally throwing clothes in here so this is something that you want to be able to do over and over and over again and that's one of the really great things about frame compositing is that you can do these things over and over again and you can just choose the best part of each of the images that you want to choose you don't have to worry about everything being correct in one frame which is really really nice and it's one of the main reasons why you would do a composite just like this so going through these basically yesterday we talked about how to flag picks you can hit the letter p for your pics like this little guy there's well hitting the letter p for your pics and this is basically you know any time you think you know the talent looks good or anything like that you can go through and flag it and then you khun a t end of flagging process let's just choose a couple more picks at the end of the flagging process what we're going to be doing I'm gonna hit g and well I don't even say that because I guess his on screen but we're going to be doing is filtering it by our picks so we're just going to go up to the filter icon and I'm going filter by just the flag photos so at this point these are the flag photos that I that I actually want to use now I still have a couple of decisions I need to make I need to figure out which are the final shots that I want of each of the subjects I need to figure out the final shot that I want of our girl in the final shot of the guy so I'm gonna do that right now and then we're going to go ahead and export everything out so you have that works as well okay so these that have picked and flag with green we did this yesterday if you remember thes air mostly for additional details so here we have details this one is with amanda there so this is the detail that we're working on here and basically going through in each of these has different details so these are necessarily details that I put in there four hours subjects thes air details for for other things in the actual photo that we're going to be pulling together okay now we've got some pics that you know we like of either of our subjects or just random clothes flying in the year and we did flag pick for our girl subject and this is if you guys remember we used to compare mode to compare two different photos yesterday and what we did is chose between many different images this's a revenge hit by this is our many different images but this is the one we're going to wind up using of our girl so what we want to do now is basically try to choose an image of our guy, so I'm gonna choose to images holding down the comanche and clicking on those two, and then you can hit c, and that will bring up comparison mode. Okay, so what I want to do now is basically figure out which of these images I like mohr of my guy, I'm gonna zoom in if you just click normally it's going to zoom in at one hundred percent one to one ratio. I don't really want to do that, though, because I can't I can't make upon mind, you know, seeing seeing something like that for assumed and it doesn't really help me out, so what we're gonna do is go right over here and change it to about a third there we go, or maybe even a fourth zoom did so this way I can still see I can still focus in on my subject there we are, and I don't have to necessarily worry about everything else. I will really only need to see my subject to this point, so I can kind of choose the choose the better frame for this, all right, between the left and the right, I think he's making a better face in the left one s o we're going to move on to the right and let's see, between these two, what do you guys think? One of the right? Maybe better. Yeah, in the audience. Perfect. And so you can hit the up arrow just kind of, like, upgrade that one. All right? We're still not getting exactly what I want. Maybe I'll zoom out just a little bit so I can see not only here we go. Here we go, so I can see not only you know, our subject, but I can also see is he, like, floating in the way we want him to float and everything like that. Okay, I think the one on the left still works. The one that's, actually. Pretty good. I think the one. What do you think? The one on the right it's better right? The closer looking good that hampers in the right place. It doesn't exactly. It doesn't cover his face all these little details. So it's, nice to be able to see the side by side to see. Like, okay, this is yeah, this is the better one. So it just hit the upkeep, which will operate that and that we could just continue school with right, and these air from the other picks that we've already chosen as what we might want the guy to be in okay and it looks like we have our winner so what we're going to be doing is just basically flight that with five stars so it's a very quick way to pull up all the images we went through and we did initial pick of like these are the images that I think will work the guy and then we brought him up in the comparison mode and chose our winner so but it g to go back and now we have our two winners so let's just pull those up and hit the seiki to compare those as well right there we go it was clicked on the wrong to apologize so this is our image of our guy and our image of the girl now this is the whole idea behind frame compositing you don't really have tto have the two things that are going to be wanted being together in the same photo they could be you know in different photos and we're going to wind up putting them together you can also have interesting elements in your photos you can see here we've got we've got john with a fan right in the center of our photo like obviously if you didn't take a photo without him there if you weren't using from compositing, you couldn't have this now in this case we have john in the middle but this could totally work with something like a soft box with you know, lighting modifiers, you know, wind machines things like this other types of props supports all kinds of things can be used and you can have them in one frame and as long as there are things you have your camera on a tripod and you take a picture with that person not in the plate in the way or that object, then you always have the option to kind of like, bring it back all right? So what we've got now is basically a couple of pics here I've got two of our main subjects we've got a couple of extra exposures here of our background we've got some of the things that we did with leaf you guys remember towards the end of the day pulling these together for some different options back here as well and I have a one hundred percent decided if I want to go with that route with lee in the background, I thought there were some really great suggestions but in the end we have to kind of balance the fact that we do have a composite and we do have a concept that we're working towards and the concept is for love the washingtons and these elements you know, in the background with like a multiple subject in the background that's like it is kind of a cool thing but that to me is like almost kind of its own concept so to combine those together, it might wind up destructing it might not, but that's something that we have the option now to play around with it so we can just pull it all together, and we could just decide afterwards. It's not really that big of a deal. Okay, so what we're gonna be doing that was basically starting the export process. What I want to do is choose the images that I know I like. So all of our green images are going to get exported. Now, the first thing I'm going to do is kind of injured introduce you guys to a little bit of, like, a file structure and these air all shot in this aaron hasty to fuller. So I'm going to do is write click here and I'm gonna create a folder inside this and we're going to call this selects. All right? So we were goingto open this folded up by clicking on this arrow here and now we have a selects folder inside of the detail, right click and create another fuller called master. There we are and I'm gonna write click and we're going to create an output folder, and then we're gonna create one more and this will be working files. Great. So where am I creating all these holders? Basically, when when you have a lot of images like this, and when you're starting to, like, build a catalogue and you have a lot of things, you need to go through it's really good to be a cz well organized it's possible? I'm sure if you look back to like your old photo shoot that we're just all the one folder your ptsd is in there, like you're exported j pegs or tips or whatever p and g's are in there, some of them are different sizes, they're all named something different, and you're like what? Like, you can't find anything, right? It's horrible. Not only that, but like if someone had to, like, get on your computer and you were like, I need that psd that I shot six months ago, it was of a girl in a dog send it to me now like they wouldn't be able to do it right? They'd be like, oh god, where is everything? So this is just a really great way to keep everything organized, so basically what we've got is our our shoot files would I normally do is I also will create a sub folder in here called capture or the actual name of the photo shoot, I also usually renamed this I'm going to right click over here and we're going to rename this hope this is going to mess up anyone here at the creative live studio we're gonna call this washing suds so just looking at the folder name there we go just looking at the folder name let's say this is our work drive here and this wasn't open and I had maybe twenty or thirty different photo shoots I could see just by the folder name what the photo shoot is so I don't need to go in and look at all the files everything like that we're going to open these up now our master files this is where our ps d's go if you guys are editing very large file this is going to be like a psb like a large photos that document if you're editing in tiff this where you're tifico so this is where all all of your documents with layers are going to go the output folder is where everything is these air the final so these they're going to be like going out to the web so you might have some re sides images in here these air like final j pegs and p and g's and things like that the selects folder usually depending on how you work in photo shop I usually bring in tiffs directly into photo shop and those were going to get exported out in just a second to my selects folder so we do have duplicate files in that way, I have the originals, but I have the exports out tiff, and that way, I can always see, like, you know, it can also be confusing when you do work on a composite too, remember, okay, what images that actually choose that went into this composite, especially now, I mean, we've got maybe twenty images that we're going to bring into this final composite if I had to recreate this or, like, fine, fine these elements again, for some reason, instead of going back to all the files again, what I would just do is go to my selects folder and say, these are the actual files that they used to create this composite, okay, so let's, go back here, and I'm going to just show you guys how we actually export everything out, and we're gonna go ahead and filtered by these picks again, and then we're ready to go. So if you remember the green files, what we flagged his green and flag this picks, those are all going to be like those extra detail shots. So I want to make sure that all those to get exported going, filtered by the flag and the green files when hit command a and I'm gonna write, click here and go down to export and we'll just say our export dialogue so we've got a lot of different we've got a lot of different presets and everything like that maid here, you probably won't have a cz many presets because this is, you know, this is not your computer I don't have anywhere near this about in presets, so basically, there would be almost nothing here, but what I'm gonna do is I'm gonna create create a quick pre set and that's just going toe basically serve is my selection. So what we're gonna do is I'm going to go to export, we're going to choose choose folder later, which is useful for the process who'd a thunk and wei don't need to rename this, I generally don't rename my files if you want to. You can do that as well, so we're not working with video. The file settings here, what I want to do is I'm going make these tiff format. Now I'm gonna check on the stats on this computer. We're just going to go to about this mac, all right? And we're looking at eight gigabytes of ram and so that's telling me that this is going to make a decision right now based on a bit depth that I'm going to export my computer at home, I loaded up with ram it's got thirty two gigabytes of ram so I do add it in sixteen bit given this computer I'm working on right now with eight gigabytes of ram, I'm not going to reason is it's going to slow this computer down massively? So I'm going to make sure this bit depth here let's, go ahead and close that up this bit, that is eight it's not the biggest deal in the world. Sixteen bit is going to get you a little bit more wiggle room, but you do want to work on ah, fast computer, if you can, because it's there's nothing worse than like, you know, making a change and then waiting for ten minutes that actually apply it kills your creative process and you can't actually, like get in the mix of things color, space, pro photo rgb is usually what I use this well, okay, so we're just getting down image sizing things like this for the most part, you can just kind of ignore all that stuff. So this is these air, the settings that I've got in place, these they're going to be the export, and they're going to go into my things going to go into by selective older I'm gonna go ahead and add a preset, and we're just going to call these selects. There we go so when I'm open this up let's say I'm gonna be exporting the image of the girl and the guy I don't have to go and choose all those options again all I just choose my selects preset right over here and we're ready to export so we're good to export I'm gonna go ahead and hit export and now what we're going to do is choose this love of the washington it's the greatest thing about what we're doing, you know, here in light room is created these four folders in lighter, but it actually creates those folders on your computer to so it's not a catalog system just in light room, it actually works on your computer. So now what I'm doing as I'm choosing the folder that they're going to be output and we're going to choose the selects folder, so I'm gonna head out hit open and it's going to export these out as tips the reason I used tips, they do have a lot of information much more than a j peg they're not compressed like the j peg and there you can read them throughout, you know any file system and things like that so you don't need I'm not really editing directly from raw files that if I didn't need to do any adjustments to the raw files, I would do that those in light room before I went to photo shop, but in this case, I don't I don't think we need to do that, okay, so we can see light room doesn't like automatically update these things we still have, you know, it says we have zero full files in our selects holder. What you want to do is write click here and you want to go to synchronize folder and basically it's going to find those seven files and it's going to pull them back in the light room, and we're just going to hit the ad and there we go. Import, okay, so they're back into light room now, and these are my seven images that we just chose, and we can see that they are hit, I we can see that they are tips, so we've got all of our images and let's go ahead and just basically do the same things and figure out all the images that we actually do want for our for the final, okay, so when do we want these to write? These are going to be our our main shots? We've got a hero shot of the guy and are here of the girl, someone right click we're going to go down to export, and then you can actually just find your selects. Preset right here so it'll save you a little bit of time love the washingtons and we're going to choose our select it opened there as well and it says apparently you already have something like that well, we'll just say use unique names because I don't know why I would do that. Oh, it's said that because I had this guy selected as well so re exported this one out but now I've got two versions of their generally you don't want to do that, but in this case that just happened okay? So now we're going to go through just in case I don't have I did flag as our picks you know, with no information there we're going to go through and see if we need any more details are either not green or five stars the green again was for the extra details and the five stars were for our two subjects there we go, but we did a pretty good job yesterday of making sure that we did go through all of our files and fly them and mark them appropriately. I think the only things that we're missing here are the are these four lovely here in the bay area someone should click all of those and right click go to export and all the way down here we're going to go to select we don't choose our file again and hit open here and there we go it's going to export these outback in this lex and then I'm gonna re synchronize the selects folder so this might seem like a lot of work you guys probably don't do all these things it won't take you as long when you're actually doing it. I'm explaining through everything but that's going to help you be really, really organized you know, this way if you can see like if ah lot of the times if you're working with a client and you do a composite, they're going to want the original source images as well depends on how you if you do deliver the product if you're doing retouching for another photographer, they're going to want to see all the source images. It depends a lot of ways, but it's it's really not uncommon for l do a composite and someone will want the final image, but the law also want the source images as well and that you can work that out with your in your contract. But it's just a really great way to keep everything organized, so we're gonna go ahead and synchronize this folder as well and there we go now in this case there we go and we'll just hit ad I don't need to copy them or anything like that will just hit the ed, so in this case we've got our fourteen selects images and they're in their own folder and everything like that. This is really great to let's. Say you guys are working on you did a portrait outside and you were going to be like replacing the sky well on my own computer. I have thousands of pictures of skies because it's it's not really that hard thing to do. We had architecture, photography and you replace guys all the time, right? Exactly. So replacing size is something that you know is done quite a bit in photo shop and it's. Not really that hard I do, and it can make images of a lot more dynamic. So let's say these were all pictures that I just took of ah, nice building. And I wanted to put some skies in there. Do you have a pretty large library of skies on your computer as well? Same here. So instead of like trying to figure out what sky did I use and going back through the entire library, I would go find those guys. And then I would copy those folders into this selects folders. Well, you could even create a sub folder that would be like a skies. So I know that every single file that I used to create my final image that's going to be in this select file. Okay, so it's pretty easy to go into photo shop now, I don't really have to like, right? Click here and say edit in photo shop or anything like that because I know exactly where all of these files are. If you do need to ever figure it out, you can right click and go to show in finder and this is going to tell you exactly where your actual files are, which is going to be good for me because I need that I don't know where they are on this computer system. Mostly I just keep these in, like a drive that will have, you know, my entire photo shoots, okay, so I know they're in this tethering washing suds, and here we have all of our shoot files if you didn't. If you're like me and you really like things to be very organized, I normally don't have the actual like shots there and then just some folders, so we're going to do one more thing, but I'm gonna do is I'm gonna right? Click here and we're going to create another folder and we're gonna call this capture now I'm gonna show you guys how to move things in light room, so I'm going to shift quick, I'm just gonna hit command a, and I'm gonna move these to my capture folder and what they're going to do is it's actually gonna move the files it's here in light room but it's also on my computer as well. So it's actually moving the files. So now within the washington I've got my capture folder and that's where all of my files are you can choose right over here. You can go to view and you can choose to have this be where is it? It's an edit no it's in library. Thank you. How did you read my mind? Talk? That was awesome! Show folders in sub folders so show photos and samples but you can unclip that and you so you can see if you just click on love with washington's you won't see anything now, but here the capture you're going to see and hear the selects you should see those as well. Well, it didn't bring that. Oh, you know why I didn't bring in the selects? Because when they were in the capture, when we had this visible, it brought all those files back into their ok, so that brings us another challenge. How do we find just those selects out now and then put those back in this lex folder well, that's, a really good way to use this a tribute or text so you can search for dot t f and this should bring up just the tips that are actually in this folder, which is pretty cool I wasn't fine on teaching that today because I was a total accident but it's a nice way to be able to search through some of your folders so we've searched dot in the capture folder right click and drive those back to the selects holder where they should go and you'll see they will not show up in my capture folder there back in my selects folder okay, so if you did have, you know, during a day of photo shooting if you had ten or fifteen different like individual sub chutes that you did in fact later we're going to be doing this. We're going to divide our capture folder into sarah and which was with the cereal bowl in like jasper who was in pool so we can do that as well. Okay, so let's now right? Click over here I want to do we're getting right click and go to show this in finder and now we're going to switch to photo shop so I'm pretty much done in light room at this point a lot of people will do exposure adjustments and white balance and things like that in light room if those things are like pretty off, I do recommend doing those in light room before you export out your select in this case we were shooting tether the entire time which have four hours to set up our lighting like we've been pretty confident that it's about what we wanted to do if it wasn't like we should have taken the time to do that during the photo shoot itself one thing I'm gonna do is we're gonna go ahead and delete this guy because remember I exported the same file out twice on accident cause I had it selected so I'm gonna click on there and hit command elite and there we go it's gone so let's go ahead and open up photo shop now and what we're going to be doing is actually like bringing these files in two photoshopped let's go ahead and quit light room out here so here in photo shop what we're going to do is go to file and we're going to go to script and then I'm going to go toe load files into stack and there are a lot of different ways to get images out of light room and into photoshopped this is the way I use it's quick and it's relatively easy so we're gonna say use files I'm gonna have this brows key because there's a lot on this computer here right now it looks like some of this is from brooke shadings workshop but I'm gonna do I still have this folder open this is pretty cool you can actually click and drag from any dialogue if you guys are using mac over to like open dialogue there we go and it'll switch it exactly it'll switch it over so I don't have to re find it over here already found it here three light room I'm going to shift click on all those and hit open so it's going to load them here we do have an option to it automatically a line source images I'm not gonna click that now we're going to go through how to do that later a zoo just in case you get into a script and we're going to hit okay so what is true? And I was all of my selects all my images that I exported out as a tiff it's now bringing them all together in photo shop and it's stacking them in a way that we can see they're all right over here here we go for our u so we can go ahead and close this out weaken bring photoshopped let's just hit this full screen here and then usually when I work in photoshopped there's a lot of different you can do this however you want but I would really liketo add it in full screen so I always hit f right before I actually added my image this way I can use my space bar iken bring us up here and over there all kinds of things like that so it's it's just a really easy way to kind of like navigate around the images do you have any questions so far? Maybe from the folks of the internet we just covered a lot we all his seven questions okay, let's go through some before we get into the image so a little less technical one jefty schultz says wow provide the client with source images doesn't take away from the magic that's a really good question and that totally depends on what your job is. I do work as a commercial photographer. I take clients where I deliver the final images. I also worked as a professional re toucher, so what's gonna happen is the client my client is actually the photographer so the photographer might send me a drive with, you know, maybe two or three hundred you know, see are two files or whatever you have it raw files directly from the camera and then it's my job to create the composite for them but they're gonna want to get they're going to want the original files back. Not only that, but if they have a client. I just worked on a relatively large nationwide campaign where the client wanted all of the files as well, so the final client wanted all the files so the photographer had to deliver an entire drive to me. I had to make a composite I had to send not only the files that I used but the final files as well as the ps d's because that's what the original client wanted so I really that was part of the job that I took so I had to take all that and then deliver it all back out to the client so it yes it kind of destroys the magic but if someone's passing one hundred thousand dollars to have a nationwide campaign made there's there's not much magic going on right there anyway so yes, sometimes it depends on the client a lot of people are curious about the file types you're working on let's see tao su is exporting tiffs better than psd is when it comes to compositing good question now it totally depends on what you're working like file format is in this case I wouldn't have a reason to export a psd but if it's going to have justus much information and psst they're really useful when you do have layers so I wouldn't start off with a psd the only thing I'm sorry the other thing which is relatively interesting well just go ahead and bring this out so you can see these are all a bunch of tiffs that I've brought together now they have a lot more information than j pick so I wouldn't recommend starting with a j peg thie other through a really interesting thing is we can go ahead and save this file as a tiff as well tiffs do support having layers and in the commercial industry tips are pretty standard generally when I'm delivering images or like files like this to a client unless it's very large which I'll deliver up psb file which is a photoshopped big fire I think does anyone know doesn't really mean that okay, cool, you know, if your final images like two plus gigabytes you can't save a tiff that large or psc that large maybe tiff has a slightly higher cut off limit but a ps you can save like up to very, very large so I'll even deliver the final layered file as a tiff and we'll go ahead and save that out right now weaken I'll talk through this and we can take maybe one more question germany hit shift command s and that's going to go ahead and say save as so we can see I can choose here we're going to go to our selects folder we're going go back here and now look how organized this is this is awesome it's no question if I keep the same structure and organization I could go back six months and I confined my exact working files I confined my you know psd this is going to go in our master folder so master folder and we'll just call this washington and often times if you do create if you do create multiple files, we're going to call this w ay p one and that's work in progress one in other words I'll save this out I'll do some work on it maybe tomorrow will come open this file again and I'll do more work I'll save this w ay to so I can get that I can I have like a backlog just in case something happens to my w pipe to file it becomes becomes corrupt or something that's doesn't happen much, but it's just an extra backup for you guys so we're going to call this washington's work in progress one it's going to be a tiff? We do want to make sure we include layers and we're going to hit save right here and that's going to save in the master file there we go, image compression, we're going to choose none and all this stuff we're gonna we're gonna save just like that. Okay, it's going? Yeah, really going to increase file size? Uh so let's un check showed me how to get because I really don't need to see it now I'm going to go back into the light room really quickly and we're going to show you how we can re bring this back in the light room again it's again with that synchronized folder before I do would contain more quest sure let's go with old red eye who is asking why you create the folders physically instead of just using collections for working files that's what? Yeah that's a really good idea collections everyone's got their own system for me I use collections a little bit differently than a lot of people some people collect create collections for every single photo shoot that's not really the way that I like to do it I liketo have basically I have one collection that is my quote unquote serious photo shoots and so I can see all my photo shoots at a glance that way if someone's asking for portfolio images or whatever it is I can go back through an entire year of my serious photo shoots I can see you know ok, go to this photo shoot look at the output folder you know export that out to a folder on my desktop that says, you know, final resolution images for portfolio and I can go through all those really quickly I do have other collections that I use like when I take images of skies for instance I have a whole collection that I just to like skies and textures and wood grain and things like that I also have a whole collection of just inspiration images where I gather in images from the internet and I put those in a collection as well so that's how I use collections but there's a lot of different ways to do these things and it's worked for me, but I other people have their own methods that that doesn't make them wrong this is just something that I've used for years and years sounds great. All right, let's open applied room and I'm gonna show you guys again how we can access this back and synchronizer folders all right, so we are going to choose to open the catalogue and right here oh, that's how you scatter? I've been saying the word collections that's how I used catalogs sorry, guys, I realized that I just completely did not answer the question because I misunderstood I heard catalogs in my head. Okay, so let's, go back down here and I'm gonna write click on this master file we're going to go to synchronized folder and then it's going to bring back in there we go it's going to bring back in the tiff that is my master file. So we've gotta capture our master in ursula. Now. The other thing that I do want to do in this case because we're going to be providing with these images for the people who were working at home it's a follow along, we're going back to the select hit command a animal right click and we're going to go toe export let's, just go back to our export dialogue I'm going click on this select preset but in this time, instead of being a tiff, what I'm gonna do is export these out as j pegs just because the images that we want you guys to file along with j picks will be more than good enough, for example, we'll choose s rgb color space or pro photo rgb srg bees what a lot of people use that's what's going to be out on the web and generally when I'm just living like working files or things like that, a sergeant is fine for that sort of thing too, so we're going to choose export here and we're going to choose washingtons and then this is going to be our working files. Okay, so this is not something I normally do during this process. This is something that I'm doing because I want people who are following along at home to be ableto have these files so they can then take these images from they could take these images from this computer and upload them which should be available soon ok? It says this guy could not be found can anyone remember why we can't find his file? I deleted it in finder yeah, so it's not even here in this select fuller so what I can do is right click on there synchronize again and what it's going to do is it's going to find hey one of these days he's gone let's synchronize it and get rid of it in light room it would be nice if it auto synchronised but at the same time you sometimes you have many many different files and sometimes you don't want some programs to do an auto something in the background because going toe eat up all your system resource is we're going to go synchronize folder for our working files as well so we can see we've got thirteen files here and everything's organized really well so you know the folks you know who are working with these files we can see these are the pictures we took this is the master file we're actually going to start editing these are our select as a tiff in you know the high resolution and here are the working files that are going to go find going out on the internet so while we're doing everything in photo shop we're keeping everything organized and I literally like the organization process here so we're going to go ahead and quit that and go back into our faro and we're going to go ahead and get started we got actually let's take one more question is a good time before we get into it all right next question in the chat rooms there's quite a few people wondering about the color profiles that you're selecting output carlos is wondering what's the difference between all the other color profiles on wipro photo was chosen by you and don uh fan stock says why does it make a difference to work in pro photo and an export for printing as an r s b srg be ok really good question well pro photo the different color profiles and we could dork out about this for a long time but but I'm going to do is go to edit and we're going to go down to our color settings here now you have a few different options here this is apparently my working space right now is s r g b I would actually want to change that to pro photo rgb what I exported those working tips out as the reason is you do your different color profiles or they're created for different devices and for different uses pro photo rgb is going it's a very large color spectrum includes a lot of information so when you're editing especially if you need to push your files in some ways like really start to push your colors you're going to have a lot more options when you choose something like pro photo rgb most people use adobe rgb I tend to prefer pro photo rgb the reason to be totally honest as I read an article like two years ago that convinced me that pro photo rgb was the way to go and I forgot all the reasons, but I just remember my decision was made at that point, so I stuck with it s rgb, I wouldn't really recommend editing in srg because srg b is a limited color space it's a much smaller color space that gives you a lot less options and s r j b is great for actually exporting out to the web. Todd, you have a comment? Yeah it's goingto say so if you do all this work in bro photo, then you end up exporting and out index rgb yes, do you see a lot of shifting going on? You won't see shifting and we're going to go through exporting it back out again! I don't see any shifting, so it doesn't make a whole lot of sense like mentally it's like colors color, but if you it's like if you start off with a certain large amount of information you can kind of like, push it and pull it and worked with it, it doesn't degrade your files nearly as much it's a lot like working with the j peg versus a raw file. Now once you have your final image and it looks the way you want to look, then you can go ahead and export it out as a jpeg and s rgb and things like that it's just going to take what it actually looks like and transfer that over to like a little bit lower resolution in a different color space but in order to get to that final you really sometimes you do push and pull things quite a bit, so I'm really glad that question was asked because our color settings here the working space was actually in s rgb which these photos are they were exported out of light room as pro photo rgb so I'm going to change this back to pro photo rgb I'm gonna hit this and I'm just gonna close this back out we're going to have to bring those files back in again so we're going to go toe files down the scripts and load files into second if not, we were going to get a mismatch when it comes to color profiles and that's not really something you want to do because I made the conscious decision I want to work with these in pro photo rgb, which is the largest color space why would I limit myself to a surgery while I'm editing? So we're going to just choose the same thing again and they should still be there, so we're going to go back here, go back to our selects folder see how easy this is I don't have to like go back in my capture folder like find every image that I want to do again it's just like oh well now I can just re import my selects it, okay and hit okay, there and let's, just double check on our color spectrum, and you'll actually be able to see. When I first started in photo shop, I heard s our gbs rgb s surgery, and I didn't want to get confused by it because it is kind of confusing. So I was editing my photos in s rgb for probably a couple of years when I switched over to pro photo rgb, you can see it actually in yur color special, like you can see the colors in your color will like. It might be hard to tell, but for those of you guys who were familiar and use the editing and sergeant like they're, they're more vibrant, like you have more options when it comes to colors, they're literally mohr colors that you can work with on dh you can see it here like in the pinks, like how vibrant this area is in particular, you might be hard to tell, but if you're used to working with us, rgb colors don't look like this in this rgb. Yeah, it did kind of jumps out at you like what, what, where these colors I never saw them before, right? So it's really nice to be able to have those now we re imported these there are in pro fit or gb and again, I'm very thankful for that question because it basically kept us from editing here in s rgb. So whoever asked that thank you very much. Now what I want to do is I'm gonna hit shift command as we're going to go back to our master file. There we go and I'm just going to save right over this guy, so we saved that one earlier. It had the sergeant color space that we are say working in, I'm going to re save over in profile, rgb. Now keep in mind, guys, I am I'm not the most technically minded person in the world. There are a lot of people out there, probably in the chat rooms who know maura about color spaces, who know about profiles, who know about, you know, all this stuff a lot more than I do my my specialties in compositing, so I know enough to get the job done and to make my clients happy and create cool images of I have never had anyone complain, but I'm sure I could no more.
Class Materials
bonus material with purchase
bonus material with enrollment
Ratings and Reviews
a Creativelive Student
Great moment i Won't miss. 2 of my favourites learning web sites in one !!! Thanks Aaron for all you bring to me including lessons of English...(don't understand every joke but...when you smile , i do too... ) Best regards from Brittany (France)
Mohamed Rasoon
i'm amateur photographer.i had a hope move on as professional, this is great lesson and CreativeLive motivate my self step by step to fulfills my hopes.