Project 2: Create Grounding
Lesson 17 from: Compositing for Digital ScrapbookersTiffany Tillman-Emanuel
Project 2: Create Grounding
Lesson 17 from: Compositing for Digital ScrapbookersTiffany Tillman-Emanuel
Lessons
Class Introduction
17:03 2Conceptualize & Narrow Down a Theme
11:21 3Build Your Compositing Studio
05:24 4What is Blending?
09:38 5Most Common Blend Modes & Groups
08:07 6Self Blend a Photo Two Ways
12:31 7Drop & Go Blending
07:39 8Blend Two Photos Together
21:36Project 1: Introduction
05:49 10Project 1: Build Background & Focal Point
31:45 11Project 1: Create Grounding
13:57 12Project 1: Add Personalization & Lighting Effects
28:58 13Project 1: Fine Tune & Finalize
10:57 14Project 2: Deconstruct Layer-by-Layer
04:41 15Project 2: Start With a Focal Point
18:13 16Project 2: Add Background & Build a Scene
09:25 17Project 2: Create Grounding
04:07 18Project 2: Add Lighting Effects
14:15 19Project 2: Add Personalization
11:56 20Project 2: Fine Tune & Finalize
18:39Lesson Info
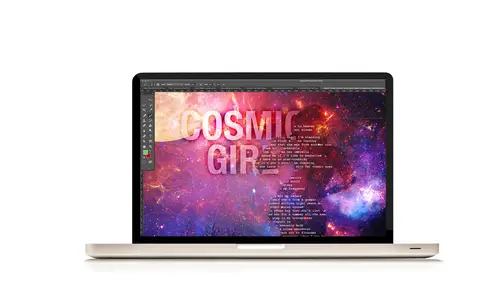
Project 2: Create Grounding
So to add a shadow, we're going to click on the create new fill layer icon in the layers panel, and this, or create new layer. And this is on page 22, step seven, letter A, so we're gonna create a new layer, and then we're gonna drag this layer behind our focal photo in our layers panel, okay? And that's called the subject's base photo, 'cause remember this is the stack that we've clicked to the base photo and this is our base, and I can just name it base. That will help if anyone's wondering, well what's the base? This is your base, okay? So we have now a, a new layer underneath the subject. We're gonna target the new layer and use shortcut key D, to change the foreground of our color picker to black. My color picker's already black. And then what we're going to do is, we're going to Control or Command click the thumbnail of the subject's face, so we can get his body shape. I need to get an outline or selection of his body shape. So Command click his shape creates a selection, and the...
n come back to your new layer, and then flood it, so that's all Option Delete and black, okay? We're gonna fix the little area that holds on to it, all right? All right, now what we needs is first to fix the little area, so hold down your Alt or Option key, and click and drag on that layer mask from the original base to just duplicate it onto your shadow, what will become your shadow, okay? So that's what we're looking at. And I need that layer's mask right there to kind of hide the arm part, okay? So that's how we do it. You don't have to go back and create a new layer's mask. I'm gonna keep it up so you guys can see it and keep the photo away, so you can see how I'm gonna ground it, okay? Now with this layer still targeted in the layers panel, we're gonna create a blur, so we can create a really quick shadow. We're gonna go to Filter, Blur, and select Gaussian Blur, okay? And the radius I'm gonna set is gonna be pretty big. 100 pixels for something that's this big. Oops, am I on the layer's mask? Lemme click the layer's mask. Make sure I'm clicked on the thumbnail, then go to Filter, Blur, Gaussian Blur, and now you can see how that blur's created, and we've created a really quick shadow. So no drop shadows, no create layers, just a flood fill of shadow. Very easy way to create a shadow. Then we need to increase the radius so he's really really blurred. Now the radius will depend always on how much blurring you need to ground your subject, okay? If you don't want him to be as blurred or as shadowed, you would leave your radius pretty low, okay? That's your typical kinda drop shadow radius. But if he's like existing in space or with clouds behind him, you need a little bit more, little bit more umph, okay? So around 100 pixels should do the trick. You can, if you're used to smart filters, you can just come back and keep changing Gaussian Blur as much as you want. But since we're working with the idea that elements, my elements friends are watching, we're gonna do 103. And if you need to back up in your history panel, because it doesn't look good, then just do that, okay? Then let's toggle on my friend, and look! Now he looks grounded. He kinda has this kind of shadowed effect that makes him feel like it's casting from him, okay? A cast shadow. Also, if you're used to shadowing, we usually use Multiply for our shadows or Linear Burn, okay? So that's gonna give you a more in-depth shadow blend mode, and if you're used to linear burning, you already know, kinda know why we do that, all right? Finally, if it's too much. If it's over powering, you can always reduce your fill opacity to make the shadow less or more prominent, okay? And again, that's just to your taste. All right, that's how we ground our focal photo for our subject. Any questions on that? Very simple, huh? Once you see it come together, then it makes sense, doesn't it? If you had to guess, and say, "Okay, this is how she did it." Would you have figured it out?
Class Materials
Bonus Materials with Purchase
Ratings and Reviews
Phyllis
I was in Tiffany's Mixed Media class and was also lucky enough to be in this class. Tiffany is an AWESOME instructor and well organized. Her Mixed Media class was a great building block for this class. The class is well worth the money--well organized workbook and other great bonuses. If you want to take your scrapbooking to the next artistic level, I highly recommend Tiffany's two classes at CreativeLivel.
a Creativelive Student
Great course with easy to understand ways of blending more than one photo together for a great composite layout. Excellent materials and workbooks.. Thanks Tiffany for a wonderful class! - Christa (cfile)
E.L. Bl/Du
I think Tiffany is good at explaining it so those who arent pro photgraphers can start at the basics to learn photoshop. I really liked watching this even tho my vision is in another direction, I like how she explains how to get there in photoshop. She makes it not so scary to jump in. She is clever mom too, every parent wants their own kids to be a star and she surely did that. What a neat thing to "scrapbook" the photos. I liked learning adjustment layers, would like more in curves too. But great place to start out in ps. I recommend if your lost in PS.