Lessons
Day 1
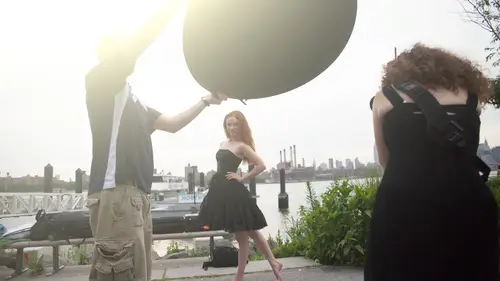
1Class Introduction
32:47 2Crappy Lighting Conditions: Direct Sunlight
27:47 3Crappy Lighting Conditions: Fluorescent and Mixed
21:00 4Crappy Lighting Conditions: Low Light
29:21 5Crappy Lighting: Dappled, Backlit, and Overcast
12:32 6Setting Your Camera Up for Crappy Light
27:43 7Shoot: Fixing Fluorescent Lighting
06:16Focusing and Shooting Modes
18:35 9Shoot: Mixing Daylight and Tungsten
23:16 10Getting Started with Flash
43:30 11Shoot: Low Light without Flash
19:43 12Shoot: Low Light with Flash
16:49 13Recap and Q&A
16:37 14Crappy Lighting Condition: Backlight
33:16 15Crappy Lighting Condition: Low Light Outdoors
24:10 16Shoot: Direct Sunlight
37:20 17Shoot: Direct Sunlight with Shade
05:47 18Shoot: Direct Sunlight with Flash and High Speed Sync
25:35 19Shoot: Dappled Light with and without Flash
28:57 20Shoot: Open and Covered Shade
11:29 21Shoot: Overcast without Flash
23:50 22Shoot: Overcast with Flash
30:04 23Recap of Shoot
1:40:16 24Scenario Kit: Event
27:44 25Scenario Kit: Wedding
20:56 26The Next Step Slideshow
24:52 27File Managment and DNGs
12:02 28Creating Color Profiles
27:56 29Noise Reduction in Lightroom
12:59 30Using a Color Checker
23:32 31Post Production: Basic Adjustments
25:19 32Post Production: Smart Objects and Color Processing
25:29Day 2
Day 3
Lesson Info
Creating Color Profiles
And if any of you are thinking like okay, well I don't really care about d angie's heaving sighs or you know, archival ability you have to convert to dandy to be able to do what we're going to do with the color checker so if you want to know how to use that in conjunction with later in the fancy way besides just the white balance but actually the color profiles that's why we're going through this and trust me I'm gonna show you something side by side color profile ours were going like oh my goodness I can't believe I've been like not using the engine color profiles the whole time I'm kind of old okay, but I usually embrace new ideas and new technology really well light room is something I just doesn't make sense to me so I used bridge camera raw in the photo shop work flow but I know the developing engines the same it looks a little different on screen wouldn't be able to use the color checked er in that workbook I just worked too good for me I create a folder of my sub folders for my ...
process things backed up on a drive in and everything just works really nice that way this I mean I tried light room once I started mr put moving files and I couldn't find them and I'm just like this just is way too complicated hardly find it watch one of the labor class uncreative life, but the answer is a little light room class, and all that was is about developing photos at nothing doing deliveries so okay, library is kind of the basis, so we should definitely start you off on that route. The color checker has a standalone option, too, okay? And then there is also a dmg profile manager, so we will make a color profile for you. We're using that, then we can manage it using this software, and then I'll show you how in adobe camera are lindsay will rather this afternoon how we can apply that. So yes, for you, photoshopped bridge users will show you that when we come back from the break and for light room users will show you how to do in light room and if you don't do either, we'll show you how to do it with ease. Standalone applications here. Yeah, and at a very minimum, you could use it to achieve white balance. It just takes a few more steps if you want to do the profiles, but you can't, and we'll show you why pounds with it too. So we're gonna give you all of it's a great question color checker, but I don't want to change my entire work for justice. So let's let's jump back over here so here's our copy now right here you can make previews because he doesn't want to have to load all the data for this raw file every single time you look at it it's you could basically make a smaller j peg preview or a full sized a pig preview you could make backup copies here is where you would copy to a secondary drive to make it back it up to bring it off site file rename and if you didn't do it separately I recommend you do it here get in some kind of convention of having a date and a name so you don't get redundant files otherwise if you're like I need files seven eight nine well file seven eight nine you've shot in your camera ten times you have ten versions of seventy nine on your anything if you have a date you never run into that problem um developed settings this is huge this is stuff that you can apply before you even start editing your photos so I'm gonna be able to edit my photos before even getting the light room to edit them so this is saying it'll go ahead and apply all of these things right off the bat as I'm importing so if I know that I like I want to go black and white with all these and maybe a little red filter to make the skin look nice and glowy I can set it up. So has these photos come in? They will go black and white, they will enhance the reds, so when I start editing them, they have a good base. So this is just really neat, because if you look over here and use the presets, I've got some film simulators, a certain client of mine that I shoot for a lot. I already have that preset standard adjustments. These are things that I do to every photo, every time, every import, and now it doesn't automatically for me as it imports. And I just if you don't mind, I want to take a step back. I've taught light room a lot, and one of the things that people don't quite understand is they think that light room is like a gigantic fancy, a version of photoshopped that holds all their files, fundamentally, what it is it's, a cataloguing system, and what it does is it creates reference files basically more or less j peg previews that have the information of that the overall information of that file there. But when you make a change in light room to an actual fight, it's not changing a file, what it's saying is okay, here's, this image and what you're gonna do is you're going to create a version of this this is how you see this image because I fight duplicate that image. I'm not copying and duplicating the file. I'm saying here's, another way to see this image. So see it in black and white in this one see in color in this one in each ones are like little kilobytes like they're tiny, and so I don't have to actually duplicate to make changes. I'm making something called virtual copies, okay? We're going to get into this, but the reason that I'm saying this is don't think that this is actually importing all your files, so actually ingesting them are sucking them into this thing called light room and said it's, creating a catalogue that's what I want you to know it's not actually working on your files, it's working on how it sees those files, and then you tell it when you want to apply the change by creating a new file opening up in photo shop, right? So it's it's in, you're not in danger of hurting your files by working in light room, so if it's something new to you and you're a little afraid? Don't worry you can't mess up your files this way no way to break it yeah it's called nondestructive editing so if you look on over here on the screen we're looking at the creative live catalogue this is the one that I made for this with all of those photos in itself there are hundreds and hundreds of photos we've shot over the last couple of days that are living on my hard drive here and as I make adjustments in light room, they're not getting touched those adjustments are being kept right here in this little catalog that's on ly fourteen megabytes big so basically it's writing it has a tally sheet so if I say I want more exposure, less exposure, this color profile plus more contrast they're just right enough contrast plus two color plus one and then when I go ahead beside and now I want to send these somewhere then I export them as a j peg because I can send you a j peg I can't send I can summon mama j peg I can't send her a raw file she won't know what to do with it, so even then it doesn't edit your photos basically it just takes that raw reference file applies our little check sheet of adjustments and then makes a new j peg so light room rocks because you can't break your stuff so you bring up what you're just looking at the reason that I wanted to bring this up in case someone's really unfamiliar with this, we're looking over here and he was looking at the applied import and the develop settings and do you think you can edit your photos before you edit them? Don't worry, you're not it's not like something like if you apply one of these changes that you're going to screw up your photo and you can't go back. What it's actually just saying his late room here's how I want you to show me a preview of this of this photo what's cool is see how it says that it's developed setting each one of those are presets so you could make a pre set for a specific like if you know in your living room and in the living room that you always shoot your photos in, you make a white balance special color profile for that you could select it and it will automatically import it with the cracked white balance applied for your living room or for your studio with that particular, um, strolled like I had a set of strobes my long time ago that were slightly magenta, so when I imported into light room, I automatically had it correcting for that maestro, you're a little off color, so just know that when you're doing this, you're not messing up your files yeah, thank you very much for clarifying that too. Yeah, this is just like she said updating a preview this is just saying has these come in do this and like, make a tally of doing these adjustments to each of them and then when I want those as a j peg then apply those tallies but show it to me in the meanwhile so I can visualize that that's what? Those are meta data I want to cover this really quickly this is an important profile let me go ahead and read it and show you what this is metadata is like that little that little folder that I showed you originally that's living over here he's ex mp files this is where you can write who owns the photo and all of that see all of this information you can embed in there I don't want to have to pick every single photo and say copyright eric valent yes it's copyrighted here's the terms instead I have this I have a preset that puts in my name contact information this is copyrighted. You cannot use this without paying me. This is how you get ahold of me to pay me like very simple done and every time I import a photo it leaves my leaves my memory card for my camera goes to my computer this gets applied to every single photo so when I export them later and they go out there into the world and someone finds them on google and says, hey, this is pretty I want you to put this on a billboard. There's no excuse not to call eric valent, mail me a check to use that picture on a billboard. I don't want any gray area there. So you all should put your basic contact information there, especially because flicker is owned by getting now. So I mean, people can license you and pay for your photos, even if you're just sharing them on flicker for friends. I mean, you could be a commercial stock photographer accidentally overnight, so time magazine had a cover of a jar of pennies. They paid a full dollar for it. Way to go time, but still they license that dollar worth of a photograph by just basically contacting the person on flicker. So yeah, oh, yeah, um, commercial fashion, not editorial. And so basically, they're then you just pick where you want to go with it so I could say, hey, I want to put it in this dmg folder so it takes it off. My memory card potentially applies. These settings or previews basically applies the copyright information so this contact and then moves it here for me so it's not actually another step to convert it to dan jae it's, all in your normal import process, it's nothing you need to worry about, but I also know that if you already have a light room catalogue with all these files, you're thinking, well, secondly, doesn't angie, what do I do in in actual light room itself? You can select files and convert them to dmg within light room, and you don't have to duplicate the fouls. You can just convert those files and automatically get rid of the original and get rid of the original roz, but it really has original rock contained, so that really need the leading going on so I could go here and I can select a photo and appear in library there's an option to convert to dmg so you don't have to worry about if you have everything going on like this, he said. You could do this after the fact to, or you could just go and use that standalone application as well. There's plenty of ways to get you where you need to go, and by the way, when I used to do ah lot of weddings, when I'm trying to import those files and just get them backed up, converting to dmg does take a little more time so when I was in a hurry I wouldn't but then as soon as I got home I would convert them to d angie um I well depends on what your computer is my computers hold it you got nto get your stuff tio yeah this is this is what you have nerd friends for all right so you look here this is how we would normally import set everything up I want to send my copyright stuff I wanted maybe you do like my standard adjustments right there bring them all in to save you guys the time I had it chugging through this over lunch so you don't have to sit there and watch me process all these I want had made a folder and you're going to notice that these are already dmg files so we are where we need to be we have raw files now it doesn't matter what camera shot among because really doesn't but now they are dmg files and we can start headed in um the first thing I'm going to do our first thing let's actually start calling them down so my least favorite part of being a photographer is getting off of issue tw and then having to pick my favorite photos after I poured my heart and soul into taking a bunch of photos it's rough because then you're like ok I just berth seventeen children now I need to pick my favorite so it's like very, very difficult what is this is like bad about me that I don't find anything that hard my favorite child question would eat her children wear to jump in here we have to be ruthless so I'm gonna give you a really quick run through here so you don't waste a whole bunch of time we're just gonna do one two, three star ratings the reason we're doing star ratings is because light room house of need ability to flag something as a pick in tow, unflagging as a pick or to put colors on in stuff, but stars are a universal rating one through five that apply in your metadata. So if I do this in light room, ridge will see my stars aperture will see my star, but they'll talk I mean, there's a way if you if you put the stars on it and then export it, you'll see if somebody says that to you. Yeah, so that's why we're going to go that route that's why I want to teach that? Because then when I send these over instead of living in this little sidecar file that then got lost somewhere in translation it's baked into the dmg files, you can never lose the star rating, so if you spend the time in agony to pick your favorite child it's going to stay with you all right, so and then even if your catalog crashes, your ratings are so they're in the information it is still there and what's great is if you do all this work to a photo shop file or a tiff file or a j peg file, you've got a backup all of those files, which is hundreds and hundreds of gigs or terabytes worth of stuff. If I do all this work in light room, I'm just gonna back up this fourteen megabyte file another drive or a thumb drive, and then when it crashes or dies or gets corrupter of my hard drive breaks, I've got a thumb drive right here with all of the work that I've done to hundreds of thousands of photographs saved in the catalog file. So I mean, I have years worth of catalogs that don't get more than a couple big's big couple gigabytes large, so it's a great way to back up all your work, too. All right? So we're gonna hop in here and basically we're gonna go through and do a quick edit and I'ma show you how quick this is. Really this job shot about two thousand files. I'm showing you about seventy three, so we're just gonna run through really quick. You can see all of these here. I have to narrow it down, probably like a front and back of each look, and then we're going to apply some gullible adjustments to it and get him all going. The first thing you want to do is one really, really quick pass and that's basically a one star some to cycle through all of these ones not seeing any other photo. And I'm gonna hit one star on it if I think it deserves to be seen another day. So it's gonna go through like that one like that one? No, no, no. I like that one. Ok, like that one. You mind if I say something jump in here? So, um, I'm gonna have him way don't need this behind the scenes were held. So, um, there's no right answer for how you call through things or how you start things. The importance is consistency so that if you wanted to be able to explain it to someone in the future that's, perhaps helping you or so if you want to know what the heck you were thinking during that shoot just need to be consistent. So what eric's doing right now is he goes through in any thing that he would actually consider as a select he's, adding one star I do three stars because when later on things I say no to done great to two stars and things I say yes to upgrade to four, then they end up at five if I want them like, it doesn't matter as long as it's consistent, and it makes sense to you, and you can explain it to someone else I recommend when you find your system, write it down, let's, keep it next to a computer. So we've done our one passed right like that that quick? So now we're just gonna go ahead, and I'm using some keyboard shortcuts here, but especially essentially, I hit the pipe tool on my keyboard and it drops down this little menu up here. What's the five, this guy, right? Well, I below your your delete key is like one of the slashes and it's going to give me some options, or if you don't want to do the tulle thing, this is what you normally look like and there's options down here to now start filtering things so you can set custom filters. If you if you have a certain kind of starring or flagging rating, you convince, set a filter so that he could be like, okay, the next step is to give me all the files that aren't three stars. So I could go through or give me only the three stars, so I'm going to say on lee, give me the one stars so here's, what? We came up a cross, so now I'm to start going through and really thinking about it. So I've got three of these up here now that I've seen them before, I know that I like this one more than the last one, and I want a variation and this one causes both can live there. I kind of like that look that mohr and I guess one of things that I would hope that people would take away as well is that if you dwell on it forever, you'll never be able to actually shoot and do something fun or better. So you make it here and six to it it's kind of like, you know, if anyone had done this with a photo show file, I could probably work on something until the end of time, but at some point you say it's done and you just put it out there, I never I never go back and revisit things like, for example, this file on the wall over here, um, I see mistakes now I even know that it's there in that file, but if you can't see it, it doesn't matter, so we're good all right, good. So now we get down to this and I want to show you guys kind of like a light table option. So now we've done our one stars and I was ruthless. I mean, those photos did not get a second look by two stars. I went back and forth to kind of give him a second look, my three stars now are the ones that are going to start getting worked on, so I select all of these and I can just basically hit n and it brings up a light table so I can see these guys side by side like this, and I can look and be like, I think this is stronger than that, so I'm just going to get rid of it, all right? And I want the consistent front and backs I don't wantto looking over the shoulders, so I'm gonna get rid of that. All right? And now I just go back up here to my library module and had g and I could go to grid or there's an option to go, appear to view, and you could go to grid down here, but you learn your keyboard shortcuts, you could really fly through it at it, and now those two are the only ones left selected, so I hit three stars, and then I know that when it comes down to editing those are my picks, by the way, if you don't know a lookbook is basically like a mini catalog for designer in case you're wondering why his photograph in the back of some girl's head it's thank you for for just because that lookbook might not be a common word for people. All right, so here we go again, there's my side. So that was going to stay for sure. I like seeing more of the shoe. They were gonna get rid of that, but maybe we don't want to keep it more generic. We're going too simple and boring. There we go. So I go back to grid on ly to selected hit three same thing here really quick. We're gonna be like, I want to keep feet on the ground like the crossed legs. You can see both legs will go three with that one and then like that, so we'll get rid of this. Get rid of this, get rid of it. I like how they get bigger. They're like. Are you sure? Are you sure? And there we go. These air, the level in selected. So we've got three and now we go down there and get the three stars really quickly guys, I just took you through from about a hundred photos to hear our selects for that job done just like that so like linda who said you could start in the middle do whatever you want but if you star ratings it'll be universal and if you really are ruthless and you're first at it and then start to then dwell more and then dwell more you're dwelling on the content rather the volume lots of people are curious about uh dmg files and sam and sandra first asked I shoot film and the scanned image is usually in tiff format can I still convert tiff to dian jie will I lose anything in the process you technically can because okay so there's more before professionally yes you technically can because dan ji is the wrapper but because it's not a raw file you're not getting the flexibility you would have with broad we have thie ranging exposure like you won't be able to pump up three stops as you would with a raw file on bill that maintain all that detail and not have degraded quality it would be pumping up three stops on a tip it's not that it changes it to a raw so there is a dandy rapper and so yes he would be able to do ah lot of the color uh color checker um same things we're doing here by putting in a dandy wrapper okay cool and that also answers dreaming uh bird of question can you convert j peg to dmg so get forget keeping yeah keeping out of mind it's still a j peg it's just in this rapper, I actually never like knocking, and I never do that. But if I mean, the film example makes perfect sense to me, absolutely just if you shot j pegs um, don't shoot j fix you didn't catch it in day one. We really discussed why raw is good for shooting and copulate even more so than every other time. Yes, so definitely rewind if you're watching this and see that again. So here we go. First off is where we're going to start and we photographed a great card. This one is kind of like a little bit of a mix that we used on the job in the studio. This one you're going to see is that just solid? Gray has some different options here. It's got grey, white and black and all kind of explain why that isthe notice how I zoomed in here really close on the color checker so only the color checkers in the photo. Now look at my history, graham up here! See those spikes that is the grey, the white and the black represented on your history rams if you've never been able to visualize that before that's, what it looks like, basically, I'm looking for exposure. Because if I'm looking on the back of the screen I see one thing I'm looking on my laptop I can actually they bumped my brightness and all of a sudden my screen looks really dim but the image didn't change for you guys because the image didn't really change, but here you can really see that one of those highlights to shadows so by shifting this I want that to be in the center because on a great card like this, I know that that's great in the center and that's pure black and that's white so this is an easy way to get a perfect exposure without having to just eyeball it so I can take this now and compare it to the beginning see how washed out the beginning really wass doesn't really look like it's your naked eye doesn't you didn't think anything of it until we accidentally until we actually modified it right over there. Now the next thing I want to do is talk about getting a quick and simple white balance we're not gonna talk about color profiles anything, yet we're just gonna talk about white balance because chances are a lot of you already have a great card because someone told you you needed it but you didn't really know why yet so bless you for going to get in one you may not have a color check her just yet because we just not even done with the class yet um so what we're gonna do is basically get a temperature white balance setting not a color profile and to do that we can use our little eyedropper tool over here and I'm going to go back to a full screen so you see everything but then I'm gonna keep shrinking it's that you get better view into your screen we've moved from the library module oh, which is more of a universal browsing your shelf for a different book it's a catalog your catalogue and they were going to develop module. The develop module is adobe camera raw it's the exact same piece of software using bridge and use right before you go to photo, right? So if you're wondering if a lot of these things that we do as faras like decreasing noise, air reducing chromatic aberration which I'm going to show you you know for shooting and copulate you run across these things if you could do it here in light room, you can do it in adobe camera it's just not as pretty and sushi not as easy to access but it can be done and I'll walk you through at least a couple of those yeah, so this should look familiar for adobe camera users on dh then people coming over light room have no fear because you already know all the development tools so if you look at this all over over at white balance selector or w I just go here to my neutral grey now we click that and again you didn't even notice it right beforehand it didn't even look off until you click it and then it brings everything in line now look at the values the rgb values there within one tenth of a percent up there so look up here is what I mean look right below the history amazon mouse over which means it's neutral it's neutral now look beforehand see how shifted they were so when you do this by the numbers it's amazing what are eyes miss our eyes are meant to calibrate our eyes are meant to go from all kinds of light temperatures and make it seem normal so we don't just get whacked out when we go outdoors and like everything turned blue like a horrible that would be so our eyes do a really good job of this but our computers keep us honest so we look at that and now we look at the beginning it was washed out warm. This is a truly properly exposed image with a perfect grave with a perfect white balance and for creativity sometimes I like washout and warm definitely not when you're photographing clothes and furthermore it's much better for you to make that decision instead of to have been a decision randomly made by the camera you get in a patrol if you think that you want to be warm for creative purposes you do it then get it right and then you can make the decisions yeah, absolutely so here's the fun part already now do I have to do that for every single photo? Nope. You just grab it, select all of the photos there and then we can go up here to photo library develop a right click click easier to right click develop settings there we go and we can synchronize the settings or you do this so much it's command shift s or it's over here okay, so that someday I wanna warn everybody in uh in the chat rooms and whatnot I can tell you how to act this is true. I can tell you how to add keywords in seven different ways in like seven and they all do the same thing. They all add keywords I can tell you how to synchronize settings three different ways once in one of the drop down menus one is in the pop up to the right and one is by right clicking so don't go all oh my god that's not how you do it it's another way or this way is easier when you were just showing you one you could do it and you're like I don't really like that are you? I hope not they shot they shelter me from you guys. I'm new to this experience. I've all right and into the abyss, okay? I'm just I'm I'm not insulting and letting you know I know many ways, all right? Yeah. It's like in photoshopped or in photo shop it's like okay, light room could do it four ways photoshopped conduit twenty ways like it's amazing how old that thing is that that program is and how they just keep adding more ways to do things incredible. Um, so basically lindsay likes to right click and we'll do that so that you guys can visualize what's going on here, I can now reset everything that I've done to these photos, copy the settings and then paste them. But we what we did here is you're going to notice this was my main selection and see how it's lighter all right, now I select all of these so it's a light like a lighter grey and this is the brightest gray that means this is my main selector, so seeing how I'm moving around there, I still have all of them selected, but this is the one I'm referencing it won't work if you do it another way, because the one that you fixed has to be the one that selected because that's, how it knows how to apply the changes don't miss this this is the good guy right here this is the one we want to dio so we can develop our sayings over here we can synchronize them and then here's what we can jump in and it's going to give us all of the options this is everything that can be done in adobe kameron develop module we have not touched all this but you can just go ahead up here to select what we want we've touched white balance and we've also touched the basic stuff like exposure so I'm gonna go ahead and then synchronize these all of a sudden I'm on a great background instead of a tan one there we go that's what my client wanted so if you look here I'll give you the before we're going to develop module there open this up this was the before this was the after when we were going through and they didn't look that bad do you think I'll tell you about the time you get done editing a photo like man I'm a crappy photographer that look bad to begin with the reason that is is because you're just basically looking at a rant like a very very imprecise jpeg representation of what this raw data khun b now we're really trying starting to steer that raw data into the direction of what it can grow into so this is our almost butterfly this is our caterpillar we're getting there this's a good way to start but I wanted to show you guys really quickly on this job just the basics of getting your files in very quickly selecting your favorites and then how you can get a good level playing field to begin with so proper exposure and then also good white balance on I figured a job like this where it's a volume of work that can really bog some people down the fighters should look book or a catalogue is one of my first jobs I would have never finished it he never delivered it just because I would have gotten caught up in trying toe individually added everything or even pick my favorites so with a little bit of practice a naming convention and choosing convention that you stick too and then just some simple stuff like this it's amazing how you can really quickly call through the song yeah and for the bridge users I mean I'm sure you know that you can make changes and then apply it to other raw file so it is doable it's just not as it's pretty not is easy yeah, I'll convert you lost when I tried like I lost all right we'll check we'll do a case by case way should hang out you promise okay, so what we're going to hear is catalogs they can exist in different for different jobs or for different years for larger, larger clients, I just basically keep the catalogue for them and I put all their jobs and their all their photos and then at the end of the year, right, put it all together in one big twenty thirteen catalog and that gets backed up so you can manage your assets. However you want there's actually it's called a digital asset management and there's a great reaps. The resource on snp put out is what is the dps best workflow we'll have to google and we'll put a link up and we'll definitely get it in the recording there. But there is some great resource is for digital asset management, how to keep your files organized, how to back them up and all that kind of stuff. So look into it, just search damn d am I just want to swear on line line again? There's, a book called the damn book, the damn book, yeah, peter kroger, I think, does it he's a good guy. He knows his stuff.
Class Materials
bonus material with purchase
Ratings and Reviews
Victor van Dijk
Besides all the more or less 'technical, theoretical stuff', the greatest thing I'm taking away with this outstanding course is the plain joy and FUN of trying all sorts of (crappy) lighting solutions!! Speaking for myself, and I suppose also many others, as an 'advanced beginner', I strongly tend to end up to my eyeballs in all technical nitty-gritty, gear 'n' stuff, that I totally mis out on all the sheer FUN of trying out, and often 'muddling through' all kinds of lighting setups! Such a joy to see the fun exchange between Lindsay and Erik! Really catchy. There should be more classes and courses like this, redirecting students to what it's actually all about: sheer creativity and fun! Having said that, Lindsay and Erik demonstrate that there is hardly any crappy light situation that can't be overcome by creative thinking. And more often than not, it doesn't have to be high-tech or difficult! They really showed an exhaustive list of crappy light situations AND their solutions. And I highly commend Lindsay and Erik for their fun energy, and even more important, pragmatism and frankness. I recommend this course to ANY photographer AND videographer, no matter 'beginner' or 'highly advanced'! Lighting is the basis of it all, and most of the time, it isn't perfect...! I highly re
Julie Addison
I thought I understood about light before I took this course. How wrong could I be? I have re-watched this course over and over and I just love it. Quality of light, direction of light - so many crappy light situations. Learning how to actually set a white balance instead of purely relying on the camera presets and learning colour correction by the color checker was also invaluable to me. This course is so affordable. I would recommend it to anyone from beginner to advanced as you will get more out of it than you think. I love the way Lindsay and Erik work together. No right or wrong way - just showing the differences in their styles to accomplish the same end result. Well done guys. Now to have more courses by Erik would be great. Again, can't' thank creative live enough and Erik and Lindsay for this course. Love, Love, Love It!!!!
a Creativelive Student
I hope I can tune in tomorrow. Erik and Lindsay, you guys were awesome today. Some of the things I needed some refreshing on but you definitely had a way of educating. I thought the demos were great and really validating. Light is a difficult thing to keep on your good side, especially with me, someone who primarily uses ambient and available lighting scenarios. This course is great and I'm planning to tune in tomorrow because I really want to see what you have in store for outside. Best of luck guys!! -Sim
Student Work
Related Classes
Lighting