Lessons
Introduction to Workshop
05:05 2How to Use Image Trace in Illustrator
24:32 3Retouching Profile Photos in Photoshop
13:29 4Extending Images for Banners
02:53 5Creating & Using Patterns
18:26 6Using Templates in Photoshop
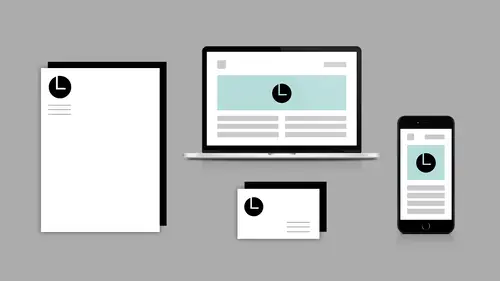
07:31 7Using Templates in lllustrator
04:34 8Show Spark Post
10:43Lesson Info
How to make Clipping Masks
- Clipping masks are very helpful. They're awesome. I use them all the time. But I also know when I'm teaching them, they seem to be a hard concept to grasp, I kind of use them as an introduction to masking, in general, but students seem to get like general masking a lot faster than they get the clipping mask. The clipping mask seems to throw them a lot. So let's go ahead and take a look at clipping masks. I'm going to close this up, and I created this. All right, I just want to hide that so we can't see it. Actually, I'm going to leave it on, I'm going to change the color. I'm just changing the colors so that we can see it. So I have all these pieces and parts that I made on the iPad earlier in this artboard, and I brought it in here and everything's a separate layer. So what I really was doing was I was really creating placeholder graphics, right? So I want to be able to drag-and-drop other things on there, and I want them to only show up inside of the area that I created, right? I a...
lready did the work to lay it out. So if I'm going to add a picture here, I don't want to have to resize it, I'm like, I already did that work, right? I took the time to make that shape, I want my picture to show up only inside of that shape, not outside of that shape. So how do I do that? Well, I can use a clipping mask. And this is a great way to use templates. So when you have a template, you might have shapes like this that are placeholders for where your picture should go, right? So the quickest, fastest, easiest way is to use them as a clipping mask. So let's come in here and let's say, I'm going to go actually to a different... I have a bunch of stock that I actually own, that I've purchased. And it should be owned stock, right there. So I'm going to come in here and I'm going to go ahead and I'm going to add some pictures that I want to go in here, okay? Oops. All right. So I want that to go in there. I want these cool steam pot glasses to go in there. And I'll put this in there. And let's see, I got a girl in here, somewhere, with... Where is she? Oh, there she is. We'll put her in here. All right. So how do I get these to do that? So I'm going to start with my girl, and I want her to sit inside of this box, right? So I going to bring her layer above that box and I am going to clip them together. There's a bunch of ways to do this, okay? I'm going to show you all the ways. I can right-click, if I right-click, I can choose Create Clipping Mask, all right? So I can right-click. I can go to the Layer panel fly-out menu and Create Clipping Mask, okay? There's a keyboard shortcut, don't use it, I'm going to show you a better way. I can hold down my ALT or OPT key and I can get my mouse in between those layers, okay? So with my ALT or OPT key, in between those layers, my cursor changes. See. Right? And I just click and it's clipped. So what the heck is a clipping mask anyway? So a clipping mask is taking these pixels and they're only showing up inside of the pixels and the layer below, right? So if we look at our Layer panel, you can see, I got a couple of things going on. I got this little arrow that comes out and points down so it's like, "Look, look, I'm clipped to that thing down there." And then, the thing down there, that layer that's underneath has an underline underneath of it, so the two of those things go together, right? And then, I can always come in here. I need make this bigger, it's not filling it out. I'm going to CMD or CTRL+T to transform, and I'm going to go ahead and make her a little bit bigger. And I can do that because it's a smart object, right? It's got the little cloud, meaning it's accessing the pixels, and I can move it around in here, okay? I'm going to do the same thing with these tickets. I want them to go in here. I'm want to place the tickets right up here. ALT or OPT, click, get it in there. I'm going to take the glasses, they need to go in here. I'm going to move them up. Click in there. Now, it's the wrong color, right? So my glasses fit but it's, you know, it doesn't look very good. But that's okay. I can take the pixels underneath in my shape, this happens to be a shape. Actually, I'm just going to open up the Properties panel. Where's our Properties panel? I guess I've got to have the Shape tool to do that right? No? All right, I'll change it. Change it that way, so I just changed it to white. And then, same thing, this guy's here and this guy here. Put it in there, and I have to change the color. By the way, for beginners, a lot of beginners, just as a quick FYI, they go here and they're like, "That's white." That's not white you guys. So click-and-drag into the corners for white and click-and-drag into the corners for black, okay? You'll be very unhappy when that prints and it is not white, okay? All right. So those are clipping masks inside of Photoshop, okay? If I want to apply a layer style to a clipping mask, I have to apply the layer style to the object underneath, right? So let's take the picture of this girl here, let's zoom in, not zoom out. And I would like to have a drop shadow underneath of her. I have to choose her shape, not her, right? So I can come down here into my FX and say drop shadow. And did you all know this, I love doing this. People don't know you can do that. Did you know you can do that? Oh, you all knew? Well, you're no fun. Okay. So really big, ugly, drop shadow. She's lovely now. Okay. All those templates that I was telling you guys about, some of these are really helpful. So if we go to print like this one, let's see if it'll open up quickly. And it did. Look, you guys, it has instructions. Isn't that cool? So it's telling you what to do and how to do it. This is great. I'm telling you, they're trying to get rid of their instructors. They want people like me gone, but I don't want to go. I like my job. So it has instructions on here but what I wanted to show you was this the clipping mask. Oh! Yes it is, right? So if we click on here, look, it's clipped. You got a whole bunch of stuff I just taught you going on in here. So we've got our type in an envelope, right? It's warped, warped type, and it's got a layer style, right? It's got a stroke and an inner shadow and a drop shadow on it that you can change and it has a, what am I trying to say, pattern, right, clipped to the inside of the text. Kind of cool, right? So these templates are definitely worth checking out even if you know what you're doing, right? Anything that can save me five minutes, I'm there. I don't care if somebody else designed it. You're going to give it to me for free to use, I'm going to use it as a starting point for sure, right? And just go ahead and redo everything. So definitely download those. All right. Questions about clipping masks in Photoshop. Clipping mask in Photoshop, once you understand them, I know they can be tricky to understand, but once you understand them, they're easier to do in here than Illustrator, where we're going to go next. - If you are working with a clipping mask, can you like group stuff, a bunch of layers together and make a clipping mask? - Can you clip to a group? Is that what you're asking me? Yeah, so let's take...let's see, I have to think of an example. Let's group...let's see, this is not my file. So I want to group...I don't want to group that. I'm going to unclip this, and I'm going to turn that off. And let's take this... And where's this guy? All right. We're going to group these two things together. We'll turn everybody else off. Turn that guy on. Where did it go? It's here, it did not get into my group. All right. So let's group this and this together. And now, there you go, right? I know, it's weird. I couldn't think of a good example but I did what you asked, it's just not a very good example of it, right? So I have a group, right? So if I turn...So I'm going to turn all these junk off here. So I've got a group. Inside my group, I have my warped text, I have my background graphic, and I have this weird border graphic. Maybe if we turn that off, it'll make more sense, right? I don't care about that. I'll get rid of that. So these two things inside of my group, and then I clipped my image to my group. - Can you have the group at the top thing being clipped or can you only have the thing being clipped be one...have the group above the image or the group get clipped to the image? - Let's see, now you're getting complicated here. We have to have something that is smaller. So I would have to have actually background graphic. You want me to clip the background? Okay, wait a second. - So if you make a group and you have one layer underneath it, you want it to be clipped to can you have the group be the thing that's being clipped by something else? - So can I have the group up here? - Yeah. - Being clipped to this, okay, let's see. Okay, let go, unclip. No, I cannot, I can't do it. Nope, can't clip a group. So you would have to make a duplicate copy, you know, take your layers, make a duplicate copy and turn it into something else. Let's move over to Illustrator real quick. And in Illustrator, I'm going to open up that template again that we had open earlier. Actually, I'll do it this way. We'll do a clip inside of Illustrator. So I quickly made... Let me grab my... I'll just make a different artboard to play on over here. And I did this thing over here with the tree, I just made a tree. I took my polygon tool and I dragged it out. And to make a triangle, just hit your down arrow, right, and I can make a triangle. And then, real quick, I'm just going to duplicate. Let's give that... Fill that in so I have something to grab on to, duplicate that guy. All right. And I'm going to make myself a tree, not a very good tree. That's close enough, okay? So I have a tree here and what I'd like to do is I would like to use this as a group. So I going to bring in, I mean, as a clipping mask. So I'm going to come in here and I'm going to grab myself a picture. We'll just grab... Oops, not what I wanted to do. I have to drag and drop it. When you double-click, it opens up in the native application. Obviously, you guys saw that, right? I double-clicked it, it opened up in Photoshop. So let's say that I want to see, I'm just going to stretch this here. I just want to be able to see... I'm going to bring this to the front, my mountains, on the inside of the shape that I just created, okay? So I've got both of these selected in my Layers panel. And I'm going to go up to Object. Let's see, where I'm I going to go? I'm going to go to Clipping Mask, Make, okay? So I think it's a little trickier in Illustrator, it's not quite as straightforward as it is inside of Photoshop, but you can do clipping masks in here as well. Just think of the clipping mask as it's just limiting the pixels that you can see inside of the shape or contained within something, right? So super quick, this is the only time I'm going to jump into InDesign. InDesign is all clipping masks by default. So for any of you that have used InDesign, by default, InDesign does everything inside of a box. Those boxes are clipping masks, right? If anybody's grab the doughnut, when they move their picture and they move their picture on the outside of clipping mask and you start cursing at your screen, you know what I'm talking about. Right? All right. So I'm just going to open up a new blank document. I'm going to go into my libraries and we're going to our branding library and we'll find a picture. We'll take a picture of Viv's here. And I'm just going to draw out a box. So as long as I don't pick the doughnut, I'm good. If I click on the doughnut, I'm not so good, okay? So that's what I'm talking about. It's inherently, it is a clipping mask. And for those of you who don't know the trick to resize, right? You come in here and you're like, you're trying to resize, you're like, "What just happened?" Because it clipped it, right? I know it's very frustrating when you first learn how to use this application. So in order to resize, you have to do CMD or CTRL+SHIFT and it'll resize both the mask and the image, okay? So I just wanted to show you that just to kind of bring it home so you can see how it all works together, all three.
Ratings and Reviews
Brandon D
Its a short class, but there were a lot of tips and tricks for Photoshop and Illustrator I never knew about. It doesn't go into much detail on creating brand identity assets (such as conception, design, etc) but gives you enough know-how with PS and Illustrator to begin playing around and see what you can come up with. I got it on sale and glad I did. If you are new to Photoshop and Illustrator you'll learn some new tips that will come in handy.
Student Work
Related Classes
Branding