Lesson Info
14. BONUS: Premiere Live Kickoff
Lessons
Intro from Jason
01:16 2Intro to Brushes in Illustrator
05:11 3Calligraphic Brushes
16:08 4Scatter Brushes
16:44 5Art Brushes
15:13 6Bristle Brushes
06:40 7Pattern Brushes
14:20 8Brush Libraries
04:33Lesson Info
BONUS: Premiere Live Kickoff
Hi, and welcome back to Creative Live. I am your host today. It's a surprise visit from me, Kate Dessa. I am the Social Media and Content Manager and also your host today. So get familiar with me. It'll be between me and Ken joining all of you. And today I'm super excited to have Jason Hoppe joining us for a little live kickoff for his brand new class, Create Brushes in Adobe Illustrator. And we are gonna be chatting a little bit about his new class and talking about a couple new other classes that he has in the work. So welcome to the stream. Jason, I'm excited to kick off this class with you today. Always great to be here, folks. I always look forward to this. For many of you that have seen these before, you know the drill, you know what I do. And those of you that are new, well, welcome. It's great to have you here and we're gonna show you all the fantastic things that I can bring you. All right. That's good. Well, let's talk a little bit about the class. So this class is sp...
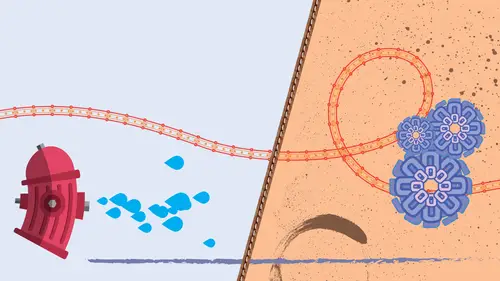
ecifically to learn a little bit about brushes, start to make your workflow a little easier. So tell me the impetus of this class. What inspired it? So brush is an illustrator are something that people think that you need to know how to paint or like using a paint brush. And a lot of people really don't understand what a brush is and people use it and it's like, "Oh yeah, it's fine. I can paint a little bit." But brushes are this world in and of themselves. And you can go into Illustrator and see some of the default brushes and play around with them. But I bring this to a totally different level. And there's lots of ins and outs with brushes that even if you are a seasoned Illustrator user, you may not know how to truly make all the brush options work. And if you've used Illustrator before, in all reality, you know there's a lot of little hidden things and a lot of little quirks and brushes, this brings it in space. So I thought, okay, let's get into this. And every little detail of what the brushes do and all these crazy things that you can create. So we just thought, you know what? Let's really bring this out, not as a surface level, but a really in depth look at what you can do with brushes and how you can use the scatter and the art brushes and the calligraphic brush and just create some amazing pieces of artwork. And it's not hard, that's the best part. All right, I need to know a little bit more about this cal, what was the name? The cal brush. The calligraphic brush. I don't even know what you just said. So for those of you that like to do calligraphy, of course, the simple brush, when you just grab the brush tool and start to paint. It's just like a little black dot and you can just kind of draw lines, but of course the calligraphic brush. You can change the angle and the thickness of the thickness. So if you'd like to do calligraphy, that's one way that you can do it with this calligraphic brush, which is just one of the five brushes, yes. Awesome. All right. Well, I wanna hear from everybody tuning in where they're watching from and what is your go-to brush. Tell us a little bit, Jason, is there a brush that you tend to go for most often, or is it based on what work you're doing? So my go-to brushes are the art brush in the scatter brush only because I create a lot of visuals. So icons and graphics and less free flowing artwork. So the scatter brush and the art brush allow you to create like random patterns. So if I'm doing like a cloud structure or doing some graph, I can use the scatter brush to create a brush and then change the attributes with the size and the rotation, and just kind of almost like spray it on there. And then the art brush is an amazing brush where you can go and you can create long lines of artwork. So I was just creating a set of brushes with some really cool lines and dots on the end. And people use these in patterns for like apparel design. So how do you create zippers? How do you create stitched seams? And that's what the art brush does. So it's like this infinitely stretchable brush. And of course, once you get into these things and see what you can do, I know so many people are gonna be like, "That's how you make it happen." And then of course you get into the pattern brushes. And the pattern brushes, you can create super intricate borders or lines that repeat, and then you can change the corners, square corners, round corners, and the way they go together. And then all of a sudden people are like, okay, mind blown. You know this is great. I've been doing this for years and I never knew that you could do all of this. So it really is one of those little hidden gems that just isn't super clear how to use, if you just jump into brushes yourself. I mean, it took some kind of mind bending stuff to really figure out how they put this together to make this, to make each and every aspect of their brush work. But I spill that all out in the videos and there's lots of them. I think there's what 13 in this series of brushes. Yeah. Yeah. So there's a lot to go on. And yeah, I'm excited to learn more about brushes. I spend more time in the Photoshop and InDesign side of things. Can you tell me a little bit, are, is the brush tool kind of similar in those two programs and is this applicable in Illustrator to use these kind of same techniques to create brushes? So to answer that question, is it the same as Photoshop? Absolutely not. All right. The Illustrator brushes are pretty unique. The one common feature that we have between the Illustrator and the Photoshop brushes are what Illustrator calls, the bristle brushes. And in Photoshop, that's your art brushes where you can get this watercolor effect and adjust the bristles and the shape of the brush and its attributes of how stiff and how soft the brush is. And basically the flow of that. But that's just one of five brushes that is in Illustrator. And so while Photoshop allows you to paint with color, Illustrator allows you to paint with artwork. So much different take on it. So one similarity out of the five, but yeah, Illustrator definitely is very unique in that regard. Okay. All right. That makes sense. Well, that gets me excited to explore Illustrator brushes a little bit more then. Oh, yes. Don't be afraid of them, that's the thing. Watch this, student try this stuff because, and so many times people are just like, you know what, "I tried and it just didn't work." And it's like, okay, it's a really simple dialogue box, but there's, they pack a lot of things into that dialogue box that you can change. And knowing the settings and make that happen, it's not super intuitive. But once you watch this brushes video, you'll definitely get it. I mean, no question about it. Great, I'm excited to explore them. 'Cause brushes are even in Photoshop as a, I would call myself a novice. The tools in all Adobe programs are so much more robust than the, whatever the intuitive thing that you're doing is. And so it's exciting to hear so much about how deep these brushes go. And it's exciting to have a class where we can actually take a deep dive into those. So tell me a little bit, behind you actually, you have your Illustrator book that you published recently. So also tell us a little bit about the... So right over there, you see my book Illustrator and it's called the "Illustrator Course and Compendium." So what makes this book unique is we cover a lot of topics in Illustrator, and then I've got 100 pages in the front of the book of all these step by step ways that you can go ahead and use Illustrator to create something. And the way I wrote this book is I take the approach that you don't have to know how to draw or paint or illustrate. Everything I show you is how to create everything out of basic shapes. And we take you from the simple to the complex constructions and walk you through all the shape tools and the pen tool and applying color and special effects and how to build an entire scene all with the basic tools, all with the basic shapes. And you're gonna be surprised because all these really amazingly cool things that you see are actually not difficult to build. It's kind of like watching a magic show. If you don't know what goes behind the scenes, you're just absolutely amazed. But once you know how the tricks work, you're like, "Oh, I know how that works." And it's like, it's easy and it's fun. So this book "Illustrator Course and Compendium," and there's gonna be a link there if you wanna buy it, definitely buy it. It's a nice book and not just like nice book, but it's like the cover is really nicely printed and the quality of the printing's really good. And of course it's a really good book too. Yeah. But you already know, just if you're joining us, I mean, you join us for a reason, so... I just dropped a link to Jason's book in the comments. So if you guys haven't got it, it is there for you guys to check out. And Jason, you sell it as a hard book and an online book, right? Absolutely, if you go to Amazon, you can get the book. But if you go to the publisher, which is Rocking Nook, you can actually buy the combination ebook and print version as well. You can, or you can both as a standalone too. And I laid out the book, designed the book and laid out the entire book so that the ebook there I know is going to be an excellent representation of the book and it's not gonna be clunky. So it's actually done really nice if you like to go ahead and have an e-reader on iPad and see the book there. It's definitely worth having. All right, nice. So let's, before we have a video we're gonna play everyone, but before we jump into that, I wanna also talk a little bit about another new class that we haven't introduced live yet, which is Illustrator color class. So tell us a little bit about that new class and how these two classes can work together. Well, the color class in Illustrator is a lot more robust than the brushes. I mean, we are only dealing with five brushes, but I made 13 videos from those five brushes and what you can do. Color in Illustrator is by far, probably one of the most featured laden things that you can find beyond what you can do in Illustrator, in Photoshop and an InDesign. So many unique features to Illustrator that we can deal with color. And when I teach color classes, I can teach the basics of color and InDesign, in under 30 minutes. In Illustrator, I don't know how many videos did we make on this. I don't know, what was 18 or something? I can't remember the number of videos. But so many color options, like the Adobe color themes, panel and the color guide and your swatches and your tints and how you can recolor artwork. And so Illustrator is, I mean, it's very wide and it's very deep how they go in and work with color. And a lot of things seem to overlap. Some of them don't seem to work the way you expect, but we cover every single one of those topics in Illustrator. And I can tell you when people see this, all they have to say is, "Wow, I never knew there was so many things you could do." And figure out color harmonies. There's like 36 different color harmonies, how to pick a color and then edit that color and get totally different color themes from that. So if you're not super confident about picking a color or a set of colors for your project or your artwork, we show you multiple different ways to get the best color you could possibly imagine, and then create your artwork and then create 10 different colored versions of that artwork in just minutes. None of this going in and changing the color. Recolor artwork and their new updated recolor artwork panel, it just, it's an absolute game changer. And I use this all the time. So can you use this with brushes? Sure, create some artwork with brushes and then go in and change the different color themes with it. You'll see that in the brushes, I did a great little animation of the little fire hydrant that's called the happy little hydrant. And so we do it as a brush, little hydrant as a brush that goes around, putting out fires with his little buddies and show you how to change the colors of the fire hydrants in just seconds. So yeah, it's fun, it's creative and it's, it truly is mind blowing, yeah. Well, we're gonna roll a little video where you actually are teaching us how to create a color wheel in Illustrator. And it, I'm like blown away how quickly you make that color wheel and then you are editing the colors. And it's like, so seamlessly given it has so many small, little sections and it, so I'm excited to show this video and kind of give people an idea of how robust the color in the Illustrator really is. Well, and with that video, what's amazing is that people are like, "Well, how hard is it to create a color wheel?" And I said, "It isn't, you just make the color wheel." I said, "But what colors do you put in the color wheel?" And they're like-- Yeah. "Oh yeah, right." And so I show you how do use a totally different color mode, HSB hue, saturation and brightness. And within minutes you can get the perfect colors. And I just had a comment from somebody on YouTube. They're like, "Why does this not have millions of views?" Yeah. It's like I don't know. Because you know, people just think, "Well, how hard can it be? Once you try it, you're like, "Oh my gosh." But then of course I make it easy. So yeah. Yeah. Let's see how awesome it is. Let's watch. Hello everyone. Jason here to show you how to create a color wheel in Illustrator in a very, very, very easy way. So first of all, we need to build this color wheel. So I'm using this as representation. And the best way to build a color wheel is to use the polar grid tool, which is nested underneath our line segment tool. Polar grid tool. Click with a cursor on your art board, setting a size of 500 pixels, five concentric dividers. So we have one, two, three, four, five, the outer ring isn't considered a divider. It's just considered the edge. 12 radial dividers one, two, three, four, five, six, seven, eight, nine, 10, 11, 12. Beautiful, click okay. There is our color wheel. Now in order to make each one of these shapes fillable, I need to go to my layers panel, open the twirly, open that group of this object that I have. I wanna target just the radial dividers. So those are selected. I'm gonna hold down my option Alt key and my Shift key. And I'm gonna extend those a bit beyond the edge of my outer ring, this is something you have to do. I'm gonna select that wheel again. Pathfinder panel, and I'm gonna use the divide function. The divide function doesn't work. If those simply touch the outer ring, they have to go past it in order to divide it. Important or else you're gonna end up with very large sections that are not equally divided into segments. Once you select the entire combination, click the divide function, you'll say that they divide and those ends go away. Going back to the layers panel. Now we can see that these are all divided into separate fillable sections. I'm an ungroup, Shift + Command or Shift + Control G. And now we have each one of these set up as its own shape. Now we're gonna fill these with colors, but how do you pick the right color going around the color wheel? How do you know which are the basic colors? Your color panel. And what you wanna have when you go into your color panel is you want to set your color options for hue, saturation, and brightness. And the reason why is because hue, saturation and brightness is actually indicated on a 360 degree circle. You're doing a color wheel, it's a circle. Why is that important? Because it makes choosing the colors ridiculously easy. So here, we're gonna start off with our hue, saturation and brightness. And we're gonna set our hue at zero, which is going to start us off and our basic red. Because this is a circle and we have 12 sections, each one of these is going to be 30 degrees difference. There's our hue. Next hue is going to be 30. We're gonna keep our saturation and brightness at 100. So we're gonna do 30% and then 60% and then 90%. You get where we're going here. This is going to be 120. See how easy this is? 150, 180, 210, 240, 270, 300, 330, and then of course completing the circle, 360 or back to zero. It's that simple. And now we've got the perfect spectrum indicated on a color wheel. Next we need to go and we need to fill in these sections with the variations. Each variation going through. So this is how you do it. If you select the next section going in here, this next one, we're gonna go back to our hue and this is going to be, so we started at 30 or zero and this is 30. So I'm gonna do 30 and you can see that this is 100%. So in order to cut down the saturation, this is going to be 80. And then this coming in is going to be 60. So I can apply that color again and say 60. Then I can apply this color again. Make sure I get that selected. These are a little tricky to select. As you go through here, zooming in would probably help apply that color. This one's gonna be 40. And then this last one is going to be 20, there we have it. Now we have all our variations. Now what you're gonna do is, you're gonna complete this process, going through with each and every color, just like I showed you. Starting with the outside color and then the next outside color, the saturation's gonna be 80%. Next one's gonna be 60, 40, 20, all the way down to zero of this same color. That's how you create a color wheel, that easy. So once you've propagated this entire color wheel, you're ready to go and you're ready to create different variations of this color wheel. So to create different variations of this color wheel, you can duplicate this as many times as you'd like. And the easiest way to do that is to hold down your option Alt, click and drag and duplicate these so that you have multiple different representations of the color wheel. We're now gonna take one of the color wheels and select the entire wheel, edit menu, edit colors, recolor artwork. If you're not running Illustrator 2021, you won't see this window. This is something that they've just added. What you'll see is you'll see this. To get to that initial looking window, click on the edit tab and this is what you have. Now, this edit tab and the settings here is virtually the same as this window. When you go in, the only difference is, is that they've taken out a couple different items. But here or in the advanced options, all we wanna really talk about here is our saturation and our brightness, and we can adjust this. So with my wheel selected, I can choose my saturation. So there's my saturation and I can saturate or desaturate that entire color wheel, great. I'm gonna go to this next color wheel and I'm going to try something that is going to be brighter. So now I'm gonna click over to my brighter and I can go and I can adjust this so that I get more intense saturation, less intense saturation, or go in and do my brightness overall. So there's my brightness. So there's just a quick little tutorial on how to put a color wheel together and create your different hues and saturations. All right, so tell us in the comments, if you are as blown away as I was, when I watched this video. Jason makes these four color wheels in like what, six minutes. So Jason, tell, that for me, this blew my mind. Tell me about, kind of discovering this workflow and how you speak to it in the color class. So the way I come up with this is that I've been teaching for 20 plus years and I teach college level graphic design and photography classes. And of course, you gotta take type classes and design and color classes. And one of the basic things with color classes, understanding a color wheel. And so, they make it by hand, painting it and which takes hours. And it's like, "Let me show you how to make it on the computer." And they're like, "Oh no, we can go ahead and do." It's like, "Yeah, do it." And then they're like, "Oh yeah, how do you build it?" So simple little grid. And of course you saw the couple little tricks in there to get all little pie shapes to work and then hue, saturation and brightness. I mean, how many people knew that hue, saturation and brightness is itself a wheel in the way it represents. So instead of just taking random colors on this entire spectrum of like RGB or three dimensional space, hue, saturation and brightness, zero, 30, 60, 90 degrees, you go around the entire circle, just like a clock and you pick a color and people are like, "Why didn't I ever know this?" And it's like, "I don't know." I didn't know this. I stumbled upon it as I went through, it's like, wait a second. I learned this years ago. And it's like, I've never heard anybody say this. Yeah. There you go. So it's like, I think this is worthy of a video. It was absolutely worthy of. Yeah. So, this is the kind of fun stuff I like to do. People say, "Well, how do I do this?" And it's like, "Well, this is an awesome challenge. Let's just go ahead and make it." They're like, "Well, how do you think about it?" It's like, "You gave me the challenge and I think, okay, let's solve it." Yeah. Yeah. But it's fun. That was awesome. I, and yes, to your point, the, one of the first comments on that video, which you, if you guys saw, if you wanna check out more of Jason's videos, he has an amazing YouTube channel full of tutorials, and it's just YouTube\Jason Hoppe. That's where that video is sourced from. And the first comment was, how does this not have a million views yet? Because it is so helpful. And so many of Jason's other videos on his YouTube channel are helpful. But before you go digging around his YouTube channel, you gotta go watch his brush class, which starts here at 9:30 sharp. So if you have any questions before we kick off the class drop them in the comments now. And Jason, tell us a little bit of, just quickly remind everybody what they're gonna get from this class. So with the brushes class, we cover the five different types of brushes. And we also go through show you how to use the brush tool. If you are like a working tablet or tablet user with a pen, we show you some of the features that you can go ahead and use with those. Keeping in mind, because you've got five different brushes, vastly different styles of things that you can create. And when you watch this, you may say, "Okay, what am I gonna get out of this?" Well, watch the different types of brushes. And there's, you're probably gonna look at things and it's like, "That's how they do those. They didn't go in there and draw that they made it a brush. And then they just painted the thing in there." It's like, "Wow, that simple." And it's like, "It is." Because you see all these cool things that people do. And they're like, "How do they make this twisted thing with this pattern?" And it's like, "I can't figure it out." Most likely a brush folks and how to make texture brushes, you get these, you could buy these brush packs online, you know make your own, it's great. So you're gonna get just everything you want to know about brushes and then some in this class. Awesome, and I am dropping in the comments, a link to go watch the class. We'll be closing out this live stream with Jason. And so you'll head over to the class page. You can watch it for 24 hours for free. So make sure you do that today. And Jason, before we sign off, tell us where we, everybody can follow you. We talked about your YouTube channel. Where else can they keep in contact and ask you questions if they arise? Well, you can always go to my website, JasonHoppe.com. And I've got a blog there that have been doing for years on All Things Illustrator. You can see me there, of course, on YouTube, youtube.com/JasonHoppe of course the Creative Live. If you wanna know everything about Illustrator, I have got this huge, massive Illustrator class here from start to finish on Creative Live, as well as many other videos, I'm gonna be doing more of them as well. LinkedIn, Jason Hoppe. Post a lot of stuff there too. And if you wanna follow me on Instagram, it's Jason Hoppe ACE. By the way ACE stands for Adobe Certified Expert. So Jason Hoppi ACE. Ah. And it's all my car stuff on Instagram. But if you search for me, I'm either a baseball player in Wisconsin or a doctor in New York or here in Seattle. So not very many Jason hobbies to look through. All right, well, thank you so much, Jason, for coming back and doing this little live kickoff. I'm so excited to dig into these brushes and learn things that I didn't even know existed. So just as a friendly reminder, we are signing off here in just a minute. And so I just dropped a link to the class that will kick off in just a few minutes where you guys can watch it all for 24 hours for free. So thank you everyone for joining us today and thanks Jason for putting together another killer class. Well thank you, Kate. And thank you everybody. Those of you that have joined us for many times in the past, and those of you that have just here and will join us many times in the future. Thanks again, we look forward to seeing a lot more of you.
Class Materials
Bonus Materials with Purchase
Ratings and Reviews
Angie redpolkadot
Illustrator is my favorite Adobe product, and I have been using it for a while, but I still learned so much watching this webinar. And Jason's teaching style is pleasant to listen to, and his enthusiasm is infectious.
user-7090b5
Student Work
Related Classes
Adobe Illustrator