Lessons
Day 1
1Workflow Philosophy
13:18 2Four Main Goals for Workflow Management
1:14:40 3Pricing and Packages
1:02:19 4Set for Success - Gear
27:19 5Software Workflow
41:43 6Slideshow Prep
28:09 7Fast Book Production
58:10Day 2
8What is InDesign?
09:40 9Setting InDesign Preferences
21:26 10InDesign Basics
48:04 11InDesign Basics Q&A
11:56 12More InDesign Basics
11:14 13Image Management, Retouching, and Exporting
24:00 14InDesign for Flip Books and Blogging
24:16 15Creating a Marketing Piece
32:50 16Design Principles
27:17 17Typography
29:13 18Thanks + Credits
07:12 19Start to Finish Album Design
35:59 20Workshop Recap
10:30Lesson Info
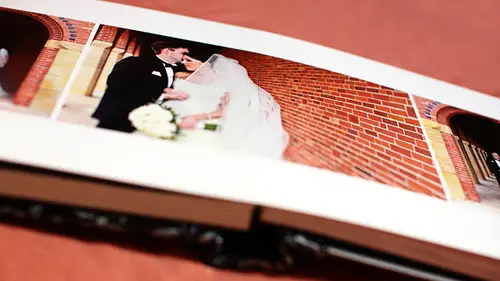
Fast Book Production
this is now the finished at it. So this is after we've gone through the second time K. So first time again was just picking picks. Second time was weeding down and developing. And now everything's been developed and picked and weeded down and whatever. So magic, that's great. So now we gotta export out of here. And if you are shooting raw way talked about that earlier. If you are shooting rather with a question about do I convert, you know, out of that format and you wouldn't have Teoh and it wouldn't really affect anything other than your download time. So have at it. If that floats your boat here, then I would still have the raw files, and then I would just They would not become anything else until the export. So, um, all right, then. So to export everything, I would be selecting all and then bringing up the export box. Now, here's the difference. And this some folder here, this area here, I would then call this that in a proofs. Okay, So if we review my chosen file folder situation,...
we have the client name. I have the originals. We made the done folder which has the photos for the blogger, which are now retouched right And and now we have proofs. Now, I have not re numbered these yet. So that means that I've chosen picture number three, picture number picture. Whatever, right? I will remember them, but not yet. And the reason is I personally like to export my proofs. Then I personally choose to go into my done folder to take my retouched photos and replace the corresponding proofs. Does that make sense? So I don't want to rename my proofs yet because I want them to have the same file name as my Dunn's. If that doesn't matter to you, you could rename them now. But I like that because when I designed the the album, as you will see tomorrow and in design when I designed the album, I don't wanna have to like reeling some things to that different folder and all of that kind of stuff, But I will show you how you can do that. So if you, um if you're thinking to yourselves Oh, that is not happening. I like my retouched things in a different folder and nobody gets them and their for me only and I'll show you how to deal with that. It's not a problem at all, but personally, that's not how I do it. So I would put these all in the proofs folder I e. So I don't rename anything. I would just hit export. If this was a portrait session that I was editing, I would rename them first because there's no Dunn's yet way. Skip that whole blogging step, right? So what I would do is rename them, so we'll pretend I exported this. What I would dio with the wedding then is I would that's exported. I would come over tear to my flags, and then I would want to see all the rejects. These air my unflagging photos so you can manage your flags down here. Here's where you choose. You know, your whatever your filter, your desired filter so I would be flagged. But I want to actually see the UNF lagged photos. So that's this right here. This icon represents the unflagging photos, So if I click on that and click off this one, I'm looking at the UN flag stuff and I would do a select all and I would hit the leak and those are gone. Okay, if I'm doing a portrait, I would delete those before I rename them that way. It's just a nicer flow of file. Then you don't get, like photo number 1-1 I don't know why that bugs me really bugs me. So I don't like that I would delete for a portrait. Delete the unflagging photos first, then rename, then export for weddings. You could delete the unflagging stuff first. It doesn't matter export, but I don't yet rename. It came. So then I would go in. Let's just take a look at what that looks like. I guess we can do it in bridge. Um, so Enbridge, I would then have. Let's see, we have are done folder already. We have our originals. And then here would be the proofs. Right? So once I get these exported out of light room, I want to make sure I delete all of my own flag stuff. Then I would come into my done folder and I would copy. So command, all in command. See? Copy these. Come up. Go back into my proofs and paste so I would pace to those in over my proofs. So my retouched images air replacing some of my proofs. Then I can go and rename my proofs, and I would do that. Enbridge. So once they're in here, I would select all and a command shift. Our will bring up back to rename and I can come in here and I'll start them over from one. Right. And I would do the same then from within light room. So I'd come back to light room. Once the unflagging photos are deleted, everything's been exported. I've copied over from my done folder. I would come in here and rename them here. Why would I do that? Because these are the originals in the original folder. The original originals are backed up, right? These are the light room originals, whatever my original proofs. So the advantage of renaming these so that they match my proof folder is that if a client says, you know, maybe I've made a photo black and white and I know some people are like, That's it. You can never have it in color. But if I elect to give it to them in color, I want to be able to know the original file number to get it really quickly. So I want my original file numbers to match my proof file numbers. Um, and everyone kind of handles that differently, but that's how I like to do it. So I would copy and paste that stuff over. And then as far as light room goes, I'm kind of done with light room for me. So at this point, I would be spending some time with bridge. I've got that re numbered. So a Sfar is like time into my workflow. That's, you know, im pretty almost like I'm done. I've got this wedding pretty much done. I just need the slide show in the album. So the day is still young because this all went so quickly. So at home, when I was doing this, maybe I, you know, grab lunch. Now, who knows? Themed a would still be pretty young. So at this point, I would go through my proofs. And also, what's cool is when you have things that are start and those things in light room, usually the star will carry over when you export into bridge. So, um, you can see that. And if you need to take advantage of that for anything. It's pretty cool, but I would go through here and pick. Maybe I expand my bridge window a little bit so I can see more. And I might pick, you know, whatever it is that I want. Oh, I don't know. I'm just grabbing stuff. A lot of the things you know I would recognize as having been, um I've already retouched them for the blog's. So I would just grab some stuff. I decide what I'm gonna put in the, um slideshow. So I go through here, and at this point, I would star them. Maybe is one choice. You could start them and keep them for your slideshow, or what I usually do is I copy them and I come up and I make a folder called Slideshow. I open it and I paste them. So that's how that would happen. Then I go through here, we'll pretend the J. Peg folder is not here yet, But we're just here in the flight shows I copied and pasted my chosen images for the flight show. And then I would, um, work through them and make sure they're retouched the way that I want and then I would batch resize them for my slideshow, or depending on who you use for your slideshow or your online whatever. Maybe you don't have to do that. So great. Then I would get these things ready for my slideshow. Essentially, once I got them retouched and everything's good, I would do one more copy and bring it back over here into proves and one more paste. So now I've got even a few more retouched images within my proofs. And that just helps me later with my album retouching and design and up. You know, updating if that makes your skin crawl, that's okay. I will show you a work around. If you prefer to keep everything you've ever retouched in a separate folder, you could do that. It's totally cool on bits, easy within, designed to update and replace an unretouched image for a retouched one automatically. So I'll show you how that works. The important thing, though, would still be to have a, um, the file name be the same. So you would still want your retouched filed, have the same name as your unretouched. So keep that in mind. Yeah, I want one year so um is it will be more a vision if we have 11 fold of it all the pictures and uses star ratings and Enbridge also like for Slater, you can put like, four star Totally. You could see that we're doing multiple copies. So I am sacrificing a little bit of hard drive space because I've got a few copies of things that is totally one solution you said you could do for me. I just really like I like navigating through these folders. So, for example, if I am gonna when I'm picking an image for the gallery, you know, for pick pick, you have, like, a a hero shot that goes on the cover of your online gallery. When I'm doing those things I love being able to open the folder and go into my done folder and boom like, I don't filter anything. I just personally, like managing with some folders. But if if ratings or color codings or stars or whatever, if that works for you, use it told, use whatever works, I just I'm a folder junkie. I love folders, so I do that. But whatever works, that's a really good question. All right, So we re touched for the slide show. We've copied those back into proofs, and at that point I would then switched years and go into in design and Design album. So that's what we're going to do tomorrow. I'll show you all about how in design works. I'll show you how I not get out so quickly, and I'm planning if time if the time thing works out and planning to just do a whole album for you at the end of the day, like I mean pressure weaken time it, I don't care. We'll see how that goes. We'll just do it right. This is We'll keep it real. So that's great. But right now, I thought, Before we end for the day, I want to show you how I handled the portrait session, many books, the square things and the borders and all of that. And there's lots of great resource is for that designer glow. Make some really great. I think they call improve Borders and they're gorgeous and fabulous. I think they're 25. Well, the very in price, but they have some may think that 25 bucks and they're they're wonderful, But you can also make your own really easily, so I'll show you how you can do that. And what's cool is you can customize it for your brand. Or maybe if you maybe shoot seniors. And I know I shot a ton of girls, so my stuff was and I'm a girl, so kind of girly slanted. But if you shoot a lot of guys and you want something a little more masculine, you can make that. So I'll show you how that works. But to do that, I'm actually going to jump into a different um, Holder. Let's see. It is not this one. Where is it? I was going to show you guys some. I'm on it right now. That's the thing with instructing. Sometimes you can't see right in front of your face, so I'm going to show you This is a portrait. This is an engagement session that I did. So this is what my like. I literally just copied this off my Dr eso these air my light room proofs so you can see that they're sequentially file numbered. Whatever. And here's my blogged folder. Um, I think I forgot to mention when I say for Web. I forgot to say that I saved them into a folder called Blawg. So I've got the done folder with the high rez retouched proofs and I've got the blonde folder with the block sized retouched Um, so I would go into here and I would pick my 20 images that are going to be in the book. And remember, I haven't blogged at this point yet. If it's a portrait, if it's a portrait session, so then within bridge we can view. And if we sort by rating, it'll group all of the start images together. So I've got the or not. Did not sort that cryer it. Few sort raiding. Maybe it's just not loading everything, still working on it. But here are these images, So that's not all of these, so it would sort them buy rating. I don't know what. It's not cooperating. I think it just hasn't loaded everything. It's still rendering, so maybe it can't read it all yet, but I would get all of those images rated. Those are the ones I would then retouch right, and then I would copy them into a folder that I like to call album or book or whatever. So I would pace those all in here. And I'm actually doing this in real time now, which might slow it down. Ah or not. All right, live TV, live TV and very short. That just quit. Oh, here's the stars. So I wasn't making it up the keyboard shortcut. Just quit working. So I'm command copying and I'm going into album and I'm there they are. Cell slowly, it's coming slowly will replace. Okay, so I guess it's This is why on cooking shows you cook ahead of time. The turkey, um let's just skip. We're done. Okay? So eventually you'll get those in there applied All skip. So I've got the 20 photos or something like that. Eventually, all 20 voters in here that I would then prepare for the album, right, so retouched whenever then, once those were done running the album Action is so easy, it might make you cry. Are you ready for this? So the first thing we need to do is sort by dimensions because the way that I have built these actions is with patterns and the patterns are applied to the images based on whether they are vertical or horizontal, so we need to sort them. So I'm gonna come up to view This is so easy and do sort by dimensions. And look at that. All of verticals are grouped all the horizontal. They're grouped. So all I would then Dio is select. You know what? Let's just do a few. We'll say three way tested photos opted in its silly. So I'll select these three, and then I would come up to tools and I'm gonna choose photo shop. And here you have a couple options. We can dio batch, which will back everything you run in action. It's fine or you can do image processor. And really, one of the big differences is just that In image processor, you can set the desired compression for the J peg, which, of course, we want it to be high quality, low compression if you run batch and maybe you have an image that you didn't already like, retouch or save. Somehow, if it's straight exported out of light room, you're going to get the pop up from Photoshopped that says, you know, choose your file compression so that can sometimes be annoying so you could do image processor instead. Um, and that then would look like this. The images are already selected so you can save in the same location. Or you could specify a different folder. If you do same saving, same location, it's going to just make a folder called J Peg. So, actually, already I think I have that I saw earlier. But it'll name it Day Peg, and that's it. Here. I wouldn't change any of this, um or maybe just to make the quality 12 so that you know that that set. But I'm not going to resize anything and down. Here's where I would choose the action. So I'm gonna call the actions that I have made that are included with the class or called fast book photo Borders. And I don't know, this is what this is what they look like. We have burst hearts and fancy stripes and they come in three sizes 10 Brittany by eight and five by five. So I don't know. Let's do, I guess, bursts. We'll dio Well, these are the vertical images, so we'll make 10 by 10. Let's say we're gonna make them a by 10 bucks, so I'll say vertical um bursts and will include the color profile. And when I click run, it's going to go and do some magic. Boom, boom, boom! I'm holding you in suspense. That happened behind the bridge. And if I opened the folder Look how they look will open it now and finish up. Teoh, That's the border. Awesome, Right. So then I would just I mean, I don't need to open this so we can close all of that stuff. Um, but then if we come back to bridge their story, they're still sorted here. Then I would just pick my horizontal and I would go back to tools, Photoshopped tools, photo shop, and I would choose image processor where you could batch it if you prefer. And then I would just choose the same 10 by 10 instead of vertical, I would choose the horizontal bursts, and I would hit run, and it would just knock it out. Right. So I don't know. We can see how fast does it really go? Here's it in action. So I'll show you how you can build these, um Or if you get the course, you can get him, and they come with install instructions and how to use them and all of that stuff. But you can see it just runs its magic. So I said seconds, and it's really just however long it takes there, it's done. So to run all that, then you have your folder with Enbridge, your wherever it is that you decided to save them And, um, you know, they're done. They're there. Whether they're vertical, horizontal and they're just 10 by tens or eight by eight or whatever, you upload them to your lab and done right. So I just think that's really awesome. People have lots of power and flexibility when it comes to what they make for an album, so everyone can really have it. I can show you quick. We've got a little bit of time left. I can show you how you make those actions. If you want to make your own, if you want to brand it, If you want to do colored ones and something fun for kids and port whatever, I'll show you how you can do that. So I'm going to start with just any image. I don't know if this is horizontal or what not one that's already been not one that's already been action. That would be not the best way to start. So let's see. We'll go. That's fine or no, Whatever. Anything. So here's a photo. Andi, actually, to make this action and to do the design and all of that, I think it's easier if you have your image black just because it's easier to select later, we're gonna have to knock a hole out of this thing. So my first step would be to fill the image with Black because we're really we're making the action to actually create the pattern that we're gonna put the design into. So the photo itself doesn't matter at all for the action, and you could pick like your worst ugliest throwaway blink shot ever. And it's fine. So I would fill it with black. And the next thing we want to do is, of course, start recording that action. So down in your actions you'd make the new action button and we could call it, you know, Super Border. Awesome. Uh, whatever size, let's say 10 by 10 horizontal because that's what we've got here, right? So let's put this in. Whatever you put yours and will hit record. Okay, so we've got it open here. The first thing that we want to do is to resize that image. And this, of course, is to your flavor and taste. But for if I was making, like, a 10 by 10 book, then I would probably want the horizontal with of the image to be eight. So I've got on inch on either side, so I would bring this up and I would turn off re sample, and I would set this for eight inches, so that makes the resolution monstrously huge. And we're going to design this whole thing to just be at 300 pixels per inch for consistency. That way this will work whether you kind of crop your image as long as it's to buy three ratio, it can have a little bit different size, so that's going to be cool. So once I've got it to eight inches, then I'm going to drop the resolution down to 300. All right, and then I'll click. OK, so now we've got that resized. The next thing we're going to do is increase the canvas size. So will pull up a canvas size and gonna put this in inches. And I want the whole thing to be 10 by 10. And I wanted to fill with whites, but you could make it black or hot pink. I don't care. The hot pink might be a little tough to handle a lot of, but you could do it. Why not? I'm gonna go with White and I'll click. OK, so now I've got the basis of this thing. See where we're going, right? Yeah. All right. So now, at this point, I'm actually going to stop recording the action because the actions what I want to have happen teach photo. What I'm going to do now is pause the recording so that I can create the design of the pattern, and then we'll pick up the recording and place the pattern. It's so simple. So I'll stop this by just hitting the stop button and then in my layers palette. What I need to do is we need to knock a hole in this thing on, and we need to We need to select this rectangle so we can put the border around it and all of that friend stuff. So I guess my first step will be I'm gonna grab my magic wand and I'm just going to select the black and I'm going to make a new layer because I want the border that I'm about to put. I want it to be on a new layer, so I'll do that. And here's the thing. We're going to transform this selection from the select menu. We're gonna come down and shoes transform selection, but we want to make sure that the selection is equally transformed. Right. And this is a little mind Warby. But you maybe you realize this. Maybe I was the only one who had to actually think about it, but holding down shift and option and all of that and just proportionally enlarging it, I will give you not equal space on the top and on the side, right, because when you do that, you're increasing the percentage of the size and the with is always longer than the height. So the with is gonna grow faster, and it will not be a nice, perfect border. So the work around for that is you come up in the options bar up here and if you right click, you can choose pixels instead of percent. Did you know this? It's kind of blew my mind. When I figure that out, you can actually switch. This is your options bar. This is the within the height that are talking about this selection I have here. So what I want to dio is expand my selection. And yes, you could go to the select menu and choose selection expand. But if you've ever tried to do that with square corners, what happens? They get rounded. So if you want to keep the square corners, you've got to do it this way. S I'm going to right click up in here, and then I'm simply gonna add I think I want to add, um, 100 to that. Yeah. So at 100 here to the with pixels. So it was 24. 02 Now it's 25 to for the height. I've got 16. 02 And I'm just going to make it 17. 02 And you see what happened to my selection? We should zoom in. Unless I guess. Right. So now my selection. Sorry. Viewers at home. I just realized I should zoom in. So now I've got the selection expanded and it's equal on the width and the height. It's 100 pixels. I've added to each. So then I'm going to go ahead and commit my transformation. And now I can stroke my selection to make a border. So I would come up to edit stroke. And this is gonna be to your taste. Three pixels, eight pixels, six pixels. Whatever you like. I don't know. We'll try. I don't know what I made up in my mind. Notes. I never read my notes. We'll say for Andi, Here's the other thing. You really If you want nice, clean, square corners, you want to make sure that your location is set to inside. Anything else will give you again curved corners. So if you want that great. But Photoshopped doesn't handle the corners well, so I'm going to stay inside, and I want them to be black. You could do whatever you want when I click. OK and I d select have a border so you could make it thicker or thinner however you want. That's pretty groovy. Let's see what we could dio about, Um, a little embellishment, something for the corner of these borders, right? So I'm gonna grab the type tool and get that loaded here, and I'm just going to click in here. And I think we have a typeface on here called Roma's Omni Lots. There you go. Any dingbat sort of font, I think will work really well, Andi, I think I'm gonna dio Ah, wait a minute. I would pick a different one. There we go. Db Fancy flourishes. This is a, um a picked Oh, fun. So there's little designs, you know, wingding, web dings, whatever. Dingbats they're gonna work fine. You just want to find one that you like. So I'm gonna go through with this guy, and I have decided that I really like Not that the lower part is picking. What? You um actually, when they dio and I think I had it right before, we're gonna dio, uh, do printers ornaments or No, I loaded these things. All right, well, the wrongness on the lots and maybe six. Let's say all right, so whatever character you decide you like, I've got one here. I don't probably want it to be read, though. Probably go back and make that black, so we'll get that black and get that out here. Um, so you can do, you know, anything you want, as long as you like it. That's what's important. So and as long as you can find a way to use it in the layout, well, you know something with, like, a nice t kind of shape lines up nicely with Borders or an ex, you could offset it. If you wanted to do, like a box or something, you could offset. It could be kind of interesting or something floor. She that fans out. But, well, we'll just go with this for right here. If I wanted to, I could rotate this and have it more of an ex situation. But we'll go with that, and then I'm just gonna copy it, So we'll all drag that out in about like that. Good. That's looking pretty good. Um, so simple. So that would be the finished product, all right? And then we can, Let's see, we would want to hide our background so we just have this and then we'd want to do a select all. So everything's good here. We've got all over this selected, and then I would just do an edit defined pattern and call it whatever. Clubs, clubs 10 by 10 Horizontal right click. Ok, that's great. We've now defined the pattern so I can get rid of my aunts. I can hide all of this, actually, or throw it away. We can leave it. That's fine, too. So I'm gonna go back to my my image. And now we're gonna go back to our action. So at this point, then I would come back and hit record again, and then I'll have to do is at it. Phil, choose my pattern. That's right here. So double click on that and then click. Ok, there it is. Then I hit. Stop. Done. And none of these layers will be here. Obviously, this was what I just did. So let's test it, shall we? Let's open up an image. Another one. Here. There it is. All right. So we've got this image and, like, let's girl down And it's right up here So super bored. I'm awesome. Super border awesomeness, Whatever. We called it a 10 by 10 horizontal play. Boom! So we're gonna talk more about fonts tomorrow because if you're like what? Dingbats? Where'd you get those? What is that? What fun is that? How do you get a farm that has cool things And how do you find out what they are? I'm show you that tomorrow there's something in in design called the glyphs panel. If anyone's played with that and it's a magical place, we're all kinds of fun. Little art design pieces live, and you can use it for all kinds of things. It's fabulous. Eso I'll show you how that works. We'll talk about where you can get funds and everything So you can really explore this. And of course, you could hand draw. I mean, if you're, you know, wicked awesome with illustrator skills. You mean you could create the design an illustrator or into anything and turn it into a pattern here and then place it so you would then repeat this whole action buildings process you would repeat with the vertical format. And, um, you could actually reuse this if you set everything up just right. You could just reuse this, and, uh, we probably have turned on. Um, let's scared of this. You would just select these things. And then, um, we want a rast. Arise it because you see if I try to rotate this, the box is going to be off center. That's not gonna work. So if you want to do it this way, we have to rast arise these, which means get rid of the type. So now it's just pixels. Then I can select them all. Transform them. You see Now the boxes perfectly aligned to those and I could just go rotate, define as pattern Yes, and then make a quick little new action with the new image size for vertical this time. So instead of the with being eight, I would make the height eight canvas extension fill with new pattern that I just made in seconds. Done. So there you have it. Ladies and gentlemen, what questions do you have? Anybody Have a question from V A. Ask if you can add the border action as a batch job. Of course. Right? Yeah. You create the action and then you batch it later. So you can either create your own accident or you can use the ones that I included in the course. You can get them from places like designing glow. Although I don't know what all sizes that they offer, So I made these specifically toe have five by 58 by eight and 10 by 10. If you want to use them for a bigger book, you can. But you want you either create the action or load the action. You would, of course, batch it on DWI showed that earlier, right? So you would select all these images in something like bridge, and you would come up to tools photo shop, and you have the choice of either using batch or image processor. Either way, it's a batch function, and I mentioned earlier the advantage of the image processor is you can specify the gaping compression. It's not a big deal. In fact, personally at home, I usually batch it because I've retouched everything they've been saved with depend compression. And it remembers that the Onley time that the batch itself becomes annoying is if you maybe you exported an image and it's it's so great there's no retouching. They've got perfect skin. You don't ever open and touch it in photo shop. Then you'll get a pop up when you run the batch and it'll say what you know what's your JPEG compression? And it's not a big deal. Maybe that might be two or three out of a batch, and I'm only matching 20 here. So I would just hit. Enter 12 quality compression, whatever, and it's fine. But if you want to avoid that completely, then I would choose Image processor instead of batch. But you So for Karel de Photo, who has Photoshopped elements and light Room four, she says, Can I do this Making the borders without bridge? Yeah, you can make the borders Well, there's away. Teoh play actions in elements. I know there's like a hack for that. I've never tried it. Okay, so you couldn't record the action that I'm aware of. There's no action. They do have, like, an automated thing in front in elements. But it's not an action panel the way it is in photo shop. But you could use the actions I made or that you would purchase somewhere you could play them in Photoshopped elements. You'd have to google how you make that happen, because I've never tried it elements, but you could cool. I've seen it done. And so just for people to know who aren't as familiar with Bridge Bridge comes with Photoshopped. Yeah, let me touch on that quick. So bridge comes with Photoshopped with any adobe product. That's why they call it Bridge, because it is the connector between in design. Photoshopped Illustrator What Have You So it's the connector, and it's basically a pimped out file. Rather, so it's kind of like Finder or Windows, the floor on Super steroids. And there are other browsers to I know some people really like Photo Mechanic because it's super fast. It loads. Apparently, I'm told it loans the previews really fast and everything, but I like bridge specifically because of its interconnectivity with photo shop and within design. And as you'll see tomorrow and in design, there's the wonderful ability, and this I think I hope you like as much as I do. You have the ability in design to create a keyboard shortcut. So if you've got an image placed in your album and you need to find it quick and bridge or mini bridge, there's also Mini bridge, and some folks may prefer mini bridge. But this is why I don't The keyboard shortcut doesn't work the same in Mini Bridge, and it's so valuable that I deal with kind of this like window juggling, because it's that important to me, that keyboard shortcut that allows you to pull up an image Enbridge from in design. So let's say like I let's have done the design of the album and I've got this one photo. Maybe it's a group shot, and then later I realized someone has their eyes closed or something like that. I don't wanna have to sift back like navigate back to bridge and navigate through 300 photos to find the one and then find a similar one to replace it with. So there's a keyboard shortcut that you hit and it opens at Enbridge and it goes straight to that photo, and I can grab the neighboring image and throw it in, and it's great. So I really like Bridge that reason and it comes included, so it's already there for you. Okay, I have a question from Claudia Del Rivero, who says, when I designed my books in Photoshop, I usually copy and paste frame vectors that I designed previously an illustrator. Isn't it better or faster to do that, then the steps you're explaining right now or what do you recommend? That's a really great question, and that's awesome. But she rocks illustrator. What I would say is, whatever works for you, I show it here in a photo shop. Because people are comfortable with Photoshopped. I'm a huge in design fans. So the borders that I included with the class I built those and in design and made them photoshopped patterns for the photo shop users. But if you want Teoh build them and Photoshopped, I showed you how to do that. If you're familiar with in designers, you will will be after tomorrow. You could do it in in design. You could do it. An illustrator you could do to anything. Whatever works for you. The nice thing about doing it in in design is you can actually do some things you can't dio in photo shop, or that you certainly couldn't do easily, which is things like like polka dotted like dotted borders. You can stroke with your brush, and you can fan out the spacing to make dots, but they will not be evenly distributed as they would be. An in design in design will manage the spacing even in the corners. It's better that way because that's what it's made for stuff like that. So on. And certainly an illustrator you can. You can dio so many other things, so whatever works for you and how you want to work it. But that's a good question. Yeah. Do you want to keep going with questions? Is that what we wait? I mean, we can I just I guess I just want to point out that as faras albums go with photo shop, Um, I don't I would never design an album and Photoshopped, right, because that's kind of a nightmare. That's what we'll talk about tomorrow. That's not what friendships made for. I might design elements that I placed in an album, or in this case, I'm designing the pattern that photo shop will generate onto the single image per page deal. But when I'm doing a laid out designed book, that's what I'm going to do with in design. So in case there was any confusion, I just wanted to clear that's great. So that answers, I think Carrie Carrie, CEO. How do you save then and give to the book company? But that's well, we'll talk about how I say from in design tomorrow in this example there just j peds. So I I order them. I order prints from the lab If I'm self mounting or if it's, you know, like a M picks pro the lay flat books. I just go through their rose ordering and you just drag in your day bags you didn't order. And with great is you actually drag and drop from Bridge straight into Rose. I mean, I am a bridge girl, so I'll drag and drop straight from Bridge into Rose. It'll ask me, Do you want 20 files of this at one copy? And I'm like, Guess done, upload. So I know what Rose's morrow, yes dot com are. Oh, yes, yes. There's probably a lot of people out there that don't know what todo for, like remote ordering something. I don't think a lot of companies use it. Yeah, it's great. So it's just basically, it's the interface that you use when you are ordering from an album from some album companies, not all of them, but for some of them onder prints and things. If you use it for prints that these air prints basically or building a book, so it's just their interface where you build your orders and you can drag and drop. It's really simple Cool. Thank you. So care, we have about 15 minutes left. Do you want to just do Q and A for the remainder of the weekend? And I was gonna point out before we do that, though, I forgot to show you, and this is no biggie. But if you're looking at this and you're like I would never want So now we have it rotated. Let me just undo that. If you're looking at this and you're thinking I would never want, um, this border line to go all the way to my corners, right? Maybe that's annoying. Or maybe you want a different Maybe you have a cool design piece here. And actually having the stroke from the outline border run into it is a problem. Well, obviously, that's so simple to fix because we can add a layer mask and we can use airbrush tool and probably a hard edge. So I'm gonna make that hard, and I would come in here and just, you know, or I'd probably do a big brush to make it even and just knock out the corners that kind of fancy. Find it a little more. Look at that. Right. That's a little fancier. So you can knock out your corners like this. And, of course, an in designer illustrator. You can do this. You wouldn't have a layer mask. You would do it in a in a different way. But in photo shop, it would work like that. So you mean you really have You could put things in the middle. You mean you can design this? It doesn't have to be black and white. It doesn't have to be a little stroke with the dingbat. Think corner. It could be anything your wildest dreams can imagine. But this is a nice little simple example that anyone can make, uh, in a few second so we can take the rest with questions. Okay, So we can just ask questions going back the whole day, Whatever green eyes way. All right, cool. So, uh, clarification about to your workflow? Yeah. Earlier R c Z 64 Q as well as Dennis A and myths was from Mississippi. When you talk about your done folder in my room and folks are asking, they're asking if you are mixing your small files with your full size exports. So one person said in the done folder, Was that the retouch files or downsized for the blawg? Right. So are you using the same folder for the album? Okay, great question. Let me show you back. We'll go back to the folder structure and let's go back to the here. Okay, so here's my folder. And this is what it would look like. This is what it would look like when I'm done. I've finished their full album and everything, so the album folder would be created tomorrow. We'll do that tomorrow. But once this is all done, it would look like this. So I have my full size originals here. The first next folder that I made was the Duns, and that has the high rez. So I export my start favorite awesome photos from light room. I export those into the done folder. They re touch them in photo shop and save them. So they're higher, full, full size there. Then I run my block resize action, and I saved the resized retouched photos from the done folder They go in block. So this will have you know these are here. I've made some, you know, um, block boards that I did these and in design, so I'll show you how I do that. But this is the blogged folder, so that's the same as the done, but ready for the block. So high rez done. Web sized, blogged on. And then the proofs have the light room exports, and I choose to then take whatever I've got retouched in done. I copy over here, but that's just me. Great. OK, have a question from Mark Maggard. Who talks said that you you know, you talk about your block, but he would like to know how you work Facebook into your business model. Oh, super. Yeah, well, I, um, post a lot of times I'll go to my block, a person of my blogged, then all go to Facebook, and I post it there as well. I also have my blogged that goes and automatically generates a tweet which will also show up on my Facebook s. So that's how you managed it. And you know, whether you have a business page or you just have your all in one personal life, everything work, everything that's up to you guys, but I actually do end up kind of duplicating that content on dime always. You know, I'm not always sure how I feel about doing that, but it takes seconds. So on the blog's were all right, my, you know, story a little bit more about the day. I get more personal with it and explain, You know, if something really funny happened or if it was especially heartwarming or whatever, I'll tell that story on the block. Facebook. I really put that there for my clients, you know, convenience. So they don't They don't have to go like, put it, grab it off my block to put it on their Facebook profile. I just provided for them. So I put it on there and I can tag him and everything but it. So it is kind of duplicated, but they are, you know, they're becoming that way anyway, with Facebook, comments on blog's and everything. So right, Ellie into fully integrated. All right, so you've taken us through your work flu today and Teoh summarize everything so that we have something to strive for. A David Lola had said, How long does it take care to? When, what develop her 305 100 photos. Or maybe that's wedding or again. All right, so the whole thing from after the download cause I do that the night before as I told you so when I sit down to edit, I'm ready for action. There's no sit down and wait. So I sit down and from when I sit down till when I'm going out to dinner and having some wine or whatever we do, it's eight hours or less. So that means the wedding edit is done with light room. The slide show is done. The album is done. Everything's finished. The client's been notified the proof. Their online. The slide shows online. The emails been sent done so like it's really off my plate. And I am enjoying my dinner, right? Um, the the light room itself apart. I think maybe the first go through might take maybe an hour to whip through all those images. I don't I mean, maybe an hour. I don't know. Maybe, and maybe an hour and 1/2 depends. Then the second pass through that might take maybe another hour, go through and develop things, and that's what I'm also you know, agonizing a little bit more about which cake shot do we really want in which this and so I weighed it down further, and the weeding down takes a little more time. But I think that's part of the good service for our clients is give them the great shots and don't waste their time with the other stuff. So that's important. Um, but I'm really dime done with all of that stuff. And when I mean, sometimes I don't sit down and get started on this until 10 or 11 in the in the morning, maybe even at lunch. Me, I might not start, and I still might be done by five with the whole thing. So it depends. Obviously, if I am doing a wedding that my husband shot with me and we did a photo booth, I've got a lot more images and the photo booth images are a lot more work for me in light room because I end up having to do a lot of cropping because we shoot with those with a wide lens, and so we get a lot of background in them because you never know what you're dealing with and people move so quickly and those require more cropping, like I'm literally cropping almost all of them. So that's a little more labor intensive, But I can still finish a two shooter wedding with a photo booth and the album and everything in eight hours or less. So you can do it too. I promise. I promise. Oh, that's why. And you will be like, why haven't I used in design since the dawning of time? Cliffhanger. That's why we're watching this workshop. They are gonna get ours narrowed down five hours as well. The album itself should take an hour or less, I think should word. Okay. Laurie, Peanut would like to know if you belong every wedding you shoot. Um, yeah, I think I dio because I think clients, you know, like my experience with my seniors. One time I was that I thought I blogged one of my seniors. You know, the seniors are so fun in their own way, and I a blonde moment. I blogged all my shoots pretty much, I think pretty much unless it's something like, occasionally I might still shoot a family portrait because they're really special clients, or it's a special thing, but I don't want to really promote that. I shoot families because I don't really so I won't maybe block those. But otherwise they shoot pretty much everything, or I block pretty much everything. But this one time with my seniors. It's part of my work flow to do the blogging as you see, So the blogging is done, and I prepared the block by the photos. I had everything prepared, but somehow I just spaced out and didn't actually upload them. And I got a phone call from her mom wondering why didn't block her daughter. And I had blogged all of her friends, and she was so heartbroken and you know what was judging her. And I didn't think she was good enough for the block or whatever, like it was so awful. And I'm like, Oh my gosh, I'm so sorry I had it prepared and everything. I just literally forgot to do the upload so I would feel bad if I didn't block a wedding. I e feel like my clients have come to expect that they know that me weddings will be on the blogged Sunday sometimes, so people know they can check Sunday and will be something there If I shot that weekend or they know they can check Monday and they'll be something there. Eso they expect that. And I have brides who have emailed me from the beach on their honeymoon to tell me we love everything. And I'm like doing on the Internet on your honeymoon. But you know, they're waiting or they're texting me, waiting on every everything to get that online. So it's part of I think it's part of the experience and in the show that I do for them. So I think it's for me. It's important, so I do. All right. Well, maybe just a couple more questions. We have a couple left and question from Mark Mag. Guard is you may have covered this, but again because everyone so blown away by your workflow. So when you are developing those images in light room, do you individually color correct each proof image? Or do you have actions automate similar images from a different scene from a different section? Sure, of course. Well, I don't do I don't have a lot of presets that I use. I literally think I really just use black like a couple different black and white ones. But what I usually do is if I'm color correcting something. First of all, of course, I try to do that in camera as much as possible. That's why I put the sticky filters or CTO cut up jells on my flashes and everything. But of course, it's not always perfect. It might be off a little bit, so I might come in here and, you know, tweak this however on then what you can do once you've got it. Tweets. You guys probably know this. You can select one, and if you shift, click the others and you hit sync. It will synchronize those settings and you can select. Do you want to synchronize everything? Like even if you do brush and spot adjustments, you can synchronize everything or you can just synchronize. Um oh, I'm I'm sorry. I'm not in the right. Yeah, I was like, That's not Come on, computer. There we go. All right, So once you get what was even doing all right, here we are. So once we get, you know, white balance or whatever adjusted once we get that done, then let's let's do something crazy like? Well, just so you can really see right? So if I make a black and white adjustment here, I can then shift click this whole series. Thank you. I was thinking, Wow thing is a different person. So light room for totally different eso here within the synchronized settings, you can synchronize your just the white balance specifically, or you can synchronize tonal adjustments that you've made or some Whatever. If you've done some spot removing with the brush, you could do that or the cropping, So I usually don't cause those air usually really image specific, so you probably wouldn't want to do that. So I'll do all this stuff and then hit synchronized that we do that really quick. You'll see that it's now gonna process all of these. Um, so those would be synchronized. Now they all have the same adjustment. So piece of cake. If you've got just a little color correction deals, that's pretty fast. Okay, so one final question So I know how I feel after shooting a wedding or having a big shoot, and I basically walk around for several weeks with guilt and the backpack of like stones on my back I'm not getting it done. Oh, my question is, when you talk about getting it done in five hours and being able to sit down and have dinner and watch favorite TV show, what does that feel like? It's so wonderful on that. I'm here because I want everyone to feel like that. You know, it's wonderful for me. It's wonderful for my clients. I mean, it's so just to give you an idea of, like, the reality of this when I did think we mentioned earlier the cross country bicycle trip. But my husband and I rode our bikes from California to Florida. We left in October last year, and, of course, I had a wedding in two days before we left. So I shot a wedding on October 15th. I think it was, and we flew on the 17th and I mean, we were gone for two months. I had practically nothing with me. E. I had to get this wedding done and everything finished, and so and that was a big one with a second shooter. My husband and we did the photo booth. I really wanted to challenge myself there, so I did all of that and I just sat down the next day, knocked to the whole thing out, got it online. And I told the bride, you know, I'm gonna be gone, So, um, I'll get your stuff done. But I told her, You know, just so you know, if you email me or whatever, I might be pedaling my bike in the middle of the desert, but so she knew also when we were coming, of course, up on Christmas. And I said, I really want you, of course, to get your book by Christmas. Of course, we're still quite a way the way, but not a big deal. But I wasn't sure what the album company deadline Waas, and she got her revisions to me. I did it from the road. I edited her album, which I think maybe she had one photo. Some offer something, and I sent it in and she had her book. I think it was in production, like a week after her wedding, like at the lab printing, making their book. So it's a wonderful I mean to be able to just shoot a wedding and then be done and move on and shoot more. Take a vacation or whatever. It's a liberating way. So I wish that for everyone. I wish that for you. Well, thank you so very, very much for that wish. I so appreciate it. And I think we all thank you for that wish. So let's give care a huge round of applause for today. Thank you, guys. Thank you. And thank you to everyone. A creative life magic.
Class Materials
bonus material with purchase
bonus material with enrollment
Ratings and Reviews
a Creativelive Student
Yep, love your work Khara! I am now using Indesign to make my first wedding album thanks to you. So clearly explained and nicely presented. Such a powerful program that makes a complicated task seem easy, with as many variables in layout and design as I can imagine. I am just so excited! I would recommend this course to anyone who is running any size photography business. It will help simplify your workflow and increase your output.
1106 Imagery
This class is so good! I learnt so much about albums, and selling them the right way. Having never really used Indesign before, I was nervous about using it as my main platform to design albums. I'm shocked, but I really enjoy using the program! It's so simple and easy using Khara's methods of designing. I also never used bridge before too (Lightroom faithful here), and it's fantastic for sourcing images for the albums. I'm learning a few upsell methods too, so it's very exciting for my business! Thank you for such a great course :)
Adrian Farr
Khara's advice is so simple yet makes absolute perfect sense! She really knows how to get the best out of her albums and packages. If you want to learn things that will help you improve your business/workflow, then seriously buy this course!