Lessons
Day 1
1Workflow Philosophy
13:18 2Four Main Goals for Workflow Management
1:14:40 3Pricing and Packages
1:02:19 4Set for Success - Gear
27:19 5Software Workflow
41:43 6Slideshow Prep
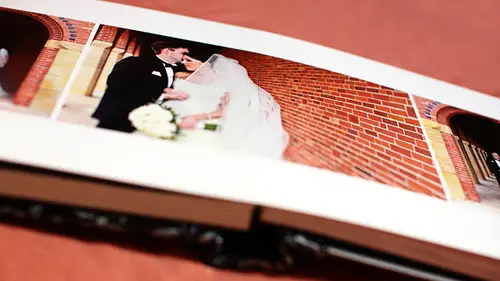
28:09 7Fast Book Production
58:10Day 2
8What is InDesign?
09:40 9Setting InDesign Preferences
21:26 10InDesign Basics
48:04 11InDesign Basics Q&A
11:56 12More InDesign Basics
11:14 13Image Management, Retouching, and Exporting
24:00 14InDesign for Flip Books and Blogging
24:16 15Creating a Marketing Piece
32:50 16Design Principles
27:17 17Typography
29:13 18Thanks + Credits
07:12 19Start to Finish Album Design
35:59 20Workshop Recap
10:30Lesson Info
Slideshow Prep
So at this point, then I'm ready to have my favorites for the block. Right? So because I have done that in camera already, look how easy this is. I would come to filters and I would go rated Boo. Here they are. So there's my whatever whatever I rated and usually all go through this and then delete some cause sometimes I just get excited about it in the moment. And then I look and I'm like, What was I thinking? So I might go through here and delete, you know, unr eight, some of them or whatever, But then I would go through and pull these up and switch to the development module and, you know, do whatever kind of adjustments. I don't know what I would dio, but adjustments, maybe some, Um Oh, these are all these are all open. But I might go through here and do some tweaking of stuff, but not a whole lot. You know, I don't I've got the presets and things. My favorites, the one that I use the most are like Kevin Cobb, Oda's black and white like I love his punch punchy in here punchy black an...
d white punch I love that. And I like totally rad black and white stuff. But I honestly don't use really presets a bunch, because I don't I don't have a super processed look. I keep it pretty clean, pretty natural, So don't do a whole ton of that. But once I've got all my favorites called out here, right, So I would go through and develop them as needed as wanted. Whatever. And then I'm gonna export them so I would select them all and do an export Teoh my client folder. Now, here's how I operate all over this stuff in my root folder. I've got, you know, Smith Wedding or whatever. So in the Smith Wedding folder, I have a folder called Originals. So when I download, I download into a folder a sub folder called Originals. Right. And the reason for that I didn't always do that. The reason I like to do it that way is later when I'm opening bridge, and I just want to quickly grab one of the other folders that I'm going to make. I want to wait to render all the some nails for all those originals. I want to jump in right away, So I group them all. So now they go in a folder called Original. When I export my blawg photos, I export those in a folder that I call done right. So now I have Smith folder inside. I have originals and everything's been re numbered and recapture timed and everything and then have a folder called Done. And that's where I would export my block foot. So we'll pretend here that I'm gonna hit export, Okay? And I'm not renaming anything at this point. So the files I've already renamed them in capture Time order. So there's all five billion of them. I'm have my selected blog's. I'm going to keep that same name, and I would just export, so we'll pretend that I'm gonna expert. Okay, But really, I'm gonna because now I'm gonna open up photo shop and I'm gonna open up bridge and I'll show you how I prepare these, then for the black. So this is bridge if you don't use it a lot probably looks like this. I like to operate in something called compact mode. OK, so here's big old bridge mood compact mood you can get to from the view menu And if you select compact mode or command, enter or command return, it will snap shut. Tiny like this. Right? So I like to operate like this, and this is the folder. When it's finished, it will have all these other things. So at this point, just imagine we have our originals, and we have done all right, So I would go to my done folder. And here's what I magically exported from light room. It's like a cooking show, right? And here's the chicken done in the oven. So here's light room. This is what I exported. These were my starred favorites. I may be made some of them black and white. Then I would go through and I would retouch them in photo shop. So I'll just show you a couple of examples there. So maybe this one and let me find, um, horizontal like something like this. Okay, so I've got these, and then I'm gonna open those so they will pop up and we can move this guy out of the way. All right, So when it comes to my retouching and my actions and all of that stuff, um, I'm also pretty kind of minimal I guess I think so. I would go through here, maybe zoom in, and I'm just I've got the, um, healing brush here and I might just pop around and you know, he'll any any blemishes, whatever might be. And you can do a lot of this in light room to I know I know some of this. I kick it old school, so I'm going to throw this back in the photo shop, but you can do some smoothing and some of those things in light room as well. But so once I've got that done, there's this really cool action, and I don't know if people are fully with it, but it's called Mama Shan's Powders. Anybody know this in the in the Internet world, So I like them because they come in three different flavors. There's Mama Powders original and Mama's powders, light and ultra lights. And when it has to do with is basically how big the face is in the picture. Like if it's a close up shot than you could use the original. If it's a group shot and everybody's this big, you know, that would be kind of dangerous. Maybe so Then you might use ultra light. So I'm gonna just use light powder here. And I have a keyboard shortcut programmed into my actions and my actions panel that I have shift effects over here or excuse me, shift F six. So I just pressed that it just did all of this magic some. I don't even I don't even click on my layers palette. I just Wow, look at that brush cursor. Let's not use that. Let's use a soft one. How about it? So I would grab my brush and then I just, you know, smooth. Look at that magic powder like airbrush makeup. Andi might dial it down because obviously I also don't want her to look like plastic. So, you know, I might do some of this and then go through. I also I really like using a tablet here in the studio. I brought with me a bamboo. This is a Wacom tablet, a two home. I haven't one of their other versions. It's really old when I have, but it's the into us, too, and I love it. I've had it for literally, like 10 years or something crazy and still works beautifully. They're fabulous. It just makes it a little easier. But anyway, then over here in the layers palette, I might dial this down if she's looking like plastic. Well, just dial that back, right so I can control that over here. And then let's see, we're happy with that. So I'm gonna flatten this image, and I have keyboard shortcuts for that. That's not a preset keyboard shortcut in photo shop. There's not a keyboard shortcut to flatten. Your image is. So I do that myself, but anyway would get that flattened and then to prep this for the block, it is a simple as oh or not, I didn't check. My pattern is being re I installed them yesterday. They might be gone today magically, that's a little magical. But you know what? I'll show you how to do it yourself, and I'll show you how to build one. But so I have this preset in here where, um, I run my action and it will actually place my block tag right here. So I boom, hit my action. Do my retouch flatten boom action blogged. Right, so it's really simple. So here's how we do that. In case you were wondering So I'm gonna grab my action in a folder, which are my my tax. So here's my little tag that I am going to drop in. So it's sized for that. So here's what that would look like. You know what? Hold on a minute. Let me go back a minute. I think I right, and they're wrong thing. Um, so for my blogged, well, right, the action in a minute. Or we can do it now. If you don't have actions made up for your blogging already, here's how you would do it. Once you've got your image retouched in your actions palette, you have to get out of button mode, so you have to go back to normal mode, just regular mode. And here's one. I think I ring the Iran my horizontal action on a vertical image. That's part of the problem. So this is the one I have here for a vertical image, but I don't think it's finding that pattern, so I don't think that that's gonna pull it up, But, um, in order to create this from scratch, we're gonna come up here and you're down here with me, and we're going to make a new action. So I would click this and I have one for vertical blogged images and one for horizontal. So I would just call this block if I vertical whatever blood. If I write. So we're going to start the recording of that, and I would resize this. So maybe 500 pixels. Whatever. Um and then I want to run my sharpen. And one of my favorite sharpening is from totally rad. Um, did from the revenge. Where is it? A better web sharpen. I think it's right here. So then I would run this action so you can actually, like, run in action with in a recorded action, which is pretty cool. So now I've got that resized and now sharpened for web, right? So now I'm gonna actually pause my recording because I'm going to create the tag. And to do that, we're going to make a pattern. So I'm gonna drag this tag in now it's sized appropriately. So here's my block tag of Drax dragged into my image, and now I'm going to define this as a pattern. So to do that, I'm gonna hide the background for a minute. So all we're seeing is the final image size and orientation with the tag on it. Okay, then I'm gonna dio select Also command control A and I'm gonna dio at it defined pattern and we'll call it block if I vertical. Okay, great. Now I'm gonna throw that away right now. We'll go back and finish recording the action, so I'll hit record again. And now I'll just choose Edit Phil Pattern. Are you ready for this block? If I hope I clicked 31 I think so. Block of I vertical boom and stop. All right, so then if you assign a keyboard shortcut to this, you can run it quickly. So it looks like this that we go back. I don't know how much we can go back. We'll go back to the original here, and I'll just hit block if I vertical boom and sized and tact does that make sense? So I would repeat that with the horizontal image, make a different pattern, recorded different action for the horizontal image. And then usually, though, on my keyboards I have it set up and everyone's different. And Max funny about it. And but I have mindset. So when I hit F one. It does my horizontal images and shift F one does my verticals. So I pop it up retouched and all my favorite retouch actions are keyboard. Shortcut it as well. So hit that retouch retouched boom done on. I save it for the book. You had a question Generally for a block will put at least like 15 pictures. Right? So a lot of do this every time, round action every time for all these 20 pictures. Well, there's a lot of ways you can do that, right? I mean, you could just retouch everything, and then you could batch action. That part of it. I just have it open already, and it's a keyboard. And so I just do it that way, and then I can save it for web on also you tomorrow. How I actually also do some blogging from in design. Yeah, So if I'm building long boards, right with cool, you know, multiple images I actually do that in in design. So, in that case, I would just retouch them in photo shop, drop them in and export on, but also you also you that room, but yeah, so that's good. So That's the blogging stuff. So if you're not using in designer, if you're not building block boards, which I don't do that for every wedding, it just kind of depends what I feel like and what's going on. So I would just kind of go through my collection here in bridge. Whatever. I decide that I want Teoh retouch and stuff. I would select it, do my retouching, which is pretty minimal. Like you thoughts, usually more. Just skin stuff. Maybe some, I don't know, a little bit of processing, but pretty minimal. And then my block, actually, and that's it. Okay, so good. Are we break time? No, we have about 10 more minutes. Great. That's great. Okay, well, then we can jump into the next part. Unless we had questions. We do. Do you want to do want to do questions about just what we did, or do you want to go that quick? Yeah, well, I switch. I'm gonna switch catalogues in leg room. So I have a question from Liberty Wards. I'm, uh, liberties much Liberty Edwards. Okay. Um Oh, cool. So I'm not sure what this means. I'm gonna ask it for her blogged dues blog's stump or just always blogged each image like what she just showed. I don't know what that I blogged Stump. It's a solution for blogging within Photoshopped. I believe it's within Photoshopped, right? It's a separate program that that you buy. And, um, basically, you can select the images and then you can arrange them and all you had to stomp and it makes it into one flying. Yeah, so I've seen that. I don't use it. I know I checked it out before, but, um, I don't use it. It might be a great solution for someone who's interested. I and I don't do every, you know, I pick select images to retouch photo shop, but if I'm doing a board or want to do really an extended post or something, I'm going to throw it into in design on. That's just as you'll see tomorrow for speed and simplicity. I think it's hard to match, but yeah, okay. Another blawg, Really good question from Sarabi is what if the image you run through bark of my action has a different size ratio than the one that you used to make? It doesn't matter. The ratio should always be the same when I'm cropping my images. If I cropped them And usually I don't do a lot unless, you know, like the photo booth that usually well, some grabbing. But otherwise, if I if I do crop anything, I'm still going to maintain that 2 to 3 ratio. So that's the same ratio is like a four by six. So, in other words, I'm not if I crop an image like in the, um, development module or something. I'm not going, Teoh. I'm not going to freehand it like I'm not going to do something like a square or whatever like that. I would be always If you hold shift, it will stay proportional. So I'm always doing this. So when I then export and then you know I'm in photo shop or whatever, I'm re sizing it. I'm resizing it to a set pixel with, so it will always be the same because I'm downsizing it. But that's a great question on I think, for a lot of things for the little actions I'll show you here soon. The borders and things the photos have to be in that to buy three ratio. Otherwise it'll screw everything up. So I live in a 2 to 3 ratio world. Yeah, that's gonna be a tweet. Tweet. Good. Okay, so we'll bounce back here to light room then. So? Well, imagine that we've gone through and blogged all of those things. Whether we retouched Photoshopped. Maybe I retook him in photo shop. And then through them together and in design, their done their on the block. So now it's Tuesday and law and orders on, and I don't have cable anymore, so I don't have it, but, um, but maybe you do, so you can watch it. Say hi to Benson and Stabler for me. All right, so we're gonna be back here. What I'm going to do is go back into my, uh, grid view mode. And what I like to dio just to sort of save myself is I'll make sure if I'm shooting with the camera, that doesn't let me rate to my images with the star. Whenever before I switched cameras and I couldn't do that, I would use flags here. And so what I would do at this point is I want to make sure that anything that I've already like, sweated over and worried about and I've already looked at like which Cakes shots the best one that I want a blogged. I don't wanna have to re think about those things. So if they're not already starred, I would put a star here because now I'm going to be using flags, and I want to make sure that I don't accidentally, like, get confused or unflagging something I've blogged. That would be bad because then they'd be like, Where's that photo in my proof book? It's not there, but it was on your block so I would star these if I hadn't already. Okay on Ben. I'm going to go back and turn my filters off, because now I want to see everything. I want to see my whole big mess, and I'll have it sorted my file name at this point because it's been adjusted for capture time. The photo booth images have all been renamed. They should be at the end, so I don't have to worry about it, and I would start at the beginning. This is why you know you get a good beverage. I'm into ginger ale these days, as I was telling Kenna, so I would have my drink, my sandwich, whatever my movies, something. And then I'm going to just start going through this beast. All right, So the way that I do that is I've got one hand on in my arrow keys and my other hand is on the letters and I've got one finger on P for pick and one finger on you for unpick. If I pick something I changed my mind about and I would just scroll through here and start picking, right, So maybe that's a good one. So I hit p pick. I keep going. Oh, that one's better. Maybe I'll pick that and all unpicked at or whatever. I'm going to keep going through this whole thing. One thing that I don't do is I don't reject images, and the reason is that's an extra unnecessary keystroke. I don't need to reject images. I need to just pick what I like. Everything else gets filtered out, right? So I would just go through this whole thing and you know, I'm and this is what's nice is when those preview there rendered It's like this, right and see. Look how much I overshoot. There's like 100 photos of the same thing, so I'm guilty of it too. But that's what you gotta have a fast work fast workflow. So I'm gonna go through here and just be like, Oh, pig. Oh, yes. Oh, pick. Oh, I like this one were, which is better and you can compare, You know, there's the side by side view in light room, but I Honestly, I don't even go there often. I'm doing this and I'm like, Oh, yeah, that one's good. And this one And at this point in the game also, if I, um, like if I am going through these and I picked and I end up picking two that are kind of similar this is not the point in time where I I'm going to really obsess about that and undo like, which one should I Really? I'm gonna pick through anything that I really like. I'm just quick, right. So pick. Oh, good. Oh, Eyelashes Lovett who? Sultry Love that. Oh, funny. Embarrassed. Maybe so. I'm just going through here and I'm just picking, right. And I'm gonna go through the whole wedding that way, and I know that I'm gonna weed it down further. Later Okay, So to show you, then we'll just imagine we've gone through this whole thing. So we'll open where we are in Step two, then. So we're gonna close that When I was building this actually built this, I wanted it to look like yours would at home with, you know, your folders. So I actually made three separate catalogues in each phase of of editing for you. So for your viewing pleasure, So here we are. Now, we'll pretend this is phase two. So faith to would be I've gone through the whole wedding start to finish right through my little filmstrip here at the bottom. So there's the beginning. Oh, my goodness. And there's the photo booth at the end, right? Eso have gone through and I've picked everything that I really loved, and then to now filter it. I'm gonna come up here to flat. So now I'm viewing on Lee. My picks. So now I've got, as you can see, right here I happened tohave 504 out of 4423. And honestly, if you're wondering, how long does it really take you to go through all those images? maybe an hour to go through 4000. Yeah. I mean, you saw how fast like I'm not. You know, I'm just I'm doing this and pick one pick whatever. So I've got the first batch now, So this is my my short list. My first short list, I guess on. And I'm going to go through here and then I'm gonna actually jump straight into the develop module. So here's if you guys don't know these keyboard shortcuts, they're very handy. G is for grid library of you. I call it grid, cause it's D but is a library of you. And so I'm going to switch to develop module by pressing D for develop. And at this point, I'm going toe, actually develop it and sort of weed it down further at the same time. So I'll just I got I went through the filmstrip and picked everything. Now I'm back at the beginning of the film strip, and I'm just going to start going through it. So now I would come through if I want to just, you know, whatever. I mean, look, you still have quite a bit of leeway when with J Peg in the end of the world. But I come through and, you know, do whatever developing move to the next photo. Do my developing moved to the next photo. And if I get in here and I'm like, you know what? These are really similar. This is the place now in sort of my phase two while I'm developing it. This is also now that I've gone through it once, this is where I'm like. Yeah, I don't need I don't need both of these. Let's get rid of that one. And I unpick it. Does that make sense? So pretty simple. So then I would just a rifle through here and, um, continue to make all my edits. Whatever. You have to actually look at 500 photos. You know what that looks like, don't you? So I go through all of that and, um, do my develops, and that's kind of that. So how are we on time for a time for a break? Perfect. So, questions before we do that, let's take a few questions. You guys can go ahead and start if you have any questions off after. So a question from a downfall one as well as a couple of other folks as well. Beauty of the lakes. Do you remove the images that you haven't picked her flag from your catalogue? Or do you keep everything? That's a super great question on. We'll see that after the break. But I delete everything that I don't pick. Not yet, right? I mean, I do my first round. Then I go through and develop and I weed it down further while I develop. And as we'll see after the break, we'll see, like, the fully developed thing. And, um and then before I export everything, I delete it knowing that if an emergency happened, of course I have my original original download, but I don't need it. And I think that I like that for file management reasons. But also, you know, kind of goes back to what we talked about earlier, where you just kind of got a commit to something and stick to it, and I'm committing to These are the photos. I'm gonna prove them and, you know, the rest are gone. So if they're like, oh, where is that one photo where you know, some obscure thing that, like, was they were blinking or clipped like it was just not worth anything. It's gone, you know. So I stick to that. But I do have them on it. The original driver, the sky cell. I have a question from Molinas said. Is it difficult for you to make the square pictures for all of the many books when you live in a two by three ratio world, that is so awesome. Can I Am I off? Can I grab this quick? Let me solve that ratio problem for you. Here's what's cool about the square books and the little border actions, which I will show you how to make. But I also made some that you get with the course, so that's cool. But this is a square book with a two by three ratio image in it, right, so on. But why I do. The square is because for here's the perfect spread example. So here's the Square book. On one page, we have a vertical image. On the next page, we have a horizontal, and these are both full frame, you know, 2 to 3 ratio images, but they are fit on the page with this lovely little border that makes them fit into a square book. So it's nice is than the client doesn't have. Teoh rotate the book, and I didn't have to design a book. So this is super. And I guess that actually reminds me cause I do you know these books. Like I said for the portrait, the little books like this. And that reminds me that I should point out that my portrait workflow I don't do the blogged photos first that specifically a wedding thing with the portrait I go through and I just edit it down to proofs I export it. Then I pick my 20 favorites, with which I retouched for the book in the slideshow, which we'll talk about. And then from there I picked the blogged. Does that make sense? So it's a little bit different because it's just not necessary. You know, I'm not going to block it and then later edit it. I just do it all at once with the ports, and we'll see that I'll show you the actions and how they work
Class Materials
bonus material with purchase
bonus material with enrollment
Ratings and Reviews
a Creativelive Student
Yep, love your work Khara! I am now using Indesign to make my first wedding album thanks to you. So clearly explained and nicely presented. Such a powerful program that makes a complicated task seem easy, with as many variables in layout and design as I can imagine. I am just so excited! I would recommend this course to anyone who is running any size photography business. It will help simplify your workflow and increase your output.
1106 Imagery
This class is so good! I learnt so much about albums, and selling them the right way. Having never really used Indesign before, I was nervous about using it as my main platform to design albums. I'm shocked, but I really enjoy using the program! It's so simple and easy using Khara's methods of designing. I also never used bridge before too (Lightroom faithful here), and it's fantastic for sourcing images for the albums. I'm learning a few upsell methods too, so it's very exciting for my business! Thank you for such a great course :)
Adrian Farr
Khara's advice is so simple yet makes absolute perfect sense! She really knows how to get the best out of her albums and packages. If you want to learn things that will help you improve your business/workflow, then seriously buy this course!