Lesson Info
8. Creating a Flare Brush
Lessons
Lesson Info
Creating a Flare Brush
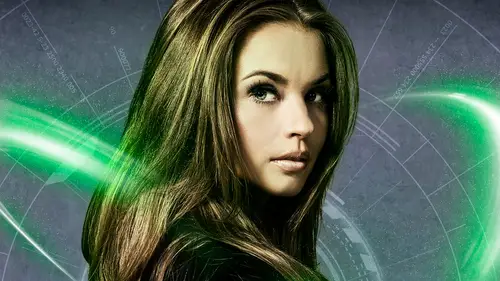
So these are examples of flares, and I got these air, actually, Um, that'll be wonderful, Tolia or Adobe stock now, but got these back in the back windows will tell you so let's just take this one here. All right? So let's say what we've got here. I like that the nickel. So hopefully there's some tricks in there you can use. You know, again, you're not probably one of the buildings that poster like, there's certainly a lot of tricks in there, especially with lighting in three D that you can really play around with. All right, so here you've got a flare image on a black background. This is typically how you gonna find him? Because you find a flare in a white background, let me know how you see it. So So what you need to do is first thing is remove the color and I'll just you just point out real quick. Let's just taken image cause I want I want to show why it's advantageous to make this a brush. So that has picked an image here. But I'm gonna take this flare as it is now that my typical ...
thinking at first was take the image. Let's drag and drop it over and scale it into the image. Change the blend mode to something like screen, and it helps blend in there and you can move it around. It was enhance. The glory like that looks great. Awesome. And that works fine. You do a little bit masking, adjusting, and that will work well. But then you'd have to do that every time you'd want to use the flare. You have to go and open up the image and do all that. So then I thought, Well, it's simple enough element. Why not make it a brush? So the first thing to do well, of course, the first thing I thought was making a brush. I'm gonna lose the cool coloring, but that's where the layer style comes in later. So let's first take the color information. L so shift command, you d saturates the image. Now when you're defining a brush in Photoshopped, me actually size this down a little bit for the sake of speed. When you're defining airbrush and Photoshopped, photo shopped looks at the image and you to find an entire photo as a as a brush. If you want. It looks at the image that darkest areas are gonna be the most opaque areas of your brush. Gray areas will be transparent, somewhat transparent, depending on how light or dark they are, and white areas will be transparent. So if you define the brush and with this image as it is, you're gonna end up with one giant, dense black brush with a flare hole through it. If we were to define it as it is now, so we're gonna need to invert it before we do that. So press commander, control I or just go under image adjustments. Invert reverses the image. Now, occasionally, there might be elements that go right to the edge of the document. If you define it as a brush. As you saw a while ago, that little area I had to clean up around 1/4 of the ring flair. That's a little bit of the residual background you may see. So you want to get take care of those edges and even the lighter gray areas that are almost not even visible. What I mean is, you want to make the pew background as pure white as possible, so I'm gonna use levels and just gonna push the highlights in here. Notice. I'm losing a couple of the little rings here, which you could barely see on the screen there, but is a couple of little ring flares kind of emanating off of this? I'm not too worried about that. Losing those. I'm gonna force this background a little bit darker, White. They don't go too far because you notice you start to lose detail in the flare. You don't want to do that. You want to keep as much detail as you can while still keeping that background white. Here we go. Now, in the event there is element. See this fire elements going right? Still going right to the edge here a little bit. So I'm just going to use a simple Grady int make my foreground white, and this is kind of, um, just gonna fade that in a little bit. All right, So now all you gotta do is to find the brush. Um, you don't have to select make a selection. As I said, it's gonna ignore the white is gonna leave that transparent. So just go to edit ah, defined brush preset and name it and now you have a flair. So if I go and get my poster because there's not enough flares in this image yet, I went a little JJ crazy this time, but you'll see that automatically selects the brush is already in the shape of it. So on a new layer in a size of rush up here a little bit. And let's put it back in normal, I just dabbed right off the edge of the document. Here you can just go crazy, adding flares. But there is the flare we just created now defined as a brush. So So once you add it to your elements, just a matter of adding whatever custom outer glow you want to it, you can have it be a cool flair or a warm flair. It all depends on the nature of your image, but now you've got an arsenal of players ready to go, so it's just just that simple to do to define it cool
Class Materials
Bonus Materials with Purchase
Ratings and Reviews
kasmath
So happy to find this class by Corey Barker and loved it! It definitely helps if you are familiar with Photoshop but he teaches you so many fun, new things in regards to poster development. I love this is in video because you can watch and re-watch if you don't understand something the first time. You can see how much Corey loves his work and he shares his passion with you! Thanks for another great class!! I look forward to owning more of his classes and they are so affordable!! Thanks Corey!!
a Creativelive Student
One of the best classes I've taken with Creative Live! Like another reviewer said, I too was yelling at my computer in excitement and taking pages of notes along the way. I learned so many valuable techniques in this short but sweet class. Thank you Corey!! You rock!
a Creativelive Student
I was literally screaming at my computer while watching this... like it was a football game or something!! YES! OMG!! SO much information - was taking notes every 2mins, and laughing along with the studio audience. Best CreativeLIVE course I have seen. Watched in it all in one go, and will re-watch many times I am sure. Very happy with my purchase. Thank you, Corey!!