Lessons
Lesson Info
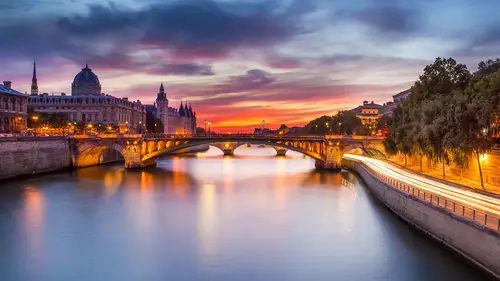
Perfecting your Colors in HDR
So that's a photo. Jimmy showed me a photo. You have a here creating lives. I d shoot of the until up. I'm gonna shoot my favorite one, which I He's stuff is really good because, like you got the light rays, which is really hard. I went in the winter is no light race, but I'm going to show you the my favorite foot of the until up and high created it. It's called The Lady in the Wind. It's a beautiful so I and it's funny cause it is so much such a high Dimmick ranch that maybe I should have taken nine photos in these kids, but I did not. Who's I'm stubborn, So I didn't mind is two plus two and you see that little sky here, even on the under exposed photo is still burned. And even if I wonder, expose everything, it's gone. It was a beautiful blue day and nothings there, and I was so sad because the foot is kind of cool, but that that white area really bums me so you know we're going to do it. J. R. Was a little bit of sky replacement on this one. The reasons called the late even win beca...
use it looks like a lady in the wind. It's on the lower antelope in page. Are we? So now you've never been You got to see that for yourself. It's anything. So I sent them all and merge to HDR. And I was hoping, you know, by doing hdr that I would get everything from the darkest because you're like in a cave, you know, with a tripod. And and the sun is bursting and it's really rough. So you see how it looks like like a lady in the winds. That's the hairs that's like a knows. That's her neck. And she's got, like, sort of Wynne and her, and I'm gonna help with tools so you can see her better. So Oto line d goes to, you know, because there's nothing moving there. I'm gonna go to merge pecan save You will see as I retouch it. The lady is coming. I really think it looks like a lady in a win. So on this one, I'm going to dio I'm gonna open up the shadows and look how much time occurrence I've got. This was shot with Sunnis, an archery so even more than any branch. A lot of photos I've showed you with. Come on, fighting Mark too. We just like the old year, Salar. But Sony did really go crazy on the Democrats show I can. I'm gonna go about 1% and bring on the highlights. But I still have an issue there. So you know what? It looks kind of weird, that kind of grayish there. So I'm not gonna go all the way. And I'm gonna do my blacks holding absorption key on this one. I want a lot of blacks because I really want some a nice contrast. And I'm going to do my whites as usual, This speaks a 1% white. And so here I am, here I am and maybe add a bit of contrast and Bussi exposure. Now, the problem with the Kenyan is that it's got a lot of different shade of colors, and it's kind of hard to do a wide balance, you know, globally for the photo, meaning that if I go here on, I go to daylight, I'm like, Yeah, I kind of like the blue in the shadow, but I don't like ah, you know, cloudy. Yeah, it gets warm everywhere, shaded. It gets warm everywhere. I'm not call. So you know what? I'm going to go for daylight for now, because I like I want to have a bit of contrasts of color. I don't want everything to be the same red because it's in real life. It looks doesn't look even like that. It looks different. So I'm gonna boost the exposure a little bit. And I'm actually gonna paint a white balance, if that's even possible. It is. I'm gonna take a little brush. I'm gonna make it big. And so I wanna make the lady and wind stand out. So I'm gonna I know there is a lot off son here, so I suspect there's a lot of yellow. So what I'm gonna do is going to take your own plus, and, uh, I want to have some yellow and some saturation here on the breastroke, but I don't want to go. I don't wanna go on the lady in the wind, so I'm gonna go auto mask on and see if you can brush here. So let's see what's happening here. I'm gonna ask him Yellow. Yeah. I wanna have some yellow here. Maybe a bit of exposure. And despite the fact that I'm using auto Mask, uh, I'm sure there is, in fact, leak on a mask. I can see where I painted. You see, I paid it anywhere on the lady in the wind. But you can click here on the rays, and I can. And now it's any razor tool, something with the auto mask on. And I can click here and eso I'm you raising the sort of yellow it's, you know, it becomes kind of blue again because that was my overall thing. So I'm trying to, you know, do something so that we can see her a little bit better. And I'm gonna go back to this brush, go back on ad. Maybe I'm just gonna add a bit more. And I think when a boozy exposure and booster yellow, I really wanted to be a lot more yellow, maybe a bit of magenta or maybe not. No, really, is a yellow is when I'm looking for and, um and I like to do that with brush because I feel like a painter. I'm like painting on my photo. Think it's cool and I'm gonna tickle new and I'm gonna go the opposite would take a blue brush and I'm gonna make maybe your brush border Remember, you're right, Click drag to make it smaller, a bigger. And on this one I'm gonna take a little mask off Just wanted And let's hear what's going on here. I don't actually make it a little darker and a little more blue And sometimes I overdo it at first and because I'm trying to get sort of cold versus warm here so that she stands out a bit more Maybe a little colder because that's how it is in the can. It goes blue yellow. It's called all these collars. I was trying to mimic that without one photo, maybe lower a little bit, you know, and you don't have to be precise, but but it's kind of cool. Um, I think that I really want the attention to be here. And I think the lady in the wind is a little too small, so I'm gonna take my crop tool and I'm gonna crap this. Also, I have lace case less. Keita replace Intersil were more into her. Sure, I'm gonna take my great and tool I'm gonna keep here on minus exposure. So everything that zero, except minutes exposure and tell me if I'm going too fast here or if you guys have any questions, I'm gonna the way the exposure. And look, you know, I'm just trying to make this little darker Iran her so that she stands out something like that. Now, this really bugs me that blue sky. Really? Just That's the only thing I can see. Like old My eyes goes to their I wish I had. It was Blue Sky. Where did it go? You know too much. Let me crunch, you know, But it's called high Democrats. How can we get the Diamond Ranch back? That's a good question. Thank you for asking, uh and eso on this one. I'm gonna go back here. Maybe at even more contrast, because they're wrong. This to be crazy. I mean, before after, Come on, something there. But we still have that issue. So, you know, the only thing that's left is to make sure you're not on a smart object, because I just want I'm happy with it. I'm gonna open the image and the This is something that I've shown before, So it's going a bit. Enbridge who had photo shop. If it wants to open up here you go reading camera will file from it. And you see, it's funny hot with the brush. You can not be Busch light and darkness but caller to make things stand out because it's all arbitrary, you know, Close, arbitrary, You know, you put a filter on, everything is blue another people, everything is yellow. So you know, it's funny because some people have like, Oh, I want to get it right in the camera. I want to get it right. Income. I like I don't want to Any post processing over. All right. Very good. So are you using an 85 1.4 to do a crazy boki effect? Oh, yeah. Absolutely. So broke A something natural, like with your eyes. You CIB okay with oldest life. Now you don't. It's in effect, created with device coastal lance. So whether you create something with the lance with a filter was a software, you know, for me, what matters is do people like the photo or not? The u Does that communicate something to you? Some photos I spent hours of retouching on people hated or some They love it. Some photos spend 20 seconds of Leiterman. What it matters to me is to people like it. I'm just showing you different techniques. It's up to you whether you want to use them or not. Okay, now I want to take care of that. And I want to show you a really cool option that came out about a year ago. Called the library. The library is amazing. I got a whole bunch of library year, for example here, Uh, or even a good difference. Guys. Your sky libraries. And I think I have another one. Ah, collect skies. Some people collects, you know, beer bottles, Michael X guys, you It's different concept anyways, and so I want to bring in some sky here. And so how do you create a collection like this? Let's say you've never seen this before. Well, let me go here. I'm gonna go back to bridge. I'm gonna go. For example, I'm gonna take a sky that I have you here in this course. Um, Sky replacement. So here is this guy that I have a right click and I open it with a photo shop and I can create here. I created a new you can go here to create a new library. But I've done it here called Creative Life and already have a sky here because already have done this. What I did is I basically decreed that you just drag and drop this here. Now that's a creative cloud feature on Lee. So you've got to be a critical member. When you do that, that sky's gonna be forever in this'll library and you can just drag and drop it. There you have it enough to be premier in all the creative cloud you haven't even on some of the apse. Really cool. So I got this big collection of its kind, by the way, on my website if you go to a show at the end but first of dot com slash creative cl for creative life, I'm going to use some sky for free, and I'm going to do my entire collection for $9. It's a steal at your straighten Skype for you guys. You can just drag and drop them in your project sky from Perry Sky from Florida sky from everywhere exotic skies and you'll see, it's crazy a lot of guys. And so But I'm not going to just one. I'm gonna go here, for example. I want some kind of blue sky something because it was blue outside. It was definitely blue. Now I want a daylight sky, so I've got a whole bunch of collection and, um so maybe maybe something like this. So here is my photo. I can just drag and drop this guy here, and I'm done beautiful. And, uh and I love her. Blue goes against red, right? It's kind of cool. No, I don't. I'm not done. So what? I'm gonna I'm gonna raise that and I'm going to just make a simple selection. I'm gonna go here. I'm proudest. W or click here for the amazing quick selectable and the way he works, you just brush and it makes a selection. And now I'm gonna go here, and you see, I have activated that layer. And when you click here, so might selections active and boom the skies there. The problem is, there's a little French here. Why is there a little of French here? That's kind funneling. It's because you know it's trying to do a good job at it, and it's having a hard time. So there is a technique for this Little French here is you click on the mask and that's gonna be be technical. So I'm gonna go very slow, slow born you on this one and you go to filter, blur, go shin blur and you go like you gotta go one picture or under. So the 0.7 is perfect. So what? You see what I'm doing? See, before and after? That's the mask here. I'm sort of blurring it. It's actually a little bit bluer. I'm blowing it. Let's go to one. I'm just blurring the mask a little bit, OK, but that's not the trick. Once you have blurred a mask a little bit with one piece alone under you. Press command L for levels that's going to open a widow call levels The levels has got many sliders, but all you really care about is a little grace lighter here. And look at this fringe here, Look at this little French. If I go right, it's becoming bigger. But if I go left, it's becoming smaller, you see, and it just sort of it's up there and look at the before and after. See French, No French, French, French and something that somehow because you get a bit of for Grillo. But it's already much better. It's like we there so something we can do is you can take a little brush. Very little brush. Make it very, very light, like 10%. Make sure white is your forward color because I want to bring back some of its kind. I'm just gonna paint here a little bit just to bring back some of the sky would sort of, you know, be there and madams. And this year you have one of my favorite photo of The Lady and the Wind. Voila. So I just love how that blue good works with. I think it used to be a knowing No, it's It used to be like a dom thing for the photo, and I think it brings a place to the photo. Um, yes, I think it's a two part question. First, when you're replacing skies, isn't it better to replace it with a an Arizona sky? Because the color the color blue in the sky in Arizona is different than the color blue in the sky in Paris. True, but with levels again, you know you can change the calls by making Darko brighter. You change clothes so much that on I've never been Tory's another. I've been derived somebody and take the blue sky there. You know it doesn't really matter because no one is ever going office. Like I put sky from Paris to Florida for Florida's guy to look like. I just I have a whole collection from the entire world and just whatever fits to me emotionally, I don't think in that Russian, I just think like, Oh, were they looking good or not? You know anyone? Former rumor was exactly like that. It was sort of like this high clowns, and it's sort of like Texture is guy. That's how you look to me. So that's how I put it back there. Okay, Any other questions? The second part of my question on maybe you have answered this. Your love of magenta does I am. I am fascinated with color and light and how the sky looks different in other in different parts of the world and is your addition of magenta because of how the colors of the sky and the the general colors in France and in Paris. Maybe that comes from maybe, like, um, or our subconscious level. Let's put it this way. Maybe the thing is, what I do not like is green, and the yellows, when I mean by that, is the tungsten and see the lights have a lot of green. It that looks kind of like makes kind of a dirty green. By adding magenta, you kill the green because it's the opposite color, so I just find it just makes more pleasing sunsets.
Class Materials
Bonus Materials
Ratings and Reviews
Dean Salman
This was a good course if you want to know how to improve your photos using post processing features in software. He does show you how to combine a HDR but that is all. Very little how to take the HDR photos and what to look for in the photos when taking them. There was only about 10% HDR. The tips on how to bring a photo to life was good, but I was hoping that the HDR was more covered since that is what it was about. So I recommend it only because of there is good information on post process, not about HDR.
renee Akana
This is not a beginner's class. It's not an automated process where the program spits something out, but it's a great approach to using photoshop to give you a fabulously realistic approach and his personality is A-okay... I enjoyed listening to him and seeing things I didn't think to do when I was working in photoshop hdr. Photomatix, Nik, et al, can spit something out, but in Photoshop, you have more control with the outcome and it will be more realistic.