Building Texture in Filter Gallery
Lesson 4 from: Creating Different Photoshop Filter LooksBen Willmore
Building Texture in Filter Gallery
Lesson 4 from: Creating Different Photoshop Filter LooksBen Willmore
Lessons
Class Introduction
01:29 2Texture Effects in Photoshop
09:43 3Adobe Add Ons
03:45 4Building Texture in Filter Gallery
05:37 5Oil Paint Filter in Photoshop
13:04 6Portrait Effects in Photoshop
07:47 7Surface Blur in Photoshop
16:35 8Graphic Effects in Photoshop
06:17Lesson Info
Building Texture in Filter Gallery
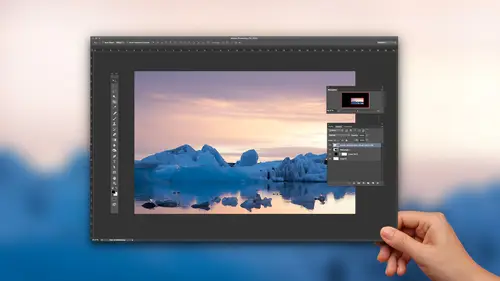
Instead of having just random textures being applied to your image, you can get a little more creative. I'll show you an end result, and then I'll give you an idea of how it was created. You see, this image has a kind of campus e feeling. It feels like it's been kind of painted in many different ways. Well, in order to create this, all I did was, Do you remember that filter called the Filter Gallery? Winning within their only once and we apply to filter that was called the texture Riser, I think, and we applied canvas texture will. With this one, I'll double click on the smart filter that's here, which will bring me right back into the settings that were used to create it. And I'll show you how you be able to create something more sophisticated. I was in this particular filter before. Do you remember I was down here under texture, and that's where I found that thing called the texture riser. Well, now that if you've applied one of these particular filters to your image in the lower rig...
ht, there's an area where you could build them up, where if you've already applied one, and you click on this icon, it means let me add another effect on top of one that I've already done. If I do that, then I can click in in this area. I could pick out a different filter to apply on top of everything that's already there. So here I'll go and try Fresco to see what happens if I plopped that on top. If you decide you don't like a particular effect, you can come in here and in the list. There's little trash can he hit the trash and you can remove effect. So if you want to see how this particular effect was created, let me turn it on one part at a time here, I've had multiple effects already applied. I'll turn off their little eyeballs so you see the original picture and then starting at the bottom, I'll just turn on an eyeball. And if I click on its name, you'll see the settings that were used to create it. So this first layer of an effect was called Sponge. That's just one of the choices within here, and you can see the settings used to produce this particular kind of spongy look. But to me, most of these filters don't look all that good on their own. It's only when I combined them together with other ones that they seem to create more interesting results. So after applying sponge, I click the little icon at the bottom. That creates a new effect on top of it, and I came up with this thing called plastic wrap in plastic wrap is not doing all that much if I turn on and off. But it's just a slight change. Experimented further, and I added something called poster edges, and it started to kind of build up and exaggerate one of the other effects I applied previously. On top of that, I applied watercolor. We'll take a moment for it to render that, and it started just looking a little bit more complex oven effect and then finally applied something called rough pastels. And by applying all of those, I ended up with this very painterly kind of look on the image. And this is another one of those things where if I ever have a television, the local news is on the news. Isn't that in throwing like it's not gonna keep my total attention for every minute. Usually you're checking your IPhone or doing something well. You could just as easily be here in the filter that is called the The Filter Gallery. In all you do is build up one effect on top of another with this little icon to say, I want to add a new one. What's nice about this is if you figure out how to create this effect once you can very easily created again in the future. Because it is sitting here is a smart filter. What I usually do is just cropped the image down to a very small size, and I think I might have one. I think it's probably on my desktop, though that's right here. This is a crop version of that image. It's just a tiny little piece, so it doesn't take up very much space on my hard drive. If you want to see how big it is, so get info on it. It's K meaning it's small. Well, all I need to do now if I want to apply this effect of something else is if I saved a little piece of it I can open that. And then I go on open whatever file I'd like to apply this to. It is the moment to get back to where I waas and let's try it on. Maybe our trailer image. Well, I'd open my trailer image most the time. I would convert it into a smart object so that anything I apply to it is not permanent. Then if I want to get that effect to it, I switched to the document that we had that little piece of it and I drag it over. Just gonna use the move tool, drag it to the tab that contains the other picture on dry. Get down into that other picture. So if all goes well, it should show up as a separate layer. Now it's a tiny little piece. So you just see this little square. But that's all we need, because if you look here, it tells me the filter that's being applied right there, and all I need to do is grab that and drag it here, drag it to the layer that contains the picture that I would like to apply things too, and might take it a while. Usually little hand icon changes. Uh, okay, there goes. And now I can get rid of that layer. And if I zoom up on this image, it might be a different resolution of image. But do you see a similar effect applied to this? So that means if you experiment, you can easily apply those effects to other images without having to remember how you did it, which I think could be rather nice.
Ratings and Reviews
lynny
Wow! Very impressed with Ben's course. I've played with filters for a long time, but I still learned a lot. I'm very glad I stopped in for this refresher, and I plan to buy it so I can be inspired by his creative uses of filters.
Carolyn Whiteside
Amazing presentation; organized; clear explanation of issues; easily understood; helpful!!
Lina
Good for beginners :-)