Lessons
Class Introduction
01:29 2Texture Effects in Photoshop
09:43 3Adobe Add Ons
03:45 4Building Texture in Filter Gallery
05:37 5Oil Paint Filter in Photoshop
13:04 6Portrait Effects in Photoshop
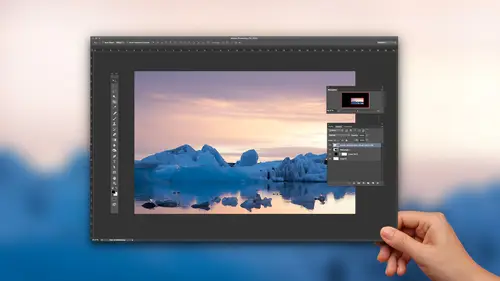
07:47 7Surface Blur in Photoshop
16:35 8Graphic Effects in Photoshop
06:17Lesson Info
Portrait Effects in Photoshop
Let's talk about some things that I might think about specifically relating to portrait and, of course, will use an amazing portrait of who else? This. Ah, picture. Let's see. What I want to do is just make it look better in some ways, and one of the things that people often do is they want to make the eyes stand out in a photograph. So let's look at one method we could use for doing this before I get into it with an eye. Let's look at it with a just a picture overall, so you could get enough idea for another reason you'd use it. Then we'll pop over. Imply it just to surmise, this image has a lot of detail in it. In what I would like to do to it. Here we're 100% view is exaggerate that detail. And so, in order exaggerated, What I'm going to do is apply a filter that that is going to make the detail pop out. There's a couple different ways of applying it. First, I'll do it. The manual method. You might think it is the old school method where I'm not using anything special to make it fan...
cy and what I'm gonna do here is first duplicate the layer by typing command J Man J remember, just duplicates. If you know of another method for duplicating, feel free to use it. The second thing I'm gonna do is we're going to be applying a filter in here that is called High Pass. But when we apply the high pass filter, all we're going to see is a bunch of gray stuff. You see this great stuff in what we want to do is somehow be able to get that gray stuff to help us without getting this end result. That looks great. So it's click OK, In order to do that, we're gonna use a blending mode. The blending, but we're gonna use is called overlay in just about all of the blending modes in this particular section have a special quality about them, and that is they will make 50% gray disappear, so 50% gray just goes away, and it happens to be when you use the filter that we just used. The majority of your end result will be exactly 50% gray in. So by using this suddenly that gray goes away and we see her picture. And if I turn this off and on, can you see the detail being exaggerated? Now let's do that again. I'll throw this away and let's do it in a smarter way away, where it's not permanent in a way where it doesn't double our file size because the moment you duplicate a layer, your file size just doubled. So what I'm gonna do is go to the filter menu and I'm gonna say, Convert for smart filters. Then I can tell I've done that because my layer was gonna have a little extra icon on top. That means this is a smart object. A smart object means it's protecting the original contents of that layer in anything we do to it will just be kind of an accessory to the layer. You'll see it listed in the layers panel, where we could turn it on and off or throw it away later. Now I'm gonna come in and apply the filter. I wanted to use its filter, other high pass and all experiment with the setting a click, OK, and unfortunately we have that gray look Now, instead of going to the top of my layers panel and changing this menu. I'm gonna go to a different area because this menu, what it does is it controls how the layer I'm currently working on interacts with what's underneath it. And if you look the layer that I'm currently working on, there is no layer underneath it. There's no extra piece. These things here are attached to it. They're not really under it. And so what I need to do is write down here where it says high pass on the right side. You see this icon, I need a double click on it. That's gonna bring me two settings. One is a blending mode in the other is opacity, and I'm gonna change the bloody mode overlay, and that's when we get the look we want. That's a great one to create an action for. If what the action could do is automatically turn your layer into a smart object, automatically apply the high pass filter, automatically change those little settings to overlay, and it can even automatically come in in. Make this come back up. If you double click on the word high pass, it comes back up. So that means if you had an action that did all those steps for you. You apply the action in. All you would see is this comes up and now you could adjust it. Because all we're doing is changing the settings to the filter that has already been applied. Look, okay, let's see the difference. I'll turn off the eyeball here. Here's before. Here's after you see how the details getting exaggerated in any time. You have a very textured, detailed image. This is another way of sharpening your picture. I turn off and on here. You see how much that details popping out. So let's try that exact same effect on this image. The difference is it's not gonna help the entire image. It's only gonna help one part of it. So I'm gonna come in in first. I might convert this to a smart object that way. Whatever I do is not permanent. And I can easily change the settings. I'll then come down here to high pass in. What you can do is just with high pass, turn it all the way down and click OK, if you turned all the way down and click OK, you get only 50% gray, and that's it. Solid 50% gray. Then when you come in here and double click on that icon on the right side, you can set it to overlay. And in overlay mode, remember, 50% Gray just goes away. It sounds kind of confusing because that means it's not doing anything to our picture. But now, if I'd simply double click on the word high pass, I'm in the high pass filter. But before, when I was in the high pass filter, everything looked grey. And now the picture looks normal because it's already in overlay mode and I can bring this up and look at what it's doing to my eyes. My skin is not being helped. I'm looking much older with that applied to my skin, but to my eyes, it makes him pop out. I click OK, and then any time you apply a filter to a smart object, you have this thing, its a mask. If you click on it, we can then paint on the mass to control how much of the image gets that effect. And if you only wanted to apply to a small area like my eyes after I click on that mask Aiken Type Command I, which is a short cut for this invert and that will turn the mask black in a mask. Black means do not apply, and now therefore, it's not applying anywhere at all. And then I can come in here and paint with White to say I want it on Lee right here where my eyes are now. My eyes are gonna be jumping out of you, but I might also want it to come into other areas that have detailed it. I'd like to have pop. Let's say it's my big Shaggy's up here in this one here. Do you see it popping out a bit when I do that down here? But I probably don't want it on my skin because I don't want my skin all the little, uh, pockmarks and whatever they are pores and all that to jump out like this. But it might look interesting if I get my mustache and things, too. If I turn off the eyeball here and you'll see before and after, he seemed popping out a little bit more
Ratings and Reviews
lynny
Wow! Very impressed with Ben's course. I've played with filters for a long time, but I still learned a lot. I'm very glad I stopped in for this refresher, and I plan to buy it so I can be inspired by his creative uses of filters.
Carolyn Whiteside
Amazing presentation; organized; clear explanation of issues; easily understood; helpful!!
Lina
Good for beginners :-)