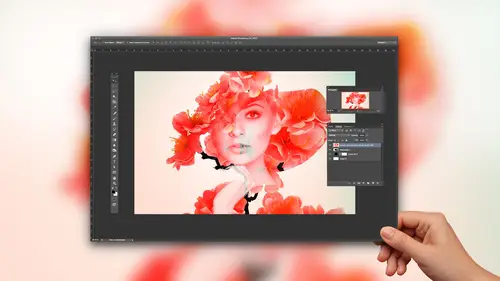
Combining Model and Fern for a Simple Double Exposure Image
Lesson 6 from: From Shoot Through Photo Editing: Creating a Double Exposure in PhotoshopAaron Nace
Combining Model and Fern for a Simple Double Exposure Image
Lesson 6 from: From Shoot Through Photo Editing: Creating a Double Exposure in PhotoshopAaron Nace
Lesson Info
6. Combining Model and Fern for a Simple Double Exposure Image
Lessons
Class Introduction
01:58 2Simple Portrait Shot for Double Exposure
35:23 3Shooting the Texture for Double Exposure Image
13:45 4Shooting Portrait of a Mother for Double Exposure
15:14 5Shooting Portrait of a Daughter for Double Exposure
14:05 6Combining Model and Fern for a Simple Double Exposure Image
19:46 7Coloring with Curves and Levels
31:25 8Mother and Daughter Storytelling Double Exposure Image
32:48Lesson Info
Combining Model and Fern for a Simple Double Exposure Image
we're gonna be working in Photoshopped primarily in the section. So first thing we're going to do, we're gonna head into capture one, and I'm gonna be exporting out our images so we can actually work with them in photo shop. Now, keep in mind had, like, five minutes during the break to actually look at these images. So you as going to see the very live and riel process of what it looks like to figure out what you're doing on the spot, because that's basically what I'm doing. So let's go ahead. I went ahead during the break, took a little bit of time and flagged a couple images. So we do have a couple of I pick. So this is the image of our subject. We have a few versions of our fern, and then we have some beautiful portrait of both mother and daughter. No, I don't know exactly how I'm going to be combining these together in photo shop because I haven't done it ever. So you're gonna be learning kind along with me for for the process. So we're going to start off by exporting out these ima...
ges here. Just thes selects and basically I just went through and did, like, a star rating on the ones that I thought would work really nicely for this class. Alright, so we finish hit, shift, click on all these. We're gonna right click here and go to export and then export our originals. And we're gonna set our output folder, which the way that capture one is organized, you have, ah, capture folder a selects holder and output folder. So basically, it's just gonna put these inner output folder. So we're gonna hit export the originals, and they are gonna be exported in this case as CR two files. So they're just gonna be placed, basically just placed in that folder for me. All right, so where exports complete. And now we're done using capture one. So we're ready to jump into Photoshopped. All right, so here in Photoshopped, we're going to start off by loading some over files into into photo shop and let's go ahead and close out. Capture one. We're gonna load up some of our files, so I've got my finder window here. We've got a few different CR two files, the ferns, as well as our first subject, Alex. So that's where we're going to start off with. Basically, I'm gonna just shift, click all of those different images and drag them into photo shop now, because they are raw files. We're gonna open these up in adobe camera raw. So, um, can take a look at these now what I'm going to use with adobe camera raw here. Basically, we're gonna do a little bit of our color and exposure adjustments, which is similar. If you guys using light room things like that and these tools are available for you in capture one as well. I'm just using them here in adobe camera rock. Alright, bring her color temperature up a little bit. There we go. Bring our contrast down and environs up just a little bit. All right. Looking good. Okay. Very nice. And then our fern shots. Yep. I'm gonna just go ahead and bring our shadows up on those as well on a per image basis. All right, Cool. So everything will said now I'm gonna hold down, shift and click on our images, and we're gonna go ahead and hit open, and it's gonna open them up as separate documents here in a photo shop. So basically again. We're just bringing everything together, and we're ready to start working on our double exposure. All right, so we've got everything we need here. Basically, it's all separate elements now, and I'm just going to use my move tool and bring these all back together again. Hit V for your move, tool. And I'm gonna hold down, shift and click and drag from one image over to another one. So we're basically just loading these up as different layers in the same document. All right? And then we're gonna close all these out as well. All right? Very quickly. So what we're gonna do now? Basically, we want to start combining are different exposures, so I'm gonna need to make my ferns a little bit less visible. So I'm gonna hold down the shift key and click on all four of my firm layers and then hit V on my keyboard to move to my move tool and then hit the number five. That's just gonna put all of those layers at 50% visibility. All right. And now going basically one by one. This is kind of what we're starting with here, But we originally started with um, kind of like looking in Capture one. Now, I'm gonna start placing these ferns on on. Our subject said basically the idea again was to make it look as though, like, these friends are kind of coming out of her head. Now, if I need to make my canvas a little bit bigger, I'm just gonna hit, see for my crop tool and then click and drag up from the top, right and just drag up in that direction. There we go. And as I move these, keep in mind guys again. We photographed a bunch of individual elements so I could move these all around. I could rotate them. I can change the size, the shape in the scale of these, it really doesn't. I don't have to limit myself to, you know, the captures as they came in into my image. All right, that actually looks really good for, like, the majority of her hair and everything like that. I think that's perfect. We do have a little bit of an area here that's a little bit blank. So I wanna see if I can get something that's going to kind of fill in that area as Well, all right. And also, keep in mind, I can resize these. So if I want to make this a little bit smaller and, you know, kind of focus it in on this area, I can do that as well. All right. And this is again, I would recommend, like, play around time. Now, this is a live class, so I'm, like, going to do this right now. Are you guys going to be severely disappointed? But if you're doing this at home, like, take a few hours and just, like, play around with this, get it to where you think it's cool, Take a break, save that version out, and then maybe start over again. And the do another complete version. That's whenever I'm doing artistic projects like this. I'll always do a few different versions, and it's usually like the third version usually comes out the best. So, um, yeah, definitely recommend. Take your time on this sort of thing. Um, okay, cool. I think you know these two layers, I think combined together are gonna look really good. So I went ahead and brought four layers of the ferns in, but I'm gonna go ahead and delete out those other two. So I think using this one for the majority of the photo and then using this one to kind of fill in that area of her hair of using me really, really nice. Okay, so let's go ahead and start cutting. Are subject out from her background. Now, we can do this in a lot of different ways. Basically, I want to use a C. We're gonna start off with a really simple technique where you use a magic one tool to cut our subject out pretty roughly from the background that will go and refined that. So, using our magic one tool, I mean it. Just shift, click a couple different times on my image, and then load that as a layer mask on my photo. Now, I know this is not like, a really great selection. We're gonna be fixing this up in just a little bit. All right, let's head command I on our layer mask. So there we have our subject on a blank background. I'm gonna go ahead and create a solid color back drop underneath our subject. Do something like this. Nice pink. There we go. Underneath our subject just to kind of see what we're working with here to start with. All right, Now, these layers as well I'd like those to be cut out from their background as well, so we can start working with the different. Basically, we're gonna be working with, like, light and color and shape here. All right. Now, in this case, I don't want to just use the magic one tool to cut out the outline of our firms because we do have, like, a lot of, like, little white areas and things like that in our ferns. So we're gonna be using channels to select out our fern. And a channel is Basically it's a visual display of your different color channels. You have a red channel, a green channel and a blue channel, and they're located right over here. The really a great way to make accurate selections in photo shop. So a red channel are Green Channel and our blue channel, and you can see it based. It's based on how much color information is in a particular part of the photo. So the blue Channel, you can see the ferns are really dark because there's not a whole lot of blue in the ferns. Green is a little bit lighter because there's a decent but a green and there's some red in the ferns as well. So basically what I'm looking for, I want to cut these ferns out of the background. So I'm looking for a contrast here between the fern and the background. My goal is to get the fern to be as dark as possible and the background to be a light as possible. Then I can use the difference between those two to make a selection, and I can use that selection to cut my fern out. All right, so let's go ahead and do it. I'm gonna duplicate my blue channel. We're gonna hit control or command l for our levels, make my whites a little bit whiter, and we're gonna bring our darks nice and dark. So again, my goal here is to create a really stark contrast between our fern. We wanted to be as dark as possible. There we go in our background, which we want to be as light as possible. If you guys are familiar with a layer mask like imagine that as a layer mask, it looks pretty good. It will do a good job cutting our fern out from the background. Okay, so now that we have our channel kind of ready to go, we're going to turn this into a selection. So I'm gonna hit control or command click on my channel, which is gonna turn the white area into a selection. Every time you select out a channel, it's always gonna select out the lights. Okay? And now we can click on my layer mask, and we have a really nice cut out, but it's actually inverted of what we want. So we're going to click on our layer mask itself and hit control or command I to invert that. All right. And there we see, we have a really nice cut out of our fern with all the detail and everything like that through there. So you can see really, really nice and cut up. Now, we do have some other areas in the, uh, in this frame that we want to get rid of. So I'm gonna hold halt or option and click on my layer mask here. That's just going to give me a nice visual of what is actually included in my frame because it did a nice job cutting out the fern. But we still have, like, a hand in some other areas in there as well. So I'm just gonna use my brush tool, and we're gonna paint with black to get rid of all this stuff in my frame. Here we go. And I'm not too concerned with, like the pot and things like that as well. Mostly. I just need my firm to be cut out. Really? Well, all right. So again, just painting black on my layer mask there. Okay? Cult or option? Click on your layer mask again. And there we have our fern. And let's go ahead and just make sure that these areas air going as well. Okay, cool. So we have one firm cut out of the background. Let's go ahead and take care of the other one as well. So we're gonna zoom in here, go to our channels, and we're gonna duplicate. Are Blue Channel all right? Basically using the exact same technique we used in our less section we'll the other fern rather. All right. And again, what I'm looking for is a really nice separation between light and dark here. All right, let's it Okay. I'm gonna hold down control or command to turn that into a selection, alright? And then we'll hold cult or option and click on my layer mask. And that's gonna do the inverse layer mask for me. Yeah. What a question. Yeah, Erin, question about how you're working with the with the channel layers duplicating the blue channel when you're adjusting the layers at that point, or excuse me, the levels. At that point, it's on Lee affecting that new channel layer. Not the actual image itself. That right? Yeah, that's right. If you go to your child's, that's why duplicate the channels if I were to actually do a levels adjustment on the green Channel of my actual image, you would see would affect what's going on on that layer there. So a duplicate channel doesn't actually apply to your image at all. It's just it's used basically to make selections. Cool. Good question. All right, All right. I'm in the wrong channel. Go back to RGB. If you are now, actually, work on your image. Um, we're gonna click on here, and I'm just gonna paint black around the areas we don't need for this Also. All right, so we're doing a relatively quick, simple job cutting are subject out now, The same thing we want to do here with our subject earlier. We just used a magic wand tool, and you can see our subject. She doesn't look at cut out like that. Well, it's not like, really, you know, it kind of looks like blotchy and things like that. So now we're going to use our channels to do the same thing with their hair. I'm gonna hold shift and click on a layer mask, which is gonna disable the layer mask temporarily so we can actually see what we're doing. And now we're going to use our channels to cut her hair out as well. All right. So again, I'm gonna duplicate the Blue Channel. We're gonna hit control or command l for levels. Let's bring our whites up and we'll bring our darks up a swell. And again, I'm just going to be using the difference between our lights and our darks here to make that selection. All right, let's it okay. We're gonna command click on our blue copy, which is going to select out the lights again. All right. And now on this layer because we want our lights to be invisible. I'm gonna paint with black on my layer mask. All right? Which is making all that invisible. Very cool. Now, I actually want some of the hair to come back because we didn't have a perfect selection. The first go around. So I selected up the background earlier, and I just painted black, which made it invisible on this layer. Now I'm gonna inverse my selection. So instead of be the background being selected, her hair is going to be selected. And then I'm gonna paint white on my layer mask to make it back visible. All right? Does that make sense? Say it again. Say it seven more times. Okay. Originally, we select out of a background, and I wanted that to be invisible and on a layer mask. If you paint black on an area, it makes it invisible. So now I want to select out her hair, and I want that to be visible. So I'm gonna invert my selection, inverse my selection, and then paint white on my layer mask. So it's going to change from selecting the background to selecting our hair. And then instead of painting black to make it invisible, I'm gonna pay white to make it visible. Okay, so now we'll see. We'll see. Um, what we're doing. So when you hit shift command, I just select out her hair and I'm gonna paint white on my layer mask, and I'm just gonna zoom in and you guys will be able to see it's gonna add a lot more detail. Look at all that, like, really nice detail that were able to add back in because we're selecting out her hair this time instead of the backdrop. And I'm painting it in back, visible, all right. And that should be reflected on our layer mask as well. So if I hold alter or option and click on my layer mask, you can see we have a really nicely to find layer mask with a lot of really good detail in there with the hair. All right. So we cut our subject out from the background. We've got a couple ferns cut out from the background, and now it's time to go ahead and combine those exposures together. Do we have any questions? So far? I do I do have a question. And that was, um What? Why was Why are you using the Blue Channel and not red or green? Is it always the blue layer for every project? Or is that specifically because of this image? Good question. You always want to use the channel that has the most contrast. So in this case, the Red Channel, you can see the fern is relatively light, same with the green, but in the Blue Channel, my fern is quite a bit darker. So again, what we're going for is a really light background in a really dark fern. So the most contrast we can use that basically sets us up for an easier time, using our levels and making a better selection. So you always want to use the color channel that gives you the greatest amount of contrast. And often times it's going to be the blue Blue Channel, especially when you're working with skin is there is not a whole lot of blue and skin. Cool thing. This is from Salou. Can you repeat the command to make this election with the channel? Yeah, for sure. Just hold down control or command and click on the thumbnail. You can also click this button right down here, which is the load channel as selection button. Thank you. Very welcome. Alright, guys. So now it's time together, a little bit more artistic here. So we're actually gonna be using, you know, some of the some of the elements here, and I want it again. We're doing a double exposure here, which means we're gonna be combining these together. And I want to get them or a little bit Maurin the same, like color range. So I'm gonna start playing around with color just a little bit as we go along. All right, So to do that, we're gonna load up on the very top of everything. AIG radiant map and ingredient map basically allows you to map out your different colors. So in this case, we're using a black toe white great map. So the darks are black and the lights or white. Now, if I want to change my great map at any point in time, I can do that. Let's start maybe something like this, and you can see my darks. Now, are this dark purple? And my lights are this orange as Well, so what's nice about this is it's going to affect the subject as well as the background. All right, Now, obviously, like this doesn't look exactly like what I want. We have a lot of different options that come, like, preloaded into photo shop. A lot of them are just, like, totally psychedelic and don't have any real world application. I'm not sure where they include these, but we're going to start changing this around a little bit. All right, so my lights here, let's go ahead and click here. I can change the color on these, so that's I'm not too incredibly concerned about. You know what? They are by default. So I'm gonna changes to, like, a really nice light pink, just like we kind of had earlier. There we go, our darks. We're gonna put this a little bit more like a dark brown. There we go. And then I'm gonna load a color up in here and make that a little bit like more neutral, like skin tone color. All right. Okay. And this guy, I'm gonna make a little bit darker there and hit OK, there. So, again, this is just gonna affect the color of our subject as well as our background. And I'm gonna lower. Ah, rapacity there. And what it's gonna do is it's basically just gonna pull those together to be a little bit more of a similar color there.
Class Materials
Bonus Materials with Purchase
Ratings and Reviews
Pamela Richardson
I LOVED Aaron's presentation style, his wonderful humour, his gentleness and humility, his creative eye, and his extensive skills with both the camera and with Photoshop. I learned a great deal from this class, and highly recommend it. It was both fun to watch, and very informative. Aaron's friendly and casual presentation style was a delight, and helped to make a very complex subject seem quite approachable. I appreciated his willingness to share his knowledge with his viewers. I understand that it is a huge challenge to create something in front of a live audience, and maintain composure, but he managed it. Aaron's use of motion-blurred images of the mother and daughter for the composite was just very creative, and was something that would never have occurred to me. I also watched Aaron's compositing class on Feb 22, which was truly remarkable. He paid close attention to every fine detail in the scene that he was creating through compositing, including size and color tone of the light source, scale, perspective, and every last detail of the shadows to make a believable and magical image! He was very good in directing and encouraging his models during the shoot on both days, and very courteous with all the assistants. I have been involved with photography on a semi-professional level for almost 40 years, and have been doing photo editing with Adobe and Corel products since 2002.
AmandaReese
Super inspiring, great class!