Shooting the Texture for Double Exposure Image
Lesson 3 from: From Shoot Through Photo Editing: Creating a Double Exposure in PhotoshopAaron Nace
Shooting the Texture for Double Exposure Image
Lesson 3 from: From Shoot Through Photo Editing: Creating a Double Exposure in PhotoshopAaron Nace
Lesson Info
3. Shooting the Texture for Double Exposure Image
Lessons
Class Introduction
01:58 2Simple Portrait Shot for Double Exposure
35:23 3Shooting the Texture for Double Exposure Image
13:45 4Shooting Portrait of a Mother for Double Exposure
15:14 5Shooting Portrait of a Daughter for Double Exposure
14:05 6Combining Model and Fern for a Simple Double Exposure Image
19:46 7Coloring with Curves and Levels
31:25 8Mother and Daughter Storytelling Double Exposure Image
32:48Lesson Info
Shooting the Texture for Double Exposure Image
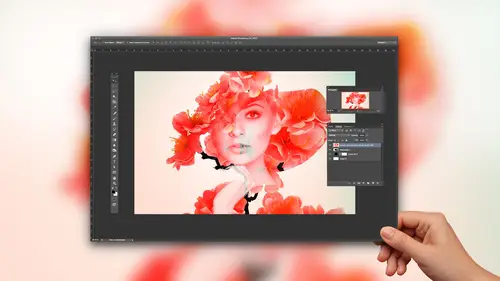
So now we're gonna be shooting our fern. So this is actually a really exciting time to show you. Like what? One of the reasons why I'm using capture one for for this application. And it's because of the overlay feature eso if we skip to the if we pop over the screen, uh, I can show you guys kind of how this works here. Um, what we're gonna do is I'm gonna to finger click here, and then I'm gonna go to show in Finder. So it's just gonna show me where this raw file is in Finder here. Now, in light room, I'm gonna switch over to our composition area and there's an overlay feature right here in, uh, in capture. What did I just say? Light room. I've used, like, room for the majority of my career, and I just started using capture one. So I'm like, uh, still in the transition face. So what's nice years? We can actually use an overly so we can shoot with two different images at the same time. I use this whenever I'm doing, like a double exposure like this in the studio or a composite, and we'l...
l be doing this tomorrow in my compositing class. But basically what I'm gonna do is we're gonna bring this double exposure, this image that we like. We're gonna click and just drag this right into the double exposure image here, and it's gonna low this up as my double exposure. So let's say we had a different image here. Click on show. You can actually see two exposures at the same time. Here we go. Let's just change this to through and that 1 to 0 as well. So I can see two exposures at the same time and adjust the capacity between them. So as long as that's up, I can compare all of my other shots to that one, which is really, really helpful. And as you shoot there we go. As you shoot, all of these shots are going to come in and compare themselves to that original. Which is there a swell? So now what we're gonna do is we're gonna start shooting the ferns, and as we do, we can put them in the right place. We can make sure that, like we've got them in the right angle to where they're they're gonna like organically be growing out of our subjects head, which is really cool. And for that we need someone in the studio audience. We have a question first. Yeah, really quick question about using the double exposures. I'm not too familiar with capture one yet. Is it possible to expand the canvas height so that as you're shooting them, you can see more of the area above her hair where we might be adding those? Yeah, for sure you can actually scale. So are subject here. Like the original image, you can scale the original image up and down. You can move it horizontally and vertically as well. So if I wanted to bring that down and then use the ferns and capture those up there, we could definitely do that as well. So it's just a super helpful tool toe, you know, like get you any time you're gonna be combining exposures and, you know, for a lot of professional photographers do quite a bit of compositing. Um, just reason being it's, you know, could be really cost effective and a lot of clients. I mean, it's just like part of photography nowadays. Like people want to see like, Oh, can we take this part of that image and that part of that image and put those together People want, like, you know, the craziest, coolest stuff, the better. So compositing is a huge part of professional photographers, like repertoire. I mean, some commercial photographers more so, like lifestyle photographer is not doing as much compositing and things like that, but, um, this it really does help with things like compositing as well. Um cool. Good question. All right, cool. We're ready to shoot. Ah, Fern Brendan, You wanna come in and help me shoot this fern? Are you okay with that? All right, cool. Let's give a hand to our fern gully for, um cool. So we got these little friends and when when we were shopping for ferns, I'm gonna give you this one to start with here. We actually wanted to find, like, we bought these ferns specific for the photo shoot eso We wanted to find ferns that would actually, like, look good. Kind of like, sprouting out his hair. Perfect. Um, so the goal here is to have the fern basically in the exact same place that we had our subject. So with the lighting, exactly so Brendan, if you want to. Just kind of like, Yep, perfect. And hold it right about there. Then we can start shooting, and I'll be able to see in real time how these actually match up with our subject so we can see, like, that's basically the start of our double exposure here. So maybe turn, turn, turn the fern. Maybe let's have you stand on this side, Brendan, if you don't mind. Yeah. So right now, it's kind of like sticking up straight up. Maybe. Let's have it like, um, kind of So the ferns air tilting back in that direction. And basically, we're trying to go with the same direction that was, you know, happening there with her hair. Very cool. And let's rotate around. So I have, like, a little bit more of, like, a dense view right about there, Uh, brown, one area little fern trimming here. All right, cool. So, basically, could you bring it in a little bit more that way? Sorry. Yep. There we go. Thank you, sir. Um, so you guys concede like I do plan on, obviously combining these exposures made a misfire with their light here. Oh, good. That's right. again here. Cool. Let's bring this down a little bit if you know mine. All right. Perfect quote. Um, so we're gonna be combining these together and Photoshopped that you can see. Like I'm already getting a decent, like idea of what our friends are actually gonna look like when they're kind of coming out of our subjects. Head, um, let's do one like that if you don't want. So I'm trying to shape, like, the ferns to where they would like be, like in a bit more of a natural. Here we go. That's very cool. All right, let's move under one expert. So all these we can actually use in combination with each other as well? Because these are all just different pieces. Yeah, some questions. Question from online. Are you always using a tripod in this type of shoot? Yeah, definitely. A tripod just makes things a lot easier, You know, it's like one less thing. I don't have to hold it. I don't have to think about it. I do a lot of my shooting without a tripod when it like, you know, if I'm shooting something that needs a little bit more like life to it. I I think shooting on a tripod. Definitely. Like it takes some life out of a photo shoot. In my opinion, it just kind of mixing super static. But in this case, it doesn't make sense because I'm kind of just like, photographing elements, and I'm gonna be adding all that stuff back together in photo shop. Yeah. Good question. All right, we're ready. Let's do it. Uh, down just a little bit. Perfect. All right. Cool. And this is also why we Yeah, if you could rotate it around the big Perfect. This is also why we photographed. Uh, why? We have several firms here. Could you actually angle it more on its side? Like it? There we go. Just like that. Perfect. Even more on its side if you could. Perfect. All right. And then, actually, if we could bring it like like that, that would be really nice. So what I'm seeing here is like these ferns. I'm not seeing like, a ton of the leaves here in the in the detail. And that's kind of what I want her. Her hair to look like they're, um So by turning the firm towards me a little bit. Hopefully, I see you a little bit more that detail, and it's gonna, like fill in. Yeah, that's that's more what we want there. Yeah, Let's do it. Okay. Yeah, that looks right. Cool. So basically, we're seeing are double exposure, Like as we're as well. Let's do the same thing with this one, if you don't mind. Cool. So, yeah, using the overlay feature in capture one is kind, allowing us to see what our double exposure kind of is going to look like. Now, we're not obviously like I'm not gonna have Brendan's hand and everything like that in the final, but we can get an idea of what it might look like with these ferns. Kind of growing out of our subjects head, which is gonna be really cool. Oh, that's really nice. Yeah, it allows me to troubleshoot. You know, we started just with the ferns, like, straight up. And now there are a lot more like pointed towards the camera, which allows me to just see, like, what we actually need for RN shot here, talking to my microphone. And Aaron Red and I are close friends, actually. So when you're shootings, I'm not I'm not able to hold these perfectly still, right? So how fast of a shutter are we having? So there's no shape. There's no shake. Yes, I'm shooting at 1/1 60th of a second, which is a pretty fast shutter speed, but really, with our studio strobes, the strobe duration is incredibly short. So if you're shooting with strobes primarily and you don't have a lot of light coming in from your ambient, it's gonna freeze just about any motion. So I don't know the T five duration of these pro foto de ones, but it's probably around like 1 4/1000 of a second. So even if you're shooting with a little bit slower shutter speed, if all the light is coming from your strobes, then you're basically effectively shooting at one over 4000 of a second. Which is fast enough. Just priest. Just about any motion. So good question again. You guys at home can look up the T five per cycle time of the pro photo. The one said, I don't know it offhand, but should be pretty quick. All right, cool. Let's grab maybe another fern. All right? It's gonna be such a cool shot. Yeah, we have a question. Just the question had come in about from Harbor Joe photos. So argue in terms of the lighting are you again getting that fern in the exact same spot in terms of how it's gonna be lit relative to her hair? Yeah, I'm doing. I'm doing my best to get it in the same spot within at least within like, a you know, six inch radius. Basically like my camera was like looking at her straight on. So as long as I've got the fern and like, the same part of my frame, Yeah, we're you know, it's probably not in the exact same place, but as close to it is possible for sure. And this would totally work. I mean, if you were just trying to do, like, your standard like composite, where you're, like, going to, like, put these two images together and make it look like realistic. This would totally work for that concept as well. In this case, we're gonna meet making it a double exposure, which is just a little bit different. We're gonna be actually like they will blend, but it's not gonna look like the hair turns into the ferns in the same way. It's gonna be a lot more like a standard double exposure, like more artistic than, uh than your Sandra composite. Um, yes. Cool. All right. Same one. And we'll be right back around. They're perfect. Cool, right. I think we nailed it. Alright, guys. So thanks. Brendan on for No. Um, yeah. So basically, that's how we're combining our different exposures. So, looking through our images, using the overlay feature, I'm able to see, Like what? These We're actually gonna look like, you know, kind of coming out of her head. And I've got, like, that one I know is going to be really, really beautiful. And I being able to see this really helps. And I've got a lot to work with. Your I've got a lot of different pictures of foreign. So, like, basically, you know, if this was, you know, like, not a live events, like, if I had these pictures, I would go home and spend like, a couple hours, like combining them together in different ways in photo shop and getting getting everything exactly how we wanted. So you always wanted when you're doing this type of like composition work you want Overshoot just a little bit. You want to get a little bit more than you think you need, and that gives you just more elements to work with in Photoshopped.
Class Materials
Bonus Materials with Purchase
Ratings and Reviews
Pamela Richardson
I LOVED Aaron's presentation style, his wonderful humour, his gentleness and humility, his creative eye, and his extensive skills with both the camera and with Photoshop. I learned a great deal from this class, and highly recommend it. It was both fun to watch, and very informative. Aaron's friendly and casual presentation style was a delight, and helped to make a very complex subject seem quite approachable. I appreciated his willingness to share his knowledge with his viewers. I understand that it is a huge challenge to create something in front of a live audience, and maintain composure, but he managed it. Aaron's use of motion-blurred images of the mother and daughter for the composite was just very creative, and was something that would never have occurred to me. I also watched Aaron's compositing class on Feb 22, which was truly remarkable. He paid close attention to every fine detail in the scene that he was creating through compositing, including size and color tone of the light source, scale, perspective, and every last detail of the shadows to make a believable and magical image! He was very good in directing and encouraging his models during the shoot on both days, and very courteous with all the assistants. I have been involved with photography on a semi-professional level for almost 40 years, and have been doing photo editing with Adobe and Corel products since 2002.
AmandaReese
Super inspiring, great class!