Lessons
Lesson Info
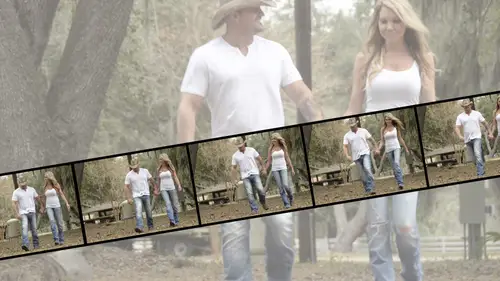
Video Editing Workflow in Photoshop
So there's a lot of things that we can do here. One of things that I discovered in my filming, the day we're doing this is you could probably tell from video was quite windy and the I wasn't recording audio. I mean, I wasn't let me rephrase that I had no need to record audio, but it recorded audio so every so often I'd be playing the clips and all of a sudden here a cz the wind blew so michael that's not good, so I need to get rid of that. So one of things that isn't any, you see that little pop up arrow right? There is just to say, I really don't want the video, the audio that comes with this clip because I'm going with my own audio clip of the bottom unless it is something you want because they're hot, we're having fun in the field, but it half the time was like this sound coming in there just was not very pleasant, so you'd have to go through each clip and do that to make sure that you're muting any other clip that's or any other sound that's in there. Yeah, there's, let me get a li...
ttle closer so you can see it here that was a question that had come in ok, so right here there's a little a little triangle right there that's always in the top right hand corner of each clip you just pop that up then there's two options video and audio she just click on the audio and muted now you might also find that you know that in the clip you're working that after that annoying wind sound then there is a part where they're kind of giggling and it's cute so you changed you don't muted but you changed the fate in so the audio only starts after three point five seconds or whatever seeking control not it's not on audio editing program but at least you can control either no audio at all or have the audio kind of fade in her fade out or be less obvious you could pull the volume down to say I still want a bit of that background noise but not as much there's not an option there to extract the argument goods on track now unfortunately, not now that would be where if I knew I want to do that I would go into you even quick time and just export thie audio separately or something like that but that's where and there's going to be a lot of those times where you'll go this is so good but I wish I could you know and that's why it's not a video editor it's ah the piece of cool software that does seem pretty nice video editing so for a lot of situations that is the case now if you remember but in the the video I showed you there was one little saying they're walking all settle into slow motion and if the longest time I was like so there's no filter and photo shop called slow motion because all filters are based on still images so all I did for that was it wouldn't work in this particular clip it'll show you anyway is I just decided where I want to happen and I right clicked and shows split clip now it's split into two but when you look at it still looks like one long clip of course and then all you do is go back to that same little arrow but the duration is saying it's one hundred percent speed what if I wanted to be fifty percent so now it's goingto take that part slow it down because I've said take longer that I work take that make the duration longer so that is the equivalent of looking like it's slow motion so that's the kind thing as you start poking around start discovering that there is no actual setting that says slo mo but it kind of is by just looking up the duration of the clip is so many seconds or one hundred percent and you just played with that setting but as you saw in that video, there were things like for example, at a certain point I decided that I wanted steak this clip here in a short and a bit so there was a clip that I like but it was the focus was a little soft when I looked at it up close, so I thought, well, I can't I mean, I suppose in theory I could apply on shark mask to a video clip, but it wasn't going to pull the focus back enough, so I thought, well, I'm gonna play on that and make it look like it was deliberate to make that soft focus, so if I was doing that to a layer I would apply filter just like I showed the very beginning so I would do that same trick gazi and blur probably not quite that much but quite a bit and then come over to the smart filter will not second once why is it not should be there because that's I couldn't sorry I forgot I did not make this a smart update first my bed so let's undo that filter ok, I forgot that these ones that's a little misleading because the icahn is actually a video but it looks very similar to the smart object video, so that was me just showing you to make sure that you remember to convert to with martin so now if we do our filter it does that but then you'll see then it shows up here so once again I have that ability to lower the opacity and make it that kind of soft focus effect so it's kind of that dreamy focus effect that fools people into realizing he didn't quite nail the focus when you were taking that video clip and the same thing applies in here if I look now at this video clip I can still do all those other things like faith and faded out generally speaking I I found it worked for me to have almost everything on the same timeline unless there's a compelling reason to put it on a separate clip for example say we were mixing video and stills because you want to kind of do a bit of both I only have one still from this a shoot but I would take the approach to go in here and shoes ad media and uh my one still I can't see it okay so we'll just use other it is I didn't like that very much for some reason well it's more more than one way to do things and photoshopped right so drag and drop a guess it still went in the video clips on just do it manually okay so once we once you have something like that and you will see eventually this is where bigger monitor would be nice there's that still image and it's on a separate track if you have a hard time finding something it will show you the name that's the file name that I brought in and so there it is there so now you khun position it where you want so as this video is playing for example now it's obviously too big so weaken scale it down and this at this point becomes an element you can do whatever you want with that you could make it's scale in the video you could make it move in the video so it starts over here and then goes off the edge or whatever you want it still has to start off being on its own layer slash track in the timeline so you can do something with it so it's just a still image right now it just sort of pops on there, but I wanted to be a little more interesting maybe I wanted to come on from the side or something like that so the same theory applies you twirl it down to say, what do you want to do? So I'm going to stop start off and say when I start this thing, I want it right off here and about maybe here I want it to be in this corner so now is the video is playing and I obviously haven't ended this because they're just by the way, this was really fun to shoot except he didn't get the idea of stopped looking at the camera he thought he was having his picture taken I'm like keep looking over there and every so often maybe throwing looking right the cameras like ok, but they were not professional soul she is but he wasn't but you can see there just a simple example now I have this coming in and at this point I could then also do another transition to scale it down so you can have multiple key frames for the same thing so it could come on wait for a second and then scaled down smaller and head off or something like that that same concept applies for at the end of that video you saw that I had some credits that we're scrolling so that's exactly the same principal is second let's um so what I would take my type tool I would probably make a text block to have credits and of course black on black does not work terribly well in orders that size of type and just for the sake of time I'm not goingto do a whole bunch of words but um that's at least get some space in here so when you don't want to put a lot of your own type you just do pace lauren gypsum and then it gives you more type than you could ever possibly want what you're going to be the world's longest credits eventually is going to get really tiny because I need to make this textbook being enough to see all the type that I want. So you have to how should I say this live with the fact that unless you do have a giant sized monitor, there'll be times where you'll be looking at your video this big to make sure you can get the position because I need to have a one point where the text block is at the bottom and thie and it goes right off the top, so be able to do that. I want to zoom out enough that I see that in tyre text block was why deliberately made it fairly big to show you this is the reality of what you're often faced with, so I have to make sure it's a video timeline and then start with it right off the page and do that same thing transform move to the end and then I'm gonna run out of room. Oh, ok, barely made it. Ok, so now we have our scrolling if it wasn't like the real movies all goes like this, like, wait, I was on there, I couldn't see me. But you see I'm doing different and results but the principle is almost always the same they're saying start here with the team frame, move it and then it automatically makes another key frame if you decide that you wanted to do something else like once it's done that transformation do another one or like with that image that came on and it paused for a second that's just a matter of saying ok after all but moral start another key frame to then have it go off the edge or whatever it is we could also do things again with opacity fading in her out um the other option would be we talked about this a lot brief mention there's all we have all the different layer styles which for a photograph I mean what you want to drop shadow but things like grady and overlay as an example way change this to multiply colored overland saving bees orjust see so it's called colored overlay but it's not really well it overly until you tell it to be overlay so we're doing like a little tint effect that's probably not a great color make it darker so we could see it so as soon as you do something like that that's an effect ok, I'm not in love with the look of it, but I want to show you the idea that as soon as I added that effect now in the timeline for that graphic I now have the ability to change that layer style over time so maybe at first I wanted to be zero opacity and gradually faded so changes from color too uh color tone or color overlay of whatever it is so let me see if I have here any question yes, we're bringing in all of your documents you would resize them but you didn't change the resolution they were always at seventy two is that what you recommend? Well because when it comes to video, we're not we don't we throw out the window anything to do with dots per inch or pixels branch we're talking about physical dimensions so when you hear people talk about my tv is ten adp or seven twenty that's means that its twelve eighty by seven twenty so whatever it says, it might say three hundred pixels per inch when you bring it in there. This is its new physical size now might come in really big because of such a high resolution, but eventually you're scaling it down to the physical dimensions as opposed to worrying about is it seventy two or ninety six or two hundred that's irrelevant? Now the only time it's relevant is if someone says could you use my local in this video and they give you a jiff file that's this big then that's a problem because you can't make it larger but even like in that example, I showed you with the wedding for tarver logo that was an illustrator logo that technically is um scaleable whatever size you want, but as soon as I brought it in and it took on the sizing of the dimensions of my document, so I kind of showed you briefly, but here there's all these built in presets if you're starting from scratch, you could go in and say, choose this size you want and you'll see it showing you there's like seven twenty hopes I said seven twenty but apparently photo shop is not voice activated because it didn't pick the one I wanted. So, um I just personally type in twelve eighty by seven twenty because I know, but some of these are there have in the video world there's they talk about video safe areas just like when you send something to print a business card that would say don't go too close to the edge because our printing press might shift site so they give you a guideline. This is the same idea that there's a safe area that it probably not as much anymore but in certain video monitors that might just cut off a little bit, so if you use one of the presets in the new documentary, has the guides already built in to tell you this is the so called safe area, especially doing stuff with tight near the bottom and might get cut off a little bit if you're just doing images it's probably less of an issue, so personally, I just have had a habit of just making my own new document. You could also just do it yourself instead of using any of these built in one's just pick the size that you're going to use and then say that as your own preset, so put us up all over the place, has the option of using presets? You could do the same thing for your document, any other questions while we do that, just a couple of quick questions from of the internet e teacher had asked, can you pull a still out of a video when you're in this? You can and there's a couple of ways of doing it, as you saw with that example of niagara falls, I just moved the timeline to the area that I wanted and just select all on copy, and then you can either pace in a new document or as I did within the same one that's probably the simplest way to do it, mostly because as you're moving the timeline you can see between these couple of areas, that seems like a good place to do it, so you're not kind, I'm guessing you're using whatever the timeline is is giving you and you pretty much answered this one when you showed us using stills to create a slide show but from adam fell bruce he'd asked do you have two important existing video to start making video are can you just work in photoshopped with shapes etcetera creating video with no existing video and and the answer is both because if for example here I just opened one of my video clips eye that automatically says this is the size and it has the video timeline or you just make the size you want again and at this point it's assuming okay, this is just a regular document until I choose create video timeline will soon as I do that now whatever I import into this will be available in my video timeline so it still shows up in the layers panel but then that you see those is thie elements on the track on the video that you khun um you know combined and move and do whatever else you want cool thank you sure so it's really up to you how you do it I the first time I did I opened any video clip and then out of the bunch of media but then occurred me the second time would be just as easy to just start with a blank documents either way I've even had an occasion where I realized that's not even a video clip I'm going to use so I just deleted it completely say, don't eat because you can't actually do that. We have another one in there seem to have at least one in so at media, so this is a, uh the thing I do on the mac normally let me take a step back when I was in bridge, I didn't do it this time because I got carried away and wanted to jump in and start doing things in photo shop, but enbridge, when I view them very often all put them in the order that I want and then do some kind of tagging of them, like putting a label on them like labeling it read or making it five stars something so it's then easier to remember which one it is since I didn't do that in in this case, just to show you the other option, and I apologize for the people in the windows world, there may be some equipment of this, I don't use windows, so I don't know, but you can tell me if there is or not. So right now I'm looking at all these names dot m ovi and I have no idea which one is which if I press in this dollar box, press the space bar if it was a still image would show me still because of video it's giving me a full screen preview and say that's, not the one I wanted. Is that this one? No. Is it this one? So this way. If you didn't have markings to say, this is actually the one that I want you, khun, start finding them very quickly. So that's actually the one that I want. So now that I have that now, I could delete this other one because this is actually the first clip that I want to start with. Is this moving of thie? This was again a pan on this slider thing. So one of things I also discovered that I did, I would say, give myself a passing mark on this part of my video is that I should have often giving myself a little more lead time and end time. There were times where, like there were a couple were walking past the camera. And as soon as they got here, I stopped. And when I went to edit, I thought, I wish I had given it a fume or even if there was a period of nothingness without them in the shot at all. At least that way, when I try to blend the clips together, I got more to go with. So for example, this is a case where I think I did an okay job because I started filming nothing's happening and then right there ariel then it starts to move so the family there's really no reason to have two seconds of video where nothing's happening at all so I would probably use this idea move that and point you can see that little previous saying right about there it's now starting to move so now that video was clip is little more interesting assumes they get to a certain point then I would do the same idea to say start to trim this down a bit and sometimes I'm trump taking a clip that's quite long and only end up using a small portion of it but I'd rather have that than the opposite of saying I wish I had a little mohr of that particular segment will work with so when you're doing the video side, especially when you're new to it like I was at that time I learned a lot about timing that I should have stayed in a shot longer or somewhere like wow that's way too long but the probably the most recurring theme was the beginning event. I want this middle part the middle, but I want to give myself some room money chance if I decide to do a really slow dissolve, I've got that room to do it, whereas if I've only got a little tiny piece, I really don't have that option of doing as much as a cross state or whatever as I want to but like anything in the first time you're doing it if you've never done fitting filming a video it's kind of a bit of a shot in the dark at least it was for me because I sort of had a rough idea, but I've always been stand around watching other people do video and not one of my friends who works in a video world says video editing is all about how much stuff you throw away so is his goal is always, you know, and a lot of people and come from the still world or thinking you press the shutter button, you get a photo where is the video you might film on our worth the video to get a minute and a half because you know all this information because you don't can't go back and just take another photo you have toe get all that information so you can try putting things in when I was experimenting, I've never used one of those sliders before, so the first couple times are probably the same clip like four times because the first time I did it just didn't seem very smooth, so I tried again and then move the camera little bit tried it again, so I had I'm only showing a few of the clips that I probably had five clips of this same view of panning across this boat house because this is the one that I like the best that there was at least one where I was doing a really good pan and then all I don't know what happened but the camera so I was like, well, that looks really good so and that's where in other high end software there's probably ways where they can deal with that kind of thing but photoshopped doesn't have the ability to say I'm wantto take out the jitter and all that kind of stuff like you would find in other other programs um ok, so and I mentioned I want to mention this again now I should also mention by the way I don't have images to show you but the other thing that people seem to like to do and I get the idea it's actually kind of cool is if you take a whole siri's and I mean like a couple hundred still images j pegs taken anywhere from a few seconds to a bunch of seconds apart and then do like a time lapse and there's two ways you can do it the simplest way is one that doesn't automatically but you don't really have any control over the timing and that is on a and e and I apologize I don't have any of those here I had taken some images but they really didn't work out very well just because it was boring I actually I should tell you the story because it was I thought about later was kind of funny and I was just I suddenly decide I want to try this so I got in my car and I drove to a right near my studio there's a building with a very busy streets off I'm going to sit here with and I only had my seventy two hundred lenses got of this long lance and I didn't have a tripod that will that will kind of add to the coolness of this time lapse so I'm sitting with my lens poking out the window, taking shots every so often of these cars going by and I thought I'm in a post office parking lots is probably not the best place to be having a long lens poking out people going what is he doing there so anyway, so I took a whole series of those shots and then they're all j peg in sequence by number and if I had them here, what it would look like is I would select these things but at the bottom you see it's great out because these are not the appropriate images but actually I guess I could fake it may be with this one hold on a second this is at least let me show you the idea um yeah it's still won't do it because they're not name probably see at the bottom says image sequence so if you had two hundred files do it renamed in in bridge to be image one, two, three, four inappropriate order than it brings them in and automatically you get a video that's a time lapse and that's really cool? The only downside was that if you don't like the timing there's really nothing could do about it because that's just the timing says I will put one image every whatever the volt is one second or something. So in photo shop in the time line if you have a siri's of images, I'll just, uh do a quick one here to show you the idea, so use thes even though it's really not again the ideal situation, so I would always try that other method first, because it's so automatic it takes hardly any time at all, and you're done here. This is these frames that go on all this time if you want to have an image sequence where you control the amount of time there is an option here normally wouldn't do this because we're trying to keep working with video. But there is an option to convert to frame animation, which is in the early days of photoshopped video was actually to make jeff animations, you'd see all these little frames and the only reason why I found this to be useful see if I can get this up a little bit, you can see it here so you know, if you can seeking to see down the bond, they're all saying, like five seconds, that would be the world's most painful time lapse of every clip was in there five minutes, so if I select them all and imagine there were two hundred of these on the timeline, I click on the first one shift click on the last one to select them all. And then when I use the pop up menu, I can change the delay to whatever amount that I want. So I've done that a couple times where I tried that image sequence and I was the results were it was okay, but I just felt like I wanted least try and see the difference and that's. The only way I figure out there may be some other way that other people have come up with. But this is the one way I could find where I could bring a whole bunch of single images in and then determine across the board. Each single image will be visible for x amount of time and then export that as an animated gif.
Class Materials
bonus material with purchase
Ratings and Reviews
dennis hartman
For years I have observe that video thing at the bottom of my CS6 program. What would you do with it. Nor could I do anything with it. I saw this course offered at Create-live. WOW, what a wonderful course. It sure helped me with the basic uses of this part of adobe photo CS6. Thanks