How To Fake A Shallow Depth Of Field In Photoshop
Lesson 4 from: Creating Impressive Effects with PhotoshopJesús Ramirez
How To Fake A Shallow Depth Of Field In Photoshop
Lesson 4 from: Creating Impressive Effects with PhotoshopJesús Ramirez
Lesson Info
4. How To Fake A Shallow Depth Of Field In Photoshop
Lessons
Lesson Info
How To Fake A Shallow Depth Of Field In Photoshop
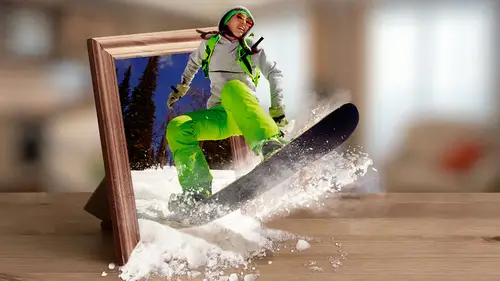
we're gonna now talk about how to have a fake, a shallow depth of field in an image. So a lot of times you may have old photos or you just don't have the right lens, and you wanna just fake that nice, blurry background and the way most people think about a project like this is Oh, I know what I'll do. I'll make a selection and they make a selection out of the whatever the subject is. Oops, sorry about that. Whatever the subject is in this case, my friend Cheryl here, who ran Run. So fashion bloggers, this Cheryl Vanderburgh and she, um, posting for this photo. We didn't have the right lands. The background doesn't look that great, but we want to make it a great image. And what most people do is make a selection duplicate the layer layers on top, and then they just blur the layer in the back and I'll show you why. That's not a good idea. It's not a good idea, because when you do, ah, something like this to create the Shelagh that the field, first of all, everything is blurry, and I know...
we can create a mask and then just sort of sharp Indy or hide the blurry pixels from the bottom just so that the sharpness comes back. But it still doesn't look very good. And also, you get this hailing effect halo effect. So if you ever try to blur an image and then put the original one on top, there's always gonna be about outlined, that blurry effect so that those two reasons why I don't like doing that technique. Instead, what I like to do is create something that, uh, that is called a depth map that allows you to, um, tell photo shop what it's gonna be in focus on what is gonna be out of focus on and sort of think about it a step a little bit like atmosphere perspective, like we talked about in the previous class. You have to, you know, fake the illusion of death when you're working in a photo shop. So what I'm gonna do first in this images create that death map, which is gonna be me telling photo shop. I want this to be in focus, and I want this to be out of focus and the way you can think about it. is like this. I'm gonna create a radiant and then just gonna reset my Grady INTs to, um, research radiance here. Just press, OK, black to white and the way you can think about this, anything that is black will be in focus. Anything that's white will be in focus. So you can sort of think about this as you taking a photo, and the further back you recede into the background, the blurrier it gets again, trying to replicate that shallow that the field. So with this here, I can click and drag the grating up or down. If black is, um, focus that that means where my friend Cheryl is standing will be a focus was roughly around this area here. I also want her and focus, of course. So I will have to make a selection out of her. And just so you know, I, um, making a selection in this particular of this particular effect is really crucial. Unfortunately, we don't have the time to create a complicated selection here, so I already took the time and created the selection beforehand. But I'm gonna show you the steps, the basic steps, and then the refinement. I'm not going to show just because we don't have the time. But, ah, you would make a selection around your subject in this case, Uh, friend Cheryl. And then, of course, click on the layer mask icon here. But before I do that, let me the select, um, that part in between her arm and her face. If if you hold option, alter the PC and click you subtract from this election, some subtracting from the selection and what I want to do again, it's keep her in focus, so she's gonna have to be essentially a black silhouette. So I'm gonna go to solid color and select black. And there she has a black silhouette. So if we enable the background and plays us on top, this is what our death map is looking like. She's just in the front. There's a Grady int Also Notre notice her dog Kellett, back here. Kelly was sitting there, and although she will be out of focus, she won't be asked out of focus as the trees in this background back here. So we also have to implement that into the depth map. So I'm gonna make a selection that around Kelava as well. And again, I'm not being supersized, Uh, at the moment and I'm gonna create a solid color. But before I do, I'm gonna enable all these layers saw the color, the color it will be the will be corresponding to the death that she has sent the dog. So she is sitting right there, and I can just click here to the side, and that's where she's sitting in terms of the, um, death of the image. We also have these bushes here, and it's to be honest, is really complicated to just select each leave accordingly, and it won't make that much of a difference. So for that for something like that, what I'll do is I would just create a new layer with a soft brush. I would just paint with the same color a scallop since during the same depth and just paint around like so. So that's my death map. Now, obviously, um, you need to go in there and adjust any, um, hard edges and things like that. So what you would do is use the, um, sliders here on the selected mass space to smooth the edges. Maybe feather. Um, contract. Um whatever you need to do, so they look good. And then at some point, you may actually need to go into the actual mask itself in paint with the brush tool in case or some fine details that you need to paint in. Like in this case, for example, I know she's got those earrings. So on the finish mass, little showing a moment. I actually had to go in there and I had to paint in the ring the earrings just because I the selection tool, wasn't getting those. So once you have a good selection and you have a good death map like this one here essentially what I just showed you now, but I took a little bit more time. I probably took more time on that mass in this whole class, so it took some time. Um, we have all these layers active. Now we want to convert this into a death map. Photo shop only recognizes channels a step maps. So what? The's layers active and this is always see, we can go into the channels panel and we can click on any one of the channels to read the green or the blue. They're all the same. They're all exactly what we saw in the previous layers panel, and we can just click on it, drag it into the new channel. I come to duplicate that channel, and we can call it whatever we like, so we can call it I'll just call it Seal for Creative Live. And then channel were actually a definite, more descriptive. And I already created one earlier called Pre Death Blur. But in this for this class would just use the one called C L Definite death map. Excuse me. So I'm gonna go back into the original image, and you always want to work on a duplicate. You never want to destroy the original pixels of the original image. I'm gonna duplicated command J Control J and a PC to duplicate and what I'm gonna do now it's apply that blur. So I'm gonna zoom Angel so we could see and notice The blur is not its There's really no, um, shallow depth of field here. But if we go into filter, blur, lens blur, we can apply the death map and we can choose the one called seal death map that I just created and make sure that right now is a lot of noise. So let me just bring the noise down and also increase the radius and notice how blurry the background is. And Norris that she is, um, focus. So this is how we can create the shallow depth to feel effect in photo shop if we don't have the proper lens when we shoot the photo or we're working with older photos, So I'm gonna just make this a little more dramatic that I normally would. Just so you can see how it works. The, um, second thing. The second reason why I love this filter is because it's one of the filters that not only blurs an image, but you can add noise back into it at the same time. So a lot of times I won't even create a death trap. I'll just blur the entire image and then use the noise slider to add noise, because when you blur in him, it's you lose all that film grain that's found in the photos. So then that's when you see something quite doesn't look right. This because you took away the film grain so I can add some of that film grain back on. You can use the slider or use the up and down arrow keys on the keyboard sometimes, like he was the arrow keys on the keyboard. Just because you're a little bit more precise that way. So in this image, an amount of three gives me a similar noise through the original image to less what'll keep and then I'll press. OK, so that's before, and that's after notice that we don't have any of that halo effect that we did in the previous example. But it just simply blurring the layer and masking out the, uh, the subject. Now, this is the shallow depth of field, but you condone take images much further in photo shop, not just stayed with what you got. So what I'm gonna do analysis auto, show you how to create that, um, some glow effect that you see a lot of portrait photographer these days. So what I'm gonna do is simply create a new layer and with the brush tool, I'm just gonna paint with white, and I'm gonna increase the size of my brush by using the right bracket p and the keyboard and make sure that I have a soft brush selected, which I do. Hardness is set to zero, and I'm just gonna tap there in the center a couple times and that's my That's gonna be my son flair, that I'm gonna place back here. So with that selected, I'm gonna zoom in and I'm gonna show you, um, one of the eight special blend most that photo shop has linear Dodge. Linear Dodge is one of those blend modes that reacts differently when you adjust capacity and Phil. And also, if I double click on the set of the layer and click on the transparency shapes layers notice how the blend mode is gonna The layer is gonna be a blend differently. And now it looks like a highlight. We're going to use that to create son effect and then bring down the opacity. Notice that if I bring down the I'm sorry that Phil, But if I bring down the opacity, notice how it looks flat. But if I bring down the Phil still looks hot, but not as bright. So that's what we want to bring down to fill Impress. Okay, But then we're going to create a hue and saturation adjustment layer, clip it to the layer below it. Click on colorized. The bar here at the bottom shows you what the final color will look like. Someone a click and drag this over to the right. So I want to be a yellow color more saturation and bring down the lightness and you'll see that color start setting in. What I can do now is zoom out, but it's a screen Rizvi in the keyboard. Click and drag this sunspot and place it back here, Command to transform. And I can scale that up just to make it much more stronger like that. And now I may want to apply a color great to the image, just that it looks better. I mean, there's yellow sunlight coming out in the emissions and look yellow. So let's fake that. One of the easiest and fastest ways to do so is by creating a radiant map. But we're going to use one of the photographic toning that photo shop has. So under this, um, fly out menu here, we can choose photographic toning press. Okay, And peace are the photographic toning that we could use, and I'm just going to find a nice yellow ones. Maybe Maybe that one or this one. We'll try this one first and see how that one works. And this doesn't look very good, but if we change the blend mode too soft light and maybe bring down the opacity. We can start applying some of that, um, yellow effect. And of course, you can go in there and fine tune it. And also fine tune the highlight of the sun. There, you can even create a 2nd just if you want to have, like, a brighter, hotter sun in the center and you don't have to do with that That trick I showed you earlier with this when you could just simply set it to something like stuff light. And there there it is, or maybe even overly might be too strong. So just bring down the opacity. So now we have this bright sun coming out and hitting her. And if we select the copy the Cheryl copy layer and hold shift and click on the very top layer here, command G control G on the PC to put that into a group, we have the before and the after. So that's how you would create a shallow depth of field effect in photo shop. When you're making your selection and you're creating that mask, what if you if you run into trouble with, like for or hair? What kind of procedures do you do to help solve that? It depends on what the background is. If there's a busy background like maybe Bushes, leaves and things like that, a lot of times is too complicated. That is just not worth the effort. And you just have to disregard them by either just completely deleting them or maybe cloning them out or just completely let them go. If the if you're working with something that has, um, more of a solid background than anything that helps you create more contrast between the foreground and the background. So a lot of times you can actually, before even creating your selection, you can make extreme adjustments to one image. For example, her pants. Here I made this extreme adjustment, and now one of the channels panel. It's much easier Teoh duplicate this channel here and then just mask outer pens because I made that drastic adjustment and then, you know, I took it into a different tool that would allow me to make that selection. So anything you can do to create more contrast between the four gun in the back and it's gonna work. Unless, of course, is crazy busy background, then he's probably just best of this regarded.
Class Materials
Bonus Materials
Bonus Materials with Purchase
Ratings and Reviews
JIll C.
Creating Impressive Effect With Photoshop is another action-packed class filled with really useful information. It includes how to do fun (or even useful) face swaps, How to create shallow DOF in images even if you didn't use the right lens and f-stop combo, how to create the golden sun flare effect, how to do a double exposure effect, how to create a duotone/graphic effect, and others. There is so much info packed into this short course that you will need to play it over and over to absorb all of the keyboard shortcuts and layer techniques, but there is surely something for everyone in this course.
user-1c544c
Great class & instructor. As soon as I was done with the class, I wanted to try what I learned on my photos.
Phreakgirl Photography
Whew! I watched it live and he goes so fast I couldn't even write down simple steps to refer back to later. SO MUCH great information packed into this course, but I'll have to buy it and use Pause and Rewind a LOT!