In Camera Multiple & Double Exposure
Lesson 11 from: Creating Painterly PhotographsKathleen Clemons
In Camera Multiple & Double Exposure
Lesson 11 from: Creating Painterly PhotographsKathleen Clemons
Lesson Info
11. In Camera Multiple & Double Exposure
Lessons
Class Introduction
03:27 2What is the Painterly Look?
04:12 3Overview of Techniques to Create Painterly Photographs
11:19 4Selective Focus & Extension Tubes
14:22 5The Magic of Lensbaby
36:33 6Tips for Beginners Using Lensbaby
12:31 7Using the Lensbaby Velvet 56
27:37 8Shooting Through Natural Materials
07:22Shooting Through Non-Natural Materials
16:58 10Painterly Backgrounds
06:44 11In Camera Multiple & Double Exposure
13:25 12Exploring Creative Blur Through Subject Movement
06:39 13Exploring Creative Blur Through Intentional Camera Movement
12:59 14More Painterly Look Options
06:25 15How to Create Painterly iPhone Photos
29:44 16Vertical/Horizontal Panning in Photoshop
10:07 17Multiple & Double Exposure in Photoshop
08:48 18Dancing Flower Technique in Photoshop
06:12 19Creating Painterly Image Effects with Software
25:41 20Applying Textures in Photoshop
25:19 21Painterly Photographs Critique
30:49Lesson Info
In Camera Multiple & Double Exposure
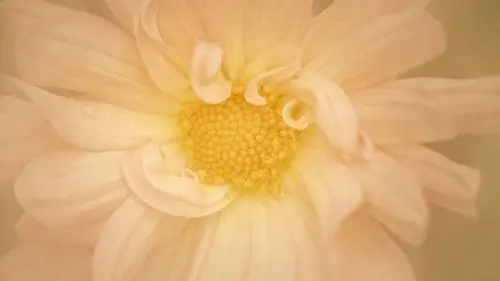
For double exposure, which is what this is you can do two different subjects. In this instance, I took a photo of some I panned some trees and then I combined it in in camera with a photo of some nearby leaves. But I generally am doing two versions of one subject for a painterly look instead of two subjects combining, I'm doing two versions one subject, so here is a rose at F13. It's a beautiful rose. So I took one shot of the rose as is and then I totally defocused so that all I got was just orange color and that's the effect. So I went from a straight shot. To a very soft painterly look with the same camera, same set up and everything. Here's another one where I did the same thing. So you can see the two of them together. You can see the effect of the double exposure and you may prefer one or the other. That's fine. But it that veil of color covers the whole photo. So here I combined this bud, which I thought was beautiful but I wasn't crazy about the background, see how its got dark...
s and lights and I wasn't crazy about that. And I saw this amazing plant next to it which is really busy but when I defocused that plant, I got that. So when I combine them, I got the image on the left which is much softer, more painterly. And then that was just another little branch on the plant. I even did the same thing with this dogwood. One in focus, one totally defocused. And the same thing with these ferns. And then the Queen Anne's Lace, on the left, I did one in focus, one out. But for the Calla Lily, I wanted to try something different so I did one in focus and then instead of going totally out of focus, I just changed how close I was so that I made it a little bit bigger. And let them be combined right in camera. Just a fun, fun technique. So you really need to check your manual to see if you can do in-camera multiple exposure. If not you can do it in Photoshop and we're gonna be talking a little bit about that this afternoon. So I set my camera to multiple mode, five images for that and here's the back of my camera. I've got it on continuous shooting if you wanted to just set your camera so it only took one shot and that you went back to normal shooting, you can do that. My exposures area averaged. I usually chose an odd number, five or three are what I use most. You can save your source images if you wanted to play with them in Photoshop after. I don't do that. And I have it set for continuous. And all this is, is just taking five, that might even have been seven shots where I'd take a shot, move my camera a little bit, take a shot, move it, move it in a circular pattern. And I did the same thing for this magnolia. For these Rebekia. And this is a little bit of more of gentle image. I used a lens baby with probably only three turns of the camera. So I can go from this, these are Snap Dragons before. You're looking for lots of color and shapes for this technique. And here is my multiple exposure of it. This is great when you have flowers that still have a lot of color but they're not in great shape. They're not in great condition because you can't tell. Yes. How many times are, how many different variations of these things perhaps are you going through as you're trying these fun things. As far as... Oh just the different multiple exposures, the are you, do you see the vision of what you wanna create or are you just playing? Generally when I see something like this, I think multiple exposure. You know, it really depends on what I'm seeing. And a lot of this comes down to sometimes me being bored. My friends are already done and I'm like, yeah my friends are not done rather and I'm done and I'm like now what am I gonna do? I'll do some multiple exposure, you know. I'm just trying to keep myself entertained (laughs) some of the time so yeah, sometimes I don't think of it ahead of time and sometimes I do. This is just a straight shot of Dogwood. And then a multiple exposure version. And another. And then I took this one step further the last time I did it. I just started playing with, I did five exposures but the last one, I totally defocused. And so I ended up with a veil of color on top of my multiple exposure so I did four of the turns and then for the last shot, I just defocused. So there's that veil of color that I seem to be quite a fan of. Same thing with this shot, same technique. And that one as well. And not just flowers. These are stairs at the Japanese Gardens in Portland. I just rotated the camera, for three. And here is the shot that I did at the Dunn Gardens and I'd like to show you how I did that. So you can watch me make a multiple exposure. I wanna show you how I do multiple exposure in-camera. Canon 5D Mark III allows me to do that. You should check your manual and see if you can do it with your camera. If you can't you can combine exposures in post processing which we'll be talking about later. The reason that I bought my 5D Mark III was because I had Nikon envy because Nikon has allowed you to do this for a while. So, when I'm doing multiple exposure, I generally choose an odd number of exposures to combine. Three and five are what I use most often and I chose a subject that has a lot of subject in a small area, a lot of color, a lot of shape, a lot of line to really get a painterly look. So I've chosen Pansies to demo the technique for you today and I'm gonna do that with five exposures. So what I'm going to do is set my focus point over to the right, a little bit off center and focus on one Pansy. And with each exposure, I'm going to tilt my camera slightly to the left. Click click click. Each time, rotating it a little bit. And you don't have to move your camera in a swirled pattern. You can move up and down, you can move sideways. That's totally up to you. But I think for the Pansies, it will look really nice with a swirl of color. So I'm gonna do that now. (camera clicks) (camera clicks) (camera clicks) and I did use auto focus for that. It worked well with the subject. If it's not working and you find that your camera's seeking then go back to manual focus but it worked perfectly here. I like the wows and the oohs and the ahhs that I'm hearing (laughing) from folks out here. Thank you girls. (laughing) So once again, clarifying, tripod, not tripod for the multiple exposures. I'm not, if you did use your tripod, you would just have to loosen your lens collar so that you could get that motion. Great and again, from Lindsey, are you moving the camera, horizontally or sort of in that circular motion. For the Pansy shot, that was all circular but you can move it horizontally, you can move it diagonally. That's totally up to you. Great and Ramesh had asked, how do you calculate the multiple exposure? You were setting it in the back of your camera right? That has that feature? Yes right, right on the back of your camera. Go in and set it up to the setting that you want. And so again, the question from Elizabeth Lovely is how are you combining the images? The camera's doing it. Camera's doing it. Camera's doing it. Great. Question from a user, how many texture boards do you carry with you. You have about four, five there? Yeah those are new and I've only had them a couple of weeks so, it probably will depend on where I'm going and what I'm gonna shoot. I'm spending a whole day at a garden, I might be bringing more but I do find lately that I'm bringing an extra gadget bag (laugh) gadget bag with me. With my clamps and my tripod and a couple of texture boards but not, it really depends. And they're so light, they don't weigh anything so, I'd say on a, if I was gonna spend a morning at a garden I'd probably bring four with me, that's gonna give with me eight different backgrounds. And you can do one board and leave it plain white, if you want a plain white background. If you like black backgrounds, you could just do a black background as well. Great. I have a question about your texture board also. Yeah, I noticed you had it pretty close to the plant and you were still able to get a narrow enough depth of field. I know that's because of your aperture but it really seemed like you were really close to the plant so. Yeah that was with the Lens Baby Velvet two [Female In Aqua Sweater] Oh okay. As well. When you were taking those multiple exposures, are you considering any changes to the amount of light that you're getting in the camera that is... I didn't have to in that situation because the scene was pretty evenly lit. Question about your clamps, I noticed you have some apparatus back there. Right. Do you make these up or do you purchase these somewhere? No, you can make 'em up. In my other class, in the Art of Flower Photography, I do have one that I demoed that I made by hand but these are purchased clamps and I in general take two with me so that if I have to held a background with one and a diffuser or reflector with the other, since I do shoot alone that I can do both and attach them both to my tripod. Where do you get them? Oh any camera store, any camera store. Okay camera store. Wimberly makes one and then they have after market ones at B&H, Adorama, Amazon. Okay okay, I appreciate your craftsmanship. I mean your craft is really great. It's refreshing not to have something that's an application. These are expensive. The one that I made by hand, I use these quick strips that I got at the Home Depot, and some clamps at the Dollar Store and had my husband wire tie them on. They're not as stiff as this but they'll do. They'll definitely do. And then they don't hold the weigh that these do because they're not as stiff but they're handy. They'll hold the diffuser, something light. Alright great, we have a couple more questions from folks at home. Janine Hubblehead asked can you use the tulle effect without a lens hood? I don't, I don't use UV filters on my lenses so I wouldn't wanna put anything up close to my lens that might scratch it. So, I would not. But perhaps you could create something that's holding otherwise or what have you, DIY? I'm always using a lens hood just to protect my lens anyway. So if you have like I said, the scalloped edge makes it a little bit tougher to pull that tulle evenly in front. Great and Sea Welsh Photo had asked, can you use fabric for a texture board like a velvet or something else? Yes definitely definitely. And I started before I came up with the idea of printing my textures, I was using fabric. Great. And just to clarify in some of the videos, folks were asking, Christina Kaye, how long was the lens that you used in these last couple of videos. It was my 180 millimeters, with F3.5. Great, for the shoot through. Yeah, for the shooting through. And Linda B is asking how large are those foam boards again? Those are eight and half by 11. Okay great. Which is that's large enough for what I shoot. If you have a larger subject then you might wanna go larger but it's gonna be harder to hold with the clamp so that works for me. Great. And one more clarification from Edwardo, the technique to shoot one image in focus and the other one out of focus, those were two separate images, right, not a multiple exposure. They were two separate images combined in my camera in multiple exposure. So I had the multiple exposure settings for two. And then took one in focus, the next one defocused and the camera combined them into one. And if you wanted to do those, have the camera save those images, it would also be handy because then you could go in and you could mask maybe some of that effect off of you flower so or your subject. Great. And once again, can we clarify or talk about who makes these clamps even though there are different ones that you could use. Yeah, I think Wimberly makes the ones that I have. There's one called the Plamp. Then there's the Stick which has a stick that goes into the ground and the clamp part comes out so you wouldn't have to attach it to your tripod.
Class Materials
Bonus Materials with Purchase
Ratings and Reviews
user-7773bc
Wow. I really loved this class. I took her other class, "The Art of Flower Photography" as well. She is very thorough, explains concepts clearly and is professional, yet kind. I have been doing photography for decades, but flower photography is a little bit of a different animal. I have found it to be extraordinarily challenging - which is also invigorating! At the same time, using Kathleen's principles, I feel like I now have basic rules and tools under my belt which I did not have before. This is a little humbling as I have been doing photography for so long and was surprised there were a few basic concepts I didn't "get the memo" on. haha. This class will save me heaps of trial and error time. I will be much better able to zero in on what I really need to work on. I actually recommend taking both her Creative Live courses. Yes, there is a bit of overlap - but that little bit of repetition is actually helpful. They are not the same class. Oh, and one more "perk"...you get to view some of the most stunning flower photography ever created. Masterful. Thank you, Kathleen.
Donna Macri Stevens
As I've been watching this class, I have literally been sitting at my computer and saying aloud, "Wow....WOW!" This is an absolutely amazing class!!! I began watching it while it streamed, but had to buy it. Kathleen is an amazing instructor, and she is SO generous with her tips and techniques. I love that she supplemented her instruction with on-site videos, in class photo manipulation and so much more. If you love flower photography or want amazing tips on how to make your photos more painterly, CLICK BUY NOW! I'm just blown away! This is a GREAT, GREAT class!
TypicalCheryl
Kathleen's images have a very artistic and painterly character, so she is a great presenter for this subject. In this class she openly shares many of her methods of shooting to create in-camera artistic images (even with your phone) as well as post-processing techniques. She presents this material with her open, calm, strong and passionate manner that gives you an "artistic license" to experiment and discover "What happens if?" I have admired her work for a long time and am so excited that she shares the secrets of creating her enchanting images here. If you are interested in capturing images that go beyond what you see to incorporate how you feel about a subject, you will love this class!