Adding and Manipulating 3D Models
Lesson 2 from: Creating Projects in Adobe Dimension CC 1.0Paul Trani
Adding and Manipulating 3D Models
Lesson 2 from: Creating Projects in Adobe Dimension CC 1.0Paul Trani
Lessons
Class Introduction: Introducing Adobe Dimension CC
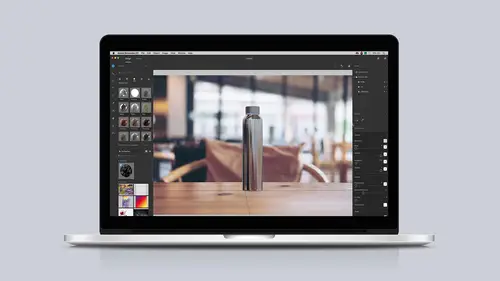
04:44 2Adding and Manipulating 3D Models
06:38 3Adding Materials and a Background
10:30 4Adding Custom Images and Backgrounds
10:42 5Matching Scenes with Perspective, Lighting, and Reflections
08:03 6Creative Design using Backgrounds, Models and Lights
08:36 7Creative Design using Imported Models
11:10 8Rendering and Editing in Photoshop
04:15Lesson Info
Adding and Manipulating 3D Models
Now we're going to dive into adding and manipulating 3D models. You can see right over here there's a couple models in this pax area, and what I want to do is I actually want to switch to this models area in the assets panel. I can zoom in on those, you can see a number of assets right in here, everything from bottles down into basic shapes and some more unique shapes, and not only that, you can actually find more 3D content, I'll talk about that later, how to bring in your own 3D models from other places. But in this case what I want to do is just grab a couple of elements, I want to grab this gift bag, dropping it right in the center, just like that. See it right there? I'm going to grab this food pouch, dropping that in there like that, and just really start combining some of these together. Coffee cup as well, dropping it right in here. And what I'm going to be making is basically some branding for a coffee company. So, I can see already that there are three assets, and they're pre...
tty large. I want to be able to navigate this scene, and there's two groups of tools that will allow you to not only navigate the scene, but manipulate 3D objects. So right up here at the top, these options are for manipulating the object. So yes I can move it, right? Using these controls, or even freely if I want to. Scaling it for instance, scaling it down from the center, making it larger or smaller. Rotating it, which you're not really tell a whole lot when I rotate it this way, but I can rotate it more vertically, you can see what happens, I'll just do command Z. And then what we have down here are for manipulating the entire scene, so this is really going to allow me to orbit around these 3 objects, I can pan around them, and then use the dolly tool for some zooming in and zooming out, okay? So, again object controls, and these right down here, they look similar, but these are actually sort of your seeing controls. So let's check these out, moving around this whole scene. Let's pan around, we definitely need to zoom out, so selecting that dolly tool, click and drag. And as you get more comfortable, you'll start to get used to these tools using the shortcuts, so the orbit tool is really just going to bey key 1, okay, we have the number 2 for the hand tool, and then number 3, really easy to remember, 1, 2, and 3, on down the line. Okay, but while you're actually manipulating these models, you wanna be able to frame up the scene accordingly. So, to see everything in the scene, I can come right up here, zoom to fit selection. Okay, and clicking that I can see everything within that current view. So that's typically what I'll use a lot, and I'll get used to sort of panning around by maybe using the number 2 key, zooming in as well, and then even rotating using the number 1 key, and then I'm just clicking and dragging, okay? So, I'm going to work on getting this setup a little better, zooming out, adjusting some of these elements, rotating, and moving to create a nice composition. Again, holding down the 2 key, and then getting it about right there. I like this, I like this view, I feel like this is a pretty good setup, I'm going to be adding branding to this and a background and all that fun stuff, but I like this view a lot, and what's great is I can actually bookmark this view, so right over here, clicking on that camera, see right here? This is, could be the sort of front, potentially the final view, right? So that's what I would add there. So now anytime I decide to, you know, come over here and make sure maybe this bag is gonna be maybe a little bit further back. I can get a better view here and then always jump back to the front final view, is how I'd typically work. Now I encourage you to peruse all these models in the modeling section, you can also browse Adobe stock, selecting that, it'll jump out to Adobe stock, this is just a great place to get models. Really it's just set to 3D, and there's nothing in this field. But what I've actually noticed is you can license images, and then there are also images that are available for free as well. So this is always a good place to not only checkout models, but also lights and materials. So from there I can maybe find a model that I wanna use, even if it's say for instance, this coffee cup, I'm already noticing that, guess what it is? Free, and I can license and save it to my particular creative cloud library. Okay, so you're not going to have these same folders, but all you need to do is make your own library like I'm doing now. I'll just call this my project just like that, empty creative cloud library, it's being synced to that creative cloud library, and will be available to me as I go back in here. Where is it? Right down here, creative cloud libraries. It's just a matter of selecting my project. And there it is being synced right now, okay. Well what is this really, sort of the actual file type, is an OBJ. An OBJ is just your general 3D object file that can not only include the 3D object itself, but also materials. Okay, so with this white coffee cup, you can drop it right here in the center. And now I have that model as well. So you can see it's pretty easy working with models, essentially selecting what you want, just be mindful of what you're controlling, whether you're controlling the model or the scene, and saving that view, but from there really what I want to do is to start adding some materials and some backgrounds to this project.
Ratings and Reviews
Student Work
Related Classes
Graphic Design