Adding Custom Images and Backgrounds
Lesson 4 from: Creating Projects in Adobe Dimension CC 1.0Paul Trani
Adding Custom Images and Backgrounds
Lesson 4 from: Creating Projects in Adobe Dimension CC 1.0Paul Trani
Lesson Info
4. Adding Custom Images and Backgrounds
Lessons
Class Introduction: Introducing Adobe Dimension CC
04:44 2Adding and Manipulating 3D Models
06:38 3Adding Materials and a Background
10:30 4Adding Custom Images and Backgrounds
10:42 5Matching Scenes with Perspective, Lighting, and Reflections
08:03 6Creative Design using Backgrounds, Models and Lights
08:36 7Creative Design using Imported Models
11:10 8Rendering and Editing in Photoshop
04:15Lesson Info
Adding Custom Images and Backgrounds
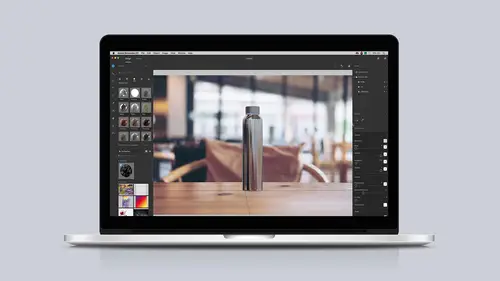
So what I have right now are really just a bunch of stock textures and just a general background image but I want to add my own branding to all of these various items here as well as change the background. I want to make it my own. There's a couple ways to do that. This is really the easiest, in fact I'm gonna grab an Illustrator logo, which is really where all logos seem to start out. Here I am in Illustrator and this is the company, Luna solar roasted coffee. See all these vectors, really straightforward. I'm gonna use my libraries panel. So to recap this model actually came from Adobe Stock, was a free model and now it's in there but all I need to do is take this, drop it right in here and I'll sync this logo, right just like that, okay? So I can go back into Dimension, open up my Creative Cloud library panel. Make sure I'm that same library, we can see it right here. There it is, my project, and I can take this Luna logo and drop it right on this bag here. There it is and I can jus...
t kinda pan around. I'm not going to worry to much about the background because I'm going to add a background to this in a second anyway but I can start to kinda get a better view of this but it's nice that once I apply any sort of decal, as it's known, I can then start to reposition it accordingly. See how it's wrapping around the side is what's happening and not only that I can decide to potentially resize this. I'm gonna hold on the Shift key, just kinda shrink that down like that, okay? If I decided to rotate it, I'd use that option right there. But look at what's happening over in my properties panel. See what's changing over there? It's like, oh I kinda what this turned to the side, oh did I, maybe want to straighten it back up? Right over here I'm basically manipulating all of these numbers. So I could just zero that out just like that. Sure enough it's nice and straight and that's how I can start to add these decals. I'm gonna do this a couple more times because this is what I just do with everything is drop everything in my library including bitmap graphics. So here I am back in Illustrator. I'll just close that file, don't really need that one either but there's other graphics in here, so I'll just tile all of these graphics, right? So this library panel gets to be pretty important. Might end up using this, so I'll drop that in here. This is actually for my to-go coffee cup right here, can drop that right there, okay? Here's another burst, just putting in various graphics in here, these happen to be all vector in this case but I wanna do some fun things in here, this happens to be just a white logo, so really some interesting things I can do and this one right here, dropping it in here, I'm doing this all in Illustrator. Again, I want some bitmap graphics as well. I can open up Photoshop and I have a number of graphics in here. A number of graphics in here that I can just drop into my library and I actually can't add gradients as a color so what I would do is actually just make my own gradient in Photoshop and bring it into my library panel. So here I am in Photoshop, a bunch of bitmap graphics, just images, all I need to do is take those images, drag them into that same library project that I'm dealing with, I just called it my project but this is how I start to sync assets. These are automatically going to be in Adobe Dimension which is nice, I can actually even just grab the layer and bring it in. I'm not gonna worry too much about the names of these but I'm basically gonna be switching between these different backgrounds to find the ones that I like and these gradients, I'm actually gonna bring in. Adobe Dimension won't really allow you to add gradients but I kind of want that as part of my design, so that's why these are also bitmaps as well. So we're just gonna add a bunch of fun colors. That looks pretty good. Those are being synced right now. These are just flat graphics, vector graphics, let's go into Adobe Dimension, here we are, that's mapped, that's looking good, remember, I also have my wood table scene that I can click back to. I can grab all those elements, dropping that on as a decal as it's known so it doesn't replace that material, it actually will add it as a decal, I can see, thank you very much, right over here. Scaling that down. Something a little bit more appropriate. Taking this nice burst, adding it to the coffee cup, and then let's take a look at that gift bag which will be pretty interesting. So let's just move this over here, just a nice design element in this case. Because I'm thinking I would like to change this. So this is really where we get into really customizing these materials, so I'm actually gonna start maybe with a plastic material because for this brand, let's just undo that by the way, what just happened is I applied it to everything and I need to apply it just to the bags, so be mindful of what's selected, just the bag is selected. But what I want to do is I wanna create a really like shiny bag that is gonna be both matte and glossy so that's kind of the idea. So I'm gonna use this plastic, drop it on there, so that is a plastic material, I can kind of rotate around, you can see it has a little bit of shine, and what I wanna do at this point is grab this artwork and I actually wanna load it into this metallic texture right over here, so notice it says select a file, well, hey, you know what? I just want it to be this burst. So, this is gonna be partially metallic and then partially matte, so, we'll just wait for that to load in. There it is loaded in, it's already a pretty cool design element and it is actually, you can see how shiny it is on that side at least but I can also adjust this as well so clicking through here, I can see the texture is added, scrolling down, right down here, the very bottom, these are my textures, so if I want something with a very fine grain, I make sure it repeats a lot and it's gonna be smaller and my offsets as well so this is pretty large, so I wanna just scrub on that number and you can see, look, oh hey, it's repeating, I like that how it's repeating a lot like that, I maybe wanna rotate it, I'm rotating it, and just creating a cool design element for this bag. It's fantastic but going beyond that I still need to make sure I have the branding for it so, I was playing with the material, on top of that material can be you guessed it a decal, dropping that on, that's our logo made in Illustrator, dropping it right on there and just being mindful of, you know, selecting it, again, I'm using my selection tool for the object and then just scaling it down and getting something nice and neat and elegant for this brand. Last thing I'm gonna do is actually add a new background 'cause it's all about customizing this to your liking and I could use, as I take a look right over here, all of these various backgrounds, I can browse for other backgrounds out on Adobe Stock but I happen to have those, some backgrounds right in here and my current project, so I can start to add some of these if I want to as well. So, in this case, I can just grab any one of those, drop it onto the background, it's gonna say hey, I know what you're trying to do, you're trying to match this, we want you to, you know, make sure this works for your scene so let's map everything accordingly. Environment sunlight, perspective, okay. It does that. I'm glad the ratio changed, so I'm gonna show you what happens there but look, you could actually really see how reflective that bag is now but as I've added this in you can see right over here, the canvas size has changed we can see the size and that's where that's coming from, these are scrubby numbers, so I can kind of zoom in but essentially I'm making this canvas size larger, the width, and this is more along the lines of what I wanna go for. We could see how metallic and shiny everything is, I can change that accordingly, but I can even also just kind of show you how metallic it is just like that and adjust this. From here I can take a look also at the sunlight just so you can see how that is actually being mapped and I can change the sunlight. If anything kinda gets a little off, it's typically gonna be the sunlight 'cause that's kind of hard to tell when it comes to photos but you could see how I changed it. So, from there, let's just do one final sort of like zoom in and adjust like that and this is more along the lines of what I'm going for. Real world environment using my own background or one that I got from stock as well as taking images whether they came from Illustrator or Photoshop and applying them as decals on these various 3D objects and I can always render it out or even just keep in mind the render preview right there. The next step is even taking this further by adding reflections, depth of field, and more complex realistic situations you might come across when you're mapping say 2D to 3D.
Ratings and Reviews
Student Work
Related Classes
Graphic Design