Adding Materials and a Background
Lesson 3 from: Creating Projects in Adobe Dimension CC 1.0Paul Trani
Adding Materials and a Background
Lesson 3 from: Creating Projects in Adobe Dimension CC 1.0Paul Trani
Lessons
Class Introduction: Introducing Adobe Dimension CC
04:44 2Adding and Manipulating 3D Models
06:38 3Adding Materials and a Background
10:30 4Adding Custom Images and Backgrounds
10:42 5Matching Scenes with Perspective, Lighting, and Reflections
08:03 6Creative Design using Backgrounds, Models and Lights
08:36 7Creative Design using Imported Models
11:10 8Rendering and Editing in Photoshop
04:15Lesson Info
Adding Materials and a Background
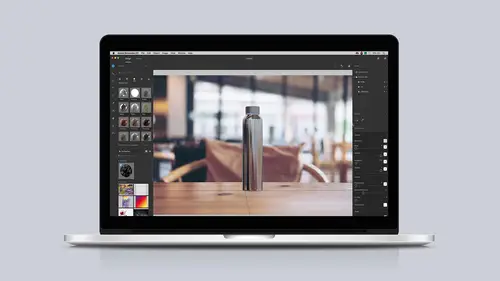
Now things are really going to start coming to life as I start adding materials and images, basically backgrounds to the scene, because obviously it's kind of boring right now. It's very white. So how can we do that? It's really easy. Right in here, there's a lot of various materials baked right into Adobe Dimension. We can see them down here. We can scroll through everything from glass to granite to solid colors, and you can get kind of shiny as well. So we could kind of take a look at some of this. In fact, I can take any one of these materials, and I like this metal. I'm thinking about applying that to this. This is basically our bag of coffee beans. I can click and drag that right over there. Sure enough, it added it, and I don't know if you noticed this change on the right side. It added metal to the food pouch, okay? So you can start to see this resembles sort of like a layers panel. That's what the scene panel does. So with metal selected, I can look down here. Sure enough, yeah...
. Here are all the various properties of this metal pouch. So I can change some of these properties, and this is typically what you'll do, is you'll come in here, and you'll start changing some of these properties until you see something visibly change. But what you can also do is just roll over any one of these words, and this will tell you, oh, this index of refraction is what happens as that light refracts as it passes through this if it was glass. It's not glass, but I now know what that is. So I love the fact that we have these little tips as you roll over these items. I will make it, maybe scrolling up, maybe a little rough. It's going to make it a little more matte. But let's go ahead and take a look. As I use my orbit tool, I can kind of pan around, and you can see sure enough it is metal. It is shiny and wonderful just like that. Well, guess what? Some more is happening in here. If I even select this to go coffee cup, we could see it over here. It actually already has potentially a couple textures applied to it, so look. Cup material and then the lid material. So there's some already applied to it. For this lid, I actually want it to be white, but there's a chance that I might want to make it more, say, more metallic in this case, just kind of cranking that up a little bit, just basically making it a little more shiny, and I can take that roughness down as well. But I'm actually changing those properties, okay, just like so, getting this visually the way I want it to look. But a lot of these reflections and things are going to change as soon as I start adding lights and backgrounds, but this is a good place to begin. I'm going to select this cup right down here, and I'm thinking for this cup, the material, guess what, I just want it to be a solid color. I could use one of them over here, or I could just click right here on the base color and change the color of this any way I want. I actually want it to match that bag, so selecting the sample color, click right there, and that's what I want in this case. So far, so good. I'm going to also take a look, and this bag, I want this to be kind of like any typical sort of brown bag, like that cardboardy type fleck material. So I would come in here and peruse this and see if that's available in here as well. And again, I could try one of these. How does granite look? Well, what about this wicker? How does the wicker look? Not quite, but sure enough, here it is. There's this cardboard material right there, and it looks fantastic. I could always zoom in on that. You could see that nice texture right there. And if I take a look right over here, being mindful, by the way, it happens to be selected. We are inside the gift bag. We're actually on the bag itself. Cardboard paper is what's selected, okay? But I can see the base color. Unlike adjusting the color, there's actually an image associated with that bag. So that's what's going on there. And again, I can go through and start changing some of these other properties as well. All right, so far so good, and I'm thinking I just want to add a background, and really watch these materials change as I add a background. So right over here, if you go to images in the assets panel, you'll see a number of images that are already baked in. So I could do this with a couple images just for fun. City backdrop, why not. Sure enough, it says, hey, do you want to match the environment, the sunlight, the camera perspective? Yeah, let's do that. These are going to be just monstrous products at this point, but it's really cool. Look, you could see that it actually did. It's picking up that environment. See how this metallic bag looks blue? It's actually reflecting that scene. In fact, look right over here. I'll even select this food pouch. Remember that metal right in here? The metallic is turned all the way up. When I drop any image on the background, it makes it part of the environment. So selecting the environment right over here, these are the settings that were added. Said yeah, it added it to the background. Guess what else? It made it the environment light. If I turn this off, for instance, there's nothing to reflect, so it's just black. Turning that on. It said it matched the sunlight. Oh, guess what? Right down here, it tries to sense the light from that flat photo, which is really impressive, but for the sunlight I can come in here and start to adjust the sunlight, sort of the rotation. Where's the sun coming from? How high is it in the sky? So if I want it to come up from up above a little bit more, I can adjust accordingly. But let's get a real scene in there. I think it's awesome how you can actually match a flat photo and pick up on the depth of the photo. Something more realistic might be this table, so I will drop that in. I can see that adjust accordingly. Not only that, I have one more that I can put in here. Again, this is sort of a more real world scenario. This is going to help me sell this in to the client if I'm doing packaging for them. I also have this wood table right here again that I could drop in. This wood table is nice, because what I'd want to do is make sure my shadows here match the shadow of this flat object right here. So that's the case, just using some of these tools, just kind of dollying out. Adjusting the horizon is this tool here, and this is a matter of adjusting the horizon line, but that's what's being sensed when it says hey, you know what, match the perspective. It's changing that horizon line, too. So again, positioning that like so, and it's just a matter of manipulating this accordingly to get it just right. Let's rotate this a little bit. And you'll notice this kind of extreme perspective that it's trying to sense from these angles. That's actually kind of partially the dolly tool, okay? So you're building this extreme. See how it's nice and flat as I zoom out? If I take a look right in here with the environment selected, it's my camera perspective. So any tool that you use that's on the left side is actually manipulating values on the right hand side. And you can see your field of view is what's changing at that point. So just keep that in mind. Sometimes you might actually have to make the objects larger like I might have to do in this case. To get this took right, I could select all of these, scale them all up, and then adjust to get this to look correct. And again, this horizon tool. Let's pan it down, making these adjustments. Almost there. Again, just lots of little tweaking in this case as I start to move this around. And let's actually bring this bag right here up some. Once I've matched the perspective in this case, I can make sure I save the view right up here. So this is actually for the wood table scene in this case like that. And lastly, I'm going to just change the sunlight at this point, making sure the rotation is coming from the right point, because we could see the shadow from that plant, and we'll make sure the height is correct as well, bringing that in like that. And that's a good place to start. Obviously, you could use these stock images. Later on, I could also show you how to bring in your own backgrounds, and you can go with realistic versus some more abstract ones. At this point, all I'd want to do is render it, but you don't need to render every time. In fact, what typically you might have open is this little render preview. So as you work, you'll have this render preview, which will, of course, render out what you're currently working on. You could even potentially sort of go full screen with this or at least cover the main area and watch this render out as well, just to get an idea of how this will look. But really what I want to do at this point is add my own custom images, maybe my own custom background, and definitely some of my own artwork to these items, and that's my next step here.
Ratings and Reviews
Student Work
Related Classes
Graphic Design