Creative Design using Imported Models
Lesson 7 from: Creating Projects in Adobe Dimension CC 1.0Paul Trani
Creative Design using Imported Models
Lesson 7 from: Creating Projects in Adobe Dimension CC 1.0Paul Trani
Lesson Info
7. Creative Design using Imported Models
Lessons
Class Introduction: Introducing Adobe Dimension CC
04:44 2Adding and Manipulating 3D Models
06:38 3Adding Materials and a Background
10:30 4Adding Custom Images and Backgrounds
10:42 5Matching Scenes with Perspective, Lighting, and Reflections
08:03 6Creative Design using Backgrounds, Models and Lights
08:36 7Creative Design using Imported Models
11:10 8Rendering and Editing in Photoshop
04:15Lesson Info
Creative Design using Imported Models
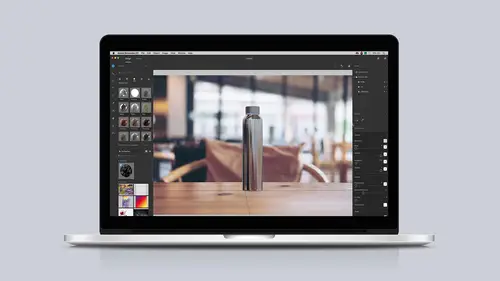
It really gets fun when you start importing models from other places. I want to show where you can find other models as well as how to make 3D models very easily in Photoshop. So this is my current design, and that's what I can use. I'm thinking it could use still some more coffee elements like coffee beans, whatever the case may be, and I could search right down here, Adobe Stock, just by selecting that button down at the bottom of that assets panel, and I can see a number of assets right in here. So this is quite a bit happening in here, everything from materials as well as 3D objects, and there's even lighting kits right in here as well. So check this out. There are a number, in fact, I can see this one right here. There's this splash that I actually already have a couple of them. So you could purchase them here. In fact, if I license this, I can license it and save it directly to my library, and I could use that as just a fun splash. So that's one place to get one. In fact, I have ...
this coffee cup. It happened to be free, so I encourage you to use these. I have a number of them out here. Let's go beyond that, okay? In fact, let me just show you real fast right in here. We'll go beyond just bringing in models from Adobe Stock, but there it is. So dropping this in. It's way back there in the background. I can go ahead and add whatever material I want to it and make sure it's the right size. And this is probably a big thing that happens when you start to import 3D models, is the dimensions are going to be different. But you can see that splash right there in the background just adds a fun aspect to it. And from here, I will just make sure it has a fun material attached to it as well. Going beyond that, Photoshop is what Adobe Dimension will render to. It will make these PSD files. So chances are you have Photoshop. Photoshop has a lot in it. In fact, in Photoshop, you can go to 3D, okay? From here, you can get more content. So I'm pointing this out as a resource for you, because there's lots of links to other sites, TurboSquid, Thingiverse is good, Mixamo. In fact, TurboSquid is actually pretty popular. And my tip for you is if I wanted to search for coffee bean or whatever the case may be, I can actually sort by price, and just change this to zero and zero. So that's how I can find free models. So you can see some of them here. The big thing to remember is what Adobe Dimension is going to import is this file type, OBJ, an object file, sort of a general, universal file type. And you can see some of those coffee beans right there. So use this page as a resource, and in fact, I've already downloaded those coffee beans, and I can bring them in. I'll show you what that looks like, but I also want to make some 3D models in Photoshop, which I think would be really fun. So just to step back, in Dimension, I want to bring in a coffee bean or any 3D model, here it is, 3D model. Going out to, say for instance this assets folder, I could see the coffee bean. And noted that when you bring in some assets, they might already have a material as well, but I can bring in that element to help enhance this project. Okay, it brought it in. First thing I want to do is I actually want to save this final view, because I like this view. But I also don't know where it put the item that just got imported. It's like, hey, it's somewhere. I know it's actually right here in my scene panel. Well, I can click this button up at the top, zoom to fit selection. Oh, there it is. If I use the dolly tool, I can kind of zoom out and see where that element is and move it into place, okay? So that's typically the way you would work. I can always go back to that final view as I select it. There's that coffee bean. And I can add as many of these as I want to, but I want to show you how you can also make 3D models, because that's really super fun when it comes to using Photoshop and Dimension together. So sizing that down, there's our fun coffee bean. Going back into Photoshop, and you can do this with a logo or any type or any sort of shape. In this case, I just want to add rise and shine to the background and just do some fun things with it. So selecting this type, the rise and, then opening up my 3D panel, which is right here, and right over here what I want to do with it is I want to extrude it. It's that simple. Select and create. As a designer, you'll probably appreciate this. You'll probably want to use type a lot, and you could see how my 3D panel changes. Here's my rise and, okay? Just like in Adobe Dimension, I want to be mindful of what's selected. I can select the current view, and sure enough, you can see what happened. It looks like it did something funky there. For the most part, it's kind of weird. But what's nice is if there's anything that you want to change, you could select that layer and select edit source, right? So if I don't want that weird ampersand, we could do A-N-D. Chances are if you misspell something, that's going to solve the problem. Everything looks great, okay? And from here, I could take this layer and 3D. Let's export this 3D layer as an OBJ, because I know Dimension accepts OBJs. And if there was a texture mapped to this, I could slap a texture on there. It will include it as well, but I'm just going to select okay, put it right in here. Rise and OBJ done, and that is good to go. Do the same thing with the word shine. 3D extrusion, the same idea. There it is, and now I have two words in 3D that I can then bring into Dimension. So this makes it really fun, doing this with any sort of phrase that I want to make 3D, and use that to bring my scene to life. So from here, I'll zoom out. You get the idea, but this is really going to help drive home this project. There it is, rise and. Let's open that up. Just as expected, it's absolutely huge, but it looks great. I love it with this lighting. Let's import the other model, which is shine. The reason I made them separate is I want to be able to skew them differently, and there they are. So now it's just fun being able to play with these two. So I can move that, take this rise text, rotate it that way. Since they're both imported now, I can select them both as well. I can click on them here, and then holding down my shift key selecting them both and then scaling them down. Again, everything is really small, and that's typically what happens when you're bringing in models from all these other sources. You have no idea exactly how large it is or where they come in, so it's good to scale them down, and it's good to be mindful of the properties panel. Here's the position, the Y position. Look at how high it is. Guess what? We could easily just bring that down to the bottom by typing in zero, enter, and then press this button right up here, zoom to fit selection. Boom, there we are. And now I can start to still adjust this a little bit more appropriately as I shrink this down and have some fun with it. The reason it's getting cut is because there's still a background there. That is fine by me, because I'm just going to move everything up and into position, having some fun with this text, again, created just a moment ago in Photoshop. And I'm still using my shortcut keys as well. So notice how I'm kind of panning around? I'm holding down the two key. That allows me to pan around using the hand, similar to say, for instance, Photoshop and Illustrator. Selecting this text, almost done with this. Shrinking this content down and moving this into place. Now remember, I actually have the views saved. So right up here, these are my camera bookmarks. So now I can go to this final view. Obviously, it's pretty close compared to what I just added, but I can easily zoom out and start to position everything accordingly. Move that down, and make this layout a little bit more appropriate for what I'm doing, moving this content in. Another thing you can do is actually just drop a logo in the background as your background, but this seems to work out pretty well. I have not only stock elements from Adobe Dimension off to the side here, I also have elements that were imported, such as this coffee bean, and then text that I actually created in Photoshop. So from here, I could easily just render this and see how this looks and begin to tweak it some more to get it just right for this particular project. But really, once I have this all in place with a perspective and everything, I can render this out and then bring that into Photoshop, and that's really my next step for this project.
Ratings and Reviews
Student Work
Related Classes
Graphic Design