Matching Scenes with Perspective, Lighting, and Reflections
Lesson 5 from: Creating Projects in Adobe Dimension CC 1.0Paul Trani
Matching Scenes with Perspective, Lighting, and Reflections
Lesson 5 from: Creating Projects in Adobe Dimension CC 1.0Paul Trani
Lesson Info
5. Matching Scenes with Perspective, Lighting, and Reflections
Lessons
Class Introduction: Introducing Adobe Dimension CC
04:44 2Adding and Manipulating 3D Models
06:38 3Adding Materials and a Background
10:30 4Adding Custom Images and Backgrounds
10:42 5Matching Scenes with Perspective, Lighting, and Reflections
08:03 6Creative Design using Backgrounds, Models and Lights
08:36 7Creative Design using Imported Models
11:10 8Rendering and Editing in Photoshop
04:15Lesson Info
Matching Scenes with Perspective, Lighting, and Reflections
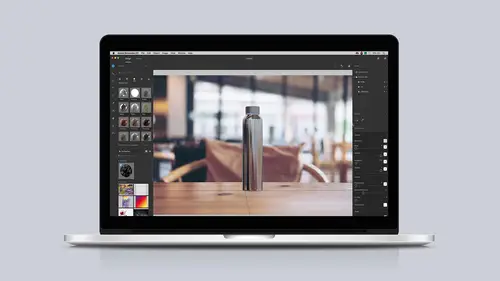
Now let's dive into some more complex situations. We're matching the perspective, as well as adding reflections, and even depth of field. How can you match that content to come up with something interesting? In fact, if I take a look, I will actually open up Photoshop because I happen to have a couple images. This obviously has shallow depth of field. So, in my project, you can see it's just this background. If I take a look at even this one right here, this table, look at this, look at this reflection. Let's take a look at those scenarios and tackle them right now. In fact, you can see them right over here in my project. Starting with the reflection. Grab this background, let's drop it right in there, saying hey, you know what, I'll try to match the perspective. It might not, 'cause it might not be a solid line there. It's gonna try to, ready? Click okay. Great with the light. Hey, that actually worked out pretty, pretty well. I'm gonna adjust this. Panning down, but really, the big i...
ssue here, as I move this, I wanna actually put this right on the table. And this is the situation I'm dealing with. And I can kind of angle it, tweak it a little bit because you are tricking the eye, ultimately. So, it might not be truly in perspective, but you might need to exaggerate that a little bit, which is why I adjusted the perspective. So, the big issue is the reflection right down here. I can select Environment, and off to the side, I can see the Environment Light and some of those other things that have been added. But let's take a look at the Ground Plane right in here. Sure enough, there is the shadow being cast, so that's what the Ground Plane is. If I turn that off, I eliminate the shadow. I wanna increase the reflection, so I'll crank that up, and you'll notice nothing is really happening at this point, but my goal is to make it match this vase right here. So, I'm not gonna worry about the roughness, but I'm gonna increase the opacity up about three quarters of the way. You're not necessarily seeing this, but I will when I render it. In fact, I'll even just do a render preview right now. And that might happen sometimes. When it's coming to 3D, it's trying to simulate everything happening, but it doesn't wanna slow up your workflow, so when it comes to these reflections, you will have to render it. So, as that comes through, the lighting is matched, perspective looks pretty good, and we'll start to see those reflections as well. So you can see, in just this render preview alone, you can already see the reflection. And this is what you'd wanna do is do your render previews, adjust any of the setting that you need to. In fact, I can increase the opacity of this 'cause this actually looks more like 100% opaque, so I could always minimize that. That will render. Coming back down here, I can increase that accordingly, and always preview that as well. But I'm gonna go beyond that. I like how you're able to add reflections. Obviously, I can add more light to this. Let's take another scenario into account. Even if I wanted to add a different background, dropping in that different background. You'll have these backgrounds that might be offset. Notice how this is kind of a little wonky, right? It's kind of shifted a little bit. I'd wanna make sure that matches as well, so with that done, clicking okay, it's gonna match it. And the angle of that table is really the big thing that needs help. So, that being said, right up here, selecting this, you guessed it, this horizon line, as soon as I actually, let me actually adjust this a little more. Move this up. And make it a little larger, like that. Selecting the horizon line, I can match that angle like so if I happen to have a tilted case right here. Going beyond that, right down here, this tabletop counter, I'm gonna drop this in now, and this is dealing with depth of field. Of course, it's gonna be really blurry in the background. There's still a little bit of blur on the table as well. So, I'm gonna match the perspective and everything. It's gonna adjust accordingly, and now I'm gonna take a look at what we have going on here, which again, this scenario, even if this bag is technically, it might be back a little bit further, and this bag right here might be up a little bit closer to the camera. And notice how it starts to get blurry right down here. Well, I want to account for that, and let's just tilt this. So we have this scenario where we really wanna just focus on this coffee cup, okay, and simulate this situation where we have this depth of field. So, selecting Environment, just kind of closing Canvas, Environment Light, and Ground Plane, which I've already talked about, right down here is Depth of Field. So, we can actually turn this on. This gives me a focus range and then a blur amount. And honestly, I have no idea what 40 is. What is 40? I have no idea. Guess what, I don't need to worry about that because I can literally just set the focus point. As I click on that, let's focus right here on this coffee cup, and now that focus range is 53.2. In fact, as I roll over that, you can see it's telling me what I can do. I can increase this blurriness a little bit more just to make it a little bit more drastic for our preview as we take a look. And all I need in this case is a render preview. It's not the full render, so it might be a little pixelated, but this is the idea I'm going for, simulating that depth. 'Cause otherwise, what I'd have to do is, you know, simulate this in Photoshop by adding my own blurs. So here it is, this is the render preview. You can see it looks pretty good. You can already see that depth right here. See how it's sharp on this side and then blurs out definitely that background right there? Might have it a little high, but that's the whole idea with the render previews. I can adjust that accordingly. Same thing with the reflection. I have that cranked way up. But that gives me all the information I need, which is fantastic, taking this blur down, going into the ground plane, and just lowering that reflection opacity. I'll get that little preview right there. You can already tell that it's looking much cleaner in terms of that depth of field. With that said, I'll just go over to Render, and it's gonna render out this particular scene, and we'll see it with that depth of field and the reflections matching that environment. All right, looks like the render is done. It's actually saved to my desktop. You can see it there. In fact, here it is. You can open this up. You can see that depth of field. Again, I can always check that out on its own layer and then see the additional layers, which are really for selection purposes only. That's really the short of how to basically match perspectives, as well as lighting, add reflections, and even deal with depth of field to really match any scenario you're dealing with. And really, next up is to kinda tackle some more creative use of Adobe Dimension.
Ratings and Reviews
Student Work
Related Classes
Graphic Design