Rendering and Editing in Photoshop
Lesson 8 from: Creating Projects in Adobe Dimension CC 1.0Paul Trani
Rendering and Editing in Photoshop
Lesson 8 from: Creating Projects in Adobe Dimension CC 1.0Paul Trani
Lesson Info
8. Rendering and Editing in Photoshop
Lessons
Class Introduction: Introducing Adobe Dimension CC
04:44 2Adding and Manipulating 3D Models
06:38 3Adding Materials and a Background
10:30 4Adding Custom Images and Backgrounds
10:42 5Matching Scenes with Perspective, Lighting, and Reflections
08:03 6Creative Design using Backgrounds, Models and Lights
08:36 7Creative Design using Imported Models
11:10 8Rendering and Editing in Photoshop
04:15Lesson Info
Rendering and Editing in Photoshop
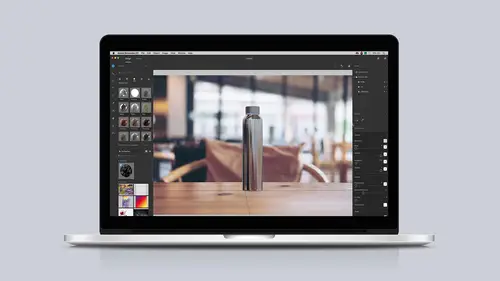
Now, we're getting down to our final segment. This is really fun. It's the rendering. It does take time, but it's cool seeing your results. And what's happening right now is this is just the render preview. You can already see how this looks. We can start to see some reflection in the transparency here. This is exactly what I want. I just need to be able to render this out and bring it into Photoshop. So if that's looking good, I can minimize that render preview and go right over here, you guessed it, to this render tab. So that will shift over here, and at this point, I could do a couple different types of renders. So I can go sort of low, medium, and fast. Of course, the high quality one's gonna take a while. Then, I can also sort of render out the different type of formats. I'm just doing 16 bit, and just so you know, there's more that meets the eye when I render this, and it's gonna give me more layers than you think. For this case, I'm just gonna stick with a low, fast render, and...
your rendering times may vary. I could change the export path to my desktop, and I'll just call it render. Quite frankly, that's where that PSD will go. We'll click render, and it will do its job. I don't have to watch it. This is my chance to actually go get a cup of coffee right now, I'd say. All right, here it is. Looks like it's rendered out. I have already saved it to my desktop, and I can open it directly in Photoshop. Clicking right there, we can see the layout right here. If we take a closer look over here in the layers panel, we can see how this is put together. So sure enough, I have that background, and then, I have all of these elements on a separate layer. Okay, you'll also notice this additional layers folder. This is mainly for selecting, so you can see the material selection masks, object selection masks, so I'll turn that off. You can see it's identified the different objects. So if I do decide that I happen to want to just select this part of the strip to brighten it up, I obviously can do that. It gives me those color blocks, and there's just the depth map information. So these are fun elements that you can deal with. In this case, for the depth map, I can play with the different layer blend modes. But overall, I probably wanna work on the background a little bit right here. Background is actually working out pretty well, but maybe I wanna simplify it. As I open up this, I can drop in, say, for instance, this gradient into the background, because now that it's rendered out, I'm thinking, "Well, how is this looking? "It looks like it's pretty, "in this case, pretty pink." And that's actually not bad, but I've dropped that in there. I can change that background. I have that layered accordingly. In fact, I could even duplicate this layer and put this on top and really do everything that Photoshop can do, right? So I'd actually bring this to the top, and just using some shortcut keys, I'm essentially diving into the different layer modes. I can change this to lighten, and it will kind of like normalize all the colors. And I can see how this looks as I start to change and customize this any way I want. So again, on, off, you can see it kind of takes the edge off and kind of melds it better with the background. But the great thing is, once it's in Photoshop, I can play with this all I want using these layers and the additional layers, all thanks to Adobe Dimension, really. It allows me to composite 3D with 2D sort of flat images to create whatever I want, whether it's a realistic scene or something fun and creative like this. Hopefully, you've enjoyed watching this, and thank you so much for watching.
Ratings and Reviews
Student Work
Related Classes
Graphic Design