Creating a Mask Layer Drop Shadow
Lesson 3 from: Creating Realistic Shadows In PhotoshopJason Hoppe
Creating a Mask Layer Drop Shadow
Lesson 3 from: Creating Realistic Shadows In PhotoshopJason Hoppe
Lesson Info
3. Creating a Mask Layer Drop Shadow
Lessons
Floating Object Shadows and Anchored Objects
10:02 2Basic Shadows Using a Paint Brush and Layers
05:26 3Creating a Mask Layer Drop Shadow
06:50 4Using Highlights & Shadows to Create Dimension
05:14 5Using Warp and Transform
04:32 6Drop Shadow Effect on Real Objects
17:37 7Creating a Dimensional Object
04:15 8Using Drop Shadow Layer Effect
09:09Lesson Info
Creating a Mask Layer Drop Shadow
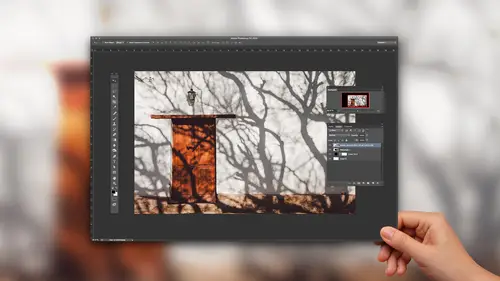
onto the best part bacon, because if you know anything about my classes, they always have to include bacon always. So I want to do a drop shadow on this piece of bacon, and what I've done here is have done something slightly different. This file actually has a mask on it, and with all of the files that I dio, I always spend the time to. You either break him out of the background to put a mask on it. If you have an object that's on a transparent background, you can always command clicked on the thumbnail. And it's going to select everything on that layer, which forms a perfect basis of your object to fill for your drop shadow. If you ever see something with a mask on it, you can do the exact same thing. You can go over to your mask layer, hold down your command key and command, click on your mask layer, and that's also gonna load this election because, most likely, your mask started office the selection so anything it's on a transparent background or any mask command. Click on the thumb...
nail and you've got yourself your selection, so I would like to add some shadow to this bacon. And we know that bacon is Ripley. So it's gonna be closer to the surface in some areas and higher from the plate and others quicker for you to grab onto. So now that I have my selection, I'm going to command click on my new layer, and that's going to give me my layer right below. And that's gonna be my shadow. Turn off my bacon just so we can see what's going on. And I can choose a nice, dark, rich, warm bacon e color and I'm going toe option delete and fill that on my layer right there. Command D for D Select. Turn my bacon back on and I'm gonna select my shadow layer with my move tool. Now, clearly, this looks completely fake, okay? And but that's fine. We're gonna make it look real. This is real bacon, by the way. So I'm gonna take and I'm going to go into the filter menu, and I'm going to perform a blur on this again. And I don't want that much of a blur because I'm gonna have something that's going to be fairly close to the surface here. something like that. I can always go back. And I can always blur this later, a little bit more. But now comes the fun part. This as I call his drop shadow in a can because the drop shadow matches the absolute perfect shape of the whole thing. And it's like, Okay, clearly this doesn't work. So I'm gonna zoom in on this right here, and I'm gonna have a little bit of fun with this. So we know that bacon has ripples. And one of the ways we can show an object closer to the surface is to bring the shadow slightly closer into the object. Really Quite simple. I know a lot of people are saying cheese. Why didn't I think of that when it's like because you wanted to take this class? That's why So when I go in, I'm actually going to use my eraser tool here because I'm going to do one of the cardinal stands, and I'm actually going to destroy my drop shadow. Later in this class, we're gonna show you how to go ahead and work with this so it's nondestructive, which I always encourage people to dio. So I'm going to have a smaller brush here, and this is my eraser tool. So I've got my eraser, and as I go through here, I'm going to work with this and I noticed some of these areas that are closer to the edge. I'm just gonna take my eraser, and I'm just gonna race a little bit, okay? And I can kind of make this up as I go. And as I start seeing these places that are a little bit closer to my plate right there and again, I'm just kind of making this up. I can go through here and I can create much mawr of a realistic drop shadow effect. Now, this is very random. And if you specifically see larger in dense, you could go in a fair amount right here. But what's cool with this is that when you get done with this, you can actually have a fairly realistic drop Shadow here if you want to have something of nonconforming, okay? And you kind of decide how this is going to look by kind of taking pieces away, adding pieces to this as well. You don't want something to uniform either. And so in the end, Maybe I've got lots of shadow there. Maybe I have very little shadow there because that gets kind of close to the edge right there. And then, of course, they just go around and make sure that there's no little shadows peeking out in areas that I don't want. And if you zoom out a little bit on there, see, that's where it is. And then I always kind of tuck it back in a little bit more to give that look and feel. This is a little bit intense, and so I take the opacity and I kind of scrub it back on that layer there to give it a little bit less intensity right there so that we have a little bit more continuity. And I realize that I need to go in and kind of smooth that out a little bit, going to give it a little bit more realistic looking feel with that, if for some reason you want to add some more back in, you go back to your brush tool and you can paint directly on your shadow layer with a nice, soft edged brush. Not a hard edge, and you can just kind of touch that back in there to kind of add a few of those areas in Go to your eraser tool, erase a little bit and it's really hard to go wrong with making a shadow. You zoom back out and I'm gonna move this up in there a little bit more, maybe through a little bit more of a blur on it right there. And all of a sudden it starts to look fairly realistic. And it's all a matter of where it curves, the closer to your object or the closer to the background. There, the less shadow you see, the higher it lumps up, the more you're going to see. Works out pretty good. Now we're gonna kind of change direction right after this question. All right, Well, first of all, chat rooms are loving the bacon, so thank you for that. I got to bring the bacon. This is the question from Lorien Davy, who says Could you also use the liquefy filter to make the shadow ripple? Absolutely. And what the liquefy filter does is if you select your layer here and I'm gonna turn the bacon off so you could see you could select that layer on the liquefy is an actual filter, so you under liquefy. And when you get your forward warp tool, I know I don't know what that is, but the forward what or how it got the name. I know what it is. The forward warp tool allows you to adjust the brush, and instead of painting or deleting things that actually allows you to kind of, like push it in and pull those areas out of it. The only problem with this is that you don't see it in context with the actual bacon because it's on its own separate layer and then use the liquefy tool. You're only seeing the layer that's being active, so but that is one way of doing it.
Class Materials
Bonus Materials with Purchase
Ratings and Reviews
a Creativelive Student
Loved the basic information Jason provided. Directions were clear and easy to follow. My only suggestion for improving this class would be to demonstrate how to add drop shadow to a person. When you Photoshop a person into a picture how do you make the shadows realistic? Thanks Jason. Now I need to get to work on my shadow practice.
a Creativelive Student
It’s really this simple?! Then why didn’t I figure it out myself? This gem of a course is entertaining, succinct, and clear. Every composite needs consistent and realistic shadows, and this is the answer for creating them. Highly recommended.
a Creativelive Student
I've been struggling with shadows in my fine art portrait work. Jason makes the process easy to understand. I feel like I now know exactly what to do. Highly recommend.