Color Theory & Monitor Calibration
Lesson 24 from: Creating Your Reality with Composite PhotographyRenée Robyn
Color Theory & Monitor Calibration
Lesson 24 from: Creating Your Reality with Composite PhotographyRenée Robyn
Lessons
Class Introduction
09:16 2Why You Should Sketch Your Composite
03:25 3What to Look for in Your Background
10:51 4Posing Your Model
08:23 5Communicate with Your Team
10:34 6Elements of Compositing
31:36 7Learning from Failure & Criticism
12:27 8On-Location Safety Tips
03:42How to Nail the Right Perspective for Your Composite Photo
07:15 10Gauging Light & Exposure On-Location
03:49 11On-Location Posing
18:37 12Cliff Shoot Location Final Thoughts
12:03 13Tips for Culling Images
09:41 14Culling Images Q&A
11:29 15Preparing Your Image for Composite
07:18 16Composite Image Cleanup
11:01 17Adding Background Image to Composite
17:04 18The Difference Between Flow & Opacity
05:41 19Composite Sky Elements
20:58 20Using Curves to Color Match
05:43 21Adding Atmospheric Depth to Image
17:08 22Using Color Efex Pro to Manipulate Color
07:37 23Using the Liquify Tool
05:15 24Color Theory & Monitor Calibration
10:35 25Adding Smoke Layer to Image
07:55 26Selective Sharpening
05:18 27Crop Your Image
02:29 28Goal Setting for Digital Artists
04:39 29Review of Location Composite
01:57 30Understand Angle & Height for Your Base Plate Image
06:15 31Base Plate Focus Point
04:45 32Base Plate Lighting Tips
06:10 33How to Use a Stand-In for Base Plate Image
03:47 34Capture On-Location Base Plate Image
05:57 35Student Positioning Demo
09:05 36Base Plate Sketching
07:33 37On-Location Sky Capture
01:53 38What to Look for in a Base Plate Model
14:30 39Building Composite Model Lighting
10:03 40Composite Model Test Shots for Angle Matching
19:48 41Composite Model Shoot: The Art of Fabric Throwing
13:34 42Composite Model Shoot: Working with Hair
05:45 43Composite Model Shoot: Posing Techniques
21:26 44Composite Test with Final Shot
06:12 45Lighting Setup Overview
04:52 46Culling Model Shoot Images
03:35 47Adjusting Skintone Colors
04:54 48Merging Background with Model
04:54 49How to Mask Hair
09:49 50Creating a Layer Mask with the Brush Tool
14:23 51Creating Shadow Layers
07:10 52Removing Visual Distractions with Stamp Tool
07:11 53Replacing Sky with Layer Mask
05:15 54Drawing Hair Strands and Atmospheric Depth
10:30 55Creating Contrast in Your Composite
12:23 56Adding Atmospheric Elements
06:43 57Using Particle Shop
11:47 58Selective Color Adjustments
07:58 59Cropping, Sharpening, & Final Touches
10:29 60Closing Thoughts
05:52Lesson Info
Color Theory & Monitor Calibration
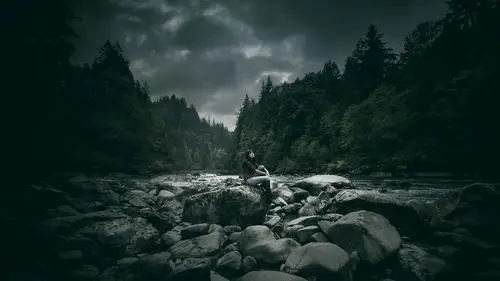
Where do you get inspiration for color in general, what you think is going to be best for the photograph that you're compositing and second question is can you talk a little bit about monitor calibration? Oh yeah, monitor calibration, that's good. Uh, okay, so I'll try to remember that. I'm sure I can remind you. (laughs) So, inspiration for color, if you want to read the most incredible books written on color, one of them, of course, is Joseph Albers' The Interaction of Color. It's a color theory book, it's incredible. It hurts the brain to read, it's raw information, it's not written in a fun way but it's incredible. The next one is Color and Light by James Gurney. He is a photorealistic painter, dude knows his stuff and you wanna get inspired by color, just crack open those books, get curious, ya know? Get curious, get out there, get, ya know, installing and upgrading the brain, right, so that's kind of some ways that you can really get curious about color because as soon as I...
started reading those books, I was like, oh my god, I could do this and I could do this and I could do this and it kind of lit up all these ideas in my head that were stuff that were way off in the category of stuff that I didn't know that I didn't know. So reading and, ya know, taking courses on stuff like that is a great way to upgrade your color. As far as calibrating your monitor, calibrating your monitor is a really, really, really good idea because you're not gonna see what's accurate. What looks good on your screen is not necessarily gonna look good on other people's screens and I edit strictly on a laptop, which can be really frustrating because I know that, even though I do color calibrations, I use a data color slider but there's lots of good ones out there to be honest, I'm not an expert of which one's the best. I find if you do any calibration, it's better than no calibration but if you have the color calibration done, it's gonna be a lot closer but I know that this screen is gonna be brighter no matter what because I can't adjust the contrast, I can't adjust the brightness of my monitor so if you have an external monitor, it's really nice to be able to get that exactly how you want it to look so you're not getting any surprises. To see the most accurate color though, of course, the best idea, in my opinion, is to print your work. Printed on some kind of paper and, of course, different kinds of paper and different kinds of ink and different kind of printers are gonna have different results, that happens, but if you wanna see pretty close to what it's actually gonna look like, print it out, a little 5 x 7 or whatever, ya know, and you can see what's going on. I find that works the best. You can always check on your phone. Some phones are more accurate than others but it's just good to check different options. Of course, you can't control what everyone else's monitor is calibrated at so you can sit there and be like it looks amazing on mine and then everyone else's, their monitor is calibrated for gaming, they have them calibrated for watching movies or whatever so their calibrations are always gonna change, you can't control that but you can control, if your stuff is gonna get printed, do a little pre-print of a sample and be like okay what's this gonna look like? There are calibrators that will calibrate for printing. I forget the names of them but, like I said, I'm not a device salesperson, I'm a pixel masher but it will help if you do that. So in this case here, this is a little bit too blue for me, a little bit too blue on her face and remember I want some things that are closer to be a little bit more tungsten than everything else so I'm just gonna slightly go through this and just maybe add a little bit, that's too strong, too strong, too strong, add a little bit of color here. Flow lower. So yeah you can see that I'm always adjusting my flow, I'm not adjusting my opacity and I'm adding highlights of this yellow tone only to the highlight parts on her. So towards this one direction of light so that shadow part of her face, I'm not gonna add very much to it. Let's see. If I had spent more time, I would spend a lot more time on the dress itself. Another thing that we can do is that we can do some dodge and burning as well on this, which can always be fun. Sometimes we do dodge and burning really early on in the process, sometimes we do it really late in the process. Depends on how I'm feeling, what the image, I think, can call for, do I want to do dodge and burning early on or not? I can't say that there's a right way or a wrong way 'cause I do them both so it's up to you and to what makes you feel happy. So if I turn this on and off, it's actually looking not too shabby. Uh. Do-do-do. Okay, let's see, what else do I wanna do with this? 'Cause it doesn't feel done. You know you're looking at something and you're like ah, we're going in the right way but it doesn't feel done yet. So let's see here. Some more color work, lots more color work, all the color. Uh, let's go. I really like the way this color lookup profiles work. Um. And honestly, this is all wild card stuff of compositing so we might, actually that's not too shabby. Do-do-do, bring it down a little bit. On, off. Yeah, I kinda like how it's reduced the contrast on her a little bit. Give it a little bit of color tweaking there. So, people want to know about the light in your room when you're color correcting. I know that you've mentioned it a couple times but could you reiterate please? Yeah, I generally try to edit and color correct in a dark room so this is like worst case scenario. If we're getting, like, really nice accurate color, if there's, like, white light bouncing, I can see my reflection in the screen. I have a matte screen, by the way, if you're getting a screen, matte screens are great 'cause they're gonna see a lot less reflection but, yeah, definitely darker rooms are nice. You can see much clearer what's going on so if anybody's watching this in a dark room and they're like dude your color looks terrible, give me some slack, my work doesn't normally look strangely colored. But, yeah, so dark room is better, you can just see what's clearer. So, I've said that, like, three times but. This is from, I'm not sure how to pronounce this name so I'm just gonna ask the question. When do you know when you're done? Mm. 'Cause you were just sayin' a second ago, "I think we can do a few more things to this." Yeah because I, what's funny is I pay attention to both sides of my brain when I'm creating. I look at it logically. I go mathematically does this make sense? So mathematically, looking at this, my composition's still fried so I still have cropping to do, right, I know that logically, it doesn't make sense yet but emotionally, I pay attention, I started paying attention to how I feel or adhere when I'm creating images. I never used to and this sounds like really fluffy and, you know, whatever else but this part of our body talks a lot and if we listen to it, sometimes we can get really good results so I started listening to it when I meet new people and when I'm creating artwork and generally, if I meet somebody and this part of my body is like nope, this is no good, then I, ya know, I pay attention to that and usually it's right. There's something up that, ya know, makes me kind of feel sticky about them that I'm not really wanna spend a lot of time with that person. Same thing with creating images, when I'm looking at this, I can feel, like, a tightness in my chest and I'm like this isn't finished, it doesn't feel good to look at it yet. It's just like when we look at amazing artwork and some people are moved emotionally by music, right, it's because it's because it's opened something up and it's something in here and I don't know what that is, I am not one of those new age people or anything like that but it's something that I've learned to pay attention to and when I'm creating these images, it's the same thing like when you take a great shot, you can feel it and if you pay attention to that feeling and then you pay attention to it logically, so mathematically, then you're gonna, I think, be able to figure out, like, okay this feels done, right? And that comes with just practice. I can't say that there's, like, a mathematical thing of like oh, Daisy, you do these steps and you're gonna do it. I mean with anything that's involved, this isn't gonna necessarily be, ya know, at the end of six hours, you're gonna be doing all this stuff to the highest level. It's gonna take time, it's gonna take practice and it's cool, all right, and so it's the same thing with learning to listen to yourself and listen to your body and then listen to yourself mathematically and logically, is this working is this not working, so just like when you're looking through the poses, of the composition of the poses, why does that work? Well we're looking at that logically of drawing the lines and okay this doesn't work because of X-Y-Z, this fabric line is going the wrong way against the composition, it doesn't make sense. But then you can also look at it and feel it and go like okay that doesn't feel right either. You have a question? Well first of all, thank you for sharing your workflow 'cause that's awesome and do you ever use Alien Skin and do you find that, I find that if I go to bed and get up the next morning, sometime when I think something is great, that I wake up and go well, it wasn't quite right. Do you do that or do you just pretty much are ready to... I sometimes will go back, I sometimes will go back to the image the next day but a lot of times, I force myself to commit to stuff 'cause I have commitment issues with art, I could go back and make changes infinitely if I wanted to but, a lot of times if I've finished the image, I posted it. So that I force myself to be done and then if I wind up eating crow the next day online because somebody caught a mistake that I made then maybe I'll go fix it but I mean, if that's something that works for what you like to do, then absolutely, do it up. A lot of times, I don't necessarily, I dream about ideas but I don't necessarily dream about the project that I'm working on so when I'm done, I close that page and I go to the next one. Does that make sense? Yeah and Alien Skin? Do you ever? Alien Skin, I don't have much experience with it, I tried it few years ago and I was like eh but, I mean, I know lots of people who are doing amazing stuff with it so obviously I just didn't crack the formula on how to make that work for the way that I like to create images so, but, I mean, there's loads of artists out there doin' great stuff that use it so. What you do is amazing, I'm just... Glad you guys are likin' it.
Class Materials
Bonus Materials with Purchase
Ratings and Reviews
Dino Maez
i have to say, the class was AMAZING! in every way from the tricks and technique's of mastering this art form to the personalized attention given by Renee. through the class you are able to learn information that would normally take the average person years of trial and error. Renee gives you the gift of benefitting from her her experiences and what she has learned THE HARD WAY! Renee is an outstanding instructor full of passion for what she does, and with a strong desire to not only improve the art, but more importantly, pay it forward, by sharing her knowledge with others. I was fortunate enough to be able to attend the event in person, truly a once in a lifetime experience for me, the staff at creative live were THE BEST! they are helpful in every way and really made this event something special, i can't say enough about the experience i had and would highly recommend that anyone who has the opportunity to go down for a class, it will be an experience that you will never forget. but the best part of creative live is that wether you are there in person or wether you are watching from the comfort of your own home, you are involved in the class in REAL TIME, you have the ear and attention of the skilled artist giving the instruction, being there myself i can tell you that Renee was regularly given questions and comments from the viewers via the creative live staff and she would respond to them as they came, in that way you are very much apart of the class you are never left without getting that personalized attention of an amazing artist or that specific question you have answered, and even better you have the option to purchase the class and have it as a constant resource in your tool kit that you can refer back to at any point that you need a refresher or want to recall that special technique that was demonstrated. thank you thank you to renee and all the staff at creative live you have a life long member in me. and i would recomend that everyone take advantage of this valuable resource dino maez
stephen lenman
I have completed many creative courses. This is by far the best so far. Quite the most amazing and inspiring presenter with a true passion for their craft. The core information is excellent, but the thing i liked most were her subtle tangents, dropping incredible information completely on the fly. A complete real world honest view of business and practical side of the industry. Especially her advice on how she started to her business. Saving up enough in her day job so she could pay the rent, and do photography for 3-6 months.
Sheldon Carvalho
Awesome class. I've been following Renee for a very long time. I love her work and to finally see her work and get an image done from start to finish was quite something.. I love the way she sees things and the way she treats her work and all fellow creative. I would recommend this to everyone interested in getting into composting. Looking forward to creating and making my own art work. But it now :) Have fun creating. :)